Device encryption is an important security feature in Windows 11 that helps protect your data from unauthorized access. It encrypts all the files stored on your system drive, so even if someone removes your hard drive and tries to read it on another computer, your data stays safe.
However, some users encounter a frustrating issue where Device Encryption does not work or shows “Device Encryption is not available” on their Windows 11 PC. This problem can arise due to missing TPM (Trusted Platform Module), outdated drivers, unsupported hardware, disabled BitLocker services, or system misconfigurations.

If you’re facing this issue, don’t worry — this guide will walk you through all possible solutions to fix Device Encryption not working in Windows 11.
What Is Device Encryption in Windows 11?
Device Encryption is a built-in feature that automatically encrypts your device’s storage to protect your files and personal data. Unlike BitLocker, which is available in Windows 11 Pro, Enterprise, and Education editions, Device Encryption can also be available on Windows 11 Home edition — if your device meets specific hardware requirements.
Once enabled, encryption ensures that only authorized users (like those signed in with their Microsoft account) can access the data. It’s especially useful for laptops and tablets that can be lost or stolen.
Why Device Encryption Might Not Work
Before diving into the fixes, let’s understand what can cause Device Encryption to fail or become unavailable.
Here are the most common reasons:
- TPM (Trusted Platform Module) is disabled or missing.
- Secure Boot is turned off in BIOS.
- Your device doesn’t support Modern Standby (InstantGo).
- Outdated BIOS or system drivers.
- BitLocker or encryption services are disabled.
- Corrupted Windows system files.
- You’re using a local account instead of a Microsoft account.
Knowing the cause helps you target the right fix and save time.
1. Check If Your PC Supports Device Encryption
Not every Windows 11 device supports automatic device encryption. To verify whether your system meets the necessary requirements:
Steps:
- Press Windows + R to open the Run dialog box.
- Type msinfo32 and hit Enter to open System Information.
- Scroll down and look for the section named Device Encryption Support.

If it says “Meets prerequisites”, your device supports encryption.
If it shows something like “Reasons for failed automatic device encryption”, your PC doesn’t meet one or more requirements.
Common reasons you may see:
- TPM is not found or disabled.
- Secure Boot is off.
- No connected standby.
- InstantGo not supported.
You can fix many of these issues by enabling TPM and Secure Boot from BIOS.
2. Enable TPM (Trusted Platform Module) in BIOS
TPM is a hardware-based security feature that stores encryption keys securely. Without it, Windows cannot activate device encryption.
To enable TPM:
- Restart your PC and enter BIOS/UEFI Setup (usually by pressing F2, DEL, or Esc during startup).
- Go to the Security or Advanced tab.
- Locate TPM, Intel PTT, or AMD fTPM and ensure it is Enabled.
- Save your changes and exit BIOS.
Once your computer restarts, Windows should now detect TPM.
Check TPM status in Windows:
- Press Windows + R, type tpm.msc, and hit Enter.
- You should see The TPM is ready for use message under the Status section.
If TPM is missing, your motherboard may not have it, and you won’t be able to use device encryption.
3. Turn On Secure Boot
Secure Boot ensures your system only starts with trusted software and is a key requirement for encryption.
To enable Secure Boot:
- Reboot your computer and open BIOS Setup.
- Navigate to the Boot tab.
- Locate the Secure Boot option and enable it.
- Save and restart your PC.
After enabling Secure Boot, check again in System Information if the “Device Encryption Support” message changes.
4. Sign in with a Microsoft Account
Device encryption often requires that you are signed in with a Microsoft account, not a local account. This is because the recovery key is stored in your Microsoft account for safety.
To switch to a Microsoft account:
- Press Windows + I to open Settings.
- Go to Accounts > Your Info.
- If you see “Sign in with a Microsoft account instead,” click it.
- Enter your Microsoft account credentials and sign in.
Once you switch, restart your computer and check if device encryption becomes available.
5. Enable the BitLocker and Encryption Services
Windows relies on several background services for encryption to function properly. If these services are disabled, encryption will not work.
To check and enable services:
- Press Windows + R, type services.msc, and press Enter.
- Locate the following services:
- BitLocker Drive Encryption Service
- Device Encryption Service
- Trusted Platform Module Service
- Right-click each service and select Properties.
- Set Startup type to Automatic.
- Click Start, then Apply and OK.
Reboot your PC and check if device encryption works now.
6. Check Windows Edition
Device encryption is available on all editions if your device meets requirements, but BitLocker is available only on Windows 11 Pro and higher.
If you’re using Windows 11 Home, you can only use device encryption, not BitLocker.
To check your Windows edition:
- Press Windows + I.
- Go to System > About.
- Under Windows specifications, check your edition.
If you need more encryption features, you can upgrade to Windows 11 Pro.
7. Update Windows and Drivers
Outdated drivers or missing updates can prevent Windows from recognizing TPM or other security components correctly.
To update Windows:
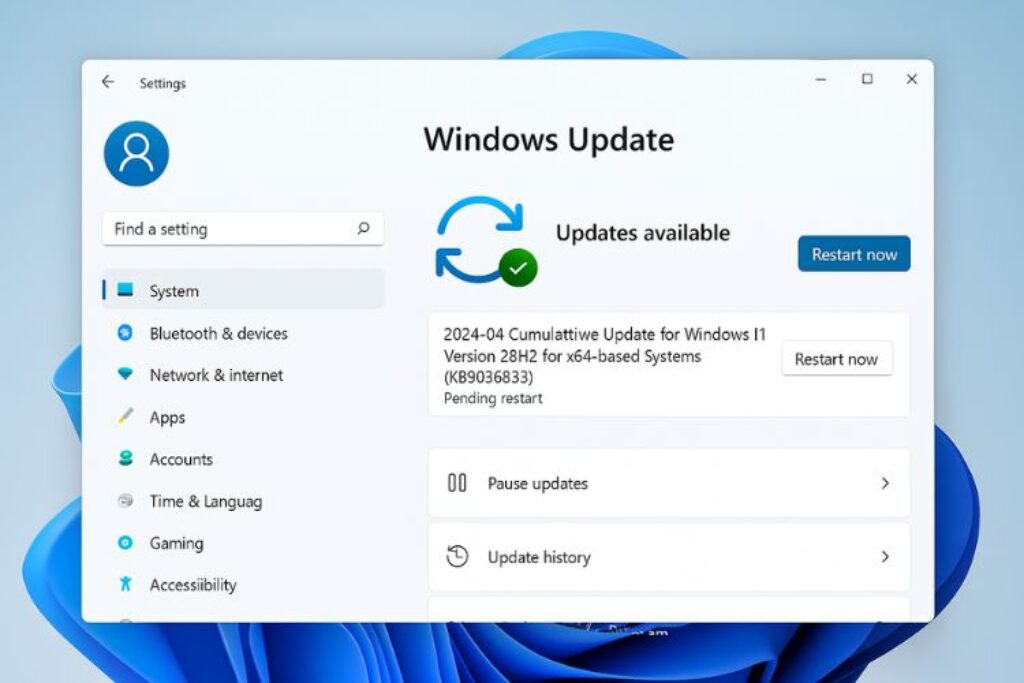
- Press Windows + I → go to Windows Update.
- Click Check for updates.
- Install any available updates and restart your computer.
To update drivers:
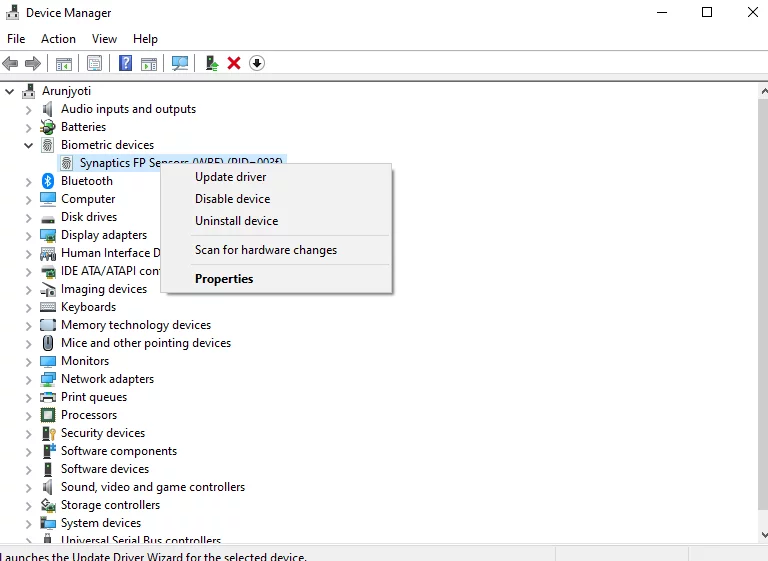
- Press Windows + X → choose Device Manager.
- Expand categories like Security devices, System devices, and Disk drives.
- Right-click your devices and select Update driver → Search automatically.
Keeping everything up to date ensures better encryption compatibility.
8. Turn On Device Encryption Manually
If encryption isn’t automatically turning on, you can try enabling it manually.
Steps to turn on encryption:
- Press Windows + I to open Settings.
- Go to Privacy & Security > Device Encryption.
- Toggle the switch to On.
If you don’t see this option, your device likely doesn’t meet requirements or uses BitLocker instead. You can then try enabling BitLocker manually:
- Press Windows + S, type Manage BitLocker, and open it.
- Click Turn on BitLocker next to your system drive.
- Follow the prompts to set it up.
9. Check for Corrupted System Files
Sometimes system file corruption can interfere with encryption features. You can repair it using SFC and DISM tools.
Run System File Checker:
- Open Command Prompt as Administrator.
- Type the command below and press Enter:
sfc /scannow - Wait for the scan to complete and fix issues automatically.
Run DISM tool:
After SFC, run the following commands:
DISM /Online /Cleanup-Image /CheckHealth
DISM /Online /Cleanup-Image /ScanHealth
DISM /Online /Cleanup-Image /RestoreHealth
Restart your PC after completion and check if encryption now works.
10. Check Group Policy Settings (Windows Pro Users)
If you’re using Windows 11 Pro, your encryption settings might be controlled by Group Policy.
To check Group Policy:
- Press Windows + R, type gpedit.msc, and press Enter.
- Navigate to:
Computer Configuration > Administrative Templates > Windows Components > BitLocker Drive Encryption - Ensure that “Require additional authentication at startup” is either Not Configured or Disabled (so encryption can start automatically).
- Close Group Policy Editor and restart your PC.
11. Verify That Your Drive Is GPT Formatted
Device encryption requires the system drive to be in GPT (GUID Partition Table) format and not MBR.
To check drive format:
- Press Windows + X → select Disk Management.
- Right-click your system drive (usually Disk 0) → click Properties.
- Go to the Volumes tab and check the Partition style.
If it says GUID Partition Table (GPT), it’s fine.
If it says Master Boot Record (MBR), you’ll need to convert it to GPT (backup data first).
Convert MBR to GPT using Command Prompt:
- Backup your data.
- Open Command Prompt (Admin) and run:
mbr2gpt /convert /allowfullos - Restart your PC.
Your drive will now be GPT formatted, and encryption should work.
12. Reset TPM (Optional)
If your TPM is acting up, you can reset it to fix encryption issues.
To clear TPM:
- Press Windows + R, type tpm.msc, and press Enter.
- Click Clear TPM in the right pane.
- Follow the on-screen instructions.
Note: This removes all TPM-stored keys, so decrypt drives first or back up your recovery key.
13. Enable Modern Standby (If Supported)
Some devices require Modern Standby (InstantGo) for encryption. You can check if your PC supports it.
Check Modern Standby:
- Open Command Prompt and type:
powercfg /a - If you see “Standby (S0 Low Power Idle) Network Connected/Disconnected,” your PC supports Modern Standby.
If not, it may be a hardware limitation — you cannot enable it manually.
14. Reset Your PC (Last Resort)
If all else fails and encryption still won’t turn on, consider resetting Windows.
Steps to reset:
- Go to Settings > System > Recovery.
- Under Reset this PC, click Reset PC.
- Choose Keep my files → follow the on-screen steps.
Once Windows reinstalls, check if Device Encryption is working.
Alternative: Use Third-Party Encryption Tools
If your device doesn’t support Windows encryption, you can still protect your files using trusted third-party encryption software like:
- VeraCrypt
- AxCrypt
- NordLocker
- BitLocker To Go (for external drives)
These tools offer file and full-disk encryption with advanced password protection.
Conclusion
Device Encryption is a crucial feature for safeguarding your sensitive data on Windows 11, especially on portable devices. However, when it fails to work, it’s often due to hardware support issues or disabled system settings like TPM, Secure Boot, or essential services.
By following the step-by-step solutions above — from checking TPM and Secure Boot to enabling services and updating drivers — you can usually get Device Encryption working again without reinstalling Windows.
If your PC doesn’t support Device Encryption, don’t worry. Tools like VeraCrypt or BitLocker (on Pro edition) can offer similar protection.
FAQs
1. Why does my Windows 11 say “Device encryption not available”?
This usually happens when your system doesn’t meet the hardware requirements — missing TPM, Secure Boot disabled, or no Modern Standby support. You can check the exact reason in System Information.
2. Is Device Encryption the same as BitLocker?
No. Device Encryption is a simplified version available on most modern Windows 11 devices, while BitLocker provides advanced options like encrypting specific drives and using external keys.
3. Can I use Device Encryption without TPM?
Generally, no. TPM is a hardware requirement for encryption. However, some users can use BitLocker with group policy adjustments if they have Windows 11 Pro.
4. How do I know if my drive is already encrypted?
Go to Settings > Privacy & Security > Device Encryption. If it shows “Device Encryption is On,” your data is already protected. You can also open Manage BitLocker to check encryption status.