Keeping your NVIDIA graphics drivers up to date is essential for optimal performance, compatibility, and stability—especially when gaming, running professional software, or using GPU-accelerated applications. However, over time, remnants of older drivers can cause conflicts, bugs, or crashes. In such cases, performing a manual clean install of the NVIDIA driver is the best solution.
This guide provides a step-by-step walkthrough on how to manually clean install NVIDIA drivers on Windows, including how to properly uninstall the existing drivers, use third-party tools for a clean slate, and reinstall the latest driver using NVIDIA’s official installer.
What Is a Clean Install of NVIDIA Drivers?

A clean installation of NVIDIA drivers means completely removing all traces of previous driver installations—including registry entries, configuration files, and leftover components—and then installing the latest driver from scratch.
Unlike standard driver updates (which layer new files over old ones), clean installations eliminate potential driver conflicts, especially when switching between major driver versions or resolving persistent issues.
Why Perform a Clean Install?
Here are several reasons why you might need to manually clean install your NVIDIA GPU driver:
- Fix screen flickering, crashes, or BSODs related to GPU drivers.
- Resolve compatibility issues with games or applications.
- Remove corrupted driver files that prevent normal operation.
- Switch from old GPU models to new ones.
- Improve system stability and performance.
- Clean out clutter left by multiple past updates.
Whether you’re an advanced gamer, a creative professional using tools like Adobe Premiere Pro or Blender, or just a power user, a clean driver install can drastically improve your system’s GPU health.
Preparation Before Starting
Before diving into the steps, here are the things you’ll need:
Prerequisites
- A Windows 10 or Windows 11 PC with an NVIDIA GPU
- Internet connection
- Administrator access
- Free disk space (at least 2 GB recommended)
- The latest version of Display Driver Uninstaller (DDU)
Create a System Restore Point (Optional but Recommended)
Before removing drivers, it’s wise to create a system restore point in case anything goes wrong:
- Press Windows + S, type
Create a restore point, and hit Enter. - Under the System Protection tab, select your system drive (usually C:) and click Create.
- Name the restore point (e.g., “Before NVIDIA Clean Install”) and click Create.
Step 1: Download the Latest NVIDIA Driver
You should download the latest compatible NVIDIA driver manually from the official NVIDIA website.
Go to the NVIDIA Driver Download Page:

https://www.nvidia.com/Download/index.aspx
Fill in the required information:
- Product Type: GeForce, TITAN, Quadro, etc.
- Product Series: GeForce RTX 30 Series, GTX 10 Series, etc.
- Product: Your specific GPU model
- Operating System: Windows 10 64-bit or Windows 11 64-bit
- Download Type: Game Ready Driver (GRD) or Studio Driver (SD), depending on your use case
- Click Search, then click Download
Once downloaded, do not run the installer yet.
Step 2: Uninstall the Current NVIDIA Drivers
Let’s remove the existing NVIDIA drivers via Windows settings.
Using Control Panel
- Press Windows + R, type
appwiz.cpl, and press Enter. - Look for all entries starting with NVIDIA:
- NVIDIA Graphics Driver
- NVIDIA PhysX System Software
- NVIDIA GeForce Experience
- NVIDIA HD Audio Driver
- NVIDIA Control Panel (if listed)
- Right-click each one and select Uninstall.
Tip: Don’t worry about restarting yet. You’ll do that after running DDU.
Step 3: Use Display Driver Uninstaller (DDU) for a Clean Slate
To remove all leftover traces of NVIDIA drivers, use Display Driver Uninstaller (DDU)—a trusted third-party tool.
Download DDU:
Go to the official site:
https://www.wagnardsoft.com/
- Extract the DDU ZIP file to a folder.
- Reboot into Safe Mode:
- Press Windows + R, type
msconfig, and go to the Boot tab. - Check Safe boot, select Minimal, and click OK.
- Restart your PC.
- Press Windows + R, type
Use DDU in Safe Mode:
- Open the DDU folder and run
Display Driver Uninstaller.exe. - Under Select device type, choose GPU.
- Select NVIDIA from the dropdown.
- Click Clean and restart (Highly recommended).
This step completely removes all NVIDIA driver files and settings.
Step 4: Reboot into Normal Mode
After DDU reboots your PC, you may still be in Safe Mode. To get back to normal mode:
- Press Windows + R, type
msconfig, and go to the Boot tab. - Uncheck Safe boot, click OK, and restart your PC.
Step 5: Install the Latest NVIDIA Driver Manually
Now it’s time to install the driver you downloaded earlier.
Run the Installer:
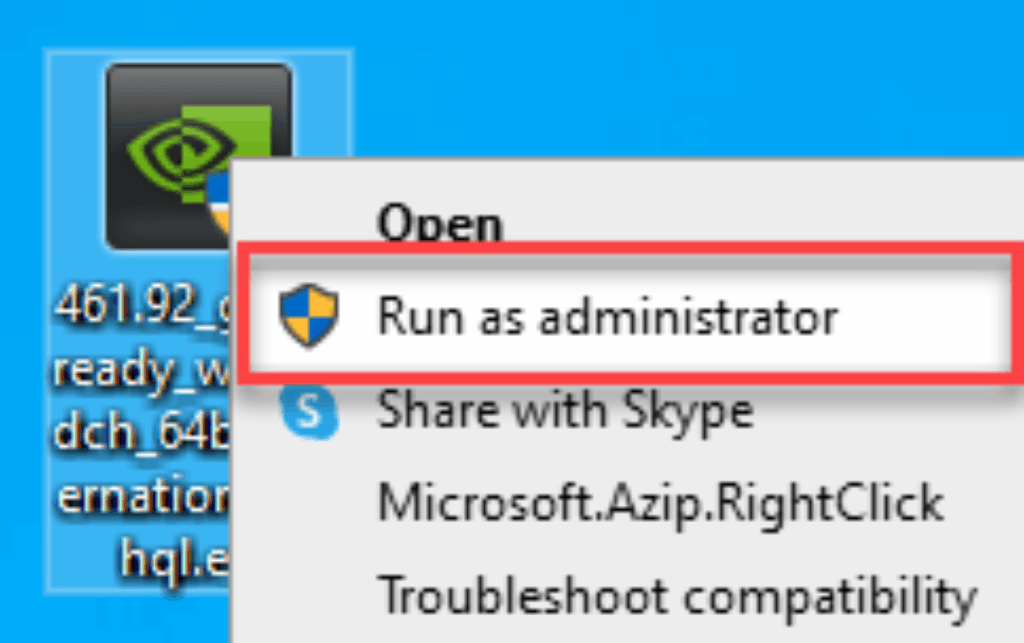
- Right-click over the NVIDIA display driver installer file and select Run as administrator as shown in the screenshot below.
- Double-click the .exe installer file you downloaded from NVIDIA.
- Accept the license agreement and proceed.
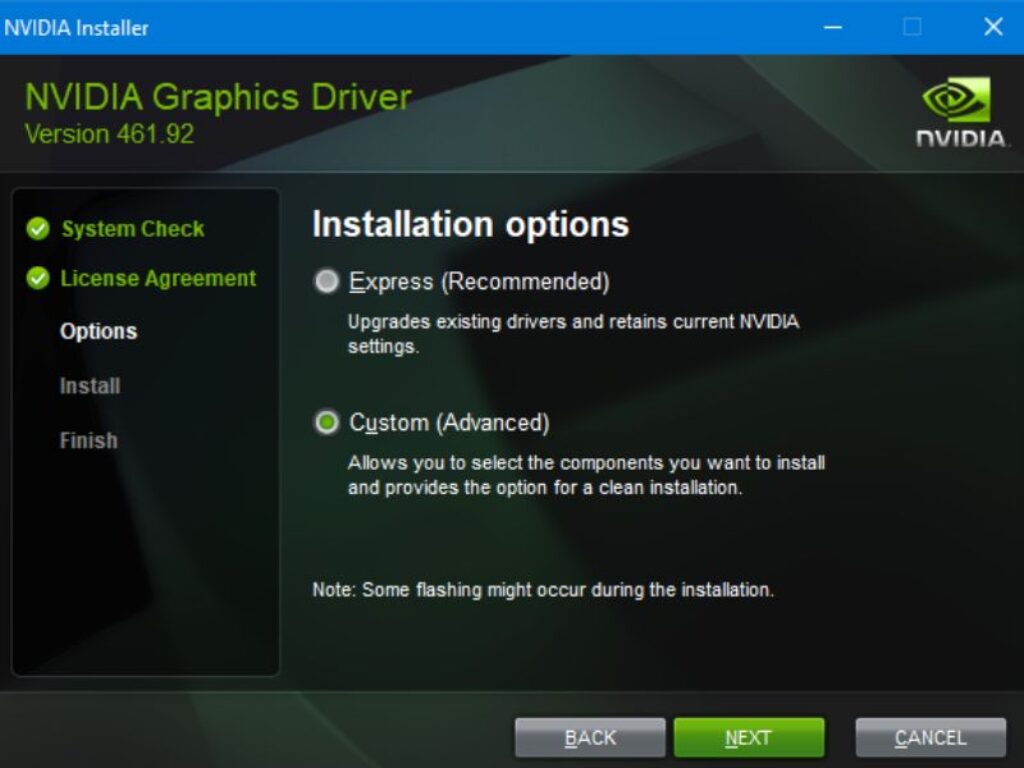
Choose Installation Type:
- When prompted, select Custom (Advanced).
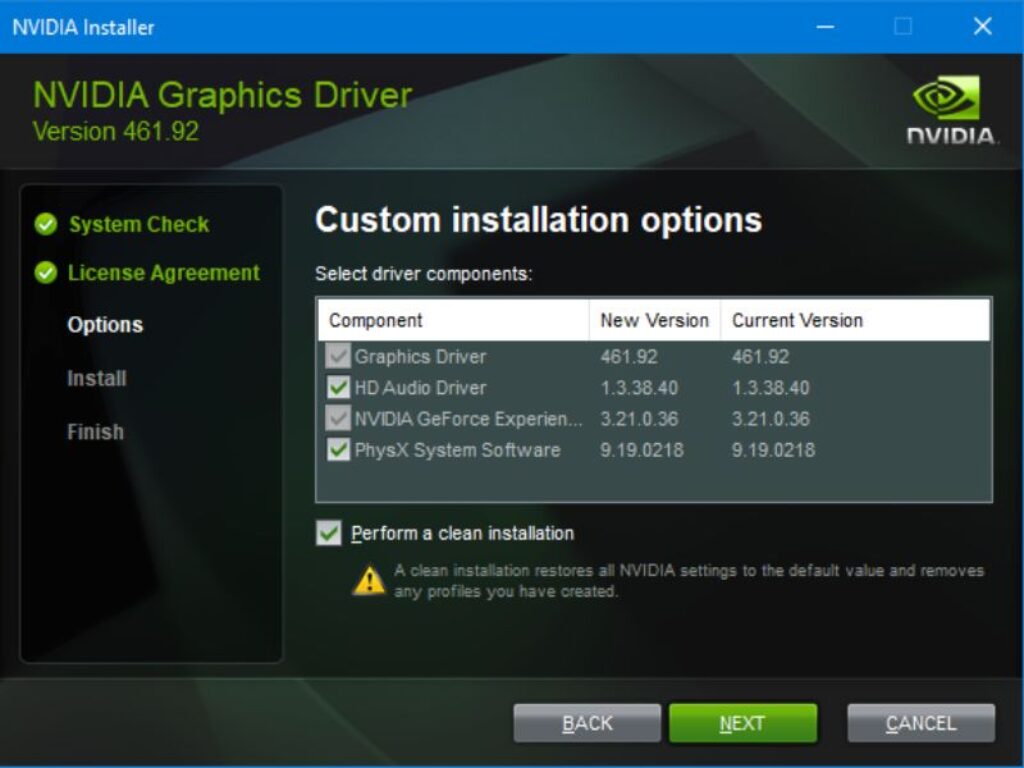
- On the next screen, check Perform a clean installation.
This tells the NVIDIA installer to reset all settings and install from scratch, just like a fresh setup.
Continue the installation process:
- Let the installer complete.
- Reboot your system when prompted.
You’ve now successfully performed a clean manual NVIDIA driver installation.
Frequently Asked Questions (FAQ)
Is using DDU safe?
Yes, DDU is safe when used correctly. Always run it in Safe Mode for best results.
What is the difference between Game Ready and Studio Drivers?
- Game Ready Drivers (GRD): Optimized for the latest games.
- Studio Drivers (SD): Tested for creative applications (Photoshop, DaVinci Resolve, etc.)
Do I need GeForce Experience?
Not necessarily. GeForce Experience is optional. It adds features like ShadowPlay, game optimization, and easy driver updates but isn’t required for driver functionality.
How often should I clean install?
Only when necessary—such as when changing GPU models, facing driver issues, or after major Windows updates. Otherwise, regular updates via NVIDIA or GeForce Experience are sufficient.
Conclusion
A manual clean install of your NVIDIA graphics driver ensures your system is free of corrupted or leftover files that could degrade GPU performance. By following this step-by-step guide—including the use of Display Driver Uninstaller (DDU) and clean installation options—you set your PC up for optimal gaming, rendering, or professional workloads.
Whether you’re a gamer experiencing crashes or a creative pro needing stability, this clean install process is one of the most effective ways to regain control over your system’s GPU behavior.
For best results, always download the latest driver from the official NVIDIA website and remember to periodically check for updates.