Over time, your Windows 11 computer accumulates a variety of temporary files—data that is no longer needed but still takes up valuable disk space. These files are created by apps, system updates, internet browsers, and background processes. While their purpose is to store information temporarily, they often remain long after their use has passed, cluttering your system and potentially slowing down performance.
Fortunately, Windows 11 provides several built-in tools and manual methods to identify and safely delete these files without affecting your essential data. Regularly clearing out temporary files can help you free up storage space, improve system speed, and maintain a cleaner, more efficient operating environment.

Whether you are a casual user or a power user looking to optimize performance, this guide will walk you through multiple ways to safely and effectively delete temporary files on Windows 11. Let’s get started with the simplest and most effective methods.
What Are Temporary Files in Windows 11?
Temporary files (or temp files) are created to hold information temporarily while a file is being created, processed, or used. Some common types include:
- Windows update files
- App cache and installation leftovers
- Browser cache and history
- Log files
- Windows error reports
- Thumbnails
These files are typically stored in:
C:\Windows\TempC:\Users\[Username]\AppData\Local\Temp
Though Windows attempts to delete some of these automatically, many are left behind and require manual cleanup.
Why Should You Delete Temporary Files?
Here are a few key benefits of deleting temp files:
- Free up disk space
- Improve system speed and responsiveness
- Fix app or update errors
- Optimize storage performance
There’s no downside to deleting these files — Windows will recreate them as needed.
Method 1: Use Windows Settings to Delete Temporary Files
Windows 11 offers a straightforward option in the Settings app to remove temp files.
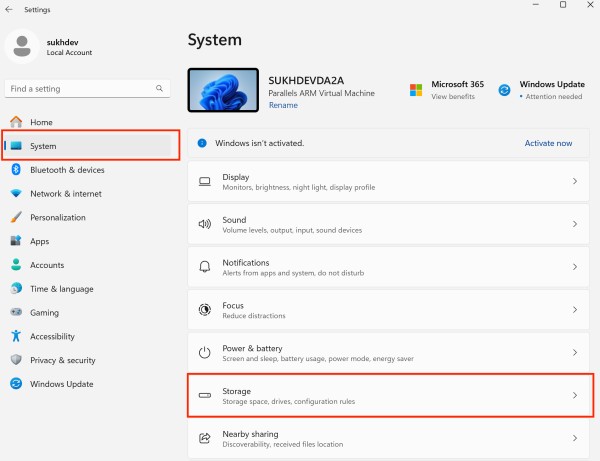
Open Settings

Press Windows + I to open the Settings window.
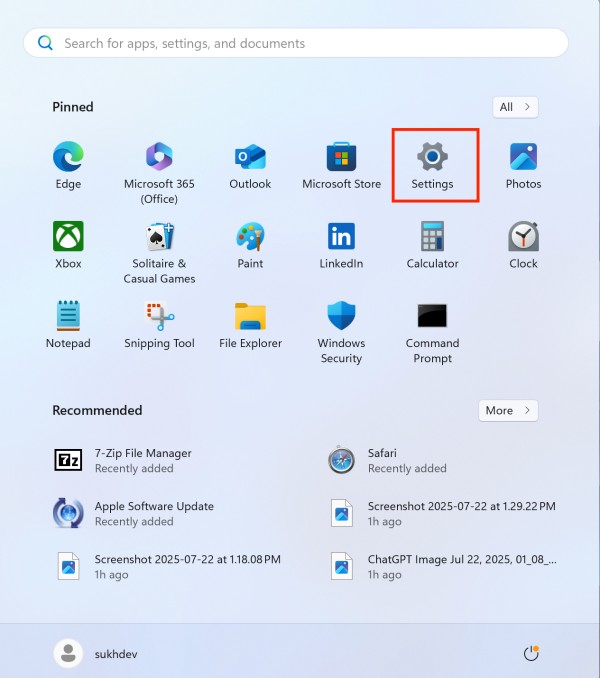
Go to System > Storage
- In the left sidebar, click System.
- Then select Storage from the right pane.
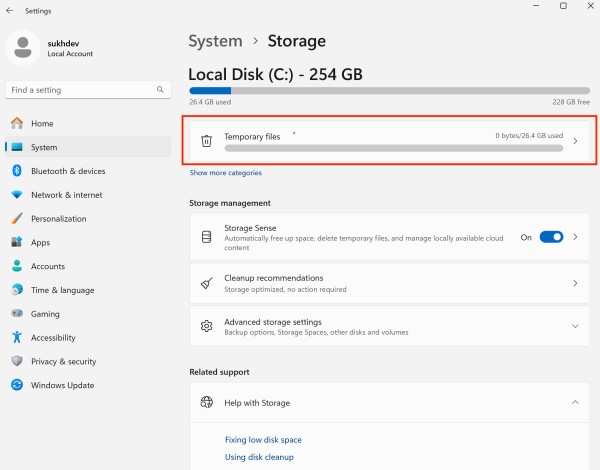
Click on Temporary Files
Windows will automatically scan and display the amount of space used by temporary files.
Select the File Types to Delete
Common options include:
- Temporary files
- Thumbnails
- Delivery Optimization files
- Recycle Bin
- Windows upgrade log files
- Temporary Internet Files
Click “Remove files.”
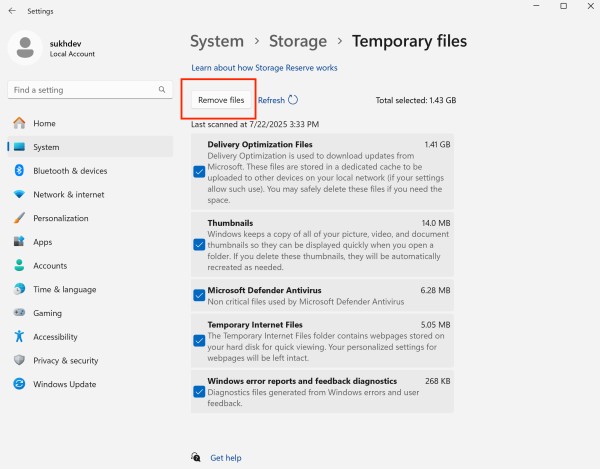
After selecting the files, click the Remove files button to delete them.
Tip: Avoid selecting “Downloads” unless you’ve backed up important files from your Downloads folder.
Method 2: Use Disk Cleanup Utility
Disk Cleanup is a classic and reliable tool built into Windows that helps you safely remove temporary files, system junk, and other unnecessary data.
Follow these steps to use the Disk Cleanup utility in Windows 11:
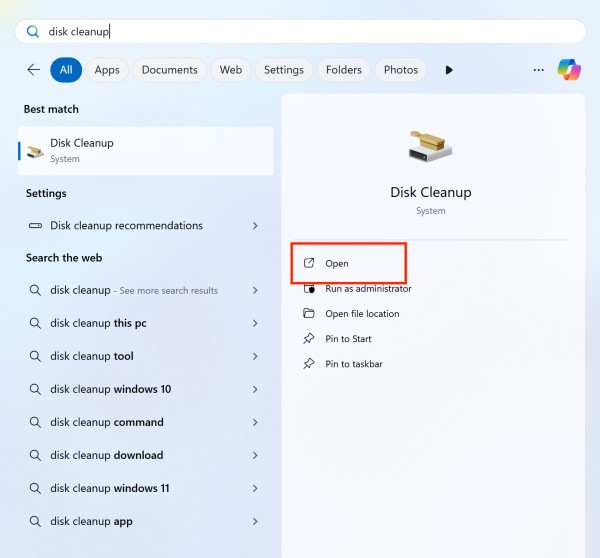
Step 1: Open Disk Cleanup
- Press
Windows + Sto open Search. - Type Disk Cleanup in the search bar.
- Click on the Disk Cleanup app from the list of results.
Step 2: Choose the Drive to Clean
- When prompted, select the drive where Windows is installed — usually
C:— and click OK. - Disk Cleanup will scan the selected drive and calculate how much space you can free up. This may take a few seconds.
Step 3: Select Files to Delete
After the scan finishes, you’ll see a list of file types you can delete. Check the boxes next to the following (based on what you want to remove):
- Temporary files
- Downloaded Program Files
- Recycle Bin
- Thumbnails
- Temporary Internet Files
- Delivery Optimization Files
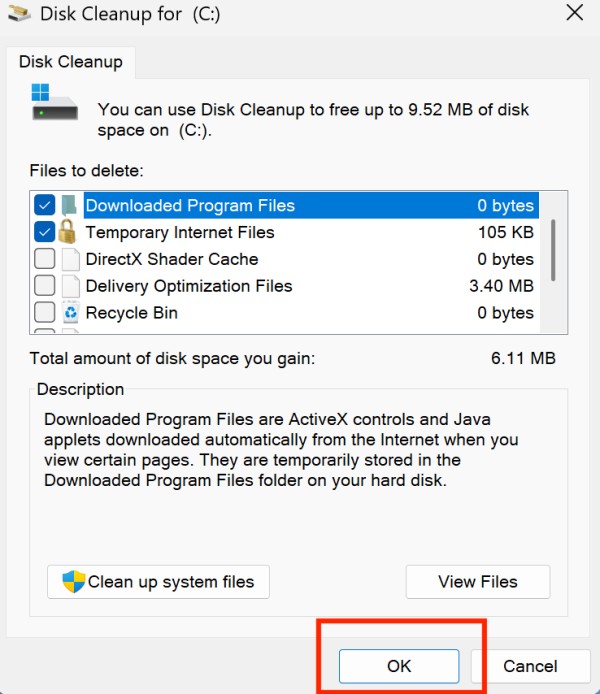
You can also hover over each item to see a brief description and how much space it occupies.
Step 4: (Optional) Clean Up System Files
For a deeper cleanup, click the Clean up system files button.
- The utility will scan your system again, this time including protected system files.
- Select your drive again if prompted.
- Once the scan completes, you’ll see additional options like:
- Windows Update Cleanup
- Previous Windows installations
- System created Windows Error Reporting
- Device driver packages
Be cautious with “Previous Windows installations” — deleting these will prevent you from rolling back to an earlier Windows version.
Step 5: Delete the Selected Files
- After selecting all desired file types, click OK.
- A confirmation prompt will appear — click Delete Files.
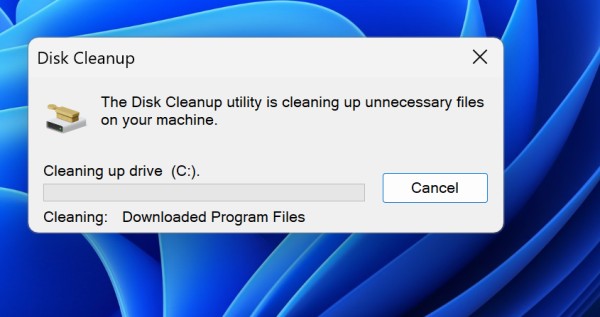
- Disk Cleanup will now remove the selected files. This may take a few minutes depending on the number and size of files.

Done!
Your temporary and system junk files are now deleted, and your storage should be cleaner and more optimized. You can repeat this process every few weeks to keep your PC running smoothly.
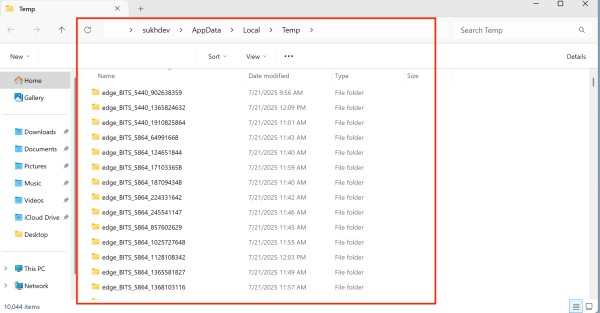
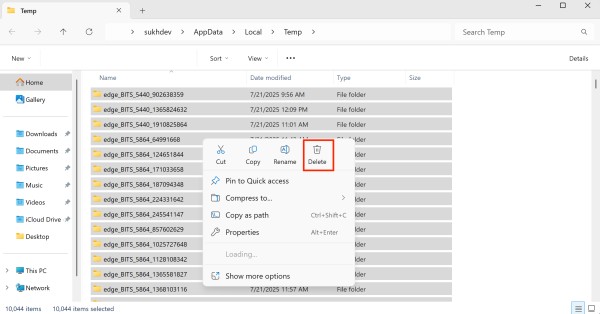
Method 3: Manually Delete Files from the Temp Folder
If you prefer a hands-on approach, you can directly delete temporary files from the system folders.
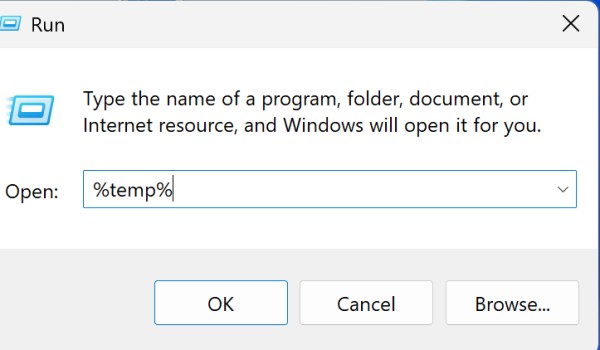
- Press
Windows + Rto open the Run dialog box. - Type
%temp%and press Enter. - This opens the user-specific temporary folder. Press
Ctrl + Ato select all files, then press Delete for permanantly delete or right click than delete for sending in bin. - Some files may be in use and cannot be deleted — skip those.
- Repeat the process:
- Open the Run dialog again.
- Type
temp(without%) and press Enter. - Delete the contents of this folder as well.
Safety Tips Before Deleting Temporary Files
While deleting temporary files in Windows 11 is generally safe and beneficial, it’s still important to proceed with care—especially if you’re manually selecting files or using system tools that access deeper parts of your OS. Follow these essential safety tips to avoid accidentally removing something important:
1. Review Before You Delete
Take a moment to carefully review the list of items you’re about to delete, especially when using Disk Cleanup or the Settings app. Look out for:
- Downloads folder: Some tools include this in cleanup selections — don’t delete it unless you’ve backed up important files.
- Previous Windows Installations: Only remove this if you’re sure you won’t need to roll back your system.
2. Avoid Deleting Unknown Files Manually
When navigating to the %temp% or C:\Windows\Temp folder manually, you may see files you don’t recognize. While most are safe to delete:
- Do not delete anything outside the Temp folders.
- Skip files currently in use — Windows will prevent you from deleting these, and that’s okay.
3. Back Up Important Data First
Before performing a full cleanup, it’s a good practice to back up any important files, especially if you’re using third-party cleanup tools that may have broader access to system and user files.
4. Don’t Force Delete Locked Files
If Windows says a file is in use or can’t be deleted, skip it. Forcing deletion using commands or third-party tools could result in system instability.
5. Be Cautious with System Files
Some utilities offer options to remove:
- Windows Update Cleanup
- System Restore Points
- Old Windows Installations
These can free up significant space, but once deleted, you cannot restore your system to a previous state. Make sure you’ve installed updates successfully and don’t plan to revert before deleting these.
6. Use Trusted Tools Only
If using a third-party cleaner like CCleaner or Wise Disk Cleaner:
- Download only from official websites.
- Avoid bundled software or fake versions.
- Review settings before running automated cleanups.
7. Empty the Recycle Bin Afterward
Many deleted files go to the Recycle Bin first. Don’t forget to empty it to actually free up space:
- Right-click on the Recycle Bin icon and select Empty Recycle Bin.
By following these safety practices, you ensure a smooth, risk-free cleanup experience while keeping your files and system safe from accidental damage.
Why Should You Delete Temporary Files?
Here are a few key benefits of deleting temp files:
- Free up disk space
- Improve system speed and responsiveness
- Fix app or update errors
- Optimize storage performance
There’s no downside to deleting these files — Windows will recreate them as needed.
How Much Space Can You Save?
Depending on your usage and how long it’s been since your last cleanup, you can reclaim:
- 500 MB to 5 GB from typical temp file deletion.
- Up to 20 GB or more by deleting Windows update leftovers or system restore points.
Conclusion
Keeping your Windows 11 PC free of temporary files is a simple yet effective way to maintain system performance, reclaim valuable storage, and reduce clutter. Over time, these files can accumulate from software installations, system processes, and everyday use—often without you realizing it. Fortunately, Windows offers several safe and accessible methods to delete these files, whether through Settings, Disk Cleanup, or manual removal from Temp folders. Automating this process using Storage Sense can make routine maintenance even easier.
For power users, command-line tools and trusted third-party apps provide deeper cleanup options. Just remember to review what you’re deleting, avoid removing critical files, and back up important data beforehand. Regularly managing temporary files should become a part of your overall PC maintenance strategy. With just a few clicks, you can keep your system running faster, cleaner, and more efficiently. Stay organized, and enjoy a smoother Windows 11 experience.