Geeksdigit Team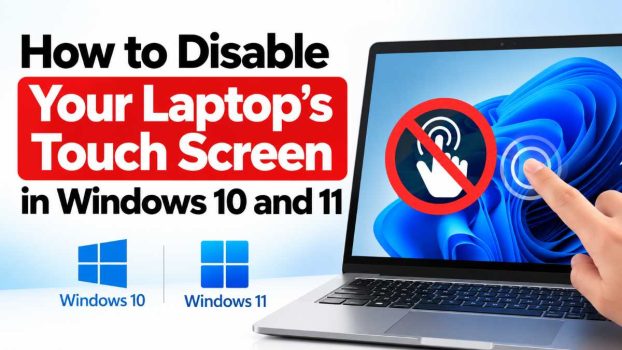
Touch screens are a handy feature on modern laptops, but they are not for everyone. Maybe you keep brushing the display with a finger while cleaning it, your kids leave smudges and accidental taps every time they walk past, or you simply prefer a keyboard and trackpad. Perhaps the screen has started registering “ghost touches,” opening apps, dragging windows, or typing random characters without anyone touching it. In every one of these cases, switching the touch function off is the sensible fix.
The good news is that Windows 10 and Windows 11 both make this possible, and you do not need any special software to do it. The bad news is that Windows does not offer a single obvious “turn off touch” switch in Settings. Instead, you have to use a handful of slightly hidden tools: Device Manager, PowerShell, the Registry Editor, or your laptop’s BIOS. Each method has its own strengths, and a few of them are easy to reverse if you change your mind later.
This guide walks through every reliable way to disable a laptop touch screen, explains when each one makes sense, shows you how to turn touch back on, and troubleshoots the problems people run into most often. By the end, you will be able to pick the method that fits your comfort level and get a touch-free laptop in a few minutes.
A quick note before you start: disabling touch does not harm your hardware, does not affect your display quality, and does not void any warranty. It only tells Windows to stop listening to the touch digitizer, the thin layer that senses your fingers. The screen itself continues to work normally.
Before You Begin
A few small preparations will make the process smoother and safer.
Use an administrator account. Most of the methods below require admin rights. If you are signed in with a standard account, Windows will ask for an administrator password.
Know your Windows version. Press the Windows key + R, type winver, and press Enter. The dialog will tell you whether you are on Windows 10 or 11. The steps below work on both, and differences are noted where they exist.
Have a mouse or trackpad ready. This sounds obvious, but if your laptop’s trackpad is also acting up, you will want a USB mouse available before you turn off the touch screen, since touch may be your only pointing method at that moment.
Create a restore point (optional but wise). If you plan to edit the Registry, type “Create a restore point” in the Start menu, select your system drive, and click Create. It takes under a minute and gives you an easy way back if anything goes wrong.
Method 1: Disable Touch Screen Using Device Manager
Device Manager is the most popular and most beginner-friendly method. It works the same way on Windows 10 and Windows 11, and it is completely reversible.
Step 1: Open Device Manager. Right-click the Start button (or press Windows key + X) and choose Device Manager from the menu.
Step 2: Expand Human Interface Devices. Scroll down the list and click the small arrow beside Human Interface Devices. You will see a long list of entries, many of which begin with “HID-compliant.”
Step 3: Find the touch screen entry. Look for an item named HID-compliant touch screen. On some laptops, there may be more than one entry with this name, or a variation such as “Touch screen” or a manufacturer-specific name.
Step 4: Disable the device. Right-click the entry and select Disable device. Windows will show a warning that disabling the device will cause it to stop functioning. Click Yes to confirm.
The change takes effect immediately. Tap the screen and you should see nothing happen. If your laptop has two HID-compliant touch screen entries, disable both, since some models use one for touch and another for related functions.
To re-enable touch, return to the same location, right-click the entry, and choose Enable device.
What if “Disable device” is missing? On some systems, the right-click menu only shows an Uninstall device option. Uninstalling is a workable alternative, but be aware that Windows may reinstall the driver automatically the next time you restart, because it detects the hardware again. If that happens, one of the other methods below will give you a more lasting result.
Method 2: Disable Touch Screen with PowerShell or Command Line
If you like typing commands, or you want to disable touch on several computers quickly, PowerShell is faster than clicking through menus. It also lets you create a toggle you can reuse.
Step 1: Open PowerShell as administrator. Right-click the Start button and choose Terminal (Admin) on Windows 11, or Windows PowerShell (Admin) on Windows 10. Accept the User Account Control prompt.
Step 2: Run the disable command. Paste the following line and press Enter:
Get-PnpDevice | Where-Object { $_.FriendlyName -like '*touch screen*' } | Disable-PnpDevice -Confirm:$falseThis command searches for any Plug and Play device whose name contains “touch screen” and disables it. Touch stops working right away.
Step 3: Re-enable when needed. To bring touch back, open an admin PowerShell window again and run:
Get-PnpDevice | Where-Object { $_.FriendlyName -like '*touch screen*' } | Enable-PnpDevice -Confirm:$falseOptional: build a one-click toggle. If you switch back and forth often, you can save each command as a separate .ps1 file, or create a desktop shortcut that runs the command with elevated privileges. For the shortcut, right-click the desktop, choose New > Shortcut, and enter a target such as:
powershell.exe -Command "Get-PnpDevice | Where-Object { $_.FriendlyName -like '*touch screen*' } | Disable-PnpDevice -Confirm:$false"Then open the shortcut’s properties, click Advanced, and tick Run as administrator. Make a second shortcut with Enable-PnpDevice for turning touch back on.
If PowerShell returns no result or an error, your touch device likely has a different friendly name. Run Get-PnpDevice | Where-Object { $_.Class -eq 'HIDClass' } to list every HID device, find the one that looks like your touch controller, and adjust the name in the command.
Method 3: Disable Touch Input Through the Registry Editor
The Registry method switches off Windows’ touch input handling rather than the hardware driver itself. It is a good fallback when Device Manager offers no disable option, though it is somewhat more technical and works most dependably on Windows 10. Results on Windows 11 can vary by device and update, so treat it as a second choice there.
Warning: Editing the Registry incorrectly can cause problems. Follow the steps exactly, and consider creating a restore point first.
Step 1: Open Registry Editor. Press Windows key + R, type regedit, and press Enter. Approve the prompt.
Step 2: Navigate to the touch key. In the address bar at the top, or by expanding folders on the left, go to:
HKEY_CURRENT_USER\Software\Microsoft\Wisp\TouchIf the Wisp or Touch keys do not exist, right-click the parent key, choose New > Key, and create them with those exact names.
Step 3: Create or edit the TouchGate value. In the right-hand pane, look for a value named TouchGate. If it is missing, right-click an empty area, choose New > DWORD (32-bit) Value, and name it TouchGate.
Step 4: Set the value to 0. Double-click TouchGate, enter 0 as the value data, leave the base as Hexadecimal, and click OK.
Step 5: Restart your laptop. The change applies after a reboot. When Windows loads again, touch input should be ignored.
To undo it, go back to the same key and either delete TouchGate or set its value to 1, then restart.
Because this change is stored under HKEY_CURRENT_USER, it applies only to your user profile. Other accounts on the same laptop will still have touch enabled unless you repeat the steps for each one.
Method 4: Turn Off Touch in the BIOS or UEFI Firmware
Some laptops, particularly business models from Lenovo, HP, and Dell, include a touch screen toggle inside the BIOS or UEFI settings. This is the most thorough option because the touch controller is switched off before Windows even starts, which means a Windows update or driver reinstall cannot bring it back.
Step 1: Enter the firmware settings. Restart your laptop and repeatedly press the manufacturer’s key as it boots. Common keys are F2, F10, F12, Delete, or Esc. On Windows, you can also go to Settings > System > Recovery (Windows 11) or Update & Security > Recovery (Windows 10), click Restart now under Advanced startup, then choose Troubleshoot > Advanced options > UEFI Firmware Settings.
Step 2: Look for a touch option. Browse the menus, usually under headings such as Advanced, Configuration, Integrated Peripherals, or Device Configuration. Look for an entry named Touch Screen, Touchscreen, or Touch Panel.
Step 3: Disable it and save. Change the setting to Disabled, then save and exit, typically by pressing F10 and confirming.
Not every laptop has this option, and menu names differ widely between brands and models. If you cannot find it, check your manufacturer’s support page or user manual, or move on to one of the Windows-based methods above.
Method 5: Use Settings to Limit Touch Gestures (Partial Option)
It is worth mentioning what Windows Settings can and cannot do. In Windows 11, open Settings > Bluetooth & devices > Touch. There you can turn off three-finger and four-finger gestures. On Windows 10, you will find similar options under Settings > Devices > Touchpad, although those relate to the trackpad.
These toggles reduce accidental swipes, but they do not turn off basic tapping and dragging on the screen. If your goal is to stop the display from responding to touch at all, you will still need one of the methods above. Think of this setting as a way to tame touch rather than eliminate it.
Which Method Should You Choose?
For most people, Device Manager is the best starting point because it is quick, visual, and easy to reverse. If you manage multiple laptops or want a repeatable toggle, PowerShell is more efficient. Choose the Registry approach when Device Manager does not give you a disable option, and use the BIOS when you want the most permanent result or when Windows keeps re-enabling the driver. The Settings option is only for people who want to soften touch behavior rather than switch it off entirely.
Troubleshooting Common Problems
Touch comes back after a restart. Some systems re-enable the device at boot. Try the PowerShell method and run it through Task Scheduler at login, or use the BIOS option if your laptop offers one.
You cannot find HID-compliant touch screen. Your laptop may not have a touch screen at all, or it may be listed under a different name. Check under “Human Interface Devices,” “Mice and other pointing devices,” and any manufacturer-specific category. Hover over entries or open their Properties to confirm what they are.
Touch works again after a Windows update. Major updates occasionally reinstall drivers and reset device states. Repeat the method you used, or switch to the BIOS option for a more durable solution.
Your trackpad stopped working too. You may have disabled the wrong HID device. Re-enable the last device you changed in Device Manager, or use a USB mouse to navigate and correct it.
Conclusion
Disabling your laptop’s touch screen in Windows 10 or 11 takes only a few minutes once you know where to look. Device Manager offers the simplest route, PowerShell gives you speed and automation, the Registry provides a backup option when the usual controls are missing, and the BIOS delivers the most lasting result on laptops that support it. Windows Settings can calm unwanted gestures, but it will not shut touch off completely.
Whichever method you choose, remember that every change described here is reversible. You can turn touch back on whenever you like, so there is little risk in trying. If one approach does not stick, move to the next, and keep a USB mouse nearby while you experiment. With the right method in place, you can enjoy a smudge-free, accident-free screen and use your laptop exactly the way you prefer.
Frequently Asked Questions
1. Is it safe to disable my laptop’s touch screen?
Yes. Disabling touch only stops Windows from reading input from the touch digitizer. It does not damage the display, change screen quality, or affect your warranty. You can re-enable it at any time using the same method you used to turn it off.
2. Will disabling the touch screen also disable my stylus or pen?
Often, yes. On many laptops, the pen and finger input share the same controller, so disabling the touch device can stop both. If your laptop has a separate pen digitizer entry in Device Manager, you may be able to disable only the touch component and leave the pen active. Test it after disabling, and re-enable the device if you lose pen functionality you want to keep.
3. Why does the “Disable device” option not appear in Device Manager?
Some drivers do not expose a disable option and only offer Uninstall device. In that case, you can use the PowerShell command, edit the Registry value, or look for a touch setting in your BIOS. Updating or reinstalling the touch driver from your laptop manufacturer’s website can also restore the missing option.
4. Why does my touch screen turn itself back on?
Windows may reinstall or reactivate the driver after a restart, a driver refresh, or a major update. To prevent this, use a method that works below the operating system, such as the BIOS or UEFI toggle, or schedule the PowerShell disable command to run each time you sign in.