Switching browsers doesn’t have to mean starting from scratch. If you’re planning to move from Google Chrome to Microsoft Edge, one of the most important things you’ll want to bring along is your bookmarks (also called favorites). Luckily, Microsoft has made it very easy to transfer all your Chrome bookmarks into Edge with just a few clicks.
In this article, we’ll guide you through every step of importing your bookmarks from Chrome to Edge, using simple and clear instructions. Whether you’re new to web browsers or just want a smooth transition, this guide will help you make the switch effortlessly.
Why Import Bookmarks to Edge?

Before we get started, you might be wondering why you should import your Chrome bookmarks to Edge.
Here are a few reasons:
- Save Time: You don’t have to search for your favorite websites again.
- Seamless Transition: All your bookmarks, saved passwords, and browsing history can move with you.
- Stay Organized: Keep the same folder structure and links that you used in Chrome.
- Use Edge Features: Microsoft Edge has useful features like vertical tabs, collections, and tighter Windows integration.
Now, let’s get started with the actual process.
Step 1: Open Microsoft Edge
If you haven’t already installed Microsoft Edge, you can download it from the official website:
https://www.microsoft.com/edge
Once installed, open Edge.
When you open it for the first time, it may prompt you to import data from another browser. If not, don’t worry. You can do it manually anytime.
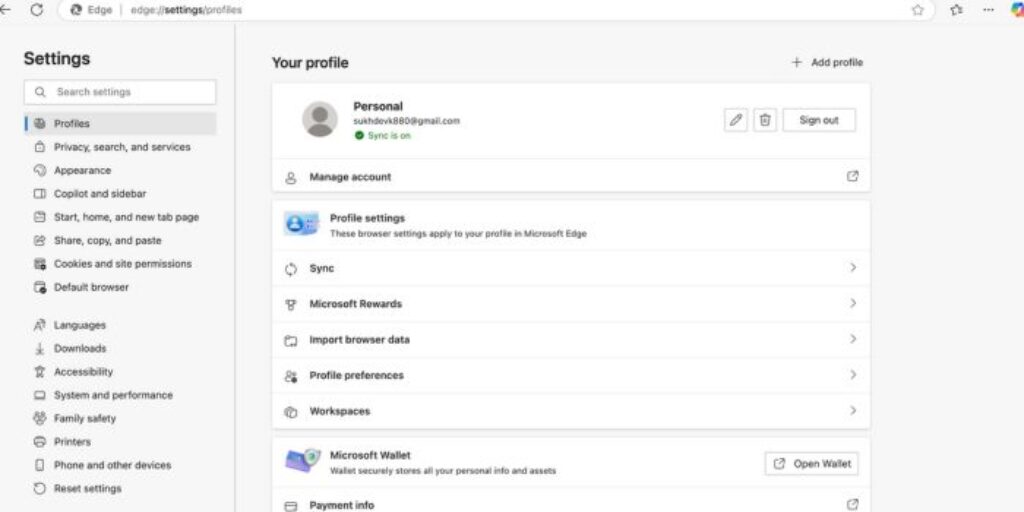
Step 2: Open the Import Browser Data Tool

Here’s how to access the import feature in Edge:
- Click on the three dots (menu icon) in the top-right corner of the Edge browser window.
- Select Settings from the drop-down menu.
- In the left sidebar, click on Profiles.
- Now click on Import browser data.
This will open a new screen where you can choose what you want to import and from which browser.
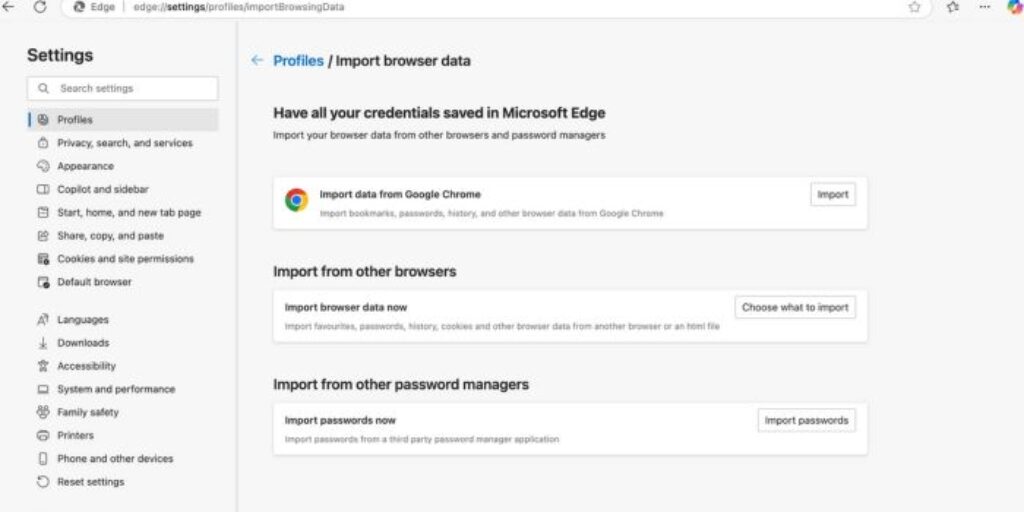
Step 3: Choose Google Chrome As the Source
You’ll now see a page titled “Import browser data”.
- Under “Import from”, click the drop-down menu and choose Google Chrome.
- If you have multiple Chrome profiles (e.g., work and personal), you’ll be asked to pick the one you want to import from.
Edge will show you a list of data types you can import, such as:
- Favorites or bookmarks
- Saved passwords
- Browsing history
- Cookies
- Open tabs
You can select all of them or just choose Favorites or bookmarks if that’s all you need.
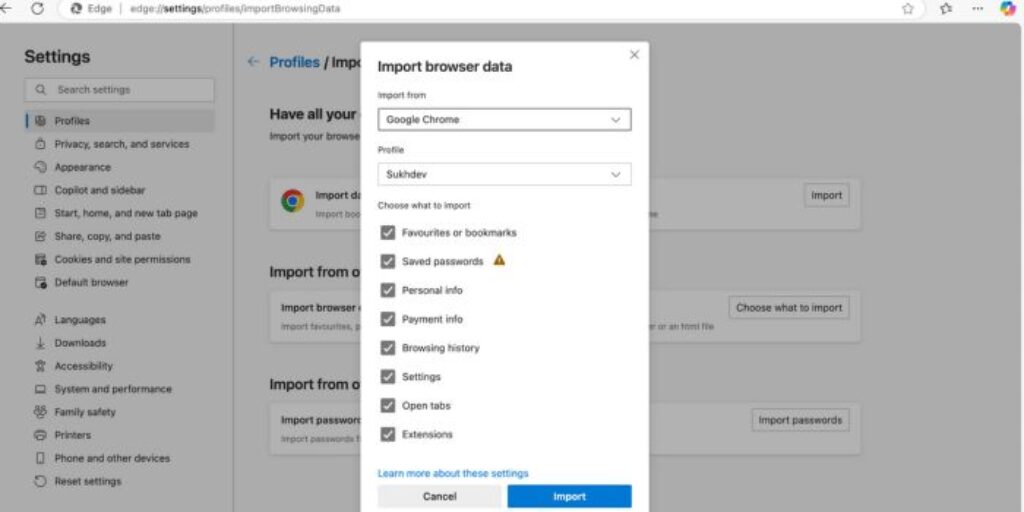
Step 4: Start the Import
Once you’ve selected what to import:
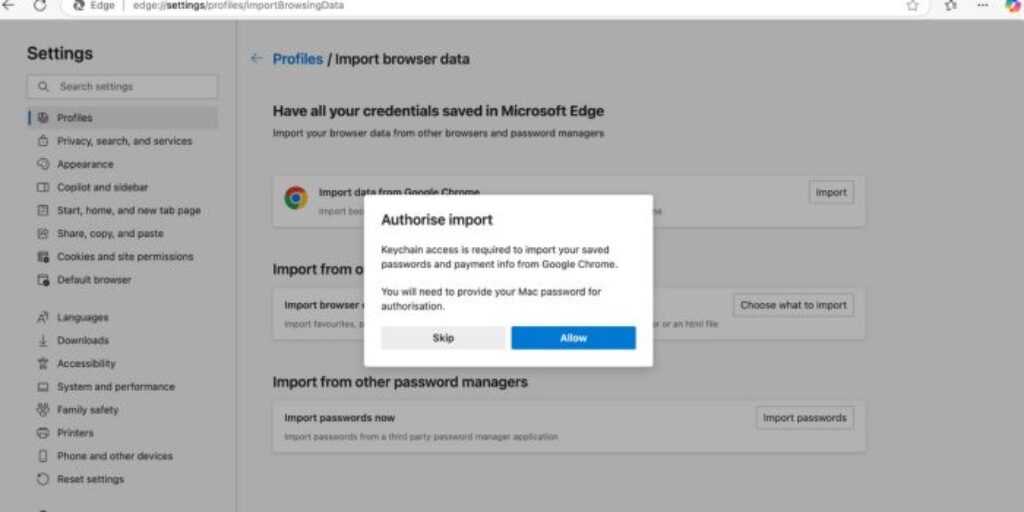
- Click the Import button.
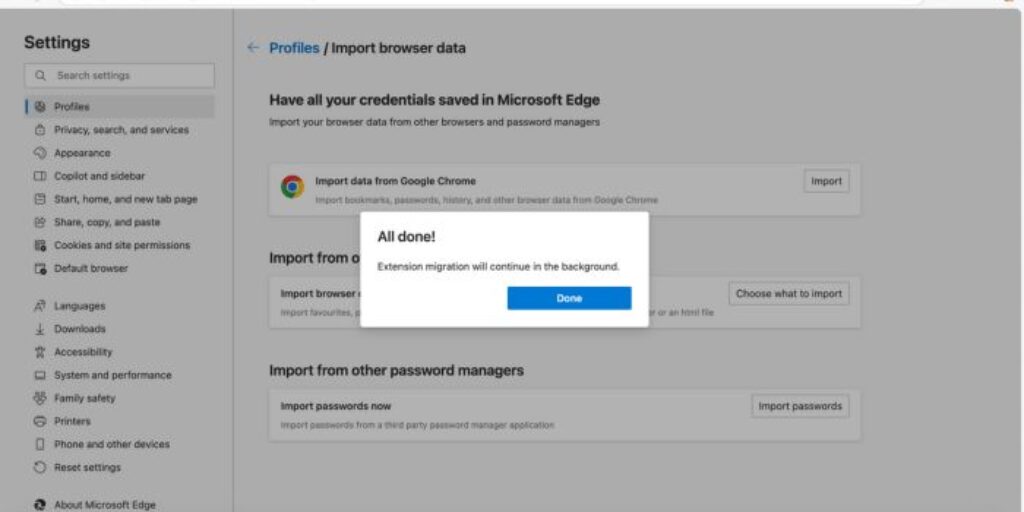
- Edge will take a few seconds (or a bit longer if you’re importing a lot of data).
- Once done, you’ll see a confirmation message: “All done!”
Congratulations! Your Chrome bookmarks are now imported into Edge.
Step 5: View Your Imported Bookmarks in Edge
After importing, here’s how you can find and use your bookmarks:
- Click on the Favorites (star) icon on the toolbar — or press Ctrl + Shift + O on your keyboard.
- A side panel will open showing all your favorites.
- You’ll see a folder named Imported from Google Chrome.
- Inside, all your old Chrome bookmarks will be available, organized just like before.
You can move them around, delete, or organize them as needed.
Optional: Sync Across Devices
If you sign in to Microsoft Edge with your Microsoft account, you can sync your bookmarks (and other data) across multiple devices — Windows PCs, Android phones, iPhones, and even Macs.
Here’s how:
- Click on the three-dot menu.
- Go to Settings > Profiles.
- Sign in with your Microsoft account.
- Turn on Sync and choose what you want to sync (make sure Favorites/Bookmarks is checked).
Now, any changes you make will update everywhere you use Edge.
Troubleshooting Tips
Don’t See Chrome in the Import List?
If Chrome isn’t listed as an option:
- Make sure Google Chrome is installed on your PC.
- Make sure you haven’t deleted your Chrome profile or user data.
- Restart Edge and try again.
Bookmarks Didn’t Show Up?
If bookmarks are missing after import:
- Double-check the Favorites panel to see if they were placed in a different folder.
- Try importing again — Edge may have missed them the first time.
- As a last resort, manually export bookmarks from Chrome and import into Edge (explained below).
Advanced: Manually Export and Import Bookmarks
If the automatic method doesn’t work, you can do it manually:
Step 1: Export Bookmarks from Chrome
- Open Chrome.
- Press Ctrl + Shift + O to open the Bookmarks Manager.
- Click on the three dots in the top-right of the manager.
- Choose Export bookmarks.
- Save the file (usually named
bookmarks.html) to a safe location.
Step 2: Import Bookmarks into Edge
- Open Edge.
- Go to Settings > Profiles > Import browser data.
- Scroll down and click Import from file.
- Choose the
bookmarks.htmlfile you saved from Chrome. - Click Open.
Your bookmarks will now be imported into Edge.
Chrome vs. Edge – Should You Switch?
While Chrome is still the most popular browser worldwide, Microsoft Edge has improved a lot in recent years. It’s based on Chromium, the same engine as Chrome, which means it’s fast and compatible with all websites and extensions.
Here are some benefits of Edge:
- Better performance on Windows 10/11
- Vertical Tabs for better multitasking
- Collections to organize research
- Less RAM usage than Chrome in many cases
- Built-in privacy features
- Coupons and price tracking for shopping
So yes, switching to Edge might be a good idea — and with your bookmarks imported, the change will feel seamless.
Final Thoughts
Switching web browsers doesn’t mean losing your bookmarks, history, or saved data. Microsoft Edge makes it incredibly easy to import your Chrome bookmarks, either automatically or manually. Whether you’re switching for better performance, more features, or tighter Windows integration, Edge is a solid browser — and now, you don’t have to leave your bookmarks behind.
We hope this step-by-step guide helped you import your bookmarks easily and quickly.
![How To Import Bookmarks From Chrome To Edge? [2026 Updated]](https://www.geeksdigit.com/wp-content/uploads/2025/05/run-command-promp-as-adminstrator.jpg)
![How To Import Bookmarks From Chrome To Edge? [2026 Updated]](https://www.geeksdigit.com/wp-content/uploads/2025/07/browser-settings-windows-11.jpg)