Disk Management in Windows 11 is a powerful built-in utility that allows users to manage disks, partitions, and volumes without the need for third-party software. Whether you’re a casual user looking to format a USB drive or a power user setting up multiple hard drives and SSDs, knowing how to open Disk Management in Windows 11 is essential.
In this guide, we will explore multiple methods to access Disk Management on Windows 11, provide step-by-step instructions, and answer common questions. This guide is designed to help you learn everything you need to know about accessing and using Disk Management, with detailed yet easy-to-follow steps.
Why You Need Disk Management in Windows 11

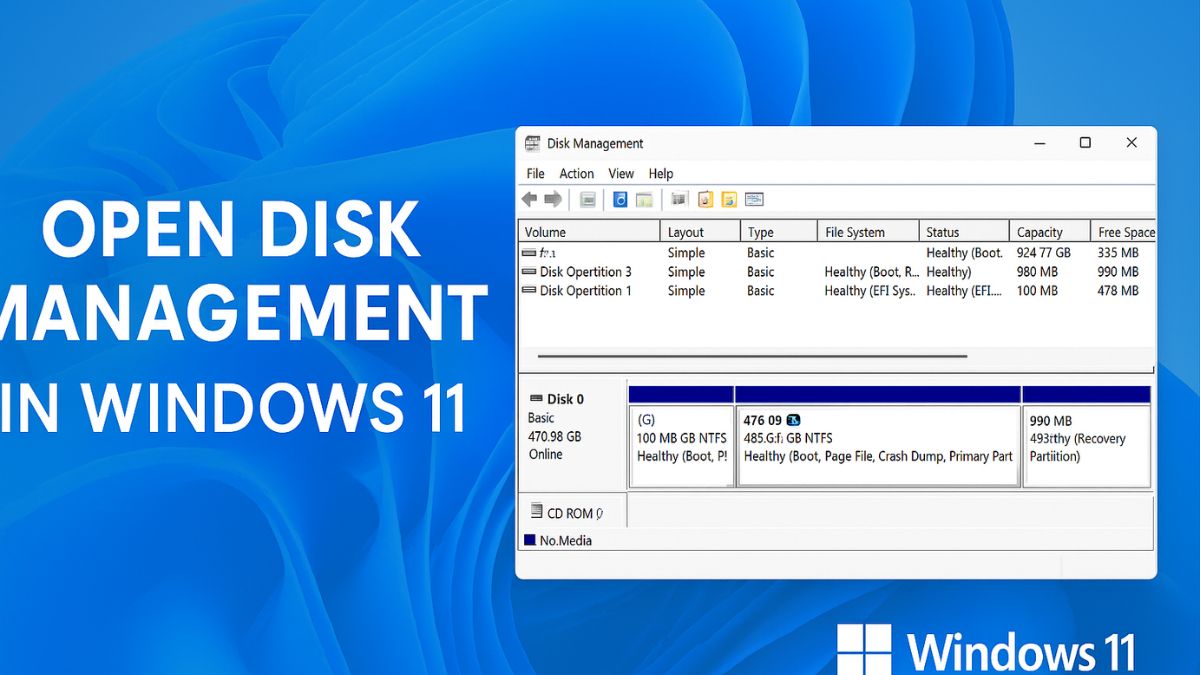
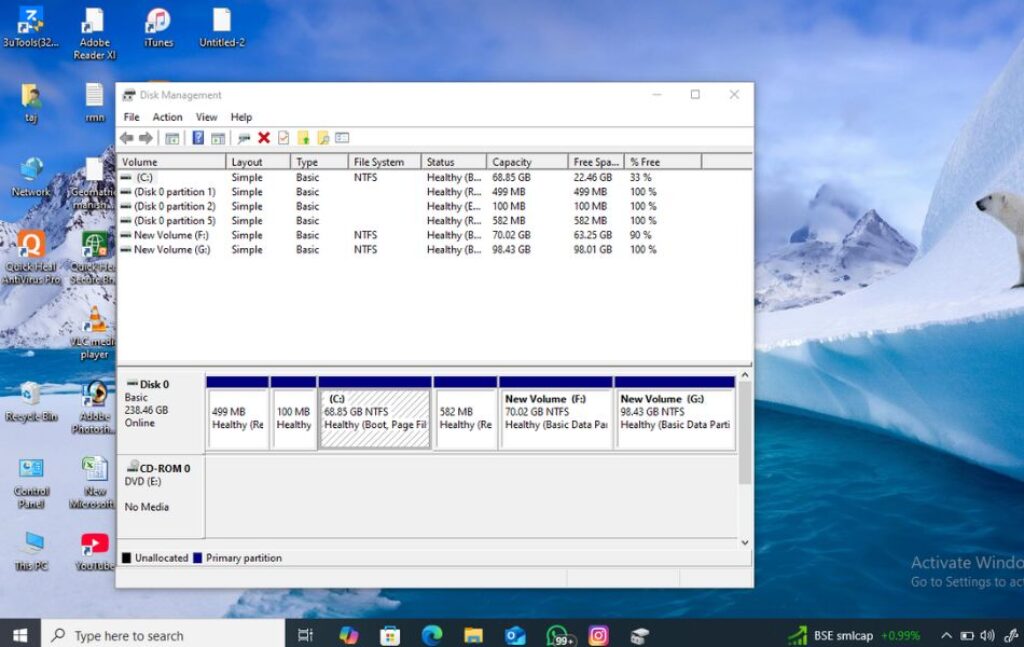
Disk Management in Windows 11 is an essential utility that allows users to perform advanced storage-related tasks with precision and control. This tool is crucial for managing your computer’s internal and external drives, enabling you to create, delete, format, and resize partitions as needed. For instance, if you’re installing a new hard drive or SSD, Disk Management helps initialize the drive and assign it a usable format, allowing Windows to recognize and use it effectively. It also allows users to extend or shrink volumes without data loss, which is particularly useful when reallocating space across partitions.
Additionally, Disk Management provides the ability to assign or change drive letters, making it easier to organize storage devices for accessibility and clarity. If you’re running out of space on your main drive, this tool helps you manage and repurpose unused partitions efficiently. Advanced users may also use it to convert basic disks to dynamic, or from MBR to GPT, especially when setting up systems with larger capacity or configuring dual-boot setups. In essence, Disk Management serves as a centralized control panel for all disk-related operations, making it a vital feature for maintaining a stable, organized, and optimized computing environment in Windows 11.
Method 1: Open Disk Management Using the Start Menu
The Start Menu is the most straightforward way to access various features on Windows 11.
Steps:
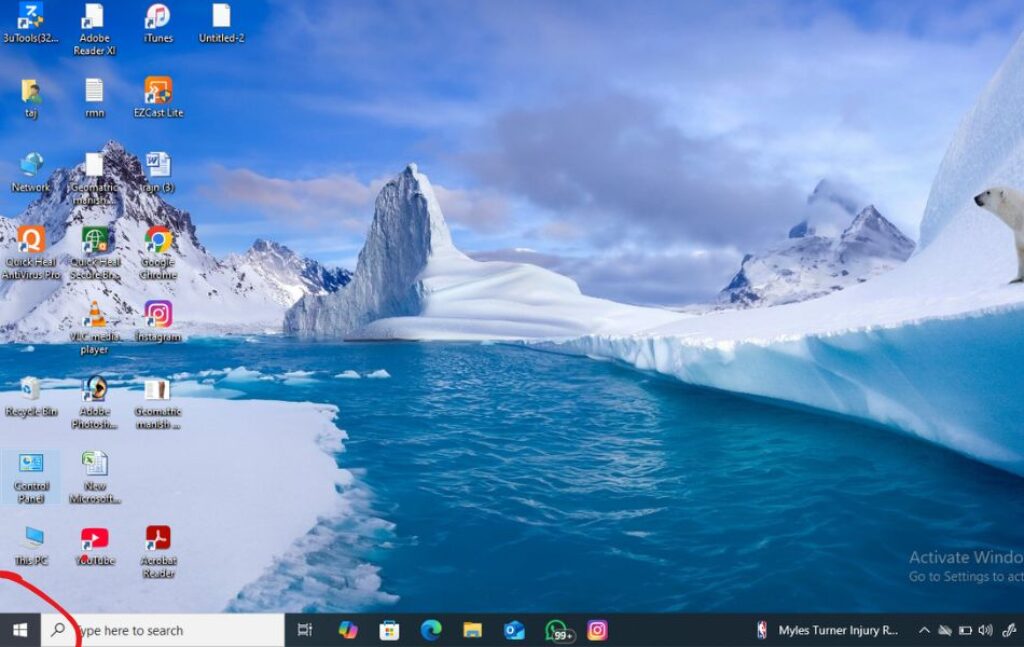
- Click the Start button (Windows icon) on the taskbar.
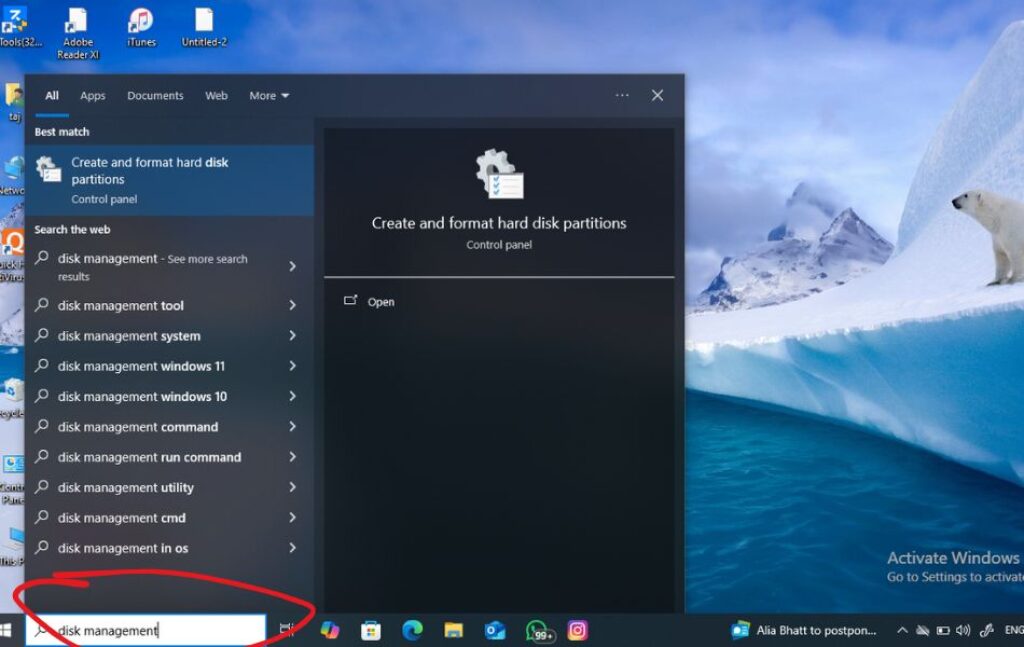
- Type Disk Management in the search box.
- From the search results, click on “Create and format hard disk partitions.”
Pro Tip: You can also right-click on the Start button and access it quicker. (More on this next.)
This method is simple and effective for beginners.
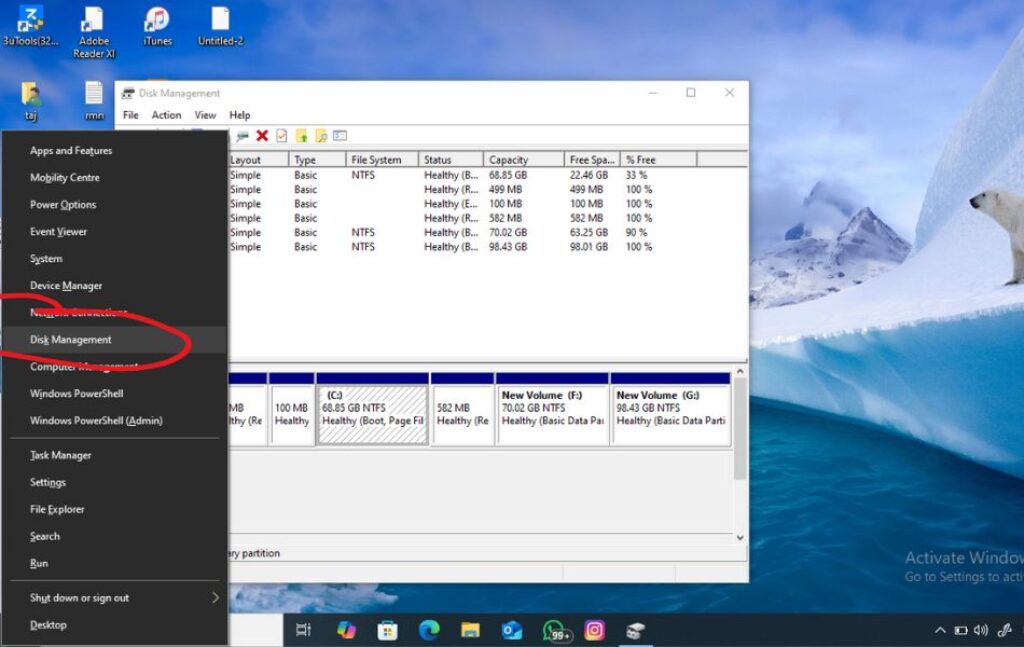
Method 2: Use the Win + X Menu (Quick Access Menu)
The Quick Access Menu in Windows 11 gives you fast access to administrative tools.
Steps:
- Press Windows + X on your keyboard.
- Click Disk Management from the menu.
Note: This is one of the most popular and recommended ways because of its speed and reliability.
This method is ideal if you’re already familiar with keyboard shortcuts.
Method 3: Run Command Dialog (Using diskmgmt.msc)
Using the Run dialog is one of the fastest ways to launch Disk Management.
Steps:
- Press Windows + R to open the Run dialog.
- Type
diskmgmt.mscand press Enter or click OK.


This opens Disk Management instantly. It’s a favorite among IT professionals and power users.
Method 4: Use Command Prompt (CMD)
You can also launch Disk Management via Command Prompt, which is handy if you’re already using CMD for other tasks.
Steps:
- Open the Start Menu, type Command Prompt, and click Run as administrator.
- Type
diskmgmt.mscand press Enter.
This launches the Disk Management utility directly.
Method 5: Open via PowerShell
PowerShell is a powerful command-line shell and scripting language included in Windows 11.
Steps:
- Click the Start button.
- Type PowerShell.
- Right-click Windows PowerShell and select Run as administrator.
- Type
diskmgmt.mscand press Enter.
This method is useful when you’re scripting or automating administrative tasks.
Method 6: Use the Control Panel (Indirect Access)
Though not the most direct method, you can still access Disk Management through Control Panel.
Steps:
- Open the Start Menu, search for Control Panel, and open it.
- Navigate to System and Security > Administrative Tools.
- Click Computer Management.
- In the left pane, click Disk Management under Storage.
While this takes more steps, it is useful when exploring other system tools.
Method 7: Use Computer Management Tool
Computer Management includes Disk Management along with other utilities like Event Viewer and Task Scheduler.
Steps:
- Press Windows + X and choose Computer Management.
- In the left pane, click on Disk Management under the Storage section.
This is a central hub for system management.
Method 8: Use Windows Terminal
The Windows Terminal can run both Command Prompt and PowerShell, making it another route to open Disk Management.
Steps:
- Press Windows + X and select Windows Terminal (Admin).
- Type
diskmgmt.mscand hit Enter.
This is useful if you’ve made Windows Terminal your default shell.
Method 9: Create a Desktop Shortcut
If you use Disk Management frequently, a desktop shortcut can save time.
Steps:
- Right-click on an empty area of your desktop.
- Choose New > Shortcut.
- In the location field, type:
diskmgmt.msc. - Click Next, give it a name like “Disk Management,” and click Finish.
Double-click the shortcut anytime to open Disk Management quickly.
Method 10: Use Task Manager
You can launch Disk Management through Task Manager as well.
Steps:
- Press Ctrl + Shift + Esc to open Task Manager.
- Click File > Run new task.
- Type
diskmgmt.mscand click OK.
It’s a handy option if you’re already managing tasks and need quick access.
Bonus: Pin Disk Management for Easier Access
Since Disk Management isn’t pinned by default, you can manually pin it for quicker access.
To Taskbar:
- Search for “Create and format hard disk partitions”.
- Right-click and select Pin to taskbar.
To Start:
- Search for it the same way.
- Right-click and select Pin to Start.
This reduces the number of clicks needed every time.
Common Uses of Disk Management in Windows 11
After learning how to open Disk Management, here are some tasks you can perform:
- Initialize new hard drives: Essential after installing a new HDD or SSD.
- Create partitions: Useful for organizing data or setting up dual-boot systems.
- Extend/shrink volumes: Manage storage as your needs change.
- Format drives: Wipe data and prepare for reuse.
- Change drive letters: Adjust drive letter assignments for clarity.
Final Thoughts
Knowing how to open Disk Management in Windows 11 empowers users to take full control of their computer’s storage. Whether you’re upgrading to a new SSD, setting up partitions, or simply checking drive status, Disk Management is your go-to tool.
Now that you know how to access Disk Management on Windows 11, you can confidently manage your system’s drives and partitions. From quick keyboard shortcuts to creating a permanent desktop shortcut, you’ve got all the methods at your disposal.
If you found this guide helpful, consider bookmarking it or sharing it with others who want to understand how to open Disk Management in Windows 11 quickly and effectively.
Frequently Asked Questions (FAQs)
What is the shortcut to open Disk Management in Windows 11?
Use Windows + X, then choose Disk Management, or use Windows + R, type diskmgmt.msc, and press Enter.
Is Disk Management available in all versions of Windows 11?
Yes, it is available in Windows 11 Home, Pro, Enterprise, and Education editions.
Can I use Disk Management to manage external drives?
Absolutely. You can initialize, format, and assign letters to external USB drives or external hard disks.
What if I accidentally deleted a partition?
You might need data recovery software. Disk Management itself doesn’t provide recovery tools.