
The Registry Editor is Windows 11’s built-in tool for accessing and modifying the system registry—a critical database containing configuration settings for the operating system and installed applications. Its interface may appear intimidating at first glance, but understanding its components is essential for system administrators, power users, and anyone performing advanced troubleshooting.
The Registry Editor features a dual-pane design similar to File Explorer, with a hierarchical tree structure on the left displaying registry keys, and a detailed view on the right showing values and their data. Mastering this interface enables safe navigation through thousands of system settings, from startup programs to hardware configurations. While powerful, the Registry Editor requires careful handling, as incorrect modifications can cause system instability or prevent Windows from starting properly.
What Is the Registry Editor in Windows 11?

The Registry Editor (regedit) is a hierarchical database in Windows that stores all configuration settings for the operating system, hardware, user profiles, and installed software. It’s essentially the brain of Windows — containing everything from startup configurations to personalization options.
Every time you install a program, connect a device, or change a setting, Windows records that change in the registry. Because of this, the Registry Editor is extremely powerful — but also potentially risky if used incorrectly. A wrong modification can cause system instability or malfunction.
Key Components of the Windows Registry
Before diving into how to open and use the Registry Editor, it’s important to understand the structure of the Windows registry. The registry is divided into five main root keys, each containing several subkeys and values.
- HKEY_CLASSES_ROOT (HKCR): This key stores information about file associations and COM objects. It determines what happens when you double-click a file — for example, which program opens a
.txtfile. - HKEY_CURRENT_USER (HKCU): This key contains configuration data and settings specific to the currently logged-in user — like desktop preferences, display settings, and keyboard configurations.
- HKEY_LOCAL_MACHINE (HKLM): This is one of the most important registry hives, storing system-wide settings that apply to all users. It includes hardware information, software configurations, and security data.
- HKEY_USERS (HKU): This hive contains user profiles for all accounts present on the PC. HKCU is actually a shortcut to one of the subkeys inside HKEY_USERS.
- HKEY_CURRENT_CONFIG (HKCC): This hive contains information about the current hardware profile used by Windows during startup, such as display and printer settings.
Why Use the Registry Editor?
The Registry Editor is used for a variety of advanced tasks, such as:
- Fixing system errors and bugs.
- Enabling or disabling hidden features.
- Changing system performance settings.
- Customizing the Windows interface.
- Managing startup applications.
- Troubleshooting software problems.
For example, you can use the Registry Editor to remove the OneDrive icon from File Explorer, change the default app behavior, or disable Windows animations for better performance.
Precautions Before Using Registry Editor
Since the Registry Editor directly interacts with the core of your operating system, mistakes can have serious consequences. Therefore, before editing, you should take some safety measures:
Create a System Restore Point

Go to Control Panel > System and Security > System > System Protection.
Select Create a restore point, and click Create to make a backup of your system’s current state.
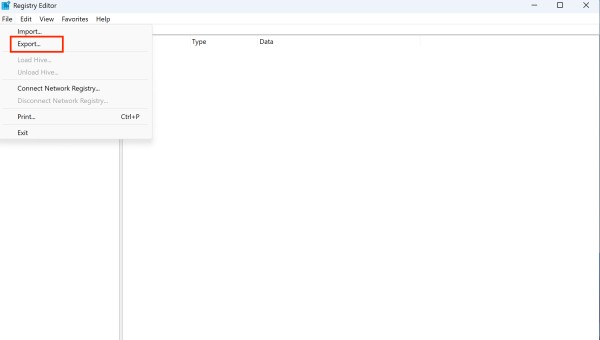
Backup the Registry
Open Registry Editor.
Click File > Export, select All, and save the backup file.
This allows you to restore the registry if something goes wrong.
Avoid Editing Unknown Keys
Only modify values you understand or have instructions for. Random edits can cause Windows to misbehave.
Follow Trusted Guides Only
Methods to Open Registry Editor in Windows 11
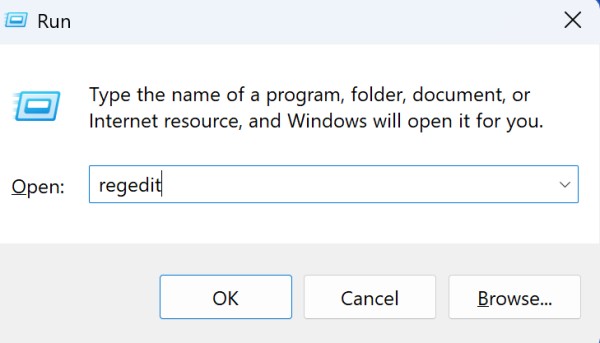
Method 1: Using the Run Dialog Box
The quickest and most universally known method:
- Press Windows + R on your keyboard to open the Run dialog box
- Type regedit in the text field
- Press Enter or click OK
- If prompted by User Account Control (UAC), click Yes to allow the application to make changes
Method 2: Through the Start Menu Search
- Click the Start button or press the Windows key
- Type regedit in the search box
- Click on Registry Editor from the search results
- Confirm the UAC prompt if it appears
Method 3: Using Command Prompt or PowerShell
- Right-click the Start button and select Terminal (Admin) or Windows PowerShell (Admin)
- Type regedit and press Enter
- The Registry Editor will open with administrative privileges
Method 4: Through Windows Settings
- Press Windows + I to open Settings
- Click on Privacy & security in the left sidebar
- Click on For developers
- Under PowerShell, you can enable Developer Mode which provides easier access to system tools
- Alternatively, search for “regedit” in the Settings search bar
Method 5: Using File Explorer
- Open File Explorer (Windows + E)
- Navigate to C:\Windows
- Scroll down and double-click on regedit.exe
- Confirm any UAC prompts
Method 6: Through Task Manager
- Press Ctrl + Shift + Esc to open Task Manager
- Click File in the menu bar
- Select Run new task
- Type regedit and check Create this task with administrative privileges
- Click OK
Advanced Features
Importing and Exporting Registry Files
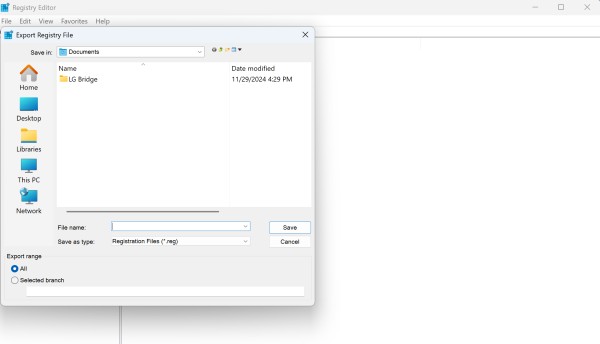
Exporting (Backing Up):
- Right-click on the key you want to export
- Select Export
- Choose a location and filename
- The file will be saved with a .reg extension
Importing:
- Go to File > Import or double-click a .reg file
- Navigate to the registry file you want to import
- Click Open and confirm the import
Adding to Favorites
For frequently accessed registry locations:
- Navigate to the desired key
- Go to Favorites > Add to Favorites
- Name the favorite and click OK
- Access it later through Favorites menu
Using Permissions
- Right-click on a key and select Permissions
- View or modify who can access the key
- Set different permission levels (Full Control, Read, Special Permissions)
Understanding the Registry Editor Interface
Main Window Components
When Registry Editor opens, you’ll see a window divided into two main panes:
Left Pane (Tree View): Displays the registry hierarchy as expandable folders Right Pane (Details View): Shows the keys, values, and data within the selected registry location
Registry Hives
The registry is organized into five main sections called “hives”:
- HKEY_CLASSES_ROOT (HKCR): Contains file type associations and COM object registration information
- HKEY_CURRENT_USER (HKCU): Stores settings specific to the currently logged-in user
- HKEY_LOCAL_MACHINE (HKLM): Contains system-wide settings that apply to all users
- HKEY_USERS (HKU): Contains settings for all user accounts on the computer
- HKEY_CURRENT_CONFIG (HKCC): Stores information about the current hardware profile
Registry Data Types
Registry entries can contain different types of data:
- REG_SZ: String value (text)
- REG_DWORD: 32-bit number
- REG_QWORD: 64-bit number
- REG_BINARY: Binary data
- REG_MULTI_SZ: Multiple string values
- REG_EXPAND_SZ: Expandable string value
Basic Navigation and Usage
Navigating the Registry
- Expanding Folders: Click the arrow next to a folder or double-click the folder name
- Collapsing Folders: Click the downward arrow to collapse an expanded folder
- Selecting Keys: Click on a key in the left pane to view its contents in the right pane
- Address Bar: Use the address bar at the top to quickly navigate to specific registry paths
Searching the Registry
- Press Ctrl + F or go to Edit > Find
- Enter your search term in the dialog box
- Choose what to search: Keys, Values, or Data
- Click Find Next to locate matches
- Use F3 to continue finding the next occurrence
Creating Registry Entries
To create a new key:
- Right-click on the parent key in the left pane
- Select New > Key
- Type the name for the new key and press Enter
To create a new value:
- Right-click in the right pane or on a key in the left pane
- Select New and choose the appropriate data type
- Name the value and press Enter
- Double-click the value to set its data
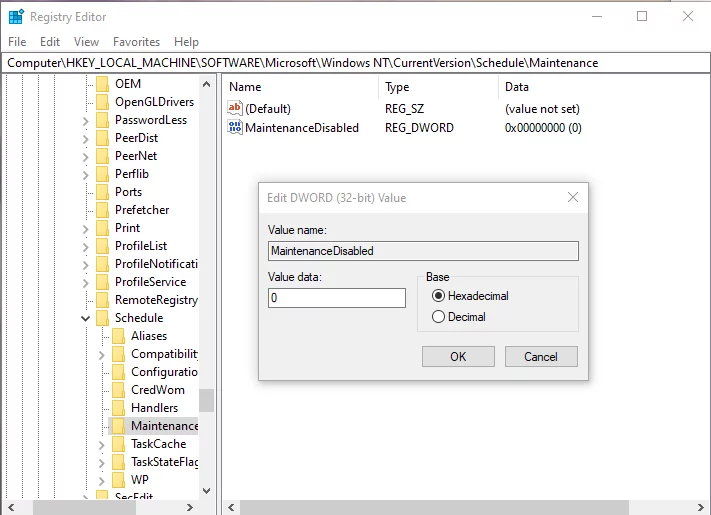
Modifying Registry Values
- Double-click on the value you want to modify in the right pane
- In the Edit dialog box, change the Value data field
- Click OK to save the changes
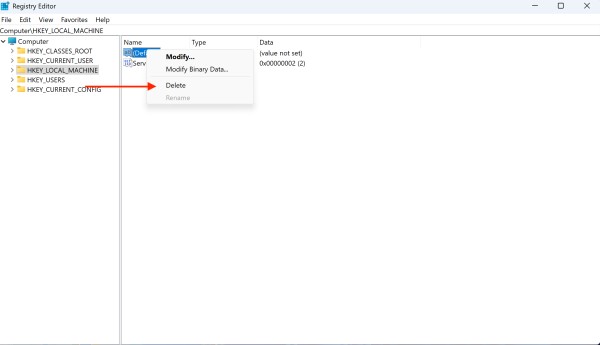
Deleting Registry Entries
To delete a key:
- Right-click on the key in the left pane
- Select Delete
- Confirm the deletion when prompted
To delete a value:
- Right-click on the value in the right pane
- Select Delete
- Confirm the deletion
Best Practices and Safety Tips
Before Making Changes
- Create a System Restore Point: Go to Control Panel > System > System Protection
- Export Registry Sections: Always export the section you plan to modify
- Document Changes: Keep notes of what you’re changing and why
- Have a Recovery Plan: Ensure you know how to boot into Safe Mode or use recovery options
While Working
- Work Slowly: Take your time to ensure you’re in the right location
- Double-Check Paths: Verify you’re modifying the correct key or value
- Use Copy/Paste: When entering long registry paths, copy and paste to avoid typos
- Close Other Programs: Minimize the risk of system conflicts
After Making Changes
- Test Thoroughly: Verify that your changes work as expected
- Monitor System Stability: Watch for unusual behavior after registry modifications
- Keep Backups: Maintain your exported registry files in case you need to revert
Common Registry Locations
Here are some frequently accessed registry paths:
- Startup Programs:
HKEY_CURRENT_USER\Software\Microsoft\Windows\CurrentVersion\Run - Windows Version:
HKEY_LOCAL_MACHINE\SOFTWARE\Microsoft\Windows NT\CurrentVersion - Installed Programs:
HKEY_LOCAL_MACHINE\SOFTWARE\Microsoft\Windows\CurrentVersion\Uninstall - User Environment Variables:
HKEY_CURRENT_USER\Environment - System Environment Variables:
HKEY_LOCAL_MACHINE\SYSTEM\CurrentControlSet\Control\Session Manager\Environment
Troubleshooting Registry Issues
If you encounter problems after registry modifications:
- Use System Restore: Boot into Safe Mode and use a restore point created before your changes
- Import Backup Files: Use the .reg files you exported before making changes
- Boot from Recovery Media: Use Windows installation media to access recovery options
- Safe Mode: Boot into Safe Mode to access the registry with minimal system interference
Conclusion
The Registry Editor is a powerful tool that gives you deep control over Windows 11’s behavior and configuration. While it offers tremendous flexibility for system customization and troubleshooting, it requires careful handling due to its critical role in system operation. Always prioritize safety by creating backups, working methodically, and understanding the implications of your changes.
Remember that many registry modifications can also be accomplished through Group Policy Editor (gpedit.msc) or Windows Settings, which are often safer alternatives for system configuration. Use Registry Editor when you need precise control or when following specific troubleshooting instructions from trusted sources.
With proper precautions and understanding, Registry Editor becomes an invaluable tool for advanced Windows 11 users seeking to optimize, customize, and troubleshoot their systems at the deepest level.