Startup programs are apps that launch automatically when you sign in to Windows. Some are useful (your cloud backup, password manager, or touchpad driver), but many aren’t essential and quietly slow down boot time and eat memory. The good news: Windows 11 gives you several safe, built-in ways to control them—no third-party tools required.
This beginner-friendly guide walks you through every practical method to remove startup programs, with clear steps, tips, and what to avoid. By the end, you will know exactly which routes are safest, fastest, and most thorough.
What are Startup Programs?

Startup programs are applications that automatically launch when Windows boots up. While some of these programs are essential for your system’s operation (like antivirus software or Windows Security), many others are unnecessary and can significantly impact your computer’s startup time. These might include media players, chat applications, office suites, gaming clients, and various utility programs that add themselves to the startup list during installation.
The impact of excessive startup programs goes beyond just slower boot times. They continue running in the background, consuming system resources even when you’re not actively using them. This can lead to increased memory usage, higher CPU utilization, and reduced battery life on laptops. By carefully managing which programs start with Windows, you can create a more efficient and responsive computing experience.
Method 1: Using Task Manager (Primary Method)
The Task Manager provides the most comprehensive and user-friendly way to manage startup programs in Windows 11. This method offers detailed information about each program’s impact on startup time and allows for easy management.
Step 1: Opening Task Manager Right-click on the taskbar at the bottom of your screen. From the context menu that appears, select “Task Manager.” Alternatively, you can press Ctrl + Shift + Esc simultaneously to open Task Manager directly, or press Ctrl + Alt + Delete and select Task Manager from the options.
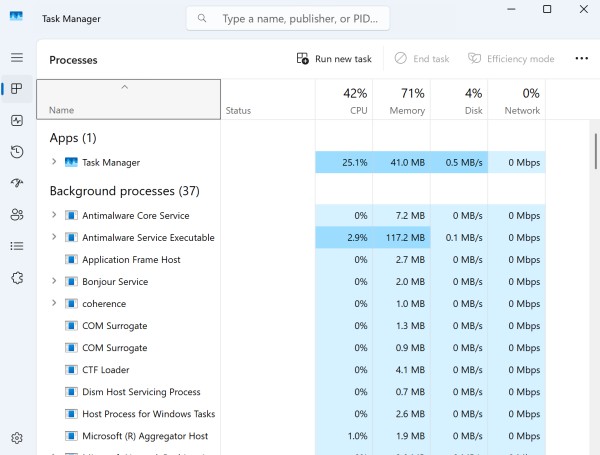
Step 2: Navigating to the Startup Tab Once Task Manager opens, look for the “Startup” tab at the top of the window. Click on it to access the startup programs management interface. If you don’t see the tabs, click “More details” at the bottom of the Task Manager window to expand it to the full view.
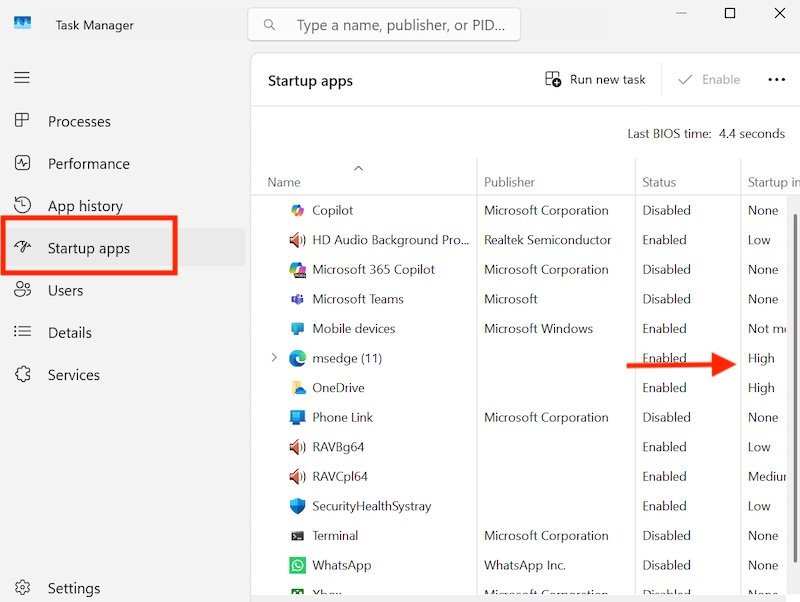
Step 3: Analyzing Startup Programs In the Startup tab, you’ll see a list of all programs configured to start with Windows. The interface displays several important columns:
- Name: The name of the program or application
- Publisher: The company that created the software
- Status: Shows whether the program is “Enabled” or “Disabled”
- Startup impact: Indicates the program’s effect on boot time (High, Medium, Low, or Not measured)
Step 4: Identifying Programs to Remove Focus on programs with “High” startup impact first, as these have the most significant effect on boot time. Common candidates for disabling include:
- Gaming platforms (Steam, Epic Games Launcher, Origin)
- Media players (iTunes, Spotify, VLC)
- Communication apps (Skype, Discord, Slack)
- Office applications (Microsoft Office programs)
- Photo management software (Adobe Creative Cloud)
- Music and video streaming applications

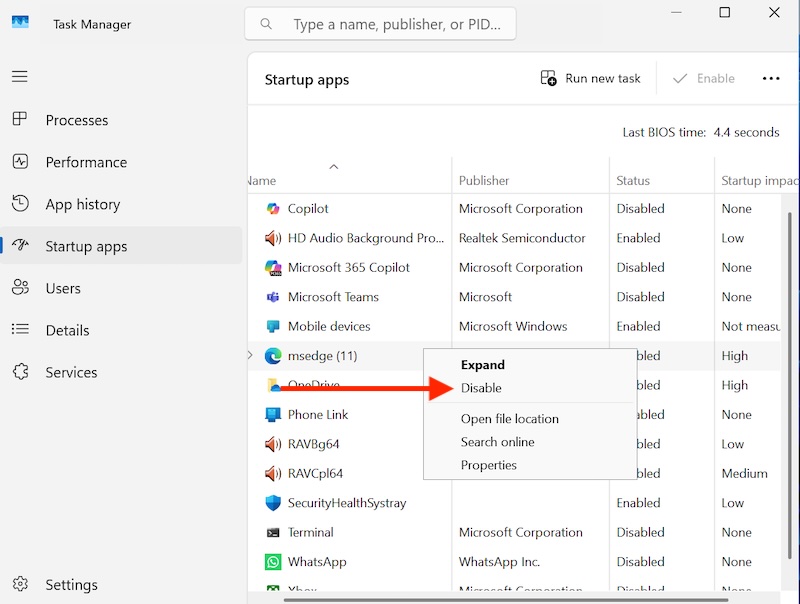
Step 5: Removing Startup Programs To remove a program, right-click on it in the list and select “Disable” from the context menu. Alternatively, select the program by clicking on it once, then click the “Disable” button that appears in the bottom-right corner of the Task Manager window. The program’s status will change from “Enabled” to “Disabled.”
Step 6: Understanding the Impact Pay attention to the “Startup impact” column when making decisions. Programs with “Low” or “Not measured” impact may be safe to keep enabled if you use them regularly. However, programs showing “High” impact should be carefully evaluated for necessity.
Method 2: Using Windows Settings
Windows 11’s Settings app provides another intuitive way to manage startup programs, offering a cleaner interface that some users may prefer over Task Manager.
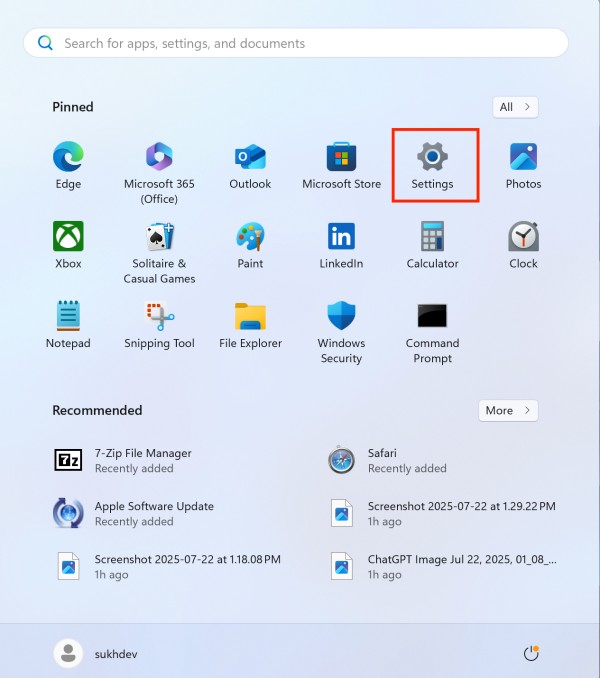
Step 1: Opening Settings Press Windows key + I to open the Settings app quickly. You can also click the Start button and select the Settings icon (gear symbol) from the start menu.
Step 2: Navigating to Apps In the Settings window, look for “Apps” in the left sidebar and click on it. This will open the apps management section.
Step 3: Accessing Startup Settings Within the Apps section, look for “Startup” in the list of options and click on it. This will display all applications that can start automatically with Windows.
Step 4: Managing Startup Apps You’ll see a list of applications with toggle switches next to each one. The interface also shows the startup impact of each application, similar to Task Manager. To remove a program from starting up, simply click its toggle switch to turn it off. The switch will change from blue (enabled) to gray (disabled).
Step 5: Reviewing Your Changes. After making changes, you can see which apps are enabled or disabled at a glance. Enabled apps will have blue toggle switches, while disabled apps will have gray switches.
Method 3: Using the Startup Folder
The Startup folder method is particularly useful for managing programs that you or other users have manually added to the startup process. This method involves directly accessing the Windows startup folders.
Step 1: Opening the Run Dialog Press Windows key + R to open the Run dialog box. This small window allows you to execute commands and open specific locations quickly.
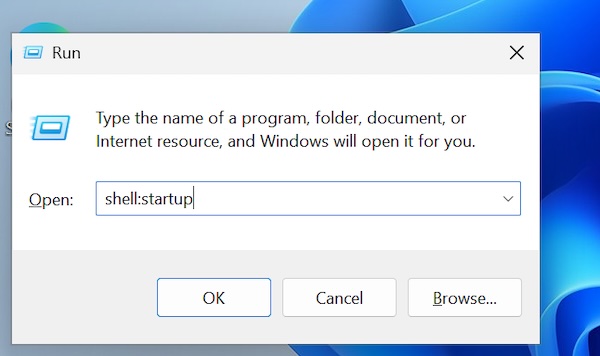
Step 2: Accessing the User Startup Folder Type “shell:startup” in the Run dialog and press Enter. This command opens the startup folder for the current user account. Any shortcuts placed in this folder will automatically launch when that user logs into Windows.
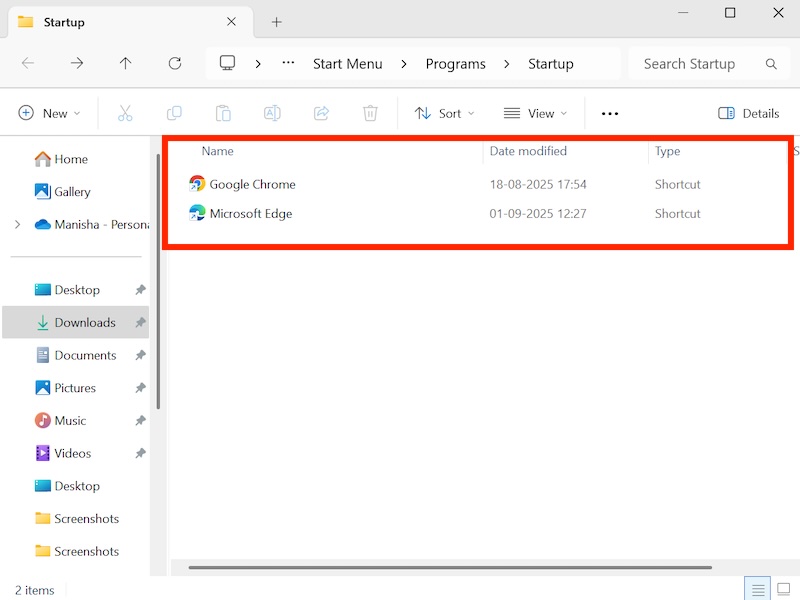
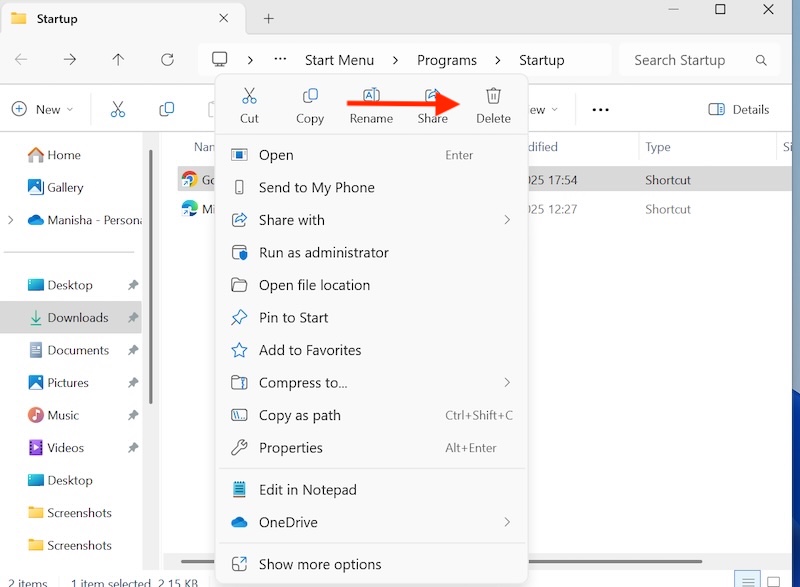
Step 3: Managing User Startup Items In the startup folder, you’ll see shortcuts to programs that start automatically. To prevent a program from starting up, simply delete its shortcut from this folder. Right-click on the shortcut and select “Delete,” or select it and press the Delete key.
Step 4: Accessing the System-Wide Startup Folder For programs that start for all users, open the Run dialog again and type “shell:common startup” then press Enter. This opens the system-wide startup folder that affects all user accounts on the computer.
Step 5: Managing System Startup Items Similar to the user startup folder, you can delete shortcuts from the common startup folder to prevent programs from starting for all users. Be more cautious with items in this folder, as they may be important system components.
Method 4: Using System Configuration (msconfig)
The System Configuration utility, also known as msconfig, provides advanced startup management options and is particularly useful for managing system services and advanced startup options.
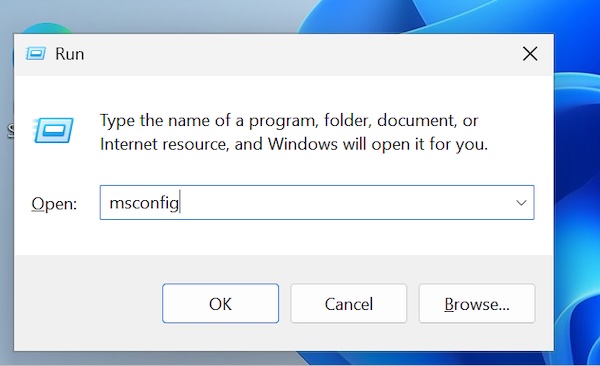
Step 1: Opening System Configuration Press Windows key + R to open the Run dialog, type “msconfig” and press Enter. This opens the System Configuration utility.
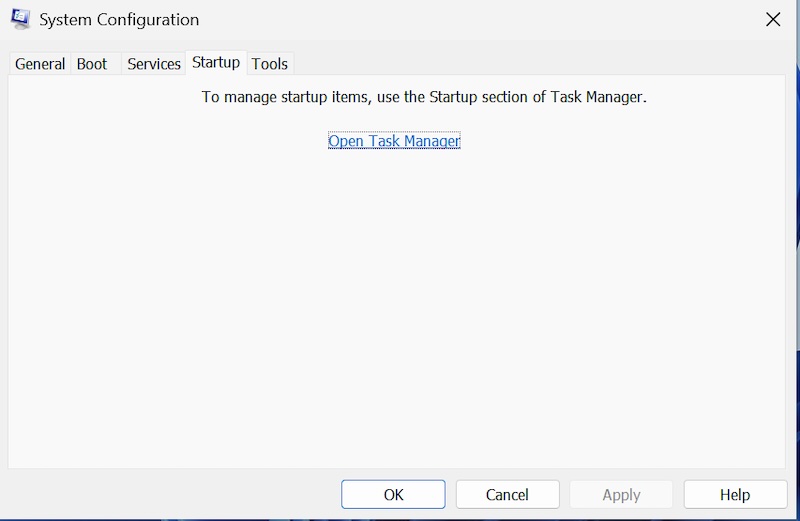
Step 2: Navigating to the Startup Tab Click on the “Startup” tab in the System Configuration window. You’ll see a message indicating that startup items are now managed through Task Manager, with a link to open it directly.
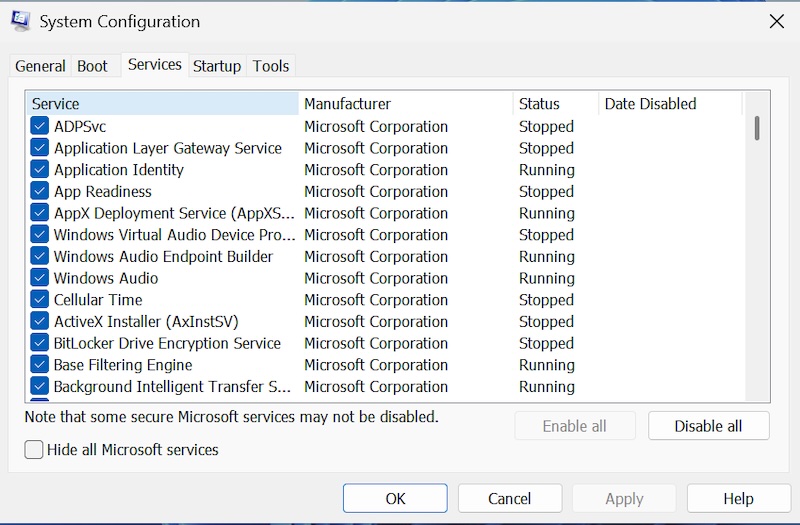
Step 3: Managing Services While the Startup tab redirects to Task Manager, the “Services” tab in msconfig allows you to manage Windows services that start automatically. Be extremely cautious when modifying services, as disabling essential services can cause system instability.
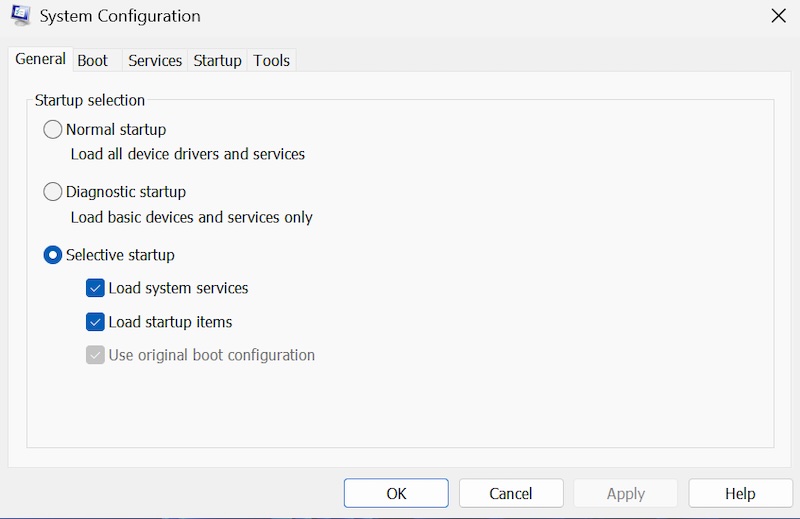
Step 4: Using Selective Startup The “General” tab offers startup options including “Normal startup,” “Diagnostic startup,” and “Selective startup.” These options are primarily used for troubleshooting and should be used carefully.
Best Practices and Safety Considerations
When disabling startup programs, it’s crucial to follow certain best practices to maintain system stability and functionality:
Essential Programs to Keep Enabled:
- Windows Security or your antivirus software
- Windows Update services
- Essential hardware drivers (graphics, audio, network)
- System utilities from your computer manufacturer
- Critical security software
Programs Safe to Remove:
- Media players and entertainment software
- Gaming platforms and launchers
- Social media and communication apps (unless needed immediately at startup)
- Photo and video editing software
- Office applications (can be launched manually when needed)
- Browser extensions and toolbars
Monitoring System Performance: After making changes to startup programs, monitor your system’s performance over several boot cycles. If you notice any missing functionality or system instability, you can always re-enable programs through the same methods used to disable them.
Creating System Restore Points: Before making significant changes to startup programs, consider creating a system restore point. This allows you to revert changes if something goes wrong.
Troubleshooting Common Issues
If you encounter problems after disabling startup programs, here are some common solutions:
Programs Still Starting Despite Being Removed: Some programs may have multiple entries or may be started by other services. Check all methods mentioned above and look for alternative entries.
System Functionality Issues: If certain features stop working after disabling startup programs, re-enable recently disabled items one by one to identify the culprit.
Performance Not Improving: If boot time doesn’t improve significantly, consider other factors like hard drive health, available RAM, or background Windows updates.
Conclusion
Managing startup programs in Windows 11 is an essential maintenance task that can significantly improve your computer’s performance and boot time. By using the methods outlined in this guide—Task Manager, Windows Settings, Startup folders, and System Configuration—you can take control of which programs launch automatically with Windows.
Remember to approach startup program management thoughtfully, keeping essential security and system programs enabled while disabling unnecessary applications that consume resources. Regular maintenance of your startup programs, combined with other system optimization practices, will help ensure your Windows 11 computer runs efficiently and responsively.
The key to successful startup management is finding the right balance between system performance and having your frequently-used applications readily available. Start conservatively by disabling obvious candidates like gaming platforms and media players, then gradually optimize based on your specific usage patterns and performance observations.