Geeksdigit Team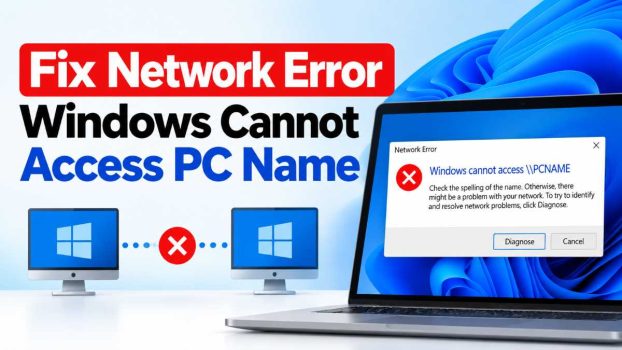
You open File Explorer, click Network, double-click another computer, and instead of a list of shared folders you get a dialog that reads: “Windows cannot access \PC-NAME. Check the spelling of the name. Otherwise, there might be a problem with your network.” Sometimes it ends with error code 0x80070035 (“The network path was not found”), and sometimes it is 0x80004005 (“Unspecified error”). Either way, the result is the same: a shared folder, printer, or drive that worked yesterday is suddenly out of reach.
This error is one of the most common networking problems on Windows, and it appears after feature updates, router changes, password changes, or sometimes for no obvious reason at all. The good news is that it is almost always a configuration issue rather than a hardware failure. The cause usually falls into one of a handful of categories: network discovery or file sharing is switched off, a required Windows service is not running, the firewall is blocking traffic, name resolution is failing, old SMB protocol settings are interfering, or saved credentials are wrong.
In this guide, we walk through twelve proven methods, ordered from the quickest checks to the more advanced fixes. Work through them in order and test access after each one. In most cases, one of the first five methods solves the problem.
Common Causes of the Error
Before you start changing settings, it helps to understand what is usually going wrong:
- Network discovery or file and printer sharing is turned off on one or both computers.
- The network profile is set to Public instead of Private, which hides the PC from others.
- Required services have stopped, such as Function Discovery Resource Publication or DNS Client.
- Windows Firewall or third-party antivirus is blocking SMB traffic.
- Name resolution is failing, so \PC-NAME cannot be translated into an IP address.
- Guest or insecure logons are blocked, a default change in newer builds of Windows 11 and Windows 10.
- Stale or incorrect saved credentials are being sent to the other PC.
- SMB protocol mismatch between an older device (such as a NAS or old Windows PC) and a modern computer.
Method 1: Run Basic Checks First
Simple problems cause a surprising number of network sharing errors, so start here.
- Verify both PCs are on the same network. Both computers must be connected to the same router or subnet. A PC on Wi-Fi and another on a guest network, or a VPN, will not see each other.
- Check the computer name. Press Win + R, type
cmd, press Enter, then typehostnameon the target PC to confirm the exact name. A typo in \PC-NAME is a classic cause. - Ping the other computer. On the PC showing the error, open Command Prompt and run
ping PC-NAME. If it fails with “could not find host,” you have a name resolution problem. If it replies, the network path is fine and the issue lies with sharing or permissions. - Restart both computers and the router. It sounds basic, but it clears stale network caches and renews IP addresses.
- Temporarily disconnect VPNs. VPN clients often reroute local traffic and break local discovery.
If the ping works but access still fails, continue to the next method.
Method 2: Set Your Network Profile to Private
Windows treats Public networks as untrusted, so it disables discovery and sharing by default. Many people hit this error simply because their home network is flagged as Public.
On Windows 11:
- Open Settings > Network & internet.
- Click Wi-Fi (or Ethernet), then select your connection’s properties.
- Under Network profile type, choose Private network.
On Windows 10:
- Open Settings > Network & Internet > Status.
- Click Properties under your connection.
- Select Private.
Do this on both computers, then try accessing the share again.
Method 3: Enable Network Discovery and File Sharing
Even on a Private network, the individual sharing features must be switched on.
- Open Control Panel > Network and Internet > Network and Sharing Center.
- Click Change advanced sharing settings on the left.
- Expand the Private profile and select:
- Turn on network discovery (and tick Turn on automatic setup of network connected devices).
- Turn on file and printer sharing.
- Expand All Networks and choose Turn off password protected sharing only if you need open access on a trusted home network. Otherwise, leave it on and use proper credentials.
- Click Save changes.
On Windows 11 you can also find these toggles in Settings > Network & internet > Advanced network settings > Advanced sharing settings. Apply the same configuration on both PCs.
Method 4: Start the Required Windows Services
Network discovery depends on several background services. If any of them are stopped or disabled, the PC will not appear properly on the network.
- Press Win + R, type
services.msc, and press Enter. - Locate each of these services:
- Function Discovery Provider Host
- Function Discovery Resource Publication
- SSDP Discovery
- UPnP Device Host
- DNS Client
- Server and Workstation
- Double-click each one, set Startup type to Automatic (or Automatic (Delayed Start) where available), and click Start if the service is not running.
- Click Apply and OK.
Restart the computer afterward. Function Discovery Resource Publication in particular is a frequent culprit, because when it is stopped the PC does not announce itself to the network.
Method 5: Use the IP Address Instead of the PC Name
If name resolution is the issue, you can bypass it entirely. This is both a diagnostic test and a practical workaround.
- On the target PC, open Command Prompt and run
ipconfig. Note the IPv4 Address, for example 192.168.1.25. - On the PC with the error, press Win + R, type
\\192.168.1.25, and press Enter.
If this works, the sharing setup is fine and the problem is name resolution. You can fix that with Method 8, or simply map the share to a drive letter using the IP address so you never have to type the name again. For long-term reliability, consider assigning the target PC a static IP or a DHCP reservation in your router so the address does not change.
Method 6: Check Windows Firewall and Antivirus
The firewall may be blocking File and Printer Sharing even when everything else is configured properly.
- Open Control Panel > System and Security > Windows Defender Firewall.
- Click Allow an app or feature through Windows Defender Firewall.
- Click Change settings, then make sure File and Printer Sharing and Network Discovery are ticked for the Private column.
- Click OK.
To test whether the firewall is truly responsible, temporarily turn it off for the Private profile and try again. If access suddenly works, re-enable the firewall and fix the rule rather than leaving it disabled. If you use third-party security software such as Norton, McAfee, Kaspersky, or Bitdefender, check its own firewall settings, since it can override Windows Firewall and block SMB ports 139 and 445.
Method 7: Clear or Update Saved Credentials
If Windows keeps sending an old username and password, the other PC rejects the connection, and the error may display as a generic “cannot access” message.
- Open the Start menu, search for Credential Manager, and open it.
- Select Windows Credentials.
- Find entries that match the target PC’s name or IP address and click Remove.
- Try connecting again. When prompted, enter the correct username and password for an account that exists on the target PC.
If you want to add credentials manually, click Add a Windows credential, enter the PC name, the username (in the format PC-NAME\username), and the password. Note that if the account on the target PC has no password, Windows may refuse network logons by default, so create a password for it.
Method 8: Fix Name Resolution (DNS and NetBIOS)
When ping by IP works but ping by name fails, repair name resolution.
Flush DNS and reset networking components. Open Command Prompt as administrator and run these commands one at a time:
ipconfig /flushdns
nbtstat -R
nbtstat -RR
netsh int ip reset
netsh winsock reset
Restart your PC afterward.
Enable NetBIOS over TCP/IP.
- Press Win + R, type
ncpa.cpl, and press Enter. - Right-click your active adapter and choose Properties.
- Select Internet Protocol Version 4 (TCP/IPv4) and click Properties > Advanced.
- Open the WINS tab and choose Enable NetBIOS over TCP/IP.
- Click OK on each window.
As a last resort for name problems, you can add an entry to the hosts file (C:\Windows\System32\drivers\etc\hosts) that maps the IP address to the PC name, for example 192.168.1.25 PC-NAME.
Method 9: Allow Insecure Guest Logons
Since Windows 10 version 1709, and more strictly in Windows 11 24H2, Windows blocks guest access to SMB shares by default. If you are connecting to a NAS, an older PC, or a share that allows guest access without a password, this setting can trigger the error.
On Windows Pro, Enterprise, or Education:
- Press Win + R, type
gpedit.msc, and press Enter. - Go to Computer Configuration > Administrative Templates > Network > Lanman Workstation.
- Double-click Enable insecure guest logons, set it to Enabled, and click OK.
On Windows Home, use the registry or PowerShell. Open PowerShell as administrator and run:
Set-SmbClientConfiguration -EnableInsecureGuestLogons $true -ForceSecurity note: guest logons are not encrypted or signed, so enable this only on trusted home or lab networks. A better long-term solution is to create a real user account on the sharing device and authenticate with it.
Method 10: Enable the Right SMB Version
Windows uses the SMB protocol for file sharing. Modern Windows disables the old, insecure SMB 1.0 by default, but very old devices may only support it. Meanwhile, some newer setups require SMB 2 or 3 to be active.
- Open Control Panel > Programs > Turn Windows features on or off.
- Find SMB 1.0/CIFS File Sharing Support. Only enable it if you must connect to a legacy device that supports nothing newer.
- Click OK and restart.
To check SMB 2/3 status, run this in an elevated PowerShell window:
Get-SmbServerConfiguration | Select EnableSMB1Protocol, EnableSMB2ProtocolIf EnableSMB2Protocol is False, enable it with Set-SmbServerConfiguration -EnableSMB2Protocol $true. Because SMB 1.0 has known security vulnerabilities, prefer updating the firmware on your NAS or router to support SMB 2 or 3 instead of turning SMB 1.0 back on.
Conclusion
The “Windows cannot access PC-NAME” error looks alarming, but it is rarely a sign of broken hardware. In nearly every case it comes down to settings: a Public network profile, disabled discovery or sharing, a stopped service, a firewall rule, failed name resolution, or blocked guest logons. By working through the methods above in order, starting with the basic checks and the Private profile setting and moving on to services, credentials, SMB, and finally a network reset, you can pinpoint and fix the cause quickly.
To prevent the problem from returning, give shared PCs static IP addresses or router reservations, use real user accounts instead of guest access, keep Windows and network drivers updated, and keep both computers on the same Private network profile. A few minutes of setup now will save you from repeated troubleshooting later.
Frequently Asked Questions (FAQ)
1. What does error code 0x80070035 mean?
Error 0x80070035, “The network path was not found,” means Windows could not locate the target computer on the network. It usually points to name resolution problems, disabled network discovery, a firewall block, or the other PC being offline. Testing with the IP address (Method 5) quickly tells you whether the name or the connection is at fault.
2. Why can I ping the other computer but still not open its shared folders?
Ping only confirms basic connectivity. File sharing uses SMB over ports 139 and 445, which may be blocked by a firewall, or the sharing feature, share permissions, or credentials may be misconfigured. Check the firewall (Method 6), saved credentials (Method 7), and share permissions (Method 11).
3. Is it safe to enable SMB 1.0 or insecure guest logons?
Both settings reduce security. SMB 1.0 has serious known vulnerabilities, and guest logons send data without signing or encryption. Enable them only temporarily, only on trusted private networks, and only if no alternative exists. The safer approach is to update the legacy device’s firmware and use authenticated accounts with SMB 2 or 3.
4. The error appeared after a Windows update. What should I do?
Feature updates often reset network profiles, sharing settings, and security defaults. Re-check that your network is set to Private, that network discovery and file sharing are on, and that insecure guest logons are allowed if you rely on them (Methods 2, 3, and 9). If the problem persists, run the network reset in Method 12 and update your network adapter driver.
![Fix Network Error – Windows Cannot Access PC Name [Windows 11/10]](https://www.geeksdigit.com/wp-content/uploads/thumbs_dir/Disable-Your-Laptops-Touch-Screen-rundle0ytnsnsbkfou6tooan9idbb3895ebdk06o8s.jpg)
![Fix Network Error – Windows Cannot Access PC Name [Windows 11/10]](https://www.geeksdigit.com/wp-content/uploads/thumbs_dir/Create-a-Custom-Bloat-Free-Windows-11-Install-Disk-rundz2keauiwrzozsr3bz806jexnchjlp45t0zwdoc.jpg)