Geeksdigit Team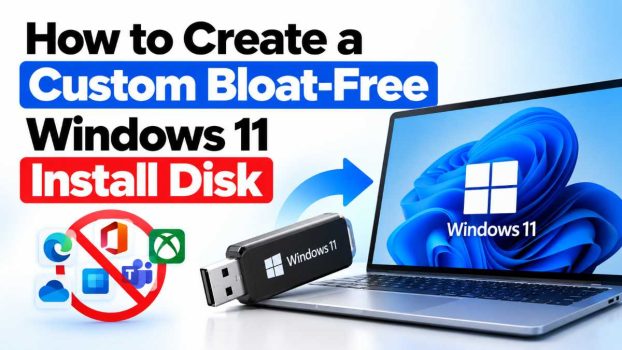
A fresh Windows 11 install is rarely clean. Within minutes of the first boot you may find Candy Crush, TikTok, Clipchamp, and a handful of promotional apps in the Start menu. Behind the scenes there are telemetry services, suggested content, and background apps that consume RAM and disk space. On a new PC this is an annoyance, and on an older laptop, a virtual machine, or a low-storage tablet it can be a real performance problem.
You can remove all of this after installation, but the better approach is to build a custom install disk that never includes the clutter. Reinstall Windows a year from now and you get the same clean result without repeating an hour of cleanup.
This guide covers four proven methods, from easiest to most hands-on:
- Rufus, which customizes the install at USB creation time
- Tiny11 Builder, a script that strips an ISO automatically
- Manual DISM editing, for full control with built-in tools
- An unattended answer file plus a post-install debloat script
You can combine them. Many people use Rufus or an answer file for setup behavior and DISM for removing apps.
Before you start, back up your important data. You’ll need:
- A USB drive of at least 8 GB (16 GB is more comfortable)
- A legitimate Windows 11 ISO from Microsoft’s official download page
- A working Windows PC to build the media on
- Administrator rights
A note on legality: modified installers still require a valid Windows license. Customizing the image doesn’t change your licensing obligations, and you should only use scripts you’ve reviewed or that come from reputable open-source projects.
Step Zero: Get a Clean Source ISO
Always start from an official image. Download the Windows 11 ISO directly from Microsoft’s software download page, choosing “Download Windows 11 Disk Image (ISO) for x64 devices.” Avoid pre-modified ISOs from torrent sites or forums. You can’t audit what has been changed, and the security risk is not worth the saved time.
Once downloaded, you can verify the SHA-256 hash against the value Microsoft publishes by running this in PowerShell:
Get-FileHash "C:\path\to\Win11.iso" -Algorithm SHA256Method 1: Rufus (Easiest)
Rufus is a free, open-source tool for creating bootable USB drives. Recent versions include a “Customize Windows installation” dialog that handles several unwanted behaviors at creation time. It won’t remove pre-installed apps from the image, but it fixes many of the most irritating parts of setup.
How to do it
- Download Rufus from its official site and run it.
- Insert your USB drive and select it under Device.
- Click SELECT and choose your Windows 11 ISO.
- Leave the partition scheme at GPT for modern UEFI systems, or choose MBR for legacy BIOS.
- Click START.
- A dialog appears with customization options. Depending on your Rufus version, you can tick:
- Remove requirement for 4GB+ RAM, Secure Boot and TPM 2.0
- Remove requirement for an online Microsoft account
- Create a local account with a username you choose
- Set regional options to match your current PC
- Disable data collection (skip privacy questions)
- Disable BitLocker automatic drive encryption
- Click OK and let Rufus write the drive.
Pros and cons
Pros: Fast, safe, and requires no scripting. It also lets you install on unsupported hardware.
Cons: It doesn’t remove pre-installed apps. You’ll still need Method 2, 3, or 4 for that.
Rufus is a good first step if your main frustrations are the forced Microsoft account and the privacy prompts.
Method 2: Tiny11 Builder (Automated Debloating)
Tiny11 Builder is a popular open-source PowerShell project that takes an official ISO and produces a slimmer one. It uses Microsoft’s own DISM tooling behind the scenes, and because the script is plain text you can read exactly what it removes.
What it typically removes
The script removes a defined list of provisioned apps, such as Clipchamp, News, Weather, Xbox-related apps, Get Help, Solitaire, Teams consumer, and similar consumer packages. It may also strip OneDrive and apply registry tweaks that bypass hardware checks and the online account requirement. Check the project’s current README, since the list changes between versions.
How to do it
- Mount your official Windows 11 ISO by double-clicking it in File Explorer. Note the drive letter it receives, for example
E:. - Download the Tiny11 Builder script from its official GitHub repository and extract it.
- Open PowerShell as Administrator.
- Allow scripts to run for this session only:
Set-ExecutionPolicy Bypass -Scope Process
- Navigate to the script’s folder and run it:
.\tiny11maker.ps1
- Enter the mounted drive letter when prompted and follow the on-screen steps.
- When it finishes, the script outputs a new ISO, usually in the script folder. The process can take 15 to 30 minutes depending on your hardware.
- Write that ISO to a USB drive using Rufus or any other tool.
Standard vs. Core builds
The project has offered a standard build and a more aggressive “core” build. The core variant removes much more, including components such as the component store, which means you generally can’t add features, install language packs, or receive normal servicing updates. It’s useful for virtual machines or test environments, but it’s a poor choice for a daily-driver PC. For most people, the standard build is the sensible option.
Pros and cons
Pros: Largely automated, produces a ready-to-use ISO, and is transparent because the script is readable.
Cons: You’re relying on a third-party script, and over-aggressive removal can break features or Windows Update behavior. Read the script before running it, and always test the result in a virtual machine first.
Method 3: Manual DISM Editing (Maximum Control)
If you want to decide exactly what stays and goes, you can edit the image yourself using DISM, which ships with Windows. This takes more time but means no third-party code touches your image.
What you need
- The Windows 11 ISO, mounted or extracted to a folder
- An empty working folder, for example
C:\Win11Build - The Windows ADK’s Deployment Tools (only needed for
oscdimg, which rebuilds the ISO)
Step 1: Copy the ISO contents
Mount the ISO and copy everything from it to C:\Win11Build\ISO. This gives you a writable copy of the installation files.
Step 2: Find the correct image index
Open Command Prompt as Administrator:
dism /Get-WimInfo /WimFile:C:\Win11Build\ISO\sources\install.wim(Some ISOs use install.esd instead. If so, you’ll need to convert it to a WIM first with dism /Export-Image.)
You’ll see several editions listed with index numbers. Note the index for your edition, such as Windows 11 Pro.
Step 3: Mount the image
mkdir C:\Win11Build\mount
dism /Mount-Image /ImageFile:C:\Win11Build\ISO\sources\install.wim /Index:6 /MountDir:C:\Win11Build\mount
Replace 6 with your chosen index.
Step 4: List and remove provisioned apps
List the pre-installed app packages:
dism /Image:C:\Win11Build\mount /Get-ProvisionedAppxPackagesRemove the ones you don’t want, using the full package name from the list:
dism /Image:C:\Win11Build\mount /Remove-ProvisionedAppxPackage /PackageName:Microsoft.BingNews_...Typical candidates include Bing News, Bing Weather, Clipchamp, Solitaire Collection, Xbox apps, Your Phone/Phone Link, Get Help, Tips, and Microsoft Teams consumer. Be cautious about removing the Microsoft Store, the Windows Security components, or the .NET and VC++ runtime packages. Other software often depends on them.
Step 5: Unmount and save
dism /Unmount-Image /MountDir:C:\Win11Build\mount /CommitIf you want to shrink the file, export the edited image to a new WIM with maximum compression, then replace the original install.wim.
Step 6: Rebuild the ISO
Open the Deployment and Imaging Tools Environment from the ADK and run oscdimg with the standard BIOS and UEFI boot parameters. Microsoft documents the exact command in its ADK reference. The result is a bootable ISO you can write to USB.
Pros and cons
Pros: Complete control, no third-party scripts, and a reproducible process.
Cons: More steps, more room for error, and the command syntax can be unforgiving. Take your time and test in a virtual machine.
Method 4: Unattended Answer File + Post-Install Script
You can also leave the image mostly intact and automate the cleanup. An autounattend.xml answer file controls setup behavior, and a script then removes apps on first login.
The answer file
Writing XML by hand is error-prone. A well-regarded web-based generator (the “Unattend Generator” by Christoph Schneegans) lets you tick options and download a ready-made autounattend.xml. With it you can:
- Skip the Microsoft account requirement and create a local account
- Skip OOBE privacy and Cortana-style prompts
- Set language, time zone, and keyboard layout
- Define partitioning so the install requires no clicks
- Disable specific features and run first-logon commands
Copy the generated file to the root of your install USB. When Windows Setup boots, it detects the file automatically.
Warning: If your answer file includes disk partitioning instructions, it can wipe a drive without asking. Double-check those settings before booting a machine with data you care about.
The post-install cleanup
Add a first-logon command, or run manually after setup, a reputable open-source debloat script. Popular options include Win11Debloat and the Windows utility from Chris Titus Tech. These tools can remove apps, disable suggested content in Start and Settings, turn off ad ID tracking, and tweak the taskbar and context menu.
As with any script, open it and read what it changes before running it with admin rights.
Pros and cons
Pros: Doesn’t modify the core image, so Windows servicing stays intact, and it’s easy to update as Windows changes.
Cons: Apps are installed first and removed afterward, so first boot isn’t truly “clean.”
Writing the Final USB
If you used Method 2 or 3, you now have a custom ISO. To make it bootable:
- Open Rufus and select the custom ISO.
- Choose GPT/UEFI for most modern machines.
- Apply any Rufus customization options from Method 1 if you haven’t baked them in elsewhere.
- Write the drive.
Always test first. Create a virtual machine in Hyper-V, VirtualBox, or VMware, boot your ISO, and run through setup and a Windows Update check. Confirm that Settings, the Store (if you kept it), and Windows Security all work. Finding a problem in a VM costs minutes. Finding it on your main PC costs an evening.
Tips to Avoid Problems
- Don’t remove everything. Over-debloating is the main cause of broken installs. Keep Windows Security, the Store, and core runtimes unless you know exactly why you’re removing them.
- Keep your build reproducible. Save your DISM command list or script settings so you can rebuild when a new Windows version releases.
- Rebuild periodically. Feature updates can reinstall some removed apps, and Microsoft changes package names. Rebuild with each major release.
- Know that Windows Update may re-add some apps. Provisioned app removal helps, but a few packages return after large updates.
- Drivers matter. Custom images don’t include drivers for exotic hardware. Keep Wi-Fi and storage drivers on a second USB or inside the image.
- Keep your license. Have your product key or digital license linked to your Microsoft account so activation happens automatically.
Conclusion
A bloat-free Windows 11 install disk is one of the best investments you can make if you set up PCs regularly. The method you choose depends on your comfort level. Rufus is perfect for skipping the account and privacy hurdles in minutes. Tiny11 Builder gives you an automated, slimmed-down ISO with little effort. Manual DISM offers precision and trust, because you control every change. And an answer file with a debloat script keeps your image official while automating the cleanup.
For most users, a good balance is to start with an official ISO, use an unattend file for setup behavior, remove clearly unwanted apps with DISM or a trusted script, and test the result in a virtual machine before relying on it. A little preparation gives you a faster, quieter, more private Windows that is ready to use from the first boot.
Frequently Asked Questions
1. Is it safe to use a custom or debloated Windows 11 ISO?
It’s safe if you build it yourself from an official Microsoft ISO or use well-known open-source tools whose code you’ve read. It is not safe to download pre-made “lite” ISOs from unknown sources, since you can’t verify what has been added. Even with trusted tools, test the image in a virtual machine first.
2. Will a debloated Windows 11 still receive updates?
In most cases, yes. Standard approaches such as removing provisioned apps with DISM, Rufus options, or answer files keep Windows Update working. Extremely aggressive builds, such as “core” variants that strip the component store, may break servicing and feature updates. If you want a PC that receives regular updates, avoid those.
3. Can I remove Microsoft Edge or Windows Defender?
You can technically remove or disable them with some tools, but it’s generally not recommended. Edge is tightly integrated, and removing it can break features that rely on its WebView2 runtime. Windows Security provides baseline protection, so removing it without installing a replacement leaves your system exposed. Debloating works best when you target consumer apps and telemetry, not core security and system components.
4. Do I need to do this again after each Windows 11 feature update?
Often, yes. Major updates can re-add some provisioned apps or change defaults you’ve adjusted. The simplest way to handle this is to keep your build notes or scripts, then rebuild an ISO from the newest official image when a major version arrives. For ongoing maintenance on an existing install, re-running a debloat script after big updates is usually enough.