Geeksdigit Team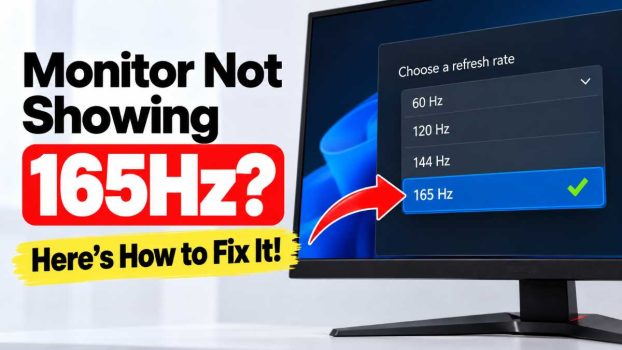
You bought a 165Hz gaming monitor, plugged it in, and opened Windows display settings, only to find the refresh rate stuck at 60Hz or 144Hz. It’s one of the most common setup problems with high refresh rate displays, and it’s almost never a sign that the monitor is broken. In most cases, the cause is something simple: the wrong cable, the wrong port, a disabled setting, or an outdated driver.
The difference matters. Moving from 60Hz to 165Hz means your screen refreshes nearly three times as often, which makes mouse movement feel sharper, reduces motion blur, and gives you a real advantage in fast-paced games. If you’re not getting that, you’re leaving performance you paid for on the table.
This guide walks through nine fixes in the order you should try them, starting with the most likely culprits. Most people solve the problem within the first three methods. Each step explains what to check, why it matters, and how to do it.
Method 1: Check Your Cable
The cable is the number one reason a monitor won’t reach its advertised refresh rate. Not all cables carry enough bandwidth for high refresh rates, and the old cable that came with another device may be the bottleneck.
- DisplayPort is the best choice for 165Hz. DisplayPort 1.2 handles 1080p at 165Hz easily, and 1.4 is needed for higher resolutions such as 1440p at 165Hz without compression.
- HDMI works only if the version is high enough. HDMI 1.4 typically caps out at 60Hz at 1440p, while HDMI 2.0 or higher is needed for 165Hz at 1080p and often 1440p. Many monitors only reach their top refresh rate over HDMI 2.1 or DisplayPort.
- DVI-D (dual link) can reach 144Hz at 1080p but usually not 165Hz.
- VGA is not suitable at all.
The simplest fix is to use the DisplayPort cable that came in the monitor’s box. If you’re using HDMI, check the monitor’s manual to confirm which port supports 165Hz, since some monitors only support their full refresh rate on one specific input. If your cable is old, damaged, or very long (over 3 meters), replace it with a certified DisplayPort 1.4 cable.
Method 2: Use the Correct Ports on Both Ends
Even with the right cable, the port matters. Many monitors have a mix of inputs with different capabilities: one DisplayPort at full speed and an HDMI port limited to 144Hz or lower. Check the labels beside each port and the spec sheet.
On the computer side, make sure the cable is plugged into your dedicated graphics card and not the motherboard’s video output. This is a surprisingly common mistake. If you plug into the motherboard, the signal runs through integrated graphics, which may not support 165Hz and will not use your GPU at all. The graphics card ports are usually on the lower section of the back of your tower, while the motherboard ports sit higher, near the USB and audio jacks.
Method 3: Enable 165Hz in the Monitor’s On-Screen Menu
Some monitors ship with their top refresh rate switched off by default, or tie it to an “overclock” or performance mode. A 165Hz panel is often an overclocked 144Hz panel, and the manufacturer may require you to turn it on.
- Press the monitor’s menu button or joystick.
- Look for settings named Overclock, OC, Refresh Rate, Game Mode, or Performance.
- Enable the option and save.
- Check for an input signal or DisplayPort version setting. If the monitor lets you choose between DP 1.1, 1.2, and 1.4, set it to the highest option available.
After changing these, the screen may flicker briefly. Then return to your computer and check the refresh rate again.
Method 4: Change the Refresh Rate in Windows Settings
Windows doesn’t always select the highest refresh rate automatically, especially on a new monitor. You may need to choose it manually.
On Windows 11:
- Right-click the desktop and select Display settings.
- Scroll down and click Advanced display.
- Under your monitor, open the Choose a refresh rate dropdown.
- Select 165Hz and click Keep changes.
On Windows 10:
- Right-click the desktop and open Display settings.
- Select Advanced display settings, then Display adapter properties.
- Open the Monitor tab and choose 165 Hertz from the Screen refresh rate list.
If 165Hz isn’t listed, the problem is upstream: the cable, the port, the driver, or the monitor settings. Keep going through the methods below. Also make sure you’re editing the right display if you have more than one connected, since the refresh rate is set per monitor.
Method 5: Update Your Graphics Drivers
Outdated or corrupted graphics drivers can hide higher refresh rates from Windows. Windows’ default “Microsoft Basic Display Adapter” driver, for instance, will limit you to basic modes.
- NVIDIA: Download the latest driver from NVIDIA’s website or use the NVIDIA App or GeForce Experience.
- AMD: Use AMD Software: Adrenalin Edition to check for updates.
- Intel: Use the Intel Driver & Support Assistant.
For a clean install, choose the “custom” or “clean installation” option, which removes old settings that could conflict. If problems persist after an update, you can use a tool such as Display Driver Uninstaller (DDU) in Safe Mode to wipe the old driver completely before reinstalling. Restart your computer afterward and check the refresh rate options again.
Method 6: Check the Graphics Control Panel
Your GPU’s control panel can override or limit refresh rate options, and it also lets you add a refresh rate Windows doesn’t show.
NVIDIA Control Panel:
- Right-click the desktop and open NVIDIA Control Panel.
- Go to Display > Change resolution.
- Select your monitor, then choose 165Hz from the Refresh rate dropdown.
- If it’s missing, click Customize > Create Custom Resolution and enter 165 as the refresh rate, then test it.
AMD Software:
- Open AMD Software and go to Settings > Display.
- Check that Custom Resolutions lets you create an entry at your native resolution with a 165Hz refresh rate.
Be careful with custom resolutions. Entering values your monitor can’t handle will produce a blank screen, though Windows normally reverts after 15 seconds if you don’t confirm the change.
Method 7: Review Resolution, Color Depth, and Bandwidth Limits
If the right refresh rate disappears only at certain settings, you may be hitting a bandwidth ceiling. Higher resolutions, deeper color depth (10-bit instead of 8-bit), and HDR all consume bandwidth, which can force the connection to drop its refresh rate.
Try these adjustments:
- Set the resolution to the monitor’s native resolution. A mismatched resolution may offer different refresh rate options.
- Switch output color depth from 10-bit to 8-bit in your GPU control panel.
- Turn off HDR temporarily in Windows (Settings > System > Display > HDR).
- Check the output color format. RGB with full dynamic range uses more bandwidth than YCbCr 4:2:0, though RGB is the better quality choice and should be kept if 165Hz works.
If 165Hz appears after lowering any of these, your connection was running out of bandwidth, and a better cable or port is the permanent fix.
Method 8: Fix Multi-Monitor and Docking Station Issues
Using several displays, a USB-C adapter, or a docking station can quietly limit the refresh rate. Adapters and hubs often don’t pass through enough bandwidth, and some GPUs reduce speeds when several monitors with different refresh rates are connected.
- Connect the 165Hz monitor directly to the GPU with no adapter, splitter, KVM switch, or dock.
- Disconnect your other monitors temporarily and test with only the 165Hz display attached.
- If you need adapters, use an active DisplayPort adapter rated for the refresh rate you want.
If 165Hz works with a single monitor, reconnect the others one at a time to find which combination causes the drop. In some setups, matching refresh rates across screens or changing which GPU port each display uses resolves it.
Method 9: Special Steps for Laptops, Resets, and Firmware
Laptops add another layer: the screen may be driven by integrated graphics rather than the dedicated GPU. If your laptop has a MUX switch or a “discrete GPU” mode in its control software, enable it so the external monitor runs from the stronger graphics chip. On many laptops, the HDMI or USB-C port is wired to the integrated GPU, so it may be limited. Try a different port, especially a Thunderbolt or full-featured USB-C port with DisplayPort output.
If nothing has worked yet:
- Reset the monitor to factory settings from the on-screen menu.
- Check for a monitor firmware update on the manufacturer’s support page, as some models fix refresh rate bugs this way.
- Install the monitor driver or INF file from the manufacturer’s website. It gives Windows exact information about supported modes.
- Test with another computer or another cable. If the monitor reaches 165Hz elsewhere, the issue is with your PC setup. If it fails everywhere, contact the manufacturer for warranty support.
You can confirm your actual refresh rate with a free tool like the UFO Test at testufo.com, which shows the measured rate in your browser.
Conclusion
When a monitor refuses to run at 165Hz, the cause is almost always a configuration problem rather than faulty hardware. Start with the basics: use a DisplayPort cable (or HDMI 2.0 or higher), plug into the graphics card instead of the motherboard, enable 165Hz or overclock mode in the monitor’s menu, and select the rate in Windows. If those fail, update your drivers, check your GPU control panel, and rule out bandwidth limits from color depth, HDR, adapters, or multi-monitor setups.
Work through the methods in order, testing after each change, and you’ll likely find the culprit quickly. Once 165Hz is active, you’ll notice smoother motion immediately in games and even in everyday tasks like scrolling and moving the cursor. If you’ve tried every step and still can’t reach 165Hz on multiple cables and computers, the monitor itself may be defective, and it’s worth reaching out to the seller or manufacturer.
Frequently Asked Questions
1. Why does my 165Hz monitor only show up to 144Hz?
This usually happens because 165Hz is an overclocked mode that needs to be enabled in the monitor’s on-screen menu, or because the connection lacks bandwidth. Switch to a DisplayPort cable, enable the overclock or 165Hz option in the monitor settings, and update your graphics driver. HDMI ports on some monitors are also capped at 144Hz.
2. Is HDMI good enough for 165Hz?
It can be, but only if both the cable and ports support HDMI 2.0 or higher. At 1080p, HDMI 2.0 generally handles 165Hz, while 1440p often needs HDMI 2.1 or DisplayPort. Check your monitor’s specifications to see which inputs support its top refresh rate. When in doubt, DisplayPort is the safer option.
3. Do I need a powerful graphics card to run a monitor at 165Hz?
Your GPU doesn’t need to produce 165 frames per second to set the refresh rate to 165Hz. The setting works with any compatible graphics card, and even desktop use will feel smoother. However, to actually see 165 FPS in games, you need hardware powerful enough to render that many frames, or you can lower graphics settings to get closer.
4. How can I tell if my monitor is really running at 165Hz?
Open Windows display settings and check the refresh rate under Advanced display, then confirm it with an online tool like the UFO Test, which measures the actual rate. You can also check your monitor’s on-screen display, since many gaming monitors show the current refresh rate in a menu or an optional overlay.