Geeksdigit Team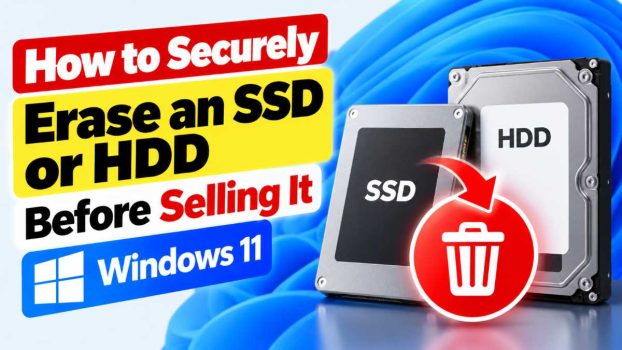
Deleting files, emptying the Recycle Bin, or even running a quick format does not remove your data. Those actions mostly erase the index that tells the drive where your files live. The underlying data stays on the disk until something overwrites it, and free recovery tools can often bring it back in minutes.
That matters when you sell a laptop, desktop, or standalone drive. A typical drive holds tax returns, saved passwords, browser sessions, photos, scanned IDs, and work documents. Identity thieves and curious buyers do recover data from second-hand drives, and it takes far less skill than most people assume.

The right method depends on the type of drive. Hard disk drives (HDDs) and solid-state drives (SSDs) store data differently, and a technique that is perfectly adequate for one can be unreliable on the other. This guide covers both, along with encryption, verification, and what to do when a drive can’t be wiped normally.
Before You Start: Preparation
Whatever the drive type, do these things first:
- Back up what you want to keep. Once a secure erase finishes, nothing is recoverable, including by you. Copy files to an external drive or cloud storage and open a few to confirm they work.
- Sign out and deauthorize. Log out of iCloud, Microsoft, and Google accounts, and deauthorize software licenses such as Adobe products, iTunes, and games. This prevents the device from staying tied to your accounts.
- Turn off Find My Device or Activation Lock. On Macs and some Windows devices, these features can block the buyer from setting the machine up.
- Note your drive model and type. Check Device Manager on Windows, System Information on macOS, or run
lsblk -d -o NAME,MODEL,ROTAon Linux (a ROTA value of 1 means a spinning HDD, 0 means an SSD). - Decide whether you’re selling the drive or the whole computer. If it’s the whole computer, you’ll probably want to reinstall the operating system afterward so the buyer gets a working machine.
Why HDDs and SSDs Need Different Approaches
On an HDD, data is written to specific magnetic locations on spinning platters. If you overwrite every location with new data, the old data is gone. One full pass of zeros or random data is enough for any modern drive. The old advice about multiple passes (the “Gutmann method” with 35 passes) dates from decades-old drive technology and is unnecessary today. NIST Special Publication 800-88, the widely cited guideline for media sanitization, accepts a single overwrite pass for HDDs at the “Clear” level.
SSDs work differently. They use flash memory with a controller that spreads writes across cells to prevent wear (wear leveling). They also reserve hidden extra capacity (over-provisioning) that the operating system can’t address. So when you “overwrite” the whole visible drive, some old data may remain in cells the controller has remapped or set aside. That’s why simply filling an SSD with zeros is not a dependable way to sanitize it, and why SSDs need firmware-level commands or encryption-based methods instead.
Methods for Erasing an HDD
Method 1: Full overwrite with the operating system
Windows. The simplest route for a whole PC is Settings > System > Recovery > Reset this PC > Remove everything, and then choose Clean drive (sometimes labelled “Also clean the drive”) instead of the quick option. This overwrites the drive rather than just deleting files, and it takes a few hours on a large HDD.
For a secondary or external drive, use the command line:
- Open Command Prompt as administrator and run
diskpart. - Type
list diskand identify the correct disk by size. - Type
select disk X(replace X with the number). - Type
clean all, which writes zeros to every sector.
Double-check the disk number before running clean all. It is not reversible.
macOS. On Macs with a spinning drive, use Disk Utility from Recovery Mode to erase the drive. Older versions offered “Security Options” to overwrite with multiple passes; newer versions removed these. For external HDDs, you can still use Terminal with diskutil secureErase 0 /dev/diskN, where N is your disk number (0 is a single pass of zeros). Note that recent macOS versions have dropped this command for some drive types, so check that it’s available on your system.
Linux. Use shred or dd:
sudo shred -v -n 1 -z /dev/sdXperforms one random pass, then a final pass of zeros.sudo dd if=/dev/zero of=/dev/sdX bs=1M status=progresswrites zeros across the whole drive.
Again, confirm the device name with lsblk first.
Method 2: Bootable erasure tools
Bootable tools run outside your operating system and can wipe the entire drive, including the system disk. DBAN (Darik’s Boot and Nuke) has long been the standard, but it’s no longer actively developed and can struggle with newer UEFI systems and NVMe drives. It’s still fine for older HDDs. Alternatives include Parted Magic (paid) and the wiping options in many Linux live environments. Create a bootable USB, boot from it, select the drive, and choose a one-pass zero or random overwrite.
Method 3: ATA Secure Erase for HDDs
Many HDDs also support the ATA Secure Erase command, which tells the drive firmware to overwrite everything itself. On Linux, using hdparm:
- Check that the drive isn’t “frozen”:
sudo hdparm -I /dev/sdX. Look under Security for “not frozen.” - Set a temporary password:
sudo hdparm --user-master u --security-set-pass p /dev/sdX - Run the erase:
sudo hdparm --user-master u --security-erase p /dev/sdX
The password is cleared automatically afterward. If the drive shows as “frozen,” a BIOS security feature is blocking the command. Putting the computer to sleep and waking it, or hot-plugging the drive’s power connection, often unfreezes it.
Methods for Erasing an SSD
Method 1: Encrypt first, then erase (the most practical approach)
If you’re still using the drive and haven’t yet erased it, one of the most reliable techniques is to rely on encryption. With full-disk encryption on, everything written to the drive is scrambled with a key. Destroy the key, and the data becomes unreadable.
- Windows: Turn on BitLocker (Pro editions) or Device Encryption (Home editions, on supported hardware).
- macOS: Turn on FileVault.
- Linux: Use LUKS.
If the drive was encrypted from the start of its life, resetting or reinstalling the operating system generates a new key and effectively renders the old data unrecoverable. If you’re encrypting just before selling, it works best to encrypt fully (not just used space), wait for it to complete, and then run one of the erase methods below as a second layer.
Method 2: Use the operating system’s built-in reset
- Windows 10/11: Use Reset this PC > Remove everything > Clean drive. On systems with encryption enabled, this helps ensure old data is unrecoverable.
- Macs with Apple silicon or a T2 chip: Use System Settings > General > Transfer or Reset > Erase All Content and Settings. These Macs encrypt the internal SSD by default, and this process deletes the cryptographic keys, making the data inaccessible almost instantly. It’s an excellent, low-effort method.
- Older Intel Macs without a T2 chip: Turn on FileVault first, let it finish, and then erase the drive in Disk Utility from Recovery Mode.
Method 3: Manufacturer tools
Most SSD makers offer software that issues the correct secure-erase command for their drives:
- Samsung Magician
- Crucial Storage Executive
- WD Dashboard (Western Digital / SanDisk)
- Solidigm Storage Tool (formerly Intel)
- Kingston SSD Manager
These tools are usually the most convenient option because they know the quirks of their own hardware. Many require the SSD to be a secondary drive or to be booted from a bootable USB they create, since you can’t easily erase the disk you’re running from.
Method 4: ATA Secure Erase or NVMe commands
For SATA SSDs, ATA Secure Erase via hdparm (described above) triggers the drive’s internal erase routine, which resets all cells and typically takes seconds to a few minutes.
For NVMe SSDs, use the nvme-cli package on Linux:
- Format with secure erase:
sudo nvme format /dev/nvme0n1 --ses=1erases user data. Use--ses=2for a cryptographic erase, if the drive supports it. - Sanitize:
sudo nvme sanitize /dev/nvme0n1 --sanact=2starts a block erase, or--sanact=4starts a crypto erase. Sanitize commands are designed to reach all areas of the drive, including hidden regions, and are considered stronger than a standard format. You can check progress withsudo nvme sanitize-log /dev/nvme0n1.
Check which options your drive supports with sudo nvme id-ctrl /dev/nvme0n1 before proceeding, and triple-check the device path. Booting a Linux live USB is the easiest way to run these commands on a system drive.
Method 5: PSID revert for self-encrypting drives
Some SSDs are “self-encrypting drives” (SEDs) that follow the Opal standard. If one is locked or won’t erase normally, the PSID printed on the drive’s label lets you perform a factory revert, which regenerates the encryption key and wipes the drive. Tools such as sedutil-cli handle this. It’s a niche option, but it works when nothing else does.
What Not to Rely On
- Quick format: Only rebuilds the file system. Data remains recoverable.
- Deleting files or emptying the trash: Same problem.
- Overwriting an SSD with zeros or random data: Better than nothing, but unreliable due to wear leveling and over-provisioning.
- Free-space wipers such as
cipher /w: These only overwrite unallocated space, not the whole drive, and are weak on SSDs. - Old multi-pass tools on SSDs: They add wear without improving security.
- Physical damage tricks like microwaving, freezing, or hammering: unreliable, unsafe, and often leave chips or platters intact.
Verify the Erase
After erasing, confirm it worked. You can boot into a live environment and check that the drive shows no partitions or that a recovery tool such as PhotoRec or TestDisk finds nothing meaningful. On Linux, you can inspect the raw drive with sudo hexdump -C /dev/sdX | head (a wiped drive should show zeros or uniform data) or sudo cmp /dev/zero /dev/sdX for zero-filled drives. Note that after a crypto erase, the data may appear as random noise rather than zeros, which is normal.
When to Destroy the Drive Instead
If the drive is failing, won’t respond to commands, or has held extremely sensitive data (business records, legal files, medical information), physical destruction may make more sense than selling it. A certified data-destruction service, or a shredding or degaussing facility, can provide documentation. If you do it yourself, remember that SSD memory chips must be broken into small pieces, since drilling a single hole may miss the chips holding your data. Of course, a destroyed drive can’t be sold, so this route is best kept for drives that aren’t worth selling or that hold data you can’t risk exposing.
Final Steps Before Handing It Over
- Reinstall an operating system if you’re selling the whole computer. Windows can be installed from a USB created with Microsoft’s Media Creation Tool, and macOS can be reinstalled from Recovery Mode.
- Remove any external storage, SD cards, or USB dongles.
- Reset BIOS or UEFI passwords and remove any firmware-level locks.
- Take photos or notes of the erase process if you want proof for the buyer.
- Deauthorize or remove the device from your online accounts’ device lists.
Conclusion
Securely erasing a drive before selling it takes some planning, but it’s well worth the effort. For HDDs, a single full overwrite, whether through Windows’ “Clean drive” option, diskpart clean all, a bootable tool, or an ATA Secure Erase, is enough. For SSDs, skip simple overwriting and rely on encryption, manufacturer tools, or firmware-level commands like ATA Secure Erase, NVMe format, and sanitize. If you have a modern Mac with Apple silicon or a T2 chip, the built-in “Erase All Content and Settings” option is about as easy and effective as it gets.
Back up first, use the method that suits your drive, verify the result, and then hand over a clean machine. A few hours of effort protects years of personal and financial information, and it gives the buyer a fresh start.
FAQ
1. Is a factory reset enough to protect my data?
It depends on the device. On Apple silicon Macs, T2 Macs, and Windows PCs with encryption enabled, a proper reset that removes everything and cleans the drive is generally sufficient because it destroys the encryption keys. On older, unencrypted computers, a basic factory reset may leave recoverable data, so choose the “clean drive” option or use a dedicated erase method.
2. Can I use the same method for an SSD and an HDD?
Not reliably. Overwriting works well for HDDs but is unreliable for SSDs because of wear leveling and hidden reserved space. For SSDs, use encryption, manufacturer tools, or the drive’s built-in secure erase and sanitize commands. Firmware-level commands like ATA Secure Erase also work on many HDDs, so they’re a good option if you don’t know which type you have.
3. How long does a secure erase take?
An SSD secure erase or crypto erase usually takes seconds to a few minutes. A full overwrite of an HDD can take one to several hours per terabyte, depending on the drive’s speed. A Windows “Clean drive” reset or a bootable tool run on a large HDD may take most of a day, so plan to start it before you go to bed.
4. Can erased data still be recovered afterward?
After a proper secure erase, recovery is practically impossible with consumer tools, and highly impractical even for well-funded labs on modern drives. The risk comes from incomplete methods: quick formats, deleted files, or overwriting an SSD without firmware-level commands. Verifying the drive after wiping, and using the method that suits your drive type, closes most of that gap.