 Geeksdigit Team
ou installed a new graphics card, pressed the power button, and got a black screen, no display signal, or a PC that boots but behaves as if the GPU isn’t there. Or maybe your card worked for months and then suddenly vanished from Device Manager. Either way, the frustration is the same: the motherboard isn’t recognizing your GPU.
The good news is that this problem is almost always fixable without buying new hardware. The cause is usually a loose connection, a missing power cable, a wrong BIOS setting, or an outdated driver. In this guide, you’ll learn why a graphics card goes undetected and walk through 10 proven methods for Windows 11 and Windows 10, ordered from the quickest checks to the more advanced fixes.
Why Is Your GPU Not Detected by the Motherboard?
Before troubleshooting, it helps to know the common culprits:
- Poor seating in the PCIe slot. Even a slightly loose card can fail to make contact.
- Missing or loose power connectors. Mid-range and high-end GPUs need 6-pin, 8-pin, or 12VHPWR cables directly from the power supply.
- Insufficient or faulty PSU. A weak power supply may not deliver enough wattage for the card.
- Wrong display cable connection. Plugging the monitor into the motherboard’s video port instead of the GPU is surprisingly common.
- BIOS settings. Integrated graphics priority, Above 4G Decoding, or PCIe mode settings can hide the card.
- Outdated BIOS or chipset drivers. Newer GPUs sometimes need updated motherboard firmware.
- Corrupt or incompatible GPU drivers. Windows may see the card but fail to load it correctly.
- Hardware incompatibility or damage. A dead slot, bent pins, or a defective card can also be responsible.
Work through the methods below in order. Many users solve the issue within the first three.
Method 1: Restart and Power Cycle Your PC
It sounds basic, but a full power cycle clears temporary hardware states that can prevent detection.
- Shut down your PC completely (not Restart, since Fast Startup can preserve faulty states).
- Switch off the power supply using the switch on its back and unplug the power cable.
- Hold the case’s power button for 15 seconds to drain residual charge.
- Plug everything back in, turn the PSU on, and boot the PC.
If the GPU appears now, disable Fast Startup so the issue doesn’t return: open Control Panel > Power Options > Choose what the power buttons do > Change settings that are currently unavailable, then untick Turn on fast startup.
Method 2: Check the Monitor Cable Connection
If you see no signal, make sure the display cable is plugged into the graphics card’s HDMI or DisplayPort output, not the motherboard’s rear I/O panel. When a dedicated GPU is installed, the motherboard’s video outputs are typically disabled or ignored.
Also try a different cable or a different port on the GPU. A faulty cable or a damaged port can mimic a card that isn’t detected. If possible, test with another monitor or TV.
Method 3: Reseat the Graphics Card
A poorly seated card is the single most common cause of detection failure.
- Power off the PC, unplug it, and touch bare metal on the case to discharge static.
- Remove the screws securing the GPU bracket to the case.
- Press the small latch at the end of the PCIe slot and gently pull the card straight out.
- Inspect the gold contacts for dust, scratches, or discoloration. Clean them gently with a lint-free cloth or a little isopropyl alcohol (90% or higher) and let them dry.
- Re-insert the card firmly into the slot until you hear the latch click.
- Screw the bracket back in place.
Use the topmost PCIe x16 slot, the one closest to the CPU. It is wired directly to the processor and is the primary graphics slot on nearly every motherboard. Check the manual if your board has multiple x16-length slots, because some run at reduced speeds or are disabled when other slots are occupied.
Method 4: Verify the GPU Power Cables
Modern graphics cards draw far more power than a PCIe slot can provide (75W). If the supplemental power cable isn’t connected, the card may not turn on or the system may refuse to detect it.
- Confirm that every power input on your GPU has a cable plugged in. Some cards have two or even three connectors.
- Use dedicated cables from the PSU. Avoid splitting one cable into two connectors with daisy-chain adapters when possible.
- Push each connector in until it clicks. For 12VHPWR or 12V-2×6 connectors, ensure they are fully seated with no gap, as partially inserted plugs are a known cause of failures.
- Don’t use Molex-to-PCIe adapters unless the GPU manufacturer approves it.
Also confirm that the GPU’s fans spin at boot. If they don’t move at all, power delivery is probably the problem.
Method 5: Check Your Power Supply (PSU)
A PSU that’s too weak or aging may fail to support your GPU. Compare the graphics card’s recommended PSU wattage (listed on the manufacturer’s page) with your actual unit. As a rule of thumb:
- Entry-level GPUs: 450W to 550W
- Mid-range GPUs: 650W to 750W
- High-end GPUs: 850W to 1000W or more
Wattage isn’t the only factor. A low-quality or failing PSU can have unstable rails even when the label looks sufficient. If you have access to a spare PSU, test the system with it. If the GPU is detected immediately, you’ve found the culprit.
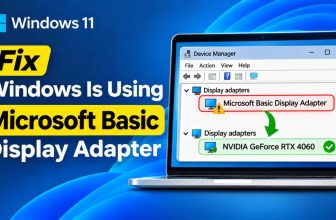
Method 6: Check Whether Windows Sees the GPU in Device Manager
If your PC boots to the desktop (perhaps using integrated graphics), verify what Windows detects.
- Right-click the Start button and select Device Manager.
- Expand Display adapters.
- Check for your GPU. If you see “Microsoft Basic Display Adapter,” a generic driver is active. If you see an entry with a yellow warning icon, there’s a driver or hardware error.
- If the GPU isn’t listed, click View > Show hidden devices, then click Action > Scan for hardware changes. Also check under Other devices or Unknown devices.
If the card doesn’t show up at all, even after a scan, the problem is likely hardware or BIOS-related. Continue to the next methods.
Method 7: Enable the GPU in BIOS/UEFI
The motherboard firmware controls how graphics hardware is initialized. Incorrect settings can leave your GPU invisible.
To open the BIOS: Restart your PC and repeatedly press Del, F2, F10, or Esc (the key varies by manufacturer). On Windows 11/10, you can also go to Settings > System > Recovery > Advanced startup > Restart now, then Troubleshoot > Advanced options > UEFI Firmware Settings.
Once inside, look for these settings (names vary by brand):
- Primary Display / Initial Display Output / Primary Graphics Adapter: Set to PCIe/PEG/PCI-E Graphics rather than IGFX or onboard graphics.
- Integrated Graphics / iGPU Multi-Monitor: Try disabling the integrated graphics to force the system to use the dedicated card.
- PCIe Slot Configuration / PCIe Speed: Set to Auto, or manually try Gen 3 if you’re on a Gen 4 or Gen 5 setup and encountering detection issues.
- Above 4G Decoding and Resizable BAR: Enable Above 4G Decoding if your GPU has large VRAM and the card isn’t recognized. Some older boards need this setting enabled for modern GPUs. If problems persist, try disabling Resizable BAR temporarily.
- CSM (Compatibility Support Module): Newer GPUs often work best with CSM disabled and UEFI mode enabled. Older GPUs may need the opposite.
Save your changes and exit, usually with F10.
Method 8: Reset the BIOS to Default Settings
Custom overclocking profiles or previous configurations can conflict with a new GPU. Resetting the firmware restores safe defaults.
- Enter the BIOS and choose Load Optimized Defaults (or Load Setup Defaults), then save and exit.
- If you can’t access the BIOS, power off the PC, unplug it, and remove the CMOS battery (a coin-shaped CR2032) for about five minutes. Reinstall it and power on again.
- Many boards also have a Clear CMOS jumper or button. Check your manual for the exact procedure.
After resetting, re-check the primary display settings from Method 7.
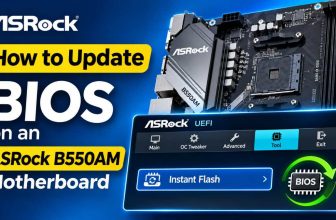
Method 9: Update the BIOS and Chipset Drivers
Outdated firmware can fail to initialize newer graphics cards, particularly when you pair a recent GPU with an older motherboard. Manufacturers regularly release BIOS updates that improve PCIe compatibility.
- Identify your motherboard model: press Win + R, type
msinfo32, and check BaseBoard Manufacturer and BaseBoard Product. - Visit the manufacturer’s support page (ASUS, MSI, Gigabyte, ASRock, and so on) and download the latest BIOS for your exact model and revision.
- Follow their instructions carefully, usually using a USB drive and the built-in flash utility. Never turn off the PC during a BIOS update.
While you’re at it, download the latest chipset drivers from the motherboard maker or from AMD/Intel, since they help Windows communicate properly with PCIe devices.
Method 10: Reinstall or Update the GPU Drivers
If Windows sees the GPU but can’t use it correctly, a clean driver install often fixes things.
- Download the latest driver from NVIDIA, AMD, or Intel (for Arc cards). Avoid third-party driver sites.
- Download Display Driver Uninstaller (DDU), boot into Safe Mode, and use DDU to wipe existing graphics drivers completely.
- Restart normally and run the freshly downloaded installer. Choose a clean installation if the option is offered.
- Restart again and check Device Manager.
If Windows Update keeps replacing your driver with a generic one, temporarily disconnect from the internet while installing, or pause updates until the proper driver is in place.
Additional Fixes If the GPU Still Isn’t Detected
If none of the methods above worked, try these final checks:
- Test with a different PCIe slot (if your board has another x16 slot) to rule out a damaged one.
- Inspect the slot for bent pins, debris, or burn marks. Use a flashlight and compressed air.
- Remove other components. Try booting with only one RAM stick and no extra PCIe cards, drives, or USB devices to eliminate conflicts.
- Check for PCIe riser cable issues. If you use a vertical mount, a faulty or low-quality riser (especially one rated for Gen 3 on a Gen 4 board) is a frequent cause. Test the card directly in the slot.
- Test the card in another PC. If it isn’t detected there either, the GPU is likely defective and may be covered by warranty.
- Test another GPU in your PC. If a different card works, the problem lies with the original GPU. If it doesn’t, suspect the motherboard or PSU.
- Check the physical clearance and bracket alignment. A card that is bowed or not fully inserted because of a misaligned case bracket will not make proper contact.
If you’ve reached this point, contact the manufacturer or a qualified technician. Hardware failure is rare but possible, and a professional diagnosis can save you from replacing the wrong part.
Conclusion
When the motherboard doesn’t recognize your GPU, the cause is rarely catastrophic. Start with the simple checks: power cycle your system, plug the monitor into the graphics card, reseat the card, and confirm that every power cable is connected. From there, move on to BIOS settings, firmware and chipset updates, and a clean driver installation. These steps resolve the vast majority of detection problems on both Windows 11 and Windows 10.
If the card still isn’t detected after testing in another slot, with another PSU, or in another computer, you’ve likely isolated a hardware fault, and it’s time to use your warranty or seek professional repair. Methodical troubleshooting, changing one thing at a time, will get you to the answer faster than guesswork.
FAQ
1. Why does my PC boot but show no display with a new GPU installed?
The most common reasons are that the monitor is plugged into the motherboard instead of the GPU, the card’s power cables aren’t connected, or the BIOS is set to use integrated graphics. Check the cable first, then confirm the power connectors, then change the primary display option in the BIOS to PCIe.
2. Can a bad PSU cause the motherboard to not detect my GPU?
Yes. If the PSU can’t supply enough stable power, the GPU may not initialize, causing it to disappear from Device Manager or stopping the system from posting. Check that the wattage meets the GPU’s requirements, use dedicated PCIe cables, and, if you can, test with a known-good power supply.
3. Do I need to disable integrated graphics when I install a dedicated GPU?
Not necessarily. Most systems switch to the dedicated card automatically when the monitor is plugged into it. However, if the GPU isn’t being detected or used, setting the primary display to PCIe or disabling the integrated GPU in BIOS can resolve conflicts.
4. Is my GPU dead if the motherboard can’t detect it?
Not always. Many detection issues come from loose seating, power problems, BIOS settings, or drivers. To confirm whether the card is faulty, test it in a different PC and test a different GPU in your current PC. If the card fails in another system as well, it’s probably defective.