 Geeksdigit Team
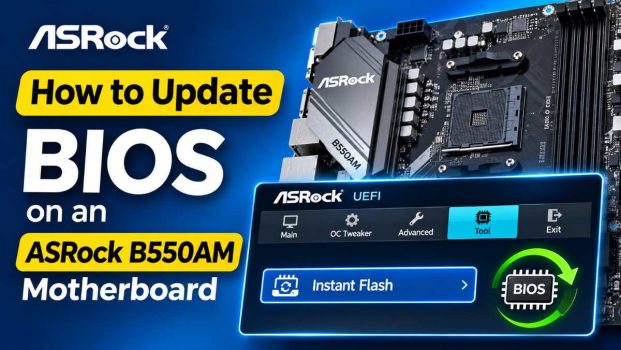
The BIOS (more accurately, the UEFI firmware) on your ASRock B550AM motherboard is the first piece of software that runs when you press the power button. It initializes your CPU, memory, storage, and PCIe devices before handing control to Windows or Linux. Because it sits at the foundation of your system, a BIOS update can change a surprising amount about how your PC behaves.
There are several good reasons to update. The most common is CPU compatibility: the B550 platform launched alongside Ryzen 3000 processors, and many boards need a newer BIOS to recognize Ryzen 5000 series chips such as the Ryzen 5 5600X or Ryzen 7 5700X. Other reasons include improved memory compatibility (fewer boot failures with certain RAM kits), updated AMD AGESA code, security patches for CPU vulnerabilities, better stability, and fixes for odd behavior such as USB dropouts or fan-control quirks.
It’s also worth being honest about the risks. A BIOS update is generally safe, but an interrupted flash, such as a power cut or a forced shutdown, can leave a board unable to boot. The old advice “if it ain’t broke, don’t fix it” still has merit: if your system is stable and you don’t need a new CPU or a specific fix, you may not need to update at all.
This guide walks through three reliable ways to update the BIOS on an ASRock B550AM series board (such as the B550AM Gaming and B550AM/ac): Instant Flash from a USB drive, Internet Flash directly from the UEFI, and the Windows-based ASRock utility. We’ll also cover preparation, post-update steps, and troubleshooting.
Before You Begin: Preparation Checklist
Good preparation prevents nearly every BIOS update problem. Spend five minutes on the following steps before you flash anything.
1. Confirm your exact motherboard model
ASRock makes several similarly named boards, so make sure you download firmware for the right one. You can find the model name printed on the board itself (usually near the PCIe slots or the CPU socket). You can also check it from Windows: press Win + R, type msinfo32, and read the BaseBoard Product line. Alternatively, open Command Prompt and run:
wmic baseboard get product,manufacturer
Note that variants such as “B550AM Gaming” and “B550AM/ac” are different products with their own BIOS files and download pages.
2. Check your current BIOS version
Restart your PC and press F2 or Delete repeatedly to enter the UEFI setup. The BIOS version appears on the Main screen. You can also find it in Windows via msinfo32 under BIOS Version/Date. Write this down so you can compare it with the version available on ASRock’s website.
3. Download the correct BIOS file
Go to the official ASRock website, search for your motherboard model, and open its Support page, then the BIOS tab. You’ll see a list of versions with release dates and descriptions of what changed. Read the notes, particularly any that mention CPU support or a required intermediate version.
Download the latest version, or the specific version you need. The download is a ZIP archive; extract it. Inside you’ll find a BIOS file with a name based on the board model and version number. Only download from asrock.com. Third-party sites may host outdated or tampered files.
4. Read the update notes carefully
Some ASRock BIOS releases have special requirements. For example, certain updates must be installed in sequence, or a major AGESA change may require flashing through an intermediate release first. The notes on the download page will say so. Skipping a required step is one of the few ways to cause problems.
5. Prepare power and hardware
- Use a stable power source. If you’re on a desktop, make sure nothing is likely to cut power. Using a UPS is ideal if you have one.
- Don’t overclock during the update. If you’ve applied manual overclocks, consider noting your settings (take photos of the UEFI screens) because updates usually reset them.
- Disconnect unneeded devices. Unplug extra USB gadgets and external drives to reduce the chance of confusion.
- Back up important data. The BIOS update doesn’t touch your drives, but it’s a good habit before any system-level change.
- Suspend BitLocker if you use it. A BIOS change can alter the TPM measurements and trigger a BitLocker recovery prompt. Suspend protection in Windows first, or have your recovery key ready.
Method 1: Update with Instant Flash (USB Drive)
Instant Flash is ASRock’s built-in flashing tool inside the UEFI. It’s the most popular method because it runs outside of Windows, so there’s no risk of the operating system interfering. It’s also the most reliable option for most users.
What you’ll need
- A USB flash drive (any size will do, 4 GB or less is fine)
- Access to another computer or your current Windows installation to prepare the drive
- The extracted BIOS file from the ASRock website
Step-by-step instructions
- Format the USB drive as FAT32. Insert the drive into your PC, right-click it in File Explorer, choose Format, select FAT32 as the file system, and click Start. (This erases the drive, so back up anything on it first.) Instant Flash works best with FAT32 or FAT16.
- Copy the BIOS file to the root of the drive. Place the extracted BIOS file directly on the USB drive, not inside a folder. Do not rename it. Make sure it’s the only BIOS file on the drive to avoid confusion.
- Leave the USB drive plugged in and restart. Insert the drive into a USB port on the rear I/O panel of the motherboard. Rear ports connected directly to the board tend to be more dependable than front-panel ports or hubs.
- Enter the UEFI setup. Restart the computer and press F2 or Delete repeatedly as it boots.
- Launch Instant Flash. In the UEFI, go to the Tools menu and select Instant Flash. On many ASRock boards you can also press F6 from the setup screen to launch it directly.
- Select the BIOS file. Instant Flash will scan the connected drives and display any valid BIOS files it finds. Choose the file you copied.
- Confirm the update. The tool will ask whether you want to proceed. Confirm, and the flashing process begins. A progress bar shows the status of erasing, programming, and verifying.
- Wait, and do not interrupt. Do not turn off the power, press the reset button, or unplug the PC. The process usually takes a minute or two. The system may restart by itself, and the screen may stay blank for a short while. This is normal.
- Let the system reboot. After the flash completes, the board restarts and often runs a longer-than-usual memory training on the first boot. Be patient and give it a few minutes before assuming something is wrong.
Tips for Instant Flash
If the tool doesn’t see your file, try a different USB port, a different (smaller) drive, or reformat the drive as FAT32. Make sure the file wasn’t left inside a ZIP archive or nested folder.
Method 2: Update with Internet Flash
Internet Flash lets the UEFI download the BIOS directly from ASRock’s servers, so you don’t need a USB drive or a second computer. It’s convenient, but it relies on a working network connection from inside the UEFI.
What you’ll need
- A wired Ethernet connection to your router with DHCP enabled (the default on most home networks)
- Access to the UEFI setup
Step-by-step instructions
- Connect an Ethernet cable. Plug the motherboard’s LAN port into your router. Wi-Fi is generally not supported inside the UEFI, so a wired connection is needed, even on models with wireless cards such as the B550AM/ac.
- Enter the UEFI. Restart and press F2 or Delete.
- Open Internet Flash. Go to the Tools menu and select Internet Flash.
- Choose the network settings. Select DHCP (auto IP) unless you have a reason to configure a static address. The tool will try to obtain an IP address and connect to the ASRock server.
- Select the BIOS version. Once connected, Internet Flash lists the available BIOS versions. Choose the one you want. Look at the version number and check it against the release notes on ASRock’s website first.
- Confirm and wait. The tool downloads the file and then flashes it. Again, do not interrupt the process.
- Allow the reboot. As with Instant Flash, the first boot after the update may take longer.
When Internet Flash isn’t a good idea
If you need a specific (not the latest) version, or you have to install an intermediate release first, the USB method gives you more control. Also, if your network is unreliable or your connection drops during the download, you may be better off using Instant Flash. In some cases, the server list may not show every historical version.
Method 3: Update from Windows
ASRock also offers a Windows-based utility, historically distributed as ASRock Live Update & APP Shop (and its BIOS update components). This lets you update from within the operating system.
Step-by-step instructions
- Download the utility. Visit your board’s Support page on ASRock’s website and look under the Download or Utility section for the Live Update & APP Shop (or the current equivalent).
- Install and run it. Launch it with administrator privileges and allow it to scan for updates. It should detect your motherboard and list available BIOS versions.
- Choose the BIOS update. Select the BIOS release and follow the prompts. The software downloads the file and prepares the flash.
- Close other programs. Before you start, shut down all other applications, including antivirus tools that could interfere.
- Reboot to finish. The update will typically complete during a restart, after which the system may reboot several times.
A word of caution
Flashing a BIOS from inside Windows carries slightly more risk than doing it in the UEFI, because the operating system, drivers, or background software could interrupt the process. For that reason, many experienced users, and ASRock’s own guidance in many cases, favor Instant Flash. Use the Windows method only if you’re comfortable with it and have no other option. The utility may also be outdated or unavailable for newer operating systems, so check that it supports your version of Windows.
After the Update: What to Do Next
Once your PC boots, a few follow-up steps will make sure everything is in order.
- Verify the new version. Re-enter the UEFI (F2 or Delete) and confirm the BIOS version shown matches the one you installed.
- Load optimized defaults. If you notice instability, press F9 (Load Defaults) in the UEFI, then save and exit with F10. Updates often reset settings anyway, but this ensures a clean baseline.
- Re-enable XMP/DOCP. Memory profiles are usually reset after a flash. Open the OC Tweaker section, enable the XMP/DOCP profile for your RAM, and save. Without it, your memory may run at a slower default speed.
- Re-apply your custom settings. Restore fan curves, boot order, virtualization (SVM) settings, Resizable BAR, and any other tweaks you noted earlier.
- Check Windows. Boot into your operating system and confirm that your drives, network, audio, and USB devices all work normally. Windows may take a moment to re-detect hardware after a firmware change.
- Re-enable BitLocker if you suspended it earlier.
- Update chipset drivers. Newer BIOS releases sometimes pair best with the latest AMD chipset drivers. Download them from AMD or ASRock to keep the platform consistent.
Troubleshooting Common Problems
The PC doesn’t POST or shows a black screen after updating. Wait several minutes, as memory training after a BIOS update can take a long time. If nothing happens, power off, then clear the CMOS (see below).
Instant Flash can’t find the BIOS file. Reformat the USB drive to FAT32, place the file in the root folder, and use a rear USB port. Try a different drive if the problem continues.
Clearing the CMOS. Turn off the PC and unplug the power cable. Either move the Clear CMOS jumper as described in your motherboard manual, or remove the coin-cell battery for a few minutes. Reinstall it, reconnect the power, and boot again.
The system won’t recognize a new Ryzen 5000 CPU. Make sure you installed a BIOS version that lists support for that processor in ASRock’s CPU Support List. You may need to flash using an older, supported CPU first.
Settings or boot order are missing. This is normal after an update. Reconfigure them in the UEFI.
If the board is bricked. Some ASRock boards offer recovery features or a dual BIOS option, but this varies by model. If your board won’t start at all after a failed flash, contact ASRock support. Don’t attempt unofficial recovery methods without guidance.
Best Practices for Safe BIOS Updates
- Update only when you have a reason to do so, such as needing CPU support or a fix.
- Always download firmware from the official ASRock website.
- Read the release notes for special instructions or intermediate steps.
- Never power off or restart during the flash.
- Prefer Instant Flash over the Windows method when possible.
- Keep your PC plugged into a reliable power source.
- Document your existing UEFI settings before you begin.
Conclusion
Updating the BIOS on an ASRock B550AM motherboard is far less intimidating than it seems, provided you prepare properly and follow the right steps. For most people, Instant Flash from a FAT32-formatted USB drive is the safest and most dependable route. Internet Flash is a handy shortcut if you have a wired connection and just want the latest version. The Windows utility works but should be a last resort, given its added risks.
Whichever method you choose, remember the essentials: identify your exact board, download the correct file from ASRock’s official site, read the release notes, never interrupt the flash, and reconfigure your settings afterward. Do that, and you’ll gain better hardware support, stability, and security without drama.
Frequently Asked Questions (FAQ)
1. Is it safe to update the BIOS on my ASRock B550AM motherboard?
Yes, it’s generally safe when done correctly. The main danger is an interruption during flashing, such as a power outage or a forced shutdown. Use a stable power source, download the right file for your exact board model, and avoid touching the PC during the update. If your system runs perfectly and you don’t need any new features or CPU support, updating isn’t mandatory.
2. How do I know which BIOS version I’m currently running?
You can check in two ways. Enter the UEFI by pressing F2 or Delete during startup and read the version on the main screen, or in Windows press Win + R, type msinfo32, and look at the BIOS Version/Date entry. Compare it with the versions listed on your board’s Support page on ASRock’s website.
3. Will updating the BIOS erase my data or reset my settings?
A BIOS update doesn’t touch your storage drives, so your files, operating system, and programs remain intact. However, UEFI settings such as XMP/DOCP, fan curves, boot order, and overclocks are usually reset to defaults. Note your settings beforehand and reapply them after the update. If you use BitLocker, suspend it first to avoid a recovery key prompt.
4. What should I do if my PC won’t boot after a BIOS update?
First, wait several minutes, since the first boot can include lengthy memory training. If it still fails, power off, unplug the PC, and clear the CMOS using the jumper or by removing the battery for a few minutes. Then try booting again. If the board remains unresponsive, contact ASRock support for recovery options rather than attempting risky workarounds.