 sukh22
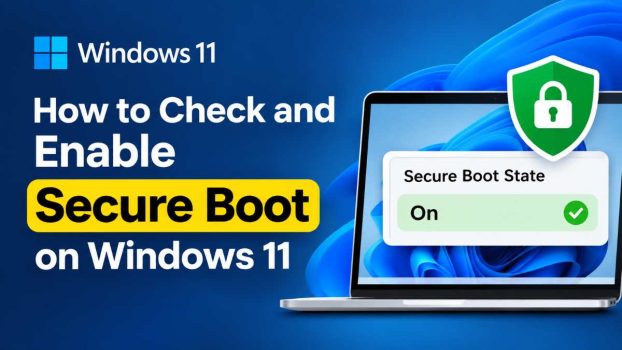
If you have tried to install or upgrade to Windows 11, you have probably run into the term “Secure Boot.” Maybe the PC Health Check app told you your computer does not meet the requirements. Maybe a game with strict anti-cheat software refused to launch. Or maybe you simply want to make your computer harder to attack. In every case, the first step is the same: find out whether Secure Boot is currently active, and if it is not, turn it on.
The good news is that checking Secure Boot takes less than a minute, and enabling it is usually a matter of flipping one switch in your computer’s firmware settings. The less good news is that the switch is hidden in a menu most people never visit, and its location varies from one manufacturer to another. On top of that, Secure Boot depends on a couple of other settings, such as UEFI mode and the GPT disk format, that can quietly block you if they are not configured correctly.
This guide walks you through everything in plain language. You will learn what Secure Boot actually does, three reliable ways to check its status, the exact steps to enable it, how to fix the most common problems, and answers to the questions people ask most often. By the end, you should know with certainty whether your PC is protected and how to fix it if it is not.
What Is Secure Boot and Why Does Windows 11 Need It?
Secure Boot is a security feature built into modern UEFI firmware, the software that replaced the old BIOS on almost every PC made in the last decade. When you press the power button, the firmware runs before Windows even starts. Secure Boot makes that firmware check the digital signature of every piece of startup software, including the bootloader and key drivers, against a list of trusted signatures stored on your motherboard. If something has been tampered with or is not signed by a trusted source, the PC refuses to run it.
This matters because of a class of malware known as bootkits and rootkits. These threats load before Windows and before your antivirus software, which means they can hide from almost every security tool and survive even a full operating system reinstall. Secure Boot closes that door by making sure only trusted code runs during startup.
Microsoft lists Secure Boot capability as a requirement for Windows 11, along with TPM 2.0, a compatible processor, and at least 4 GB of RAM. Notice the wording: the hardware must be capable of Secure Boot. On many systems, particularly those upgraded from older Windows versions or built from parts, the feature exists but is switched off. That is why you may see a failed requirements check even though your hardware is perfectly fine. Beyond the installer, some online games and anti-cheat systems also require Secure Boot to be active.
Before You Begin
A few minutes of preparation will save you headaches later.
- Back up your important files. Enabling Secure Boot itself does not erase data, but changing disk or firmware settings always carries some risk. A quick backup to an external drive or cloud storage is cheap insurance.
- Know your Windows edition and disk type. You will check the disk type later, but it is useful to know that Secure Boot requires your PC to boot in UEFI mode, which in turn requires a GPT-partitioned system disk.
- Have your BitLocker recovery key handy. If BitLocker or device encryption is turned on, changing firmware settings can trigger a recovery prompt at the next startup. You can find your key by signing in to your Microsoft account online under the devices section.
- Have administrator access. Most of the checks below require an administrator account.
Method 1: Check Secure Boot Status with System Information
This is the simplest method, and it works on every edition of Windows 11 without typing any commands.
- Press the Windows key + R to open the Run dialog.
- Type msinfo32 and press Enter. The System Information window opens.
- In the left pane, make sure System Summary is selected.
- In the right pane, scroll down to find two lines: BIOS Mode and Secure Boot State.
Here is how to read the results:
- BIOS Mode: UEFI and Secure Boot State: On. Secure Boot is enabled. You are done.
- BIOS Mode: UEFI and Secure Boot State: Off. Your PC supports Secure Boot, but it is disabled. Skip ahead to the enabling steps.
- BIOS Mode: Legacy and Secure Boot State: Unsupported. Your PC is currently booting in the old BIOS-compatible mode. You will need to switch to UEFI mode first, which may involve converting your disk to GPT.
Method 2: Check Secure Boot with PowerShell
If you prefer the command line, or if you want a clear yes-or-no answer, PowerShell is the fastest route.
- Right-click the Start button and choose Terminal (Admin) or Windows PowerShell (Admin).
- Type the following command and press Enter:
Confirm-SecureBootUEFI
The result will be one of three things:
- True. Secure Boot is enabled.
- False. Secure Boot is supported but turned off.
- An error saying the cmdlet is not supported on this platform. Your PC is running in legacy BIOS mode, or the hardware does not support Secure Boot.
This method is especially handy for IT administrators who need to check many machines through scripts, since the command returns a simple value that is easy to log.
Method 3: Check Through Windows Security
Windows 11 also reports Secure Boot status in its built-in security dashboard.
- Open the Start menu, type Windows Security, and open the app.
- Select Device security in the left sidebar.
- Look for the Secure boot entry under the “Secure boot” or “Standard hardware security” section.
If Secure Boot is active, you will see a green check mark and a message confirming that it is on. If it is not, Windows displays a standard hardware security warning with a note that Secure Boot is off. This method is friendly for casual users, though it gives less detail than System Information, so it is best used as a quick confirmation.
Method 4: Enable Secure Boot in UEFI Firmware Settings
If your checks show that Secure Boot is off but supported, you need to switch it on in the UEFI firmware settings. Windows 11 gives you a reliable way to get there without hammering a function key during startup.
Step 1: Restart into the firmware settings
- Open Settings and go to System, then Recovery.
- Next to Advanced startup, click Restart now. Save any open work first.
- When the blue menu appears, choose Troubleshoot, then Advanced options, then UEFI Firmware Settings, and click Restart.
If you do not see the UEFI Firmware Settings option, your PC is probably in legacy BIOS mode. Jump to the next section to convert it. Alternatively, you can restart your PC and repeatedly press the manufacturer’s setup key as it powers on. Common keys are F2, Delete, F10, F12, or Esc, depending on the brand.
Step 2: Find the Secure Boot setting
Every manufacturer organizes its firmware differently, but the setting is almost always on a tab named Boot, Security, or Authentication. Some common examples:
- ASUS: Go to Advanced Mode (F7), then the Boot tab, then Secure Boot. Set the OS Type to Windows UEFI mode.
- Dell: Open Boot Configuration and find Secure Boot, then set it to Enabled.
- HP: Open the Security or Boot Options menu and enable Secure Boot.
- Lenovo: Open the Security tab and set Secure Boot to Enabled.
- MSI and Gigabyte: Look under Settings > Security or the Boot tab for Secure Boot and set it to Enabled.
Step 3: Load the default keys if needed
Some boards show Secure Boot as greyed out. This usually happens when the platform keys are missing or when the system is in “Custom” mode. Look for an option called Secure Boot Mode and set it to Standard, or choose Install default Secure Boot keys or Restore factory keys. After that, the Enable option should become available.
Step 4: Save and exit
Press F10 (or choose Save Changes and Exit) and confirm. Your PC will restart. Once Windows loads, go back to Method 1 and confirm that Secure Boot State now reads On. If you see a BitLocker recovery screen, enter your recovery key and continue. The prompt is normal after a firmware change.
Method 5: Switch to UEFI Mode by Converting MBR to GPT
The most common reason Secure Boot cannot be enabled is that Windows was installed using the older Legacy BIOS with an MBR-partitioned disk. Secure Boot only works with UEFI and GPT. Fortunately, Windows includes a tool that converts your disk without wiping your data.
Check your disk type
- Right-click Start and choose Disk Management.
- Right-click your main disk (usually Disk 0) in the lower section and choose Properties.
- Open the Volumes tab and look at Partition style. It will say either Master Boot Record (MBR) or GUID Partition Table (GPT).
If it already says GPT, you can skip this section and simply enable UEFI mode in the firmware. If it says MBR, continue.
Convert the disk with MBR2GPT
- Open Settings > System > Recovery, click Restart now next to Advanced startup, and choose Troubleshoot > Advanced options > Command Prompt. You can also run the tool from within Windows, but the recovery environment is safer.
- Validate the disk first by typing:
mbr2gpt /validate /disk:0 /allowFullOS(omit the last part if you are in the recovery environment). - If validation succeeds, convert it by typing:
mbr2gpt /convert /disk:0 /allowFullOS. - When the process finishes, restart and enter the UEFI firmware settings.
- Change the boot mode from Legacy or CSM to UEFI, and disable CSM (Compatibility Support Module) if it is listed.
- Enable Secure Boot as described in Method 4, save, and exit.
Do not skip the validation step. If it reports errors, such as too many partitions, fix those before attempting a conversion. And do not switch the firmware to UEFI mode before converting the disk, or Windows will not boot.
Troubleshooting Common Problems
The Secure Boot option is greyed out. Check that CSM is disabled and that the boot mode is UEFI. Then look for a key management option and restore the factory keys.
Windows will not boot after the change. If your disk is still MBR, the PC cannot boot in UEFI mode. Re-enter the firmware settings, switch back to Legacy mode, and complete the MBR2GPT conversion before trying again.
You cannot find Secure Boot anywhere. Very old PCs, or machines built before roughly 2012, may not support it. Check the manufacturer’s documentation. If the hardware does not support Secure Boot, Windows 11 officially will not install.
Secure Boot shows as On, but an app still complains. Some anti-cheat software also needs TPM 2.0 and virtualization-based features. Check those separately in the same menus.
Keep your firmware up to date. Microsoft has been rolling out refreshed Secure Boot certificates because the original 2011-era certificates are reaching the end of their validity period. Installing Windows updates and your manufacturer’s latest firmware keeps your PC trusted for future updates. If this topic matters to you, check Microsoft’s support site for the latest guidance for your device.
Conclusion
Secure Boot is one of the simplest and most effective protections you can enable on a modern PC. It stops malicious code from hijacking your computer before Windows even loads, and it is a firm requirement for installing Windows 11 and for many modern games.
Checking its status takes seconds: run msinfo32, use the Confirm-SecureBootUEFI command in PowerShell, or open Device security in Windows Security. If it is off, restart into the UEFI firmware settings, find the Secure Boot option, enable it, and save. If the option is missing or greyed out, the cause is almost always legacy BIOS mode or an MBR disk, which you can fix with the built-in MBR2GPT tool without losing your data.
Take your time, back up your files, keep your BitLocker key nearby, and follow the steps in order. A few careful minutes now will give your PC a stronger security foundation for years to come.
Frequently Asked Questions
1. Is Secure Boot required to run Windows 11?
Yes, officially. Microsoft lists Secure Boot capability as a requirement, and the installer checks for it. Your hardware must support it, and for the standard installation it is expected to be enabled. Unsupported workarounds exist, but they leave you without guaranteed updates and weaker security.
2. Will enabling Secure Boot delete my files or slow down my PC?
No. Turning on Secure Boot only changes how the firmware verifies startup software. It does not touch your personal files, and it has no noticeable effect on performance. The only data-related risk comes from converting the disk from MBR to GPT, which is why a backup is recommended.
3. Can I still use Linux or dual boot with Secure Boot on?
In most cases, yes. Major Linux distributions such as Ubuntu, Fedora, and Debian ship with signed bootloaders that work with Secure Boot. Less common distributions or custom kernels and drivers, such as certain graphics or virtualization modules, may need extra steps like enrolling a key. If something will not boot, check your distribution’s documentation.
4. Why is Secure Boot greyed out in my BIOS?
This usually means the firmware is in Legacy or CSM mode, the platform keys are missing, or Secure Boot is set to Custom mode. Switch to UEFI mode, disable CSM, set Secure Boot Mode to Standard, and install the default keys. After that, the option should become selectable. If it stays greyed out, update your motherboard firmware and consult the manufacturer’s support page.