 Geeksdigit Team
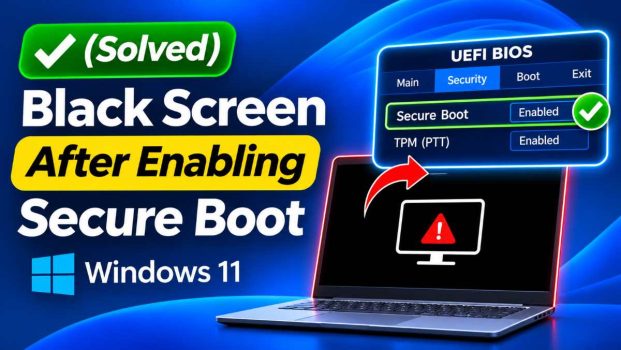
You open your BIOS or UEFI settings, switch on Secure Boot because Windows 11, a game’s anti-cheat system, or a security policy demands it, save and restart, and then nothing. The manufacturer logo may flash for a second, or may not appear at all, and you are left staring at a black screen with no desktop, no error message and sometimes not even a blinking cursor. It is one of the most alarming problems you can hit after a simple settings change, but the good news is that it is almost always fixable, and your data is almost certainly safe.
Secure Boot is a feature of UEFI firmware that only allows software signed with trusted cryptographic keys to run during startup. When it works, it blocks bootkits and rootkits that try to load before the operating system. When it does not work, the firmware refuses to hand control to something in the boot chain, and the machine ends up with a black screen. The refusal is silent because the firmware has very little ability to display errors at that stage.
The black screen after enabling Secure Boot usually comes down to one of a handful of causes:
- The disk uses MBR (Legacy BIOS) partitioning instead of GPT. Secure Boot requires UEFI mode, which expects a GPT disk.
- CSM (Compatibility Support Module) is still enabled, so the firmware is stuck halfway between legacy and UEFI modes.
- The graphics card does not support UEFI GOP, so the monitor receives no signal during boot.
- The bootloader or an operating system component is unsigned, as often happens with custom Linux kernels, third-party drivers, or older bootloaders.
- The Secure Boot keys are missing, corrupt or in the wrong mode, which can happen after a BIOS update or a reset to defaults.
- The display is connected to the wrong output, for example the motherboard port instead of the graphics card.
This guide walks through each cause in the order that is quickest and safest to test. Start with Method 1 and work down. You do not need to do all of them; stop as soon as your screen comes back.
Before You Start: Get Back Into the BIOS
If you cannot see anything, you first need to reach the firmware settings so you can undo the change or fix the configuration. Try these in order:
- Force a shutdown. Hold the power button for about ten seconds until the machine turns off completely.
- Power it on and press the BIOS key repeatedly. Common keys are Delete or F2 for most desktops and custom builds, F10 for HP, F2 or F12 for Dell and Lenovo, and Esc or F2 for ASUS laptops. Tap the key once per second from the moment you press the power button.
- Try a different display output. If you have a dedicated graphics card, plug the monitor into it. If that fails, try the motherboard’s HDMI or DisplayPort output, if your CPU has integrated graphics. Many black screen cases are simply a signal that is going to the wrong port.
- Try a different cable or monitor to rule out a handshake problem between the display and the GPU.
- Reset the CMOS if you still cannot get in. Switch the power supply off, remove the small coin-cell battery on the motherboard for about a minute (or use the CLEAR CMOS jumper or button), and reinsert it. This restores the firmware to default settings and usually disables Secure Boot again, which lets you see the screen and start over.
Once you are inside the BIOS, you can try the methods below.
Method 1: Temporarily Disable Secure Boot and Confirm the Cause
The fastest way to confirm that Secure Boot is the culprit is to switch it off again.
- Enter the BIOS or UEFI setup.
- Go to the Boot, Security or Authentication tab, depending on your motherboard.
- Set Secure Boot to Disabled, or set the Secure Boot mode to Standard or Custom if the option is greyed out.
- Save and exit (usually F10).
If the system boots normally with Secure Boot off, you know the problem lies in what Secure Boot is blocking or how the firmware is configured, not in broken hardware. That information tells you which of the following methods to try. Keep Secure Boot disabled while you work through the next steps, and re-enable it only at the end.
Method 2: Check Whether Your Disk Is GPT or MBR
This is the single most common cause on older Windows installations. Secure Boot works only when the system boots in UEFI mode, and UEFI Windows installations use GPT partitioning. If Windows was installed in Legacy mode on an MBR disk, enabling Secure Boot (or switching off CSM) leaves the firmware with nothing it can boot, which results in a black screen or a message about no bootable device.
To check the disk style (with Secure Boot disabled and Windows running):
- Press Win + X and choose Disk Management.
- Right-click your system disk (usually Disk 0) and choose Properties.
- Open the Volumes tab and look at Partition style. It will say either GUID Partition Table (GPT) or Master Boot Record (MBR).
If the disk is MBR, convert it to GPT without data loss using MBR2GPT:
- Open Command Prompt as administrator.
- Validate the disk first:
mbr2gpt /validate /disk:0 /allowFullOS
- If validation succeeds, convert it:
mbr2gpt /convert /disk:0 /allowFullOS
- Restart, enter the BIOS, set the boot mode to UEFI (disable CSM or Legacy Support), and enable Secure Boot.
MBR2GPT is built into Windows 10 (version 1703 and later) and Windows 11. It rewrites the partition table and creates an EFI System Partition without touching your files. It is still sensible to back up important data first, because any change to partitioning carries some risk.
If validation fails because of too many partitions or not enough space for the EFI partition, shrink a partition by about 100 MB in Disk Management and try again.
Method 3: Disable CSM and Switch to Pure UEFI Mode
CSM is a compatibility layer that lets a UEFI motherboard behave like an old BIOS so that legacy hardware and operating systems keep working. Secure Boot and CSM do not coexist well. If CSM is on while Secure Boot is on, many boards either refuse to enable Secure Boot, or enable it and then fail to show any video.
- Open the BIOS and find CSM, Compatibility Support Module or Legacy Support (often under Boot).
- Set it to Disabled.
- Set Boot Mode or Boot Option Filter to UEFI only.
- Make sure your boot drive appears as Windows Boot Manager in the boot priority list. If it only appears under its brand name with no “UEFI” label, your installation may be legacy, in which case go back to Method 2.
- Enable Secure Boot, save and exit.
On some boards, the Secure Boot option stays greyed out until CSM is disabled and the OS type is set to Windows UEFI mode. If you cannot click Secure Boot, look for an OS Type or Secure Boot Mode setting and choose the Windows UEFI option.
Method 4: Check Your Graphics Card for UEFI GOP Support
If you are using a graphics card that is more than roughly ten years old, or one that was flashed with a custom BIOS, it may lack a UEFI GOP (Graphics Output Protocol) driver. Without GOP, a card cannot display anything when the system is in pure UEFI mode with CSM off, which looks exactly like a black screen.
What you can do:
- Use the integrated graphics temporarily by plugging the monitor into the motherboard output, if your CPU supports it, and check whether the screen returns. If it does, the discrete card is the issue.
- Update the graphics card’s firmware. Manufacturers such as NVIDIA (through board partners) and AMD have published GOP-enabled VBIOS updates for some older cards. Follow the vendor’s instructions carefully, because flashing the wrong file can disable the card.
- Keep CSM enabled only for video on boards that offer a separate Launch Video OpROM setting. Setting video to UEFI-only while keeping other legacy components off can help, but results vary by motherboard.
- Replace the card if it is truly old and no GOP firmware exists. Any card from the last several years is fine.
Also check Above 4G Decoding and Resizable BAR settings. On some boards, changing them at the same time as Secure Boot can cause blank screens, so set them back to defaults when troubleshooting.
Method 5: Restore the Default Secure Boot Keys
Secure Boot depends on a database of keys: the Platform Key (PK), the Key Exchange Key (KEK), the allowed signature database (db) and the forbidden database (dbx). If these are missing, wiped or corrupted, which can happen after a BIOS update, a CMOS reset or experiments with custom keys, the firmware may reject even Microsoft’s own bootloader.
- Enter the BIOS and open Secure Boot settings (sometimes under Key Management).
- Set the Secure Boot mode to Custom if needed to reveal key options.
- Choose Restore Factory Keys, Install Default Secure Boot Keys or Reset to Setup Mode followed by installing the defaults. Wording varies between vendors.
- Switch the mode back to Standard.
- Enable Secure Boot, then save and restart.
If your board offers a Clear Secure Boot Keys option, use it cautiously. Clearing the keys puts the firmware into Setup Mode, where Secure Boot is effectively inactive, and you must install the defaults afterward.
Method 6: Repair the Windows Boot Files
If Windows has damaged or missing boot files, enabling Secure Boot may expose the problem because the firmware now validates what it loads. You can repair them from the Windows installation media.
- Create a Windows installation USB on another PC using Microsoft’s Media Creation Tool.
- Boot from the USB (with Secure Boot disabled if necessary), choose your language and click Repair your computer.
- Go to Troubleshoot > Advanced options > Startup Repair and let it run.
- If that fails, open Command Prompt from the same menu and run:
bootrec /fixmbr
bootrec /fixboot
bootrec /rebuildbcd
- On UEFI systems where
bootrec /fixbootreturns “Access is denied”, rebuild the EFI boot files manually: assign a drive letter to the EFI partition withdiskpart, then runbcdboot C:\Windows /s S: /f UEFI, replacing S: with the letter you assigned.
After the repair, restart, check that the BIOS lists Windows Boot Manager first, and try enabling Secure Boot again.
Method 7: Fix Secure Boot Problems on Linux
Most mainstream distributions, including Ubuntu, Fedora and Debian, ship a signed bootloader (shim) and boot fine with Secure Boot. Problems appear when you use an unsigned kernel, a custom-compiled module, or proprietary drivers such as NVIDIA’s. The latter is a very common cause of a black screen, because the graphics module is refused at load time and the display never initializes.
- Check the state of Secure Boot from a working session with
mokutil --sb-state. - Enroll a Machine Owner Key (MOK) for third-party drivers. On Ubuntu, installing the NVIDIA driver prompts you to set a password; on the next reboot a blue MOK Manager screen appears, where you choose Enroll MOK and enter that password. If you miss that screen, the driver will not load and you may see a black screen.
- Use distribution-signed packages where possible, such as the NVIDIA drivers provided in the distribution’s own repositories.
- Reinstall the bootloader if it is corrupted. Boot from a live USB with Secure Boot off, mount your system, and reinstall GRUB and shim for your distribution.
- Dual-boot setups: make sure both operating systems are installed in UEFI mode. A Legacy Linux install next to a UEFI Windows install will fail under Secure Boot.
If you must use an unsigned kernel or module, you can sign it yourself with your own key and enroll it through MOK, or keep Secure Boot off.
Method 8: Update the BIOS and Reset to Optimized Defaults
Firmware bugs are a real cause of Secure Boot trouble, especially on newer boards that were rushed to support Windows 11. A BIOS update from your motherboard or laptop maker can fix key-handling bugs, GOP problems and blank screens at boot.
- With Secure Boot disabled and the PC working, note your exact motherboard or laptop model.
- Download the latest BIOS version from the manufacturer’s support page, not from a third-party site.
- Follow the vendor’s instructions, which usually involve a USB drive and a built-in flash utility. Do not interrupt power during the update.
- After updating, load Optimized Defaults in the BIOS, set UEFI mode, and enable Secure Boot.
Loading defaults first, then enabling only what you need, avoids carrying over old settings that conflict with the new firmware.
Quick Troubleshooting Checklist
- Monitor connected to the right output (graphics card vs motherboard)?
- Disk partition style is GPT?
- Boot mode is UEFI with CSM disabled?
- Default Secure Boot keys installed and mode set to Standard?
- Windows Boot Manager first in boot order?
- Latest BIOS installed?
- Graphics card supports UEFI GOP?
- Linux drivers signed or MOK enrolled?
If all of these check out and the screen is still black, the cause is probably a hardware fault such as faulty RAM, a failing GPU or a bad cable, and Secure Boot just happened to coincide with it. Reseat the memory and graphics card, and test with known good parts if you can.
Conclusion
A black screen after enabling Secure Boot feels like you have broken your computer, but it is nearly always a configuration mismatch rather than damage. The firmware is simply refusing to run something that does not meet its trust rules, or it is waiting for a video signal that your graphics card cannot provide in pure UEFI mode.
The reliable approach is methodical. First get back into the BIOS using a force shutdown, a different video output or a CMOS reset. Then turn Secure Boot off to confirm it is the cause. After that, check the fundamentals: a GPT disk, UEFI mode with CSM disabled, a graphics card with GOP support, the default Secure Boot keys and intact Windows boot files. On Linux, pay particular attention to signed drivers and MOK enrollment. Finally, update the BIOS and load optimized defaults so that stale settings are not working against you.
Once you have resolved the problem, take a few minutes to confirm that Secure Boot is actually active. In Windows, press Win + R, type msinfo32, and look for Secure Boot State: On and BIOS Mode: UEFI. Keeping Secure Boot on is worth the effort, since it is a requirement for Windows 11 on many devices and protects you against some of the nastiest boot-level malware.
Frequently Asked Questions (FAQ)
1. Will enabling Secure Boot delete my data?
No. Secure Boot only controls which boot software the firmware will trust; it does not touch your files or partitions. The risk of data loss comes from steps you take while fixing the problem, such as converting disks or reinstalling Windows. Converting MBR to GPT with MBR2GPT is designed to preserve data, but it is still wise to back up important files before changing the partition layout.
2. Why is the Secure Boot option greyed out in my BIOS?
This usually happens because CSM or Legacy mode is enabled, because the OS type is not set to Windows UEFI mode, or because no Platform Key is installed. Disable CSM, set the boot mode to UEFI, choose the Windows UEFI OS type if offered, and restore the factory keys. After that, the Secure Boot toggle normally becomes available.
3. Can I use Secure Boot with Linux or a dual-boot system?
Yes. Most major distributions provide a signed shim that works with Secure Boot out of the box. Dual-boot setups work as long as both systems are installed in UEFI mode. The main complication is third-party or custom kernel modules, such as proprietary graphics drivers, which must be signed and enrolled through MOK. If that is not practical, you can keep Secure Boot disabled on a Linux-focused machine.
4. Is it safe to leave Secure Boot disabled if I cannot fix the black screen?
For many home users, it is acceptable as a temporary measure, and the PC will still run normally. However, you lose a layer of protection against boot-level malware, and some software requires it, including Windows 11 on officially supported hardware and certain anti-cheat systems in online games. If you need it, it is worth working through the methods above, particularly the GPT conversion, CSM settings and a BIOS update, until you can enable it reliably.