 Geeksdigit Team
Most people think about backups only after something goes wrong. A hard drive fails without warning, a ransomware infection locks every document, a Windows update misbehaves, or a laptop is stolen from a car seat. In each case the question is the same: do you still have your files? If the answer is no, years of photos, tax records, school work, and business documents can vanish in seconds.
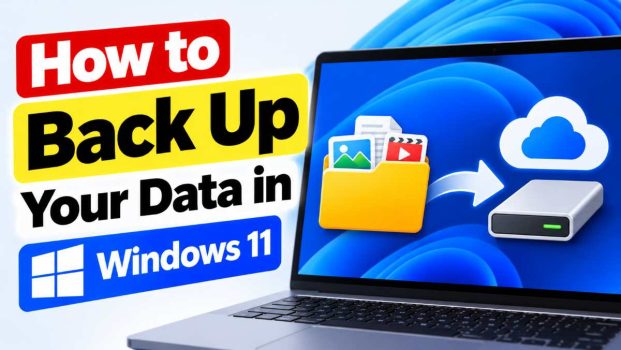
The good news is that Windows 11 gives you several built-in ways to protect your data, and you do not need to buy special software to get started. You can sync your important folders to the cloud with OneDrive, schedule automatic copies to an external drive with File History, create a complete snapshot of your system with a system image, or simply copy files by hand to a USB drive. Each method has strengths and weaknesses, and the best protection usually comes from combining two or more of them.
This guide walks you through every major backup method in Windows 11, explains when each one makes sense, and finishes with a simple strategy you can follow to keep your data safe. It closes with answers to four frequently asked questions.
The 3-2-1 rule: a quick foundation
Before choosing a method, it helps to know the rule that IT professionals rely on. The 3-2-1 backup rule says you should keep three copies of your data, stored on two different types of media, with one copy kept off-site. In practice, that might mean your original files on your PC, a second copy on an external hard drive, and a third copy in the cloud. If your PC dies, the external drive saves you. If your home floods or is burgled, the cloud copy saves you. Keep this rule in mind as you read the methods below.
Method 1: Back Up Folders to OneDrive
OneDrive is Microsoft’s cloud storage service and it is built directly into Windows 11. When you sign in with a Microsoft account, you automatically get 5 GB of free storage, and paid Microsoft 365 plans raise that limit significantly. OneDrive is the easiest way to get an off-site copy of your most important folders.
How it works
The feature you want is called folder backup (sometimes shown as “Sync and back up”). It moves your Desktop, Documents, and Pictures folders into OneDrive and keeps them synced. Anything you save there is uploaded automatically, and the same files appear on any other device where you sign in.
Steps to turn it on
- Click the OneDrive cloud icon in the system tray at the bottom right of your screen. If you do not see it, click the small up arrow to reveal hidden icons.
- Click the gear icon and choose Settings.
- Open the Sync and backup tab.
- Click Manage backup.
- Toggle on the folders you want to protect, such as Desktop, Documents, and Pictures.
- Click Save changes and let the first upload finish.
Depending on how much data you have and how fast your connection is, the first sync can take hours or even days. After that, only changes are uploaded.
Pros and cons
The main advantages are convenience and off-site protection. Your files are available on your phone, on the web, and on other computers, and you can recover earlier versions of a file and restore deleted items from the OneDrive recycle bin for a limited time. The downsides are limited free storage, the need for an internet connection, and the fact that OneDrive is a sync service rather than a true backup. If you delete a file or ransomware encrypts it, the change can sync to the cloud. OneDrive does offer file restore and ransomware detection on certain plans, but you should still keep a separate backup.
Method 2: Use the Windows Backup App
Windows 11 includes an app simply called Windows Backup. It is designed to make moving to a new PC painless, and it also serves as a basic safety net for your settings and files.
What it backs up
Windows Backup saves your folders (through OneDrive), your installed Microsoft Store apps and some other app lists, your Windows settings such as personalization and language preferences, and your saved Wi-Fi networks and some credentials. When you set up a new or reset PC and sign in with the same Microsoft account, Windows offers to restore all of it.
Steps to use it
- Click Start and type Windows Backup, then open the app.
- Expand each section: Folders, Apps, Settings, and Credentials.
- Turn on the items you want to protect.
- Click Back up to run the first backup.
Keep in mind that Windows Backup is not a full disk backup. It does not copy every file on your drive or the apps you installed from outside the Microsoft Store. Think of it as a convenient way to recreate your environment, not as your only protection.
Method 3: Back Up to an External Drive with File History
File History is a long-standing Windows feature that automatically saves copies of your personal files to an external drive or network location. It is still available in Windows 11, and it remains one of the best ways to create a local, versioned backup without paying for anything beyond a drive.
What you need
You need an external hard drive or SSD, or a network share, with enough space for your files. A good rule is to choose a drive at least twice the size of the data you want to protect so that older versions have room to accumulate.
Steps to set it up
- Connect your external drive to the PC.
- Open Start, type Control Panel, and press Enter.
- Set View by to Large icons or Small icons, then click File History.
- Windows should detect your drive. If it does not, click Select drive and pick it manually.
- Click Turn on.
File History now saves copies of files in your Documents, Music, Pictures, Videos, and Desktop folders, plus offline OneDrive files, every hour by default.
Customizing File History
Click Advanced settings on the left to change how often copies are saved, from every 10 minutes to once a day, and how long versions are kept, from one month to forever. Click Exclude folders if there are locations you do not want to include, or Select drive to switch to a different destination.
Restoring files
To recover something, open the File History window and click Restore personal files. You can browse snapshots by date, preview files, and click the green restore button to return a file to its original place, or right-click the button to restore it somewhere else. This is especially helpful when you accidentally overwrite a document and need yesterday’s version.
Pros and cons
File History is simple, automatic, and free, and it keeps multiple versions of each file. The drawbacks are that it covers only specific folders by default and it only works while your drive is connected. If you forget to plug the drive in, no backups happen. It is also a local backup, so it will not help after a fire or theft unless you store the drive elsewhere.
Method 4: Create a System Image Backup
Sometimes you want more than files. A system image is an exact snapshot of your entire drive, including Windows itself, your installed programs, your settings, and your data. If your PC fails completely, you can restore the image to a replacement drive and return to the exact state you captured.
Steps to create a system image
Windows 11 still includes the older Backup and Restore (Windows 7) tool for this purpose.
- Connect an external drive with plenty of free space.
- Open Control Panel and choose Backup and Restore (Windows 7).
- Click Create a system image in the left pane.
- Choose where to save the image: an external hard disk is the usual choice.
- Confirm which drives to include. The system drive is selected automatically.
- Click Start backup and wait for it to finish.
- When prompted, create a system repair disc or USB recovery drive so you can boot the PC if Windows will not start.
Restoring from an image
If Windows becomes unbootable, start your PC from a recovery drive or the Windows installation media, choose Troubleshoot, then Advanced options, and select System Image Recovery. Follow the prompts to pick your image and restore it. Be aware that restoring an image replaces everything on the target drive, so any files created after the image was made will be lost unless they were backed up separately.
Pros and cons
System images are the most complete form of protection and are ideal before major upgrades or hardware changes. Their weaknesses are size and age: they take a lot of space and quickly become outdated. Microsoft has described the Windows 7 backup tool as a legacy feature, so it could change in the future. Many users pair it with a third-party imaging tool for better scheduling and compression.
Method 5: Copy Files Manually
Never underestimate the simplest approach. Manually copying your important files to a USB flash drive, external hard drive, or SD card requires no setup and no special software.
Steps
- Plug in your storage device.
- Open File Explorer with Windows key + E.
- Navigate to the folders you want to protect.
- Select the files or folders, right-click, and choose Copy.
- Open the external drive, right-click an empty space, and choose Paste.
For a more reliable approach, you can drag folders while holding the right mouse button and choose Copy here, or use the built-in Robocopy command in Terminal to mirror a folder and copy only changed files. For example, running robocopy C:\Users\YourName\Documents D:\Backup\Documents /MIR makes the destination match the source. Use this carefully, because the /MIR option also deletes files in the destination that no longer exist in the source.
Manual copying is great for one-time archives, such as saving a finished project or a batch of family photos. Its weakness is human memory. A backup you must remember to make is a backup that eventually gets skipped, so use it as a supplement rather than your main plan.
Method 6: Use Third-Party Backup Software
If the built-in tools feel limiting, many reputable third-party programs offer more flexibility. Popular choices include Macrium Reflect, Acronis True Image, EaseUS Todo Backup, and cloud services such as Backblaze, which backs up your computer to the cloud for a flat monthly fee. These tools often provide features Windows lacks, such as incremental and differential backups, encryption, backup verification, bootable rescue media, scheduling that runs even when you forget, and cloud storage with generous or unlimited capacity.
When choosing software, look for good reviews, regular updates, clear pricing, and strong encryption. Test the restore process at least once, because a backup you cannot restore is not really a backup.
Method 7: Create Restore Points (Not a Replacement for Backups)
Windows also offers System Restore, which creates restore points that can roll back system files, drivers, and registry settings after a bad update or driver installation. To enable it, search for Create a restore point, select your system drive, click Configure, and choose Turn on system protection.
It is important to understand what System Restore does not do. It does not protect your personal documents, photos, or other files, and it cannot recover from a failed drive. Treat it as a repair tool for system problems, not as a data backup.
Building a Backup Strategy That Works
With so many options, it helps to combine them into a simple routine. Here is a practical plan that fits most home users and small offices:
- Cloud layer: Turn on OneDrive folder backup for Desktop, Documents, and Pictures so your core files are always off-site.
- Local layer: Set up File History on an external drive so you have versioned copies and a fast way to restore.
- System layer: Create a system image every few months, or before major changes, and keep a recovery drive handy.
- Archive layer: Manually copy finished projects and irreplaceable photos to a second drive, and store it somewhere other than your home if possible.
Good backup habits
- Automate whatever you can. Scheduled backups happen even when you are busy.
- Test your restores. Once or twice a year, try recovering a few files to confirm everything works.
- Encrypt sensitive data. If a backup drive holds financial or personal records, use BitLocker To Go (available on Windows 11 Pro) or encryption built into your backup software.
- Check drive health. External drives wear out. Replace them every few years and watch for warnings.
- Disconnect when idle. Keeping a backup drive unplugged between sessions protects it from ransomware and power surges.
Conclusion
Backing up your data in Windows 11 does not have to be complicated or expensive. OneDrive gives you effortless off-site protection, Windows Backup makes it easy to move to a new PC, File History keeps versioned copies on an external drive, system images capture everything for disaster recovery, and manual copies or third-party tools fill in the gaps. No single method is perfect, which is why the 3-2-1 approach of multiple copies on different media, with one stored away from home, is so effective.
The best time to set up a backup was before you needed it. The second best time is today. Spend an hour turning on OneDrive folder backup, plug in an external drive for File History, and schedule a reminder to test your restores. That small investment can save you from losing something that cannot be replaced.
Frequently Asked Questions
1. How often should I back up my data in Windows 11?
The right frequency depends on how often your files change and how much work you could afford to lose. For most people, continuous or hourly protection through OneDrive and File History is ideal, since new work is captured automatically. A full system image is usually enough every one to three months, or before major updates. If you create valuable files daily, such as business documents or ongoing creative projects, consider backing up more often and keeping at least one copy off-site.
2. Is OneDrive enough to protect all my files?
OneDrive is an excellent starting point, but it should not be your only backup. It syncs changes, so accidental deletions or malware-encrypted files may be mirrored to the cloud before you notice. It also protects only the folders you choose and is limited by your storage plan. Pair OneDrive with a local backup, such as File History or a system image on an external drive, to follow the 3-2-1 rule and cover more failure scenarios.
3. What is the difference between File History and a system image?
File History saves versions of your personal files, such as documents, photos, and music, so you can restore individual items or earlier versions. A system image captures your entire drive, including Windows, applications, settings, and files, so you can rebuild a whole PC after a serious failure. File History is better for everyday mistakes, while a system image is better for disaster recovery. Using both gives you the most complete protection.
4. How much storage do I need for my backups?
As a general guideline, choose a backup drive at least twice the size of the data you are protecting, and more if you want to keep many file versions or multiple system images. For example, if your files total 300 GB, a 1 TB external drive gives you comfortable room. A full system image will be roughly the size of the used space on your system drive, so check how much you have used in Settings > System > Storage before buying a drive. For cloud backups, compare plan limits and pricing to make sure they match your needs.