
 Sukhdev Kamboj
Windows Subsystem for Linux (WSL) has become one of the most popular tools for developers who want to run a genuine Linux environment alongside Windows without setting up a dual-boot system or a full virtual machine. It lets you install distributions like Ubuntu, Debian, or Kali Linux, run native Linux command-line tools, and switch between Windows and Linux workflows in seconds. For many people, that convenience makes WSL a permanent fixture on their machine.
But there are plenty of good reasons to remove it. Maybe you installed a distro for a one-off project that’s long finished. Maybe WSL is acting up and a fresh reinstall seems like the cleanest fix. Maybe you’re reclaiming disk space, preparing a machine for a different use case, or just tidying up a system that has accumulated tools you no longer need. Whatever the reason, uninstalling WSL on Windows 11 isn’t as simple as clicking a single “Uninstall” button. Because WSL touches several layers of the operating system — installed distributions, an app package, and low-level Windows features — removing it completely means working through each of those layers in order.
This guide walks you through everything you need to know to uninstall WSL from Windows 11 the right way. We’ll cover four practical methods, ranging from the built-in one-command approach to manual removal through Settings, PowerShell, and Windows optional features. We’ll also flag the things people commonly get wrong, like forgetting to back up their files before deleting a distro, since that step permanently erases everything inside it. By the end, you’ll know exactly which method fits your situation and how to confirm that WSL is fully gone from your system.
Before diving in, it’s worth pausing on one critical point: uninstalling a WSL distribution deletes all the files, code, and configurations inside it. There’s no recycle bin for this. If you have projects, repositories, database files, or configuration scripts living inside your Linux distro, copy anything you want to keep to a Windows folder (or push it to a remote repository) before you start removing anything.
Method 1: Use the Built-In wsl --uninstall Command (Fastest Option)
The simplest way to remove WSL on a modern, up-to-date Windows 11 system is to use the dedicated uninstall command built into the WSL command-line tool. This is the quickest path if your goal is just to wipe WSL and start clean.
Step 1: Back up your data. Before anything else, copy any important files out of your Linux distributions. You can access your distro’s file system from Windows Explorer by typing \\wsl$ (or \\wsl.localhost) into the address bar, or by using cp commands inside the distro to move files to a mounted Windows drive (typically under /mnt/c/).
Step 2: Open PowerShell as Administrator. Click Start, type “PowerShell,” right-click the top result, and choose “Run as administrator.” Running as admin matters here — several of the commands in this guide will silently fail or throw permission errors otherwise.
Step 3: List your installed distributions. Run:
wsl --list --verbose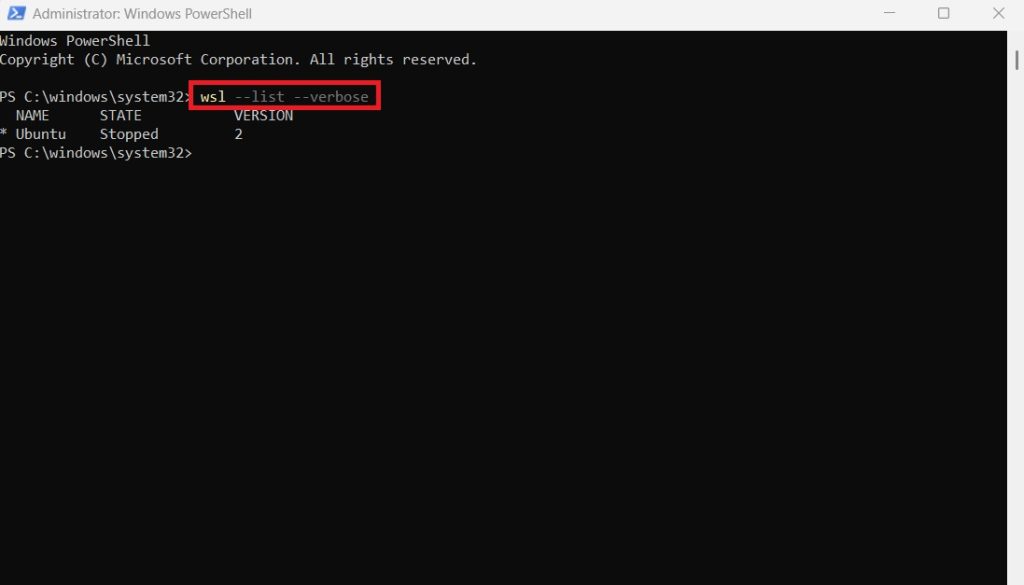
This shows every distribution installed on your machine, along with its WSL version (1 or 2) and running state. Make a note of the exact names, since you’ll need them for the next step.
Step 4: Remove each distribution. For every distro listed, run:
wsl --unregister <DistroName>Replace <DistroName> with the exact name from the list (for example, wsl --unregister Ubuntu). This permanently deletes that distribution and everything inside it, so double-check your backups first. Repeat this command for each distro you have installed.
Step 5: Run the uninstall command. Once all distributions are removed, run:
wsl --uninstall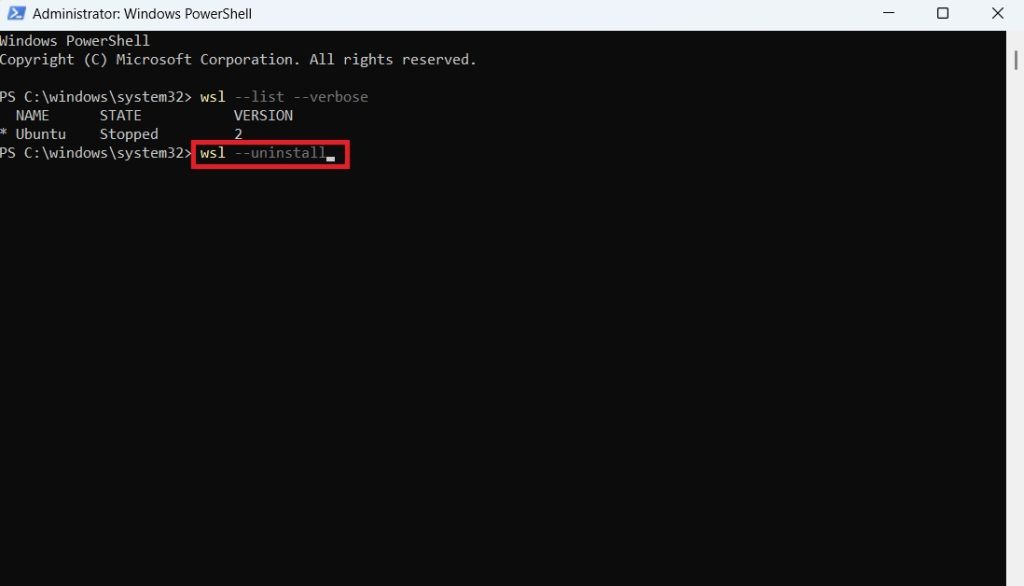
This command removes the WSL app package itself, including the Linux kernel components that Microsoft ships separately from Windows. On many systems this is enough to fully remove WSL.
Step 6: Restart your computer. A reboot ensures any lingering services or drivers tied to WSL are fully released.
Note: if the wsl --uninstall command isn’t recognized on your system, it usually means you’re running an older build of Windows 11 or an older version of the WSL package that doesn’t yet include this shortcut. In that case, skip to Method 2 or Method 3 below.
Method 2: Remove WSL Through Settings (Apps & Installed Apps)
If the command-line shortcut isn’t available, or you’d rather work through a graphical interface, Windows 11’s Settings app can handle most of the job.
Step 1: Remove your Linux distributions first.
- Open Settings.
- Go to Apps > Installed apps.
- Search for the name of your Linux distribution (e.g., “Ubuntu” or “Debian”).
- Click the three-dot menu next to it and select Uninstall.
- Confirm the removal when prompted.
- Repeat for every distribution installed on your system.
Step 2: Remove the WSL app package. On many current builds of Windows 11, WSL itself shows up as an installed app (since Microsoft moved it to the Microsoft Store as a standalone package that updates independently of the OS). If it appears in your Installed Apps list:
- Search for “Windows Subsystem for Linux.”
- Click the three-dot menu and choose Uninstall.
- Confirm the action.
Step 3: Turn off the underlying Windows features. Removing the app and the distros gets rid of the software layer, but WSL also relies on two optional Windows features that need to be disabled separately:
- Open Settings > System > Optional features.
- Click More Windows features (or search for “Turn Windows features on or off” in the Start menu, which opens the classic Control Panel dialog).
- Uncheck Windows Subsystem for Linux.
- Uncheck Virtual Machine Platform (this is the hypervisor layer WSL 2 depends on — only disable it if you don’t use other tools like Hyper-V or certain Android emulators that also rely on it).
- Click OK and restart when prompted.
This three-part approach (distros, then the app, then the features) is the most GUI-friendly way to remove WSL and works reliably across most Windows 11 builds, including ones where the wsl --uninstall shortcut isn’t yet available.
Method 3: Uninstall WSL Using PowerShell and DISM Commands
For users who prefer scripting or need to uninstall WSL across multiple machines (IT admins managing several devices, for instance), PowerShell and DISM (Deployment Image Servicing and Management) give you full command-line control over every layer of WSL.
Step 1: Open PowerShell or Command Prompt as Administrator.
Step 2: List and remove distributions, exactly as in Method 1:
wsl --list --verbose
wsl --unregister <DistroName>
Step 3: Disable the WSL feature using DISM. Run:
dism.exe /online /disable-feature /featurename:Microsoft-Windows-Subsystem-Linux /norestartStep 4: Disable the Virtual Machine Platform feature, which supports WSL 2’s lightweight virtual machine backend:
dism.exe /online /disable-feature /featurename:VirtualMachinePlatform /norestartStep 5: Restart your computer to finalize the changes. The /norestart flag in the commands above lets you disable both features first and reboot only once, rather than restarting after each command.
Step 6: Verify removal. After rebooting, open PowerShell and run wsl --status or wsl --list. If WSL has been fully removed, you should see an error indicating that WSL is not installed, rather than a list of distributions.
This method is particularly useful if you’re troubleshooting a broken WSL installation, since DISM operates at a lower level than the Settings app and can clear out feature states that the GUI sometimes fails to reset properly.
Method 4: Use Group Policy to Disable WSL Access (For Managed or Shared PCs)
If you’re managing a work computer, a shared family PC, or a fleet of devices in an organization, you might want to prevent WSL from being reinstalled or used at all — not just remove the current installation. Group Policy is built for exactly this kind of administrative control (note: this method requires Windows 11 Pro, Enterprise, or Education, since Group Policy Editor isn’t available on Windows 11 Home).
Step 1: Open the Group Policy Editor. Press Windows + R, type gpedit.msc, and press Enter.
Step 2: Navigate to the WSL policy setting. Go to:
Computer Configuration > Administrative Templates > Windows Components > Windows Subsystem for LinuxStep 3: Disable WSL access. Double-click the policy labeled Allow Windows Subsystem for Linux (or a similarly named setting depending on your build), set it to Disabled, and click Apply then OK.
Step 4: Restart the computer to enforce the new policy.
This method doesn’t necessarily remove already-installed WSL files, so it’s often used together with Method 1, 2, or 3 rather than as a replacement. Its real value is stopping WSL from being reinstalled or re-enabled by other users on a shared or managed device — useful in corporate environments with strict software policies, or on family computers where you want to keep things simple.
Frequently Asked Questions
Does uninstalling WSL delete my files permanently? Yes. Unregistering a distribution with wsl --unregister or uninstalling it through Settings deletes the entire virtual disk associated with that distro, including all files, installed packages, and configurations inside it. There’s no built-in recovery option, so back up anything important — code, databases, config files — before you begin. Copying files out to a Windows folder or pushing your code to a remote Git repository beforehand is the safest approach.
Will uninstalling WSL affect my Windows installation or other apps? No, WSL runs as an isolated subsystem, so removing it doesn’t touch your core Windows files or unrelated applications. The one thing to watch is the Virtual Machine Platform feature — if you use other software that relies on it, such as certain Android emulators or Hyper-V—based tools, disabling that feature could affect those programs too. If you’re unsure, leave Virtual Machine Platform enabled and only disable the WSL-specific feature.
Why doesn’t the wsl --uninstall command work on my system? This shortcut was added in a more recent update to the WSL package and isn’t available on every Windows 11 build. If PowerShell tells you the command isn’t recognized, your WSL version is likely out of date, or your Windows installation hasn’t received the update that introduced it. In that case, use Method 2 (Settings) or Method 3 (DISM) instead, both of which work across virtually all Windows 11 versions.
How do I check if WSL is fully removed? Open PowerShell and run wsl --list or wsl --status. If WSL has been completely uninstalled, you’ll see a message saying the Windows Subsystem for Linux is not installed, rather than a list of distributions or version details. You can also check Settings > Apps > Installed apps to confirm that “Windows Subsystem for Linux” and any distro entries no longer appear, and check Settings > System > Optional features > More Windows features to confirm the WSL and Virtual Machine Platform checkboxes are unchecked.
Can I reinstall WSL later if I change my mind? Yes. Reinstalling is straightforward — open PowerShell as Administrator and run wsl --install, which re-enables the necessary Windows features, downloads the WSL package, and installs a default Linux distribution (Ubuntu, by default) in one step. If you previously used Group Policy to block WSL, you’ll need to re-enable the policy setting first before the install command will work.
Do I need to remove Virtual Machine Platform, or just the WSL feature? Removing just the “Windows Subsystem for Linux” feature is enough to stop WSL from functioning. Virtual Machine Platform is a broader Windows feature that WSL 2 depends on, but other tools can depend on it too. If you’re certain nothing else on your system needs it, disabling both gives you the most complete removal. If you’re not sure, it’s safer to leave Virtual Machine Platform enabled and just disable the WSL-specific feature.
Is there a risk of leftover files or registry entries after uninstalling? Occasionally, yes — some users report leftover folders under their user profile or residual registry keys after uninstalling WSL through Settings alone. Running through all three layers (distros, app package, and Windows features via DISM or Settings) minimizes this. If you’re troubleshooting a stubborn leftover installation, a restart after each major step and checking wsl --status along the way helps confirm each layer was actually removed before moving to the next.
Conclusion
Uninstalling WSL from Windows 11 isn’t a one-click process, but it’s straightforward once you understand the three layers involved: the individual Linux distributions, the WSL app package itself, and the underlying Windows features that make it all run. For most people, the fastest path is Method 1 — back up your files, unregister each distro, and run wsl --uninstall. If that command isn’t available on your system, Method 2’s Settings-based approach or Method 3’s PowerShell and DISM commands will get you to the same result, just with a few extra steps. And if you’re managing a shared or work computer where you want to prevent WSL from coming back, Method 4’s Group Policy option adds that extra layer of control.
Whichever method you choose, the two things worth remembering are simple: back up your data before you unregister any distribution, since that step is irreversible, and verify the removal afterward with wsl --list or a check through Settings, so you’re not left wondering whether some piece of WSL is still lingering on your system. Follow those two habits, and removing WSL from Windows 11 becomes a quick, low-risk cleanup task rather than something to dread.
If you ever want WSL back, reinstalling is just as easy as removing it was — a single wsl --install command in an administrator PowerShell window will set everything up again from scratch.





