
 Geeksdigit Team
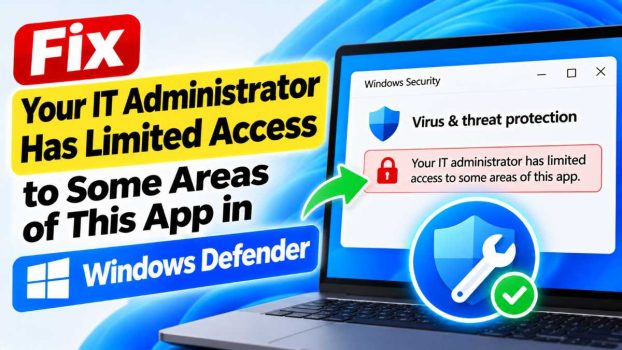
You open Windows Security to check your virus protection, and instead of the usual dashboard you get a gray banner: “Your IT administrator has limited access to some areas of this app, and items may not be available to you.” Sometimes the scan options are missing, sometimes the toggles are grayed out, and sometimes the whole Virus & threat protection page is blank.
The message sounds as if someone in your company has locked your PC. On a personal laptop or desktop with no IT department, that is confusing and a little alarming. In practice, “IT administrator” is just Windows’ generic wording for “a policy or setting is restricting this feature.” The restriction can come from several places:
- A third-party antivirus (Norton, McAfee, Avast, Kaspersky, etc.) that took over security duties and told Windows Defender to step aside
- A Group Policy or registry setting that disables or hides Defender features, sometimes left behind by “debloat” or “privacy” tools
- Malware that tampered with security settings so it could not be removed
- A corrupted Windows Security app or damaged system files
- A work or school account that applies device management rules
- Disabled Windows services that Defender depends on
The good news is that this error is almost always fixable without reinstalling Windows. The methods below run from the quickest and safest to the more advanced. Work through them in order and test Windows Security after each one.
Before you start: Make sure you are signed in with an administrator account. Several of these fixes edit system settings, and they will fail or do nothing from a standard account.
Method 1: Restart Your PC and Install Pending Updates
It sounds too simple, but a restart clears temporary glitches in Windows Security services, and updates often include fixes for Defender components.
- Save your work and restart the PC (use Restart, not Shut down, since Fast Startup can keep a broken state alive).
- Go to Settings > Windows Update and click Check for updates.
- Install everything offered, including optional quality updates, then restart again.
- Open Windows Security and see if the message is gone.
If the banner remains, move on.
Method 2: Remove or Disable Third-Party Antivirus Software
When you install another antivirus, Windows automatically turns off Microsoft Defender’s real-time protection to avoid conflicts. Even after you uninstall that product, leftover files, drivers, or registry entries can keep Defender in a restricted state, which is one of the most common triggers for this error.
- Open Settings > Apps > Installed apps.
- Look for any security products: Norton, McAfee, Avast, AVG, Kaspersky, Bitdefender, ESET, Trend Micro, and similar.
- Uninstall them and restart.
- Download the vendor’s dedicated removal tool (for example, the Norton Remove and Reinstall tool or the McAfee Consumer Product Removal tool) and run it. Standard uninstalls often leave remnants behind, and these tools clean them up.
- Restart again and open Windows Security.
If you want to keep your third-party antivirus, note that some limited access in Windows Security is normal in that case. Defender defers to the other product. If you see this message and you’re happy with your third-party antivirus, you may not need to fix anything.
Method 3: Check Your Work or School Account
If your device is joined to an organization or has a work/school account connected, management policies may apply, and some of those policies restrict Defender.
- Go to Settings > Accounts > Access work or school.
- If you see an account you don’t recognize or no longer need, select it and click Disconnect.
- Restart your PC.
If this is genuinely a company-owned laptop, don’t remove the account. The restriction is probably intentional, and you should contact your IT department. Removing the account may cut off access to company resources.
Method 4: Reset or Repair the Windows Security App
If the Windows Security app itself is corrupted, it can display restriction messages even when no policy is set.
Using Settings:
- Open Settings > Apps > Installed apps.
- Find Windows Security, click the three dots, and choose Advanced options.
- Click Repair first. Test the app.
- If that doesn’t help, click Reset.
Using PowerShell (more thorough):
- Right-click the Start button and choose Terminal (Admin) or Windows PowerShell (Admin).
- Run this command:
Get-AppxPackage Microsoft.SecHealthUI -AllUsers | Reset-AppxPackage- If you get an error, try re-registering the package:
Get-AppxPackage -AllUsers Microsoft.SecHealthUI | Foreach {Add-AppxPackage -DisableDevelopmentMode -Register "$($_.InstallLocation)\AppXManifest.xml"}- Restart your PC and open Windows Security again.
Method 5: Check Group Policy Settings (Windows Pro, Enterprise, Education)
If the Local Group Policy Editor is available on your edition of Windows, check whether a policy is disabling Defender or hiding its interface. Windows Home doesn’t include this tool, so skip to Method 6 if that’s you.
- Press Win + R, type
gpedit.msc, and press Enter. - Navigate to:
Computer Configuration > Administrative Templates > Windows Components > Microsoft Defender Antivirus - Double-click Turn off Microsoft Defender Antivirus. Set it to Not Configured (or Disabled), then click Apply and OK.
- Next, open the Real-time Protection subfolder and check that Turn off real-time protection is set to Not Configured.
- Also check:
Computer Configuration > Administrative Templates > Windows Components > Windows Security
Look through the subfolders (such as Virus and threat protection, App and browser protection, and Notifications) for any policy set to Enabled that hides areas of the interface, and set them to Not Configured. - Open Command Prompt as administrator and force a policy refresh:
gpupdate /force- Restart and test.
Method 6: Fix the Registry Entries
On Windows Home, or when Group Policy changes don’t stick, the same restrictions can be set directly in the registry. Tweaking tools and some malware write these values.
Warning: Editing the registry incorrectly can cause problems. Create a restore point or export the key before changing anything. In Registry Editor, choose File > Export to save a backup.
- Press Win + R, type
regedit, and press Enter. - Go to:
HKEY_LOCAL_MACHINE\SOFTWARE\Policies\Microsoft\Windows Defender - If you see a value named DisableAntiSpyware or DisableAntiVirus, either delete it or set its data to
0. - If a subkey named Real-Time Protection exists, check it for values such as DisableRealtimeMonitoring and set them to
0or delete them. - Then check this key:
HKEY_LOCAL_MACHINE\SOFTWARE\Policies\Microsoft\Windows Defender Security Center
If it exists, look through its subkeys (for example, Virus and threat protection, Notifications) for values like UILockdown or DisableNotifications and delete them or set them to0. - Close Registry Editor and restart your PC.
If the Policies\Microsoft\Windows Defender key doesn’t exist at all, no policy is applied there, and you can move on.
Method 7: Make Sure the Required Services Are Running
Windows Security depends on several background services. If one is stopped or disabled, the app may show restricted or missing options.
- Press Win + R, type
services.msc, and press Enter. - Check the following services:
- Security Center (wscsvc): Startup type should be Automatic (Delayed Start) and the status Running
- Microsoft Defender Antivirus Service (WinDefend): Should be Automatic and Running
- Microsoft Defender Antivirus Network Inspection Service (WdNisSvc): Should be Manual or Automatic
- Windows Security Service (SecurityHealthService): Should be Manual and running when needed
- For any that are stopped, right-click and choose Start. If the startup type is wrong, double-click the service, change it, and apply.
Note that on some systems, WinDefend appears grayed out and can’t be changed from this window. That’s normal protection against tampering. If that service is disabled and can’t be changed, a malware infection or a leftover third-party antivirus is a likely cause, so see Methods 2 and 8.
Method 8: Scan for Malware
Some malware deliberately disables Windows Defender and hides its settings. If the earlier fixes didn’t work, or the problem appeared suddenly along with other odd behavior (slow performance, pop-ups, browser redirects), scan thoroughly.
- Download the Microsoft Safety Scanner from Microsoft’s website and run a Full scan. It works even when Defender’s own interface is restricted.
- For stubborn infections, run a Microsoft Defender Offline scan if you can reach it (Windows Security > Virus & threat protection > Scan options), or use a reputable second-opinion scanner such as Malwarebytes.
- Remove anything found and restart.
- After cleaning, repeat Methods 5 and 6, because malware often re-applies policy and registry restrictions that need to be removed manually.
Method 9: Repair Corrupted System Files with SFC and DISM
Damaged system files can break Windows Security. Windows has built-in tools to repair them.
- Open Command Prompt as administrator.
- Run the System File Checker:
sfc /scannowWait for it to reach 100%.
- Then run the DISM repair commands, one at a time:
DISM /Online /Cleanup-Image /CheckHealth
DISM /Online /Cleanup-Image /ScanHealth
DISM /Online /Cleanup-Image /RestoreHealth- Restart and run
sfc /scannowonce more to confirm the system is clean. - Open Windows Security to test.
Method 10: Use System Restore or an In-Place Repair Upgrade
If none of the above works, the problem may be deep in the system, and rolling back or refreshing Windows is the next step.
System Restore:
- Press the Windows key, type Create a restore point, and open it.
- Click System Restore and choose a restore point from a date before the problem began.
- Follow the prompts. Your personal files are not affected, but apps installed after that date may be removed.
In-place repair upgrade (keeps files and apps):
- Download the Windows installation media (Media Creation Tool or ISO) from Microsoft’s website.
- Run setup.exe from within Windows, not by booting from the drive.
- Choose to keep personal files and apps, and let the installation complete.
This reinstalls Windows system files, including Windows Security, without wiping your data, and it resolves most stubborn cases. Back up important files first as a precaution.
Conclusion
The “Your IT administrator has limited access to some areas of this app” message looks serious, but it rarely means someone is actually controlling your PC. In most cases it’s a leftover third-party antivirus, a policy or registry value set by a tweaking tool, a damaged Windows Security app, or occasionally malware.
A sensible order for troubleshooting is:
- Restart and update Windows.
- Remove any third-party antivirus completely.
- Check for a work or school account.
- Reset the Windows Security app.
- Review Group Policy and registry entries.
- Verify that the required services are running.
- Scan for malware.
- Repair system files with SFC and DISM.
- Use System Restore or an in-place repair upgrade as a last resort.
Most people find the fix in the first few steps, especially removing old antivirus software or clearing the policy and registry restrictions. Whatever you do, don’t leave your PC without active protection for long. If Defender stays restricted, make sure another reputable security product is running until you’ve solved the problem.
Frequently Asked Questions (FAQ)
1. Does this error mean my computer is being controlled by someone else?
Usually not. “IT administrator” is generic wording Windows uses whenever a policy restricts something, even when no real administrator exists. On a personal PC the cause is typically a leftover antivirus, a registry or Group Policy change from a tweaking tool, or a glitch in the app. The exception is a company or school device, where the restriction may be intentional. In that case, talk to your IT team before changing anything.
2. Can malware cause this message?
Yes. Some malware changes Defender’s registry keys or policies so that scans are blocked and settings are hidden. If the message appeared suddenly and you also notice slowdowns, strange pop-ups, or unknown programs, run a full scan with Microsoft Safety Scanner or Malwarebytes, remove any threats, and then clean up the policy and registry settings described in Methods 5 and 6.
3. Is it safe to edit the registry or Group Policy to fix this?
It is safe if you’re careful and only change the specific entries described. Always back up the registry key first (File > Export in Registry Editor) or create a System Restore point. Only delete or change values related to Windows Defender and Windows Defender Security Center. Avoid changing anything you don’t recognize. If you’re not comfortable with these edits, use the other methods first or ask someone experienced.
4. Why is Windows Defender restricted after I uninstalled my other antivirus?
Windows turns Defender off when it detects another security product, and some uninstallers don’t fully reverse that change. They can leave behind drivers, services, or registry entries that still tell Windows another antivirus is active. Running the manufacturer’s dedicated removal tool, restarting, and then checking the Security Center service (Method 7) usually restores Defender’s normal operation.