 sukh22
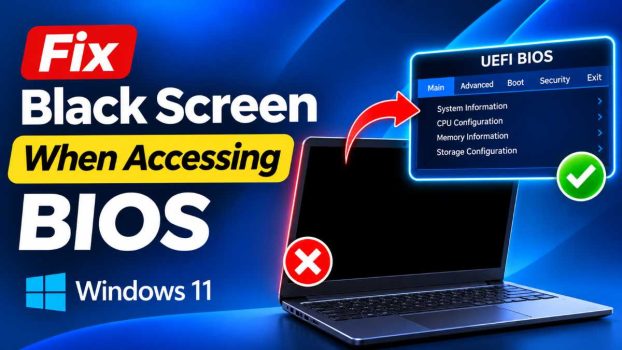
A black screen when you try to enter BIOS is stressful because it usually looks like a dead computer. In most cases it isn’t. The cause is typically a display signal problem, a setting that routes video to the wrong output, or a hardware component that isn’t seated properly. This guide goes from the quickest checks to deeper fixes, so you can stop as soon as the problem is solved.
First, Work Out What Kind of Black Screen You Have
The right fix depends on the symptom, so spend a minute identifying which of these you’re seeing:
- The PC powers on (fans spin, lights glow) but the monitor shows “No signal.” This points to a video connection, GPU, or RAM problem.
- The monitor is on and shows a black screen with a cursor or nothing at all after the logo. This often means a display mode or driver conflict, or Fast Boot skipping the point where you could enter BIOS.
- The BIOS key does nothing and Windows loads instead. Not a true black screen, but a related problem. Fast Boot or Windows Fast Startup is usually responsible.
- The screen is black only after you change a BIOS setting. A bad setting such as the wrong primary display, overclock, or CSM/UEFI mode is the likely culprit.
- The PC doesn’t power on at all. This is a power supply, power button, or motherboard problem rather than a BIOS display issue.
Keep your symptom in mind as you read on.
Step 1: Rule Out the Simple Causes
These sound obvious, but they account for a surprising share of cases.
Check the monitor input. Monitors with several ports (HDMI, DisplayPort, DVI, VGA) won’t always switch to the active one automatically. Press the monitor’s input or source button and select the correct port manually.
Reseat the video cable at both ends. A loose HDMI or DisplayPort connector can lose signal during the resolution change that happens as the PC starts up. Unplug it, wait a few seconds, and plug it back in firmly.
Try a different cable. Cables fail, especially older HDMI cables and cheap DisplayPort cables. If you have a spare, swap it in.
Try a different monitor or a TV. If the second display shows the BIOS, your original monitor or its cable is the problem, not the computer.
Disconnect extra devices. Unplug USB drives, external hard drives, printers, and extra monitors. A faulty peripheral can occasionally stall the boot process. Leave only the keyboard, mouse, and one display connected.
Step 2: Use the Right Port (The Most Common Desktop Mistake)
If you have a desktop with a dedicated graphics card, you’ll see video ports in two places: on the graphics card, and on the motherboard’s rear panel. Plug the monitor into the graphics card. If a graphics card is installed, the motherboard’s video ports are usually disabled, and plugging into them gives you a black screen.
The reverse can also be true. If your graphics card has failed or been removed, connect the monitor to the motherboard’s port and the system may display the BIOS using the processor’s integrated graphics. This works only if your CPU has integrated graphics. Many Intel chips ending in “F” and many AMD Ryzen chips without a “G” suffix do not.
Testing both ports is a useful diagnostic. If the BIOS appears on the motherboard port but not the graphics card, suspect the card. If it appears on neither, look at RAM, CPU, and power.
Step 3: Perform a Hard Reset and Power Drain
Residual electrical charge and corrupted temporary settings can cause display problems at startup. Draining the system is safe and takes a few minutes.
For desktops:
- Shut down and switch off the power supply using the switch on its back, then unplug the power cable.
- Hold the case’s power button for 15 to 30 seconds to discharge remaining power.
- Wait a minute, reconnect power, switch the supply back on, and try again.
For laptops:
- Shut down, unplug the charger, and remove the battery if it’s removable.
- Hold the power button for 30 seconds.
- Reconnect the charger (and battery), then power on and try the BIOS key.
On many laptops with built-in batteries, a long press of the power button (15 to 30 seconds) acts as a hard reset. Manufacturers such as Lenovo, HP, and Dell also publish model-specific reset procedures.
Step 4: Clear the CMOS (Reset BIOS to Defaults)
If the black screen began after a BIOS change, a failed update, or an overclock, resetting the BIOS settings often solves it. The CMOS stores your BIOS configuration, and clearing it restores factory defaults.
Method A: Use the CMOS jumper (desktops).
- Power off and unplug the computer.
- Find the CLR_CMOS, CLRTC, or JBAT1 jumper on the motherboard (check your manual).
- Move the jumper cap from pins 1-2 to pins 2-3, wait about 10 seconds, then move it back.
- Reconnect power and start the PC.
Method B: Remove the CMOS battery.
- Power off, unplug, and hold the power button for 15 seconds.
- Gently remove the coin-cell battery (typically a CR2032) from its socket.
- Wait 5 to 10 minutes, reinstall it, and power on.
Method C: Use the CLR CMOS button. Many modern motherboards have a button on the rear I/O panel or on the board itself. With the power off, press and hold it for a few seconds.
After clearing, the first boot may take longer than usual as the board retrains memory. Be patient and give it up to a couple of minutes before assuming it has failed.
Step 5: Reseat the RAM
Faulty or poorly seated memory is one of the most frequent causes of a no-display condition. If the system can’t initialize RAM, it often can’t draw anything on screen, including the BIOS.
- Power off, unplug, and (for desktops) ground yourself by touching bare metal on the case.
- Press down the clips on each RAM slot to release the modules.
- Remove the sticks and reinsert them firmly until the clips click into place on both sides.
- Try booting with a single stick in the slot recommended by your motherboard manual (often the slot second from the CPU).
- If that works, test each stick individually, and each slot, to find a bad module or slot.
Laptops with accessible memory panels can be tested the same way. If your RAM is soldered, this step doesn’t apply.
If you recently installed new RAM, remove it and test with the old modules. Incompatible or incorrectly configured memory, such as XMP or EXPO profiles that the board can’t handle, can block the display during startup.
Step 6: Check the Graphics Card
If the black screen persists and you have a dedicated GPU, check it carefully.
Reseat the card. Release the PCIe slot latch, pull the card out, and push it back in until it clicks.
Check power connectors. Make sure the 6-pin or 8-pin PCIe power cables are fully attached. A partially inserted power cable is a frequent cause of “fans spin, no display.”
Try a different PCIe slot if your board has one.
Test with integrated graphics. Remove the card, connect to the motherboard’s port, and see whether the BIOS appears. If it does, the card is the likely culprit, or its slot is.
Test the card in another PC if possible. A GPU that works elsewhere points back to the motherboard or power supply.
Step 7: Deal with Fast Boot and Windows Fast Startup
Sometimes the problem isn’t a black screen but a BIOS that never gets a chance to appear. Both the BIOS Fast Boot option and Windows Fast Startup skip or shorten the initial hardware check, so the window for pressing the BIOS key may be effectively zero. Monitors that need a moment to sync can also miss the whole sequence.
Get into BIOS from Windows (if Windows loads):
- Open Settings, then System, then Recovery.
- Under Advanced startup, choose Restart now.
- Select Troubleshoot, then Advanced options, then UEFI Firmware Settings, then Restart.
Alternatively, hold Shift while clicking Restart to reach the same menu.
Disable Windows Fast Startup:
- Open Control Panel, then Power Options.
- Choose “Choose what the power buttons do.”
- Click “Change settings that are currently unavailable.”
- Uncheck “Turn on fast startup” and save.
Once you’re in BIOS, you can also disable Fast Boot there, usually under the Boot menu.
Step 8: Use the Correct BIOS Key and Technique
If you simply aren’t hitting the right key, the system will go straight to the operating system or appear stuck. Common keys by manufacturer:
- Dell: F2 (boot menu: F12)
- HP: Esc, then F10 (or F2 on some models)
- Lenovo: F1 or F2 (some use the Novo button)
- ASUS: Del or F2
- Acer: F2 or Del
- MSI: Del
- Gigabyte: Del
- Microsoft Surface: hold Volume Up while powering on
Tap the key repeatedly right after pressing the power button rather than holding it down once, since holding can trigger a keyboard error on some boards. If you use a wireless keyboard or a USB hub, switch to a wired keyboard plugged directly into the motherboard’s USB port, because wireless dongles often aren’t active that early. A PS/2 keyboard, if your board has the port, can be more reliable still.
Step 9: Fix Display Settings Inside the BIOS (If You Can Get In Briefly)
If you can reach the BIOS but the screen goes black partway through, or goes black after you change something, these settings are worth checking:
- Primary Display / Initial Display Output: Set this to PCIe/PEG if you use a graphics card, or to IGD/Onboard if you use integrated graphics. A mismatch is a classic cause of no signal.
- CSM (Compatibility Support Module): Some GPUs, especially older models, require CSM enabled to display during POST. Newer cards often need it disabled, along with UEFI mode. If your black screen started after changing this, flip it back.
- Above 4G Decoding and Resizable BAR: Misconfigured, these can blank the display on some boards. Try disabling them temporarily.
- Secure Boot: Rarely the cause, but resetting it to default can rule it out.
- Memory profiles (XMP/EXPO/DOCP): Disable them and run at the default speed to see if the display returns.
- Overclocking options: Reset CPU, GPU, and memory tuning to defaults.
If you can’t see the screen well enough to change anything, clearing the CMOS (Step 4) is the cleaner way to reset all of these at once.
Step 10: Check for a Failed or Interrupted BIOS Update
If the black screen appeared right after a BIOS flash, or after a power cut during an update, the firmware may be corrupted. Many modern boards have a recovery mechanism:
- BIOS FlashBack / Q-Flash Plus / Flash BIOS Button (ASUS, Gigabyte, MSI, ASRock): Download the correct BIOS file from the manufacturer on another computer, rename it as instructed, copy it to a FAT32-formatted USB drive, plug it into the designated port, and press the dedicated button. It works even without a CPU or RAM installed on supported boards.
- Dual BIOS boards: Some Gigabyte and MSI boards contain a backup BIOS chip that takes over automatically or via a switch.
- Laptops: Many have emergency recovery keystrokes. Dell uses Ctrl+Esc during power-on for BIOS recovery. HP uses Windows+B. Lenovo and others have their own procedures, so search for your exact model.
Make sure you use the exact BIOS file for your motherboard revision. Flashing the wrong one can make things worse.
Step 11: Look at the Beep Codes and Debug LEDs
Your computer may already be telling you what’s wrong. Most motherboards have either diagnostic LEDs labeled CPU, DRAM, VGA, and BOOT, or a two-digit debug display. Whichever stays lit when the boot stalls tells you where the process halted:
- CPU: the processor or its power connector
- DRAM: memory
- VGA: graphics card or display initialization
- BOOT: storage or operating system
Boards that lack LEDs may use beep codes through a small speaker, and the meanings differ by BIOS vendor, so check your manual. For example, a repeating series of long beeps often indicates a memory problem, while certain patterns point to the graphics card.
Step 12: Inspect the CPU and Power Supply
If none of the steps above work, the problem may be deeper.
CPU seating and bent pins. On Intel boards, bent socket pins can prevent boot or memory detection. On AMD, check for bent processor pins. Inspect carefully with a flashlight and reseat the CPU only if you’re comfortable doing so.
Power connectors. Confirm that the 24-pin motherboard connector and the 4-pin or 8-pin CPU power connector are fully seated.
Power supply health. An aging or underpowered PSU can deliver enough juice to spin the fans but not enough to run the system correctly. If you have a spare PSU, test with it.
Short circuits. A motherboard standoff in the wrong place or a stray screw can cause a short. Remove the board’s contents and test it outside the case on a cardboard box with only the CPU, one RAM stick, and the power connections if you suspect this.
Laptop-Specific Tips
Laptops have a few extra twists:
- Test with an external monitor. If the BIOS appears on an external display, the laptop’s screen, cable, or backlight is faulty. Shine a flashlight at the screen at an angle. If you can faintly see the image, the backlight has failed.
- Press the display toggle shortcut. Keys such as Fn + F4, F5, F7, or F8 switch the output between the internal and external screens.
- Remove the battery and any docking station. Peripherals can interfere with startup.
- Check the brightness. It’s occasionally just turned all the way down.
When It’s Time to Get Help
If you’ve worked through everything above and the screen is still black, the likely culprits are a failed motherboard, CPU, or graphics card, or a failed display panel on a laptop. At that point, further testing without spare parts gets difficult. Consider:
- Contacting the manufacturer if the device is under warranty.
- Taking the machine to a repair shop for component swapping tests.
- Asking in a community such as r/techsupport or the manufacturer’s forums, listing your exact model, the symptoms, and the steps you’ve already tried.
When asking for help, include your motherboard or laptop model, what changed before the problem began, what the LEDs or beeps do, and which of the steps above you’ve completed. That detail speeds up diagnosis considerably.
Quick Troubleshooting Checklist
- Check the monitor input, cable, and another display.
- Plug into the correct port (graphics card vs. motherboard).
- Disconnect all extra peripherals.
- Power drain and hard reset.
- Clear the CMOS.
- Reseat RAM and test with one stick.
- Reseat the GPU and check its power cables.
- Disable Fast Boot and Windows Fast Startup.
- Use the correct BIOS key and a wired keyboard.
- Reset the display and CSM settings.
- Check for a failed BIOS update and use recovery tools.
- Read the debug LEDs or beep codes.
Most black-screen-at-BIOS problems are solved by one of the first six steps. Work through them methodically, change one thing at a time, and note what happens after each change. If you tell me your device model and exactly what the screen and fans do, I can help narrow it down further.