 Geeksdigit Team
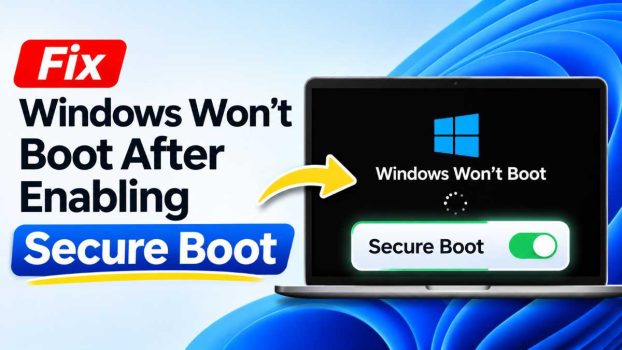
You open your BIOS, flip Secure Boot to Enabled, save and exit, and instead of the familiar Windows logo you get a black screen, a blinking cursor, or a message such as “No bootable device found,” “Secure Boot violation,” or “Invalid signature detected.” It is an alarming moment, especially if you made the change to satisfy the Windows 11 requirements or an anti-cheat system in a game.
The good news is that this problem is almost always fixable, and your files are almost certainly safe. Secure Boot does not touch your data. It only changes which boot software the firmware is willing to start. When Windows refuses to load after you enable it, the cause is nearly always one of a few things: the disk is partitioned in the old MBR style, the system is running in Legacy/CSM mode, the boot files are damaged or unsigned, or the firmware’s Secure Boot keys are missing or corrupted.
This guide explains why the problem happens and walks through nine proven methods, ordered from the quickest and safest to the most involved. Work through them in order, and stop as soon as Windows starts normally.
Why Windows Won’t Boot After Enabling Secure Boot
Secure Boot is a UEFI feature that checks the digital signature of every piece of boot software, including the bootloader, before it runs. If a signature is missing, invalid, or not trusted by the keys stored in your firmware, the computer refuses to continue. That is the security benefit, but it is also why a mismatched setup fails to boot.
The most common causes are:
- Legacy BIOS or CSM mode is still active. Secure Boot only works in pure UEFI mode. If the Compatibility Support Module (CSM) is turned on, the firmware may behave unpredictably or not boot at all.
- The system disk uses MBR instead of GPT. UEFI booting with Secure Boot expects a GPT disk with an EFI System Partition. A Windows installation made in Legacy mode on an MBR disk will not start in UEFI mode.
- Damaged or missing boot files. A corrupted Boot Configuration Data (BCD) store or EFI bootloader cannot pass verification.
- Missing or corrupted Secure Boot keys. The Platform Key (PK), Key Exchange Key (KEK), and signature databases (db and dbx) may have been cleared or may be invalid.
- Unsigned or incompatible components. Older graphics cards without UEFI GOP support, third-party bootloaders, some dual-boot setups, and unsigned drivers can all be rejected.
- Outdated firmware. Older BIOS versions sometimes have bugs in their Secure Boot implementation.
Keeping these causes in mind will help you choose the right fix quickly.
Before You Start
A few preparations will save you time and protect your data:
- Have a Windows installation USB ready. You can create one on another PC with Microsoft’s Media Creation Tool. It gives you access to the Windows Recovery Environment (WinRE), which most repair methods need.
- Note your BitLocker status. If BitLocker or Device Encryption is on, changing firmware settings can trigger a recovery-key prompt. Find your 48-digit key at account.microsoft.com/devices/recoverykey before you continue.
- Know how to enter your BIOS/UEFI. Usually this means tapping Del, F2, F10, F12, or Esc right after powering on. Check your motherboard or laptop manual if unsure.
Method 1: Disable Secure Boot to Get Back Into Windows
The fastest way to confirm Secure Boot is the cause is to turn it off again.
- Restart the computer and enter the BIOS/UEFI setup.
- Go to the Boot, Security, or Authentication tab.
- Set Secure Boot to Disabled.
- Save changes and exit (usually F10).
If Windows now starts, you have confirmed that something about your configuration is incompatible with Secure Boot. You can leave it disabled if you do not need it, or continue with the methods below to fix the underlying issue and then enable it properly. Windows 11 officially requires Secure Boot capability, so it is worth fixing rather than avoiding.
Method 2: Switch From Legacy/CSM to UEFI Mode
If your BIOS has a CSM or “Legacy Support” option, it must be disabled for Secure Boot to work.
- Enter the BIOS/UEFI setup.
- Find CSM, Legacy Support, or Boot Mode (often under Boot).
- Set the boot mode to UEFI and disable CSM.
- Make sure the Boot Option #1 entry is Windows Boot Manager rather than the raw disk name.
- Save and exit.
If Windows then fails with “No bootable device,” your disk is probably MBR-partitioned. Move on to Method 3. Do not switch back and forth between modes repeatedly without checking the disk layout, because it only wastes time.
Method 3: Convert the Disk From MBR to GPT
This is the single most common fix when Windows was originally installed in Legacy mode. Windows includes a tool called MBR2GPT that converts the disk without erasing your data.
Check your current partition style:
- Disable Secure Boot and set the firmware back to Legacy so Windows starts, or boot from the installation USB.
- Press Win + X and open Disk Management. Right-click your system disk (for example, Disk 0), choose Properties, then open the Volumes tab. “Partition style” will show either Master Boot Record (MBR) or GUID Partition Table (GPT).
Convert if it is MBR:
- Open an elevated Command Prompt. If Windows will not start, boot from the installation USB, press Shift + F10 at the setup screen, or choose Repair your computer > Troubleshoot > Command Prompt.
- Validate the disk:
mbr2gpt /validate /disk:0 /allowFullOS
- If validation passes, convert it:
mbr2gpt /convert /disk:0 /allowFullOS
- Restart, enter the BIOS, switch to UEFI mode, disable CSM, and then enable Secure Boot.
If you run the tool from WinRE rather than inside Windows, omit the /allowFullOS switch. If validation fails, the usual reasons are too many partitions (MBR2GPT needs room to create the EFI partition) or a missing Windows recovery partition. Back up important files first, because any partition tool carries some risk.
Method 4: Reset Secure Boot Keys to Factory Defaults
If Secure Boot is enabled but the key database is empty or corrupted, the firmware will reject even genuine Microsoft-signed boot files. Many boards show Secure Boot as “enabled” while it is actually in Setup Mode with no keys installed.
- Enter the BIOS/UEFI setup and open the Secure Boot or Key Management section.
- Look for options such as Restore Factory Keys, Install Default Secure Boot Keys, or Reset to Setup Mode followed by Install default keys.
- Confirm the prompt, then set Secure Boot Mode to Standard (not Custom) if offered.
- Save and exit.
On some systems the OS Type setting must read Windows UEFI Mode rather than “Other OS.” This setting appears on many Dell, HP, ASUS, and Lenovo machines and is a frequent culprit.
Method 5: Rebuild the Boot Configuration Data (BCD)
Damaged boot records are a very common reason a signed bootloader cannot load. You can rebuild them from the Windows Recovery Environment.
- Boot from your Windows installation USB and choose Repair your computer > Troubleshoot > Advanced options > Command Prompt.
- Run the following commands, pressing Enter after each:
bootrec /fixmbr
bootrec /fixboot
bootrec /scanos
bootrec /rebuildbcd
If bootrec /fixboot returns “Access is denied,” which is common on UEFI systems, use the manual method below to recreate the EFI boot files.
Method 6: Recreate the EFI Bootloader Manually
This method rewrites the boot files directly onto the EFI System Partition and works on GPT disks even when bootrec fails.
- Open Command Prompt from the recovery environment and start DiskPart:
diskpart
list disk
select disk 0
list partition
- Identify the EFI System Partition, normally a 100–550 MB partition of type System, formatted as FAT32. Select it and assign a letter:
select partition 1
assign letter=S:
exit
- Find the drive letter of your Windows installation (it is often D: in recovery; check with
dir D:\), then run:
bcdboot D:\Windows /s S: /f UEFI
- You should see “Boot files successfully created.” Remove the USB, restart, and test.
If the EFI partition is missing or damaged, you can recreate it by shrinking a volume and creating a new 260 MB partition, formatting it as FAT32, setting its type to EFI, and then running the same bcdboot command.
Method 7: Run Startup Repair and System File Checks
Windows has built-in tools that fix a wide range of boot problems automatically.
- Boot into WinRE from the installation USB.
- Choose Troubleshoot > Advanced options > Startup Repair, select your Windows installation, and let it run.
- If that does not help, open Command Prompt and run an offline scan:
sfc /scannow /offbootdir=D:\ /offwindir=D:\Windows
- Follow with a disk check:
chkdsk D: /f /r
Startup Repair sometimes needs to run two or three times before it succeeds. These scans also catch file system errors that can make a bootloader fail verification.
Method 8: Update the BIOS/UEFI and Clear the CMOS
Firmware bugs can break Secure Boot, particularly on older boards or on machines that shipped before Windows 11. Updating the BIOS often corrects key-handling problems.
- On another computer, download the latest BIOS file from your motherboard or laptop manufacturer’s support page.
- Copy it to a FAT32 USB drive and flash it using the manufacturer’s built-in utility (such as EZ Flash, M-Flash, or Q-Flash). Never interrupt the process.
- After updating, load Optimized Defaults and then reconfigure UEFI mode and Secure Boot.
If you cannot reach the BIOS screen at all, or settings appear stuck, clear the CMOS: power off, unplug the machine, and either use the motherboard’s clear-CMOS jumper or remove the coin-cell battery for about a minute. This resets the firmware to defaults, which often restores a working Secure Boot state.
Method 9: Check for Incompatible Hardware, Drivers, and Dual-Boot Setups
If the earlier methods did not work, look for components that Secure Boot rejects.
- Older graphics cards. GPUs without UEFI GOP support can produce a black screen once CSM is disabled. Check the card maker’s site for a UEFI-compatible video BIOS update, or temporarily use integrated graphics.
- Dual-boot Linux or custom bootloaders. Distributions such as Ubuntu and Fedora support Secure Boot through a signed shim, but other bootloaders, custom kernels, or modules like some proprietary graphics drivers may be rejected. Use a signed distribution or enroll your own key through MOK management.
- Unsigned peripherals and option ROMs. Some old RAID or network cards load unsigned firmware that Secure Boot blocks. Remove non-essential add-in cards while testing.
- BitLocker recovery prompts. If you see a blue recovery screen, enter your recovery key. After you regain access, you can suspend and resume BitLocker so it reseals to the new firmware configuration.
As a last resort, if none of these methods work and your data is backed up, perform an in-place upgrade repair by running setup.exe from within Windows, or do a clean installation in UEFI mode on a GPT disk. A clean install created with the USB booted in UEFI mode is guaranteed to be Secure Boot compatible.
Conclusion
When Windows will not boot after you enable Secure Boot, it feels like the computer has been broken, but in practice it is nearly always a configuration mismatch rather than damage. Secure Boot demands a UEFI-mode boot, a GPT-partitioned disk, valid and signed boot files, and a healthy set of firmware keys. When any one of those is missing, the system refuses to start.
Start by disabling Secure Boot to confirm the cause and regain access. Then work through the fixes in order: make sure CSM is off, convert the disk from MBR to GPT, restore the default Secure Boot keys, rebuild the boot files, run Startup Repair, and update the firmware. Most users resolve the problem with the MBR2GPT conversion or the key reset alone. Always back up important data and keep your BitLocker recovery key accessible before making firmware or partition changes. With a methodical approach, you can enjoy the added protection of Secure Boot, and meet the Windows 11 requirements, without losing a single file.
Frequently Asked Questions
1. Will enabling Secure Boot delete my files or erase Windows?
No. Secure Boot is a firmware setting that only controls which boot software is allowed to run. It does not modify, encrypt, or delete anything on your drive. If Windows will not start, your data is still on the disk. The only operations that put data at risk are the ones you perform while fixing the issue, such as converting partitions or reinstalling Windows, which is why a backup is recommended before those steps.
2. Can I just leave Secure Boot disabled?
Yes, Windows 10 runs fine without it, and Windows 11 will generally keep running on a machine where it was installed correctly even if Secure Boot is turned off. However, Secure Boot protects against bootkits and rootkits, and Windows 11 lists it as a requirement. Some games with kernel-level anti-cheat, such as Valorant and Battlefield titles, also demand it. If your hardware supports it, it is worth fixing the cause and enabling it.
3. How do I know if my disk is MBR or GPT?
Open Disk Management, right-click your system disk, choose Properties, and look at the Volumes tab for the Partition style. You can also open an elevated Command Prompt and type diskpart, then list disk; a GPT disk shows an asterisk in the GPT column. In Windows 10 and 11, the System Information tool (msinfo32) shows BIOS Mode as either Legacy or UEFI, which is another quick hint.
4. Why does the BIOS say Secure Boot is enabled, but Windows still won’t start?
This usually means Secure Boot is switched on while the key database is empty (Setup Mode) or the firmware is still using the wrong OS type or CSM setting. Restore the factory Secure Boot keys, set the OS type to Windows UEFI mode, disable CSM, and make sure the Windows Boot Manager is the first boot option. If the problem persists, rebuild the EFI bootloader with bcdboot and update your BIOS.