 Geeksdigit Team
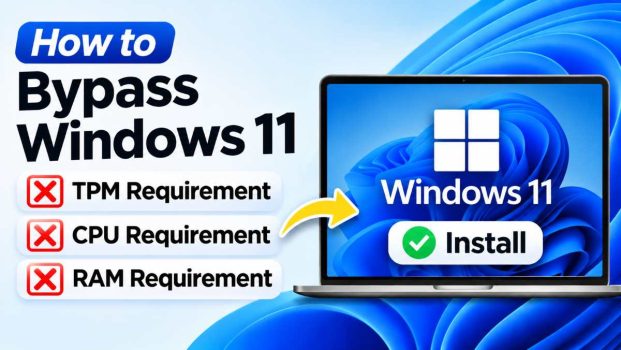
Windows 11 arrived with some of the strictest hardware requirements in the history of Windows. To install it officially, your PC needs a 64-bit processor from a supported list, at least 4 GB of RAM, 64 GB of storage, UEFI firmware with Secure Boot, and a Trusted Platform Module (TPM) 2.0 chip. Plenty of perfectly capable computers, including many laptops and desktops from 2015 to 2018, fail one or more of these checks even though they run Windows 10 smoothly.
With Windows 10 having reached the end of its regular support in October 2025, the pressure to move to Windows 11 is real. Staying on an operating system that no longer receives free security updates is a risk, and replacing working hardware is expensive and wasteful. That is why many people look for ways to install Windows 11 on machines Microsoft calls “unsupported.”
The good news is that the checks are enforced by the Windows Setup program rather than by a true technical limitation in most cases. Several well-documented methods let you skip them. This guide explains the most reliable approaches, how each one works, what they can and cannot bypass, and the risks you should understand before you proceed.
Important: Microsoft does not officially support these workarounds. Back up your data first, and treat any installation on unsupported hardware as something you do at your own risk.
What the Windows 11 Checks Actually Look For
Before choosing a method, it helps to know what you are bypassing:
- TPM 2.0: A security chip (or firmware equivalent such as Intel PTT or AMD fTPM) used for features like BitLocker and Windows Hello.
- Secure Boot: A UEFI feature that ensures only trusted software loads at startup.
- CPU: Microsoft maintains a list of supported processors, generally Intel 8th generation and newer, and AMD Ryzen 2000 series and newer.
- RAM: A minimum of 4 GB.
- Storage: A minimum of 64 GB.
Before you reach for a bypass, check your BIOS or UEFI settings. Many PCs already contain a TPM 2.0 module (called fTPM on AMD or PTT on Intel) that is simply switched off. Enabling it, along with Secure Boot, may solve part of the problem without any workaround at all. You can check your TPM status by pressing Win + R, typing tpm.msc, and pressing Enter.
Method 1: The Registry Key for In-Place Upgrades
If you are running Windows 10 and want to upgrade while keeping your files and apps, this is the simplest official-adjacent option. Microsoft itself documented a registry value that allows upgrades on machines with older TPM versions or unsupported CPUs.
Steps:
- Press Win + R, type
regedit, and press Enter. - Navigate to
HKEY_LOCAL_MACHINE\SYSTEM\Setup\MoSetup. If theMoSetupkey does not exist, right-clickSetup, choose New > Key, and name itMoSetup. - Right-click in the right-hand pane and choose New > DWORD (32-bit) Value.
- Name it
AllowUpgradesWithUnsupportedTPMOrCPU. - Double-click it and set the value to
1. - Close the Registry Editor, then download the Windows 11 ISO from Microsoft’s website.
- Mount the ISO by double-clicking it, run
setup.exe, and follow the prompts.
What it bypasses: The CPU compatibility check and the TPM 2.0 requirement. Your PC still needs at least TPM 1.2, so a machine with no TPM at all may still be blocked.
What it does not bypass: The RAM requirement and the Secure Boot requirement are not covered by this method.
Best for: People upgrading from Windows 10 who want to keep their data and settings.
Method 2: The LabConfig Registry Trick During a Clean Install
If you are performing a clean install from a USB drive, you can add bypass values during setup itself. This method is more powerful because it can skip several checks at once, including RAM.
Steps:
- Boot from your Windows 11 installation USB.
- When you see the “This PC can’t run Windows 11” message, or at the language selection screen, press Shift + F10 to open a Command Prompt.
- Type
regeditand press Enter. - Navigate to
HKEY_LOCAL_MACHINE\SYSTEM\Setup. - Create a new key named
LabConfig. - Inside
LabConfig, create the following DWORD (32-bit) values and set each to1:BypassTPMCheckBypassSecureBootCheckBypassRAMCheckBypassCPUCheckBypassStorageCheck
- Close the Registry Editor and the Command Prompt.
- Click the back arrow in the setup window, then proceed forward again. The error should be gone.
What it bypasses: TPM, Secure Boot, RAM, CPU, and storage checks. You only need to create the values for the checks you want to skip.
Best for: Clean installs on older hardware, virtual machines, or systems with less than 4 GB of RAM.
Method 3: Create a Bypass USB Drive with Rufus
Rufus is a free, open-source tool for creating bootable USB drives, and recent versions include built-in options that remove Windows 11 restrictions automatically. This is the easiest method for most people because it requires no registry editing.
Steps:
- Download the latest version of Rufus from the official website (rufus.ie).
- Download the Windows 11 ISO from Microsoft.
- Insert a USB flash drive of at least 8 GB. Everything on it will be erased.
- Open Rufus, select your USB drive, and click Select to choose the Windows 11 ISO.
- Click Start.
- When the Windows User Experience dialog appears, tick Remove requirement for 4GB+ RAM, Secure Boot and TPM 2.0.
- Optionally, tick the options to remove the online Microsoft account requirement and to skip data collection questions.
- Click OK and wait for the process to finish.
- Boot your PC from the USB drive and install Windows 11 normally.
What it bypasses: TPM 2.0, Secure Boot, and RAM checks. Rufus also modifies setup so the CPU check does not block installation in most cases.
Best for: Beginners, and anyone who wants a reusable installer for multiple older PCs.
Tip: Always download Rufus from its official site. Fake download pages and bundled installers are a common source of malware.
Method 4: Run Setup with the /product server Switch
This method works while you are already inside Windows 10 and want to upgrade in place. It tricks Windows Setup into treating the installation as a server product, which skips the compatibility check.
Steps:
- Download the Windows 11 ISO and mount it by double-clicking.
- Open a Command Prompt and navigate to the mounted drive, for example by typing
E:(replace with the correct drive letter). - Run
setup.exe /product server. - Follow the on-screen instructions. Choose whether to keep your files and apps.
What it bypasses: The compatibility appraisal, including TPM and CPU checks. The exact behavior can vary between Windows 11 versions, and newer builds of Setup may not respond to it the same way, so treat this as a fallback if the registry method fails.
Method 5: Replace appraiserres.dll in the ISO
An older approach involves editing the ISO contents. The appraiserres.dll file inside the sources folder is responsible for the hardware compatibility scan. Replacing it with an empty file can cause the scan to pass automatically.
Steps:
- Extract the Windows 11 ISO to a folder or mount it and copy the contents.
- Open the
sourcesfolder and deleteappraiserres.dll, or replace it with a zero-byte file of the same name. - Create a new ISO from the modified folder, or copy the files to a USB drive prepared for UEFI boot.
- Run setup from the modified media.
Caveat: Microsoft has changed how Setup handles this file in recent releases, so this trick works less consistently than it used to. Methods 2 and 3 are generally more dependable today.
A Limit You Cannot Bypass: Instruction Set Requirements
Some limits are not paperwork but real technical requirements. Starting with Windows 11 version 24H2, the operating system requires processors that support specific instructions, notably SSE4.2 and POPCNT. Very old CPUs, such as some early 2000s and first-generation Core 2-era chips, lack these instructions, and no registry key or custom USB can fix that. If your processor is that old, Windows 11 will fail to boot even if installation appears to proceed. In that case, a lightweight Linux distribution may be a better way to extend the life of the hardware.
Risks and Downsides to Consider
Bypassing the requirements works, but it comes with trade-offs.
Updates are not guaranteed. Microsoft has stated that unsupported PCs are not entitled to receive updates, including security updates. In practice, most people on bypassed systems continue to receive monthly updates, but major feature updates occasionally fail or require repeating the bypass.
Reduced security. The TPM and Secure Boot requirements exist for a reason. Without them, features such as device encryption, Windows Hello with hardware protection, and certain virtualization-based security protections may be unavailable or weaker.
Watermark and notices. Unsupported systems may display a message in Settings or a watermark on the desktop saying that system requirements are not met.
Performance and driver issues. Older hardware may lack Windows 11 drivers, which can cause instability, particularly with graphics, Wi-Fi, and audio devices.
Third-party ISOs. Be very careful with pre-modified or “lite” Windows 11 images from unofficial sources. They can contain malware or have security features stripped out. Always start from an official Microsoft ISO and apply the bypass yourself.
Safety Checklist Before You Start
- Back up all important files to an external drive or cloud storage.
- Note your Windows 10 product key or confirm your digital license is linked to your Microsoft account.
- Update your BIOS or UEFI firmware to the latest version.
- Check manufacturer websites for Windows 11 drivers.
- Create a recovery USB or system image so you can roll back if something goes wrong.
Conclusion
Microsoft’s hardware requirements for Windows 11 are strict, but they are not impossible to get around. For in-place upgrades from Windows 10, the AllowUpgradesWithUnsupportedTPMOrCPU registry key is the cleanest option. For clean installs, the LabConfig registry method gives you fine-grained control over which checks are skipped, while Rufus offers the fastest, most beginner-friendly route by building a pre-patched installer in a few clicks.
That said, a bypass is not a free lunch. You give up the guarantee of updates, accept some security trade-offs, and may run into driver or performance problems on very old hardware. If your PC is reasonably recent and simply has TPM or Secure Boot disabled, enable those features first. If your hardware is genuinely old, weigh the benefits of Windows 11 against alternatives such as staying on a supported-by-ESU Windows 10 plan where available, or switching to a Linux distribution.
Whichever path you choose, back up your data, use official sources, and proceed carefully.
Frequently Asked Questions
1. Is it legal to bypass the Windows 11 hardware requirements?
Yes. Installing Windows 11 on unsupported hardware is not illegal. You still need a valid license, and you are using Microsoft’s own installer. However, Microsoft does not support this configuration, so you may be denied official help, and you accept the risk of potential update issues.
2. Will I still receive Windows updates on an unsupported PC?
Usually, yes. Most users on bypassed systems continue to receive security and cumulative updates through Windows Update. Microsoft has warned, however, that it does not guarantee updates for unsupported devices, and major feature updates sometimes fail or need to be installed manually using a bypass again.
3. Can I bypass the requirements if my PC has no TPM at all?
In many cases, yes. The LabConfig registry method and Rufus both skip the TPM check entirely, so a machine without any TPM can still install Windows 11. The in-place upgrade registry key, by contrast, expects at least TPM 1.2. Keep in mind that without a TPM you will not be able to use TPM-dependent features like BitLocker’s automatic device encryption.
4. Will bypassing the requirements make my PC slower or unsafe?
Not necessarily slower, since Windows 11 performs similarly to Windows 10 on comparable hardware. Very old CPUs, limited RAM, or an HDD instead of an SSD can make it feel sluggish, though. Security is the larger concern: missing TPM and Secure Boot protections mean fewer defenses against firmware and boot-level attacks. Keep Windows Defender enabled, install updates promptly, and avoid unofficial, modified ISOs.