Geeksdigit Team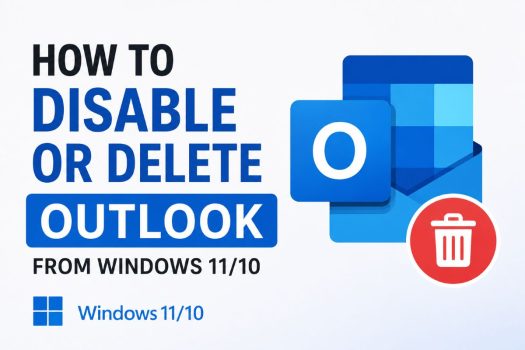
Microsoft Outlook is one of the most popular email applications available for Windows. It allows users to manage email accounts, calendars, contacts, tasks, and meetings from a single interface. Windows 11 now also includes the new Outlook app, which replaced the built-in Mail and Calendar apps on many systems. While Outlook is useful for business users and Microsoft 365 subscribers, not everyone needs it. Some users prefer another email client, while others simply want to remove Outlook to free up space, reduce background processes, or declutter the Start menu.
The method for removing Outlook depends on which version you’re using. The new Outlook for Windows behaves like a Microsoft Store app and can usually be removed through the Settings app or PowerShell. Classic Microsoft Outlook, which is included with Microsoft Office or Microsoft 365, is installed as part of the Office suite and may require modifying or uninstalling Office instead. If you don’t want to uninstall Outlook completely, Windows also lets you disable it from startup or hide it from common locations.

This guide explains the best ways to disable or remove Outlook from Windows 11 and Windows 10. Start with the easiest method and continue if Outlook remains installed or continues launching automatically.
Why Disable or Remove Outlook?
There are several reasons you may want to disable or remove Outlook.
Common reasons include:
- You use a different email application.
- You no longer need Microsoft Outlook.
- You want to reduce startup programs.
- You want to remove the new Outlook app.
- Outlook is causing problems or crashes.
- You want to free up storage space.
- You prefer web-based email services.
- You want a cleaner Start menu.
Before uninstalling Outlook, make sure you have backed up any important emails, contacts, calendars, or PST files if you’re using the classic desktop version.
Method 1: Uninstall the New Outlook Using Settings
If you’re using the new Outlook app that ships with Windows 11, the easiest removal method is through the Settings app.
Press Windows + I to open Settings.
Navigate to:
Apps > Installed apps
Scroll through the list or use the search box to locate:
Outlook (new)
or
Outlook for Windows
Click the three-dot menu beside Outlook.
Select:
Uninstall
Click:
Uninstall
again to confirm.
Windows removes the application from your computer.
After the process finishes, restart your PC if prompted.
To verify that Outlook has been removed, open the Start menu and search for Outlook. If it no longer appears, the uninstall was successful.
Method 2: Remove Outlook from the Start Menu
If you don’t necessarily want to uninstall Outlook but would rather hide it from the Start menu, you can simply unpin it.
Open the Start menu.
Locate the Outlook icon.
Right-click the icon.
Choose:
Unpin from Start
If Outlook also appears under Pinned apps, it disappears immediately after being unpinned.
You can also remove it from the taskbar.
If Outlook is pinned there, right-click its icon and choose:
Unpin from taskbar
This doesn’t uninstall Outlook—it simply removes shortcuts for a cleaner interface.
Method 3: Disable Outlook from Startup
Some versions of Outlook may launch automatically when you sign in to Windows or when other Microsoft Office components start.
To disable automatic startup:
Open Settings.
Navigate to:
Apps > Startup
Locate:
Microsoft Outlook
Turn the toggle:
Off
Alternatively, press:
Ctrl + Shift + Escto open Task Manager.
Select the Startup apps tab.
Find Microsoft Outlook.
Right-click it.
Choose:
Disable
The next time you sign in to Windows, Outlook won’t start automatically.
Disabling startup improves boot time without uninstalling the application.
Method 4: Remove Classic Outlook from Microsoft Office
If you’re using the traditional desktop version of Outlook installed with Microsoft Office or Microsoft 365, the process is different because Outlook is part of the Office suite.
Open:
Control Panel
Select:
Programs > Programs and Features
Locate:
Microsoft 365
or
Microsoft Office
Select it.
Click:
Change
Depending on your Office edition, you may see options such as:
- Quick Repair
- Online Repair
- Add or Remove Features
If Add or Remove Features is available, expand the Office applications list.
Locate:
Microsoft Outlook
Set it to:
Not Available
Continue through the installation wizard.
Office removes Outlook while leaving the remaining Office applications installed.
If your Office edition doesn’t provide individual feature selection, Outlook cannot be removed separately. In that case, you would need to uninstall the entire Office suite or continue with the alternative methods covered later in this guide.
Method 5: Remove the New Outlook Using PowerShell
If the new Outlook app cannot be removed through the Settings app or you prefer using command-line tools, PowerShell provides another reliable option.
Right-click the Start button.
Select:
Windows Terminal (Admin)
or
PowerShell (Admin)
To locate the installed Outlook package, run:
Get-AppxPackage *Outlook*Review the returned package information.
To remove the Outlook app for the current user, run:
Get-AppxPackage *Outlook* | Remove-AppxPackagePowerShell removes the application.
After the command finishes, restart your computer.
Open the Start menu and search for Outlook to verify that the application has been removed.
If Outlook is reinstalled automatically after a future Windows update, you can repeat the process or manage installed apps through the Settings app.
Method 6: Uninstall Microsoft 365 or Office
If Outlook was installed as part of Microsoft Office or Microsoft 365 and your Office edition doesn’t allow removing Outlook separately, uninstalling the Office suite is the only supported option.
Open:
Settings > Apps > Installed apps
Locate:
Microsoft 365
or
Microsoft Office
Click the three-dot menu.
Select:
Uninstall
Confirm the removal.
Windows launches the Office uninstall process.
Follow the on-screen instructions until the installation is completely removed.
Restart your computer after the uninstall finishes.
Keep in mind that removing Microsoft Office also removes other Office applications such as:
- Microsoft Word
- Microsoft Excel
- Microsoft PowerPoint
- Microsoft Access (if installed)
- Microsoft Publisher (if installed)
- Microsoft Outlook
Only use this method if you no longer require the Office suite.
Method 7: Hide Outlook Instead of Removing It
If multiple people use the same computer or you simply don’t want Outlook to appear prominently, hiding it may be a better choice than uninstalling it.
You can:
- Unpin Outlook from the Start menu.
- Remove it from the taskbar.
- Delete desktop shortcuts.
- Remove shortcuts from the Start Menu folders.
To remove the desktop shortcut:
Right-click the Outlook shortcut.
Choose:
Delete
Only the shortcut is removed.
The Outlook application itself remains installed and can still be opened through Windows Search if needed.
This method keeps Outlook available while reducing visual clutter.
Method 8: Repair or Reset Outlook Instead of Removing It
If you’re trying to uninstall Outlook because it crashes, won’t open, or behaves unexpectedly, repairing or resetting the application may solve the problem.
Repair the New Outlook
Open:
Settings > Apps > Installed apps
Locate:
Outlook
Click:
Advanced options
Select:
Repair
Windows attempts to fix the application without deleting your settings.
If the problem continues, choose:
Reset
Resetting restores Outlook to its default configuration.
Repair Classic Outlook
If you’re using Microsoft Office:
Open:
Control Panel > Programs and Features
Select:
Microsoft Office
Click:
Change
Choose:
Quick Repair
If the issue isn’t resolved, repeat the process and select:
Online Repair
These repair options often resolve Outlook problems without requiring a complete reinstallation.
Method 9: Reinstall Outlook
If you’ve removed Outlook and later decide you need it again, reinstalling it is straightforward.
For the New Outlook
Open the Microsoft Store.
Search for:
Outlook
Click:
Install
or
Get
Wait for the installation to complete.
For Classic Outlook
Sign in to your Microsoft account associated with your Microsoft 365 subscription or Office license.
Download and install Microsoft Office from your Microsoft account portal.
During installation, Outlook is installed automatically if it’s included with your Office edition.
After installation, launch Outlook and configure your email account as needed.
Method 10: Verify That Outlook Has Been Removed
After uninstalling Outlook, it’s a good idea to confirm that no shortcuts or background components remain.
Open the Start menu.
Search for:
Outlook
If no application appears, the removal was successful.
Next, open:
Settings > Apps > Installed apps
Search for:
Outlook
Confirm that it no longer appears in the installed apps list.
If you removed the classic version through Microsoft Office, verify that Outlook is no longer listed in:
Control Panel > Programs and Features
Finally, restart your computer and ensure Outlook no longer launches automatically or appears in the taskbar.
Which Outlook Version Do You Have?
Before attempting removal, it’s helpful to identify which version is installed.
New Outlook
- Installed as a Windows app.
- Replaced the Mail and Calendar apps on many Windows 11 systems.
- Can usually be removed through Settings or PowerShell.
- Receives updates through the Microsoft Store.
Classic Microsoft Outlook
- Installed with Microsoft Office or Microsoft 365.
- Includes support for PST files, Exchange Server, IMAP, POP3, and advanced enterprise features.
- May require modifying or uninstalling Office for removal.
- Updated through Microsoft Office updates.
Knowing which version you’re using helps determine the appropriate removal method.
Conclusion
Whether you’re using the new Outlook app included with Windows 11 or the classic Microsoft Outlook installed as part of Microsoft Office, Windows provides several ways to disable or remove it. The new Outlook app can usually be uninstalled directly through the Settings app or PowerShell, while the classic desktop version may require modifying or uninstalling the Microsoft Office suite. If you don’t want to remove Outlook completely, disabling it from startup or simply hiding its shortcuts can provide a cleaner Windows experience without affecting your email data.
Before uninstalling the classic version of Outlook, always ensure you’ve backed up important emails, contacts, calendars, and PST files if they’re stored locally. If Outlook is malfunctioning, consider repairing or resetting it before removing the application entirely. By following the methods in this guide, you can safely disable, hide, uninstall, or reinstall Outlook in Windows 11 and Windows 10 according to your needs.
Frequently Asked Questions
1. Can I uninstall the new Outlook app in Windows 11?
Yes. In most cases, the new Outlook app can be removed through Settings > Apps > Installed apps or by using PowerShell.
2. Can I remove Outlook without uninstalling Microsoft Office?
It depends on your Office edition. Some installations allow you to remove Outlook as an individual feature, while others require uninstalling the entire Office suite.
3. Will uninstalling Outlook delete my emails?
Removing the application doesn’t automatically delete emails stored on your email provider’s servers. However, if you use local PST files, you should back them up before uninstalling Outlook.
4. Can I reinstall Outlook later?
Yes. The new Outlook app can be reinstalled from the Microsoft Store, while the classic version can be reinstalled by installing Microsoft Office or Microsoft 365 again.