Geeksdigit Team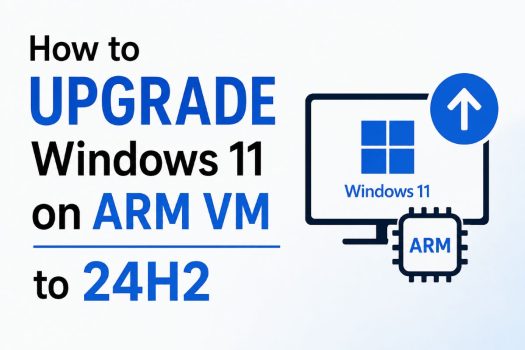
Windows 11 version 24H2 introduces several improvements for ARM-based devices, including better performance, enhanced security, updated AI features on supported hardware, improved compatibility, and the latest cumulative updates. If you’re running Windows 11 on ARM inside a virtual machine, upgrading to version 24H2 ensures you receive the newest features while keeping your apps, files, and settings intact.
Unlike a clean installation, upgrading an existing Windows 11 ARM virtual machine preserves your installed applications and personal data. Whether your VM is running in Hyper-V, VMware Fusion, VMware Workstation, Parallels Desktop, or QEMU, the upgrade process is largely the same as long as your virtualization software supports Windows 11 on ARM.

This guide explains multiple methods to upgrade an existing Windows 11 ARM virtual machine to version 24H2. Start with the simplest method and continue if your preferred approach isn’t available.
What Is Windows 11 on ARM?
Windows 11 on ARM is Microsoft’s ARM64 edition of Windows designed for devices powered by ARM processors, including Qualcomm Snapdragon chips and Apple Silicon Macs running virtualization software.
Unlike the standard x64 version, Windows on ARM includes native ARM64 applications while also supporting many traditional x64 applications through built-in emulation.
Version 24H2 includes improved performance, updated security features, enhanced compatibility, and the latest Windows platform improvements for ARM devices.
Before upgrading, it’s recommended to:
- Back up your virtual machine.
- Ensure at least 30 GB of free disk space.
- Install the latest VM software updates.
- Connect the virtual machine to the internet.
- Create a VM snapshot if your virtualization software supports it.
Method 1: Upgrade Using Windows Update
Windows Update is the easiest way to install Windows 11 version 24H2.
Open Settings by pressing Windows + I.
Select Windows Update from the left pane.
Click Check for updates.
If version 24H2 is available for your ARM virtual machine, you’ll see a feature update similar to:
Feature update to Windows 11, version 24H2
Click Download and install.
Windows downloads the required files automatically.
Depending on your internet speed, the download may take some time.
After installation finishes, click Restart now.
During the upgrade, Windows migrates:
- Installed applications
- User profiles
- Documents
- Drivers
- System settings
Once the process completes, sign in normally.
To verify the upgrade, press Windows + R, type:
winverand press Enter.
The About Windows dialog should display:
Version 24H2
If Windows Update doesn’t offer the upgrade, try the next method.
Method 2: Upgrade Using the Windows 11 ARM ISO
Microsoft periodically releases Windows 11 ARM ISO images for evaluation and development.
Download the latest Windows 11 ARM64 ISO.
Mount the ISO inside the virtual machine.
Open File Explorer.
Double-click the mounted DVD drive.
Run:
setup.exeThe Windows Setup wizard opens.
Select:
Change how Setup downloads updates
Choose whether to download updates during installation.
Click Next.
Windows checks compatibility.
Accept the license agreement.
The installer should display:
Keep personal files and apps
Leave this option selected.
Click Install.
The upgrade proceeds automatically while preserving your existing Windows installation.
Your virtual machine restarts several times during the installation.
Once finished, sign in and verify that Windows reports version 24H2.
Method 3: Upgrade Using an In-Place Repair Installation
An in-place upgrade is useful if your current Windows installation has minor issues or Windows Update repeatedly fails.
Mount the Windows 11 ARM64 ISO.
Launch:
setup.exeInstead of performing a clean installation, choose to keep:
- Personal files
- Applications
- Settings
Continue through the setup wizard.
Windows reinstalls the operating system while updating it to version 24H2.
This process often fixes corrupted system files while upgrading Windows simultaneously.
Method 4: Upgrade Using Windows Installation Assistant (If Supported)
Depending on Microsoft’s current release and your ARM device, the Windows Installation Assistant may become available.
Download the Installation Assistant.
Run the tool inside the virtual machine.
The assistant checks:
- CPU compatibility
- RAM
- TPM
- Secure Boot
- Storage
If everything passes, follow the prompts to download and install version 24H2.
The tool automatically preserves existing applications and files.
If the Installation Assistant doesn’t support ARM, continue with another method.
Method 5: Upgrade Using DISM and Setup
Administrators may prefer using Deployment Image Servicing and Management (DISM) together with Windows Setup.
Mount the Windows 11 ARM ISO.
Open an elevated Command Prompt.
Check the available Windows editions inside the ISO:
dism /Get-WimInfo /WimFile:D:\sources\install.wimReplace D: with the mounted ISO drive letter.
Launch:
setup.exefrom the mounted ISO.
Follow the normal upgrade wizard.
Although DISM is mainly used for image servicing, it helps verify installation media before beginning the upgrade.
Method 6: Upgrade Using Command Line
You can also launch Windows Setup directly from Command Prompt.
Open Command Prompt as Administrator.
Navigate to the mounted ISO.
Run:
D:\setup.exeReplace D: with your mounted drive.
To skip dynamic updates during setup, use:
D:\setup.exe /DynamicUpdate DisableWindows Setup starts normally.
Complete the upgrade wizard while keeping files and applications.
Method 7: Upgrade Offline Without Internet
If your virtual machine doesn’t have internet access, an offline upgrade works just as well.
Download the Windows 11 ARM64 ISO on another computer.
Attach the ISO to the virtual machine.
Open the mounted image.
Run:
setup.exeChoose:
Not right now
when prompted to download updates.
Continue with the installation.
After Windows upgrades successfully, reconnect to the internet and install the latest cumulative updates using Windows Update.
Method 8: Create a New 24H2 ARM VM and Migrate Data
If the existing virtual machine has become unstable or heavily modified, creating a new Windows 11 24H2 ARM VM may be a better long-term solution.
Create a new virtual machine using the latest Windows 11 ARM installation media.
Complete the installation.
Copy:
- Documents
- Pictures
- Downloads
- Desktop files
- Virtual disks
- Development projects
Reinstall any required applications.
Although this method requires more time, it provides the cleanest Windows environment and avoids problems caused by years of accumulated software changes.
Verify the Upgrade
After Windows starts successfully, verify that the upgrade completed correctly.
Press Windows + R.
Type:
winverPress Enter.
The dialog should display:
- Windows 11
- Version 24H2
- Updated OS Build
You can also verify by opening:
Settings > System > About
Review:
- Installed RAM
- Processor
- Windows specifications
- OS Build
- Version
Ensure all virtualization integration services are functioning correctly after the upgrade.
Common Upgrade Problems
If the upgrade fails, consider the following checks:
- Install the latest updates before upgrading.
- Increase available virtual disk space.
- Allocate additional RAM to the VM.
- Ensure Secure Boot and TPM are enabled if required.
- Update your virtualization software to the latest version.
- Disconnect unnecessary virtual devices.
- Temporarily disable third-party antivirus software installed inside the VM.
- Check that the downloaded ARM ISO isn’t corrupted.
If Windows Setup reports compatibility issues, verify that you’re using the ARM64 edition of Windows rather than the x64 installer.
Conclusion
Upgrading an existing Windows 11 ARM virtual machine to version 24H2 is usually straightforward and allows you to retain your applications, settings, and personal files. Windows Update remains the easiest option, but upgrading from the official ARM64 ISO using an in-place installation is often the most reliable method when feature updates aren’t offered automatically. Advanced users can also launch the upgrade from the command line or use DISM to verify installation media before starting.
Before upgrading, always back up your virtual machine or create a snapshot so you can quickly restore it if something goes wrong. After the installation is complete, verify that Windows reports version 24H2 and install any remaining updates to ensure your ARM virtual machine runs smoothly with the latest features and security improvements.
Frequently Asked Questions
1. Will upgrading to Windows 11 24H2 delete my files?
No. If you choose Keep personal files and apps, your documents, installed applications, and settings are preserved.
2. Can I upgrade from Windows 11 ARM 23H2 directly to 24H2?
Yes. Microsoft supports direct in-place upgrades from supported Windows 11 ARM versions to 24H2.
3. Do I need a new virtual machine?
No. Most users can upgrade their existing virtual machine without creating a new one.
4. Which virtual machine software supports Windows 11 ARM?
Support varies by platform, but Windows 11 ARM is commonly run using Hyper-V on ARM devices, Parallels Desktop on Apple Silicon Macs, VMware Fusion on Apple Silicon, and QEMU-based virtualization solutions.