Geeksdigit Team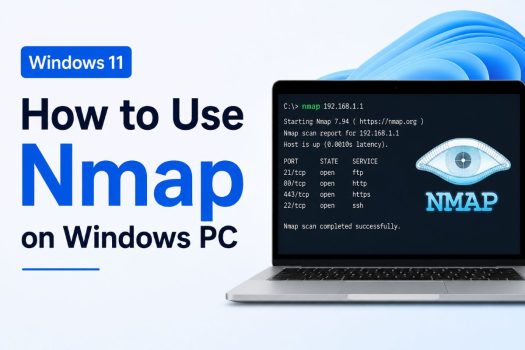
Nmap (Network Mapper) is the world’s most widely used open-source tool for network discovery and security auditing. Whether you’re a system administrator mapping out devices on your network, a cybersecurity student learning the fundamentals of penetration testing, or a home user curious about what’s connected to your Wi-Fi, Nmap gives you a fast and reliable way to find answers. While it started life as a Linux tool, Nmap now runs smoothly on Windows thanks to an official installer that bundles everything you need, including the Npcap packet-capture driver and the Zenmap graphical interface.
This guide walks you through everything you need to know about using Nmap on a Windows PC: how to install it, the different methods you can use to run it, the most useful commands for beginners, and answers to the questions people ask most often. By the end, you’ll be comfortable running your first scans and know where to go next as your skills grow.
A quick but important note before you start: Nmap is a powerful tool, and scanning networks or devices without permission can be illegal in many jurisdictions, even if no harm is intended. Always scan only networks and systems you own or have explicit written authorization to test. This guide assumes you’re using Nmap for legitimate purposes such as auditing your own home or business network, or practicing in a lab environment you control.
What Is Nmap and Why Use It on Windows?
Nmap is a free, open-source utility that scans networks to discover:
- Which hosts (devices) are online and reachable
- Which ports are open on those hosts
- What services and software versions are running on those ports
- What operating system a device is likely running
- Potential vulnerabilities, when combined with the Nmap Scripting Engine (NSE)
Network administrators use it to inventory devices and spot unauthorized systems. Security professionals use it during penetration tests to map an attack surface. IT support teams use it to troubleshoot connectivity issues. Even hobbyists use it to see exactly what’s talking to their home router.
Running Nmap on Windows used to be trickier than on Linux, but the official Windows installer has closed that gap. You get the full command-line tool plus optional companions like Zenmap (a GUI front end), Ncat (a networking Swiss Army knife), and Npcap (the packet-capture library Nmap depends on for raw socket access).
Method 1: Install Nmap Using the Official Windows Installer (Recommended)
This is the easiest and safest way to get Nmap running on Windows, and it’s the method most guides recommend for beginners.
Step 1: Download the Installer
Go directly to the official Nmap download page at nmap.org/download.html. Only download from the official site — because Nmap is a well-known security tool, it’s sometimes impersonated by fake download pages carrying malware. Under the “Microsoft Windows Binaries” section, click the self-installer link, which typically has a name like nmap-7.991-setup.exe.
Step 2: Run the Installer
Locate the downloaded .exe file, right-click it, and choose “Run as administrator.” If Windows shows a User Account Control (UAC) prompt, click “Yes” to allow it. Administrator rights are required because Nmap needs low-level network access for many of its scan types.
Step 3: Accept the License and Choose Components
Click through the license agreement, then you’ll reach the component selection screen. Unless you have a specific reason not to, leave all components checked:
- Nmap Core Files — the command-line scanning engine
- Npcap — the packet capture driver Nmap needs for most scan types
- Ncat — a modern networking utility similar to netcat
- Nping — a packet generation and network probing tool
- Zenmap — the official graphical user interface
Step 4: Complete Installation
Choose an install location (the default is fine for almost everyone), click “Install,” and wait for the process to finish. During this step, a separate Npcap installer window may pop up automatically — follow its prompts too, since Nmap won’t function correctly without it.
Step 5: Verify the Installation
Open Command Prompt or PowerShell and type:
nmap --versionIf the installation succeeded, you’ll see version details print to the screen. You’re now ready to run your first scan.
Method 2: Install Nmap via Windows Package Managers
If you’d rather skip the manual download-and-click process, Windows package managers can install Nmap with a single command. This method is popular with developers and IT professionals who already manage other software this way.
Using Winget (built into Windows 10/11):
winget install Insecure.NmapUsing Chocolatey (if you already have it installed):
choco install nmapBoth methods download the official installer behind the scenes and handle setup automatically, including Npcap. This is a great option if you’re scripting a setup process or provisioning multiple machines.
Method 3: Run Nmap Through WSL (Windows Subsystem for Linux)
If you’re comfortable with Linux or want access to the exact same Nmap experience used by most tutorials and documentation, Windows Subsystem for Linux is a solid alternative.
- Install WSL by opening PowerShell as administrator and running
wsl --install, then restart your PC if prompted. - Open your installed Linux distribution (Ubuntu is the default) from the Start menu.
- Update package lists and install Nmap:
sudo apt update
sudo apt install nmap -y
This gives you the native Linux version of Nmap running inside Windows, which can be handy if you’re following Linux-based tutorials or need scripting compatibility with a Linux environment. Keep in mind that some low-level scan types behave slightly differently under WSL because of how it handles networking, so for full-featured scanning of your local network, the native Windows installer (Method 1) is usually more reliable.
Method 4: Use Zenmap for a Graphical Interface
If typing commands isn’t your thing, Zenmap (installed automatically with Method 1) gives you a point-and-click way to use Nmap.
- Open Zenmap from the Start menu.
- Type your target in the “Target” field — this could be a single IP address, a hostname, or a whole subnet like
192.168.1.0/24. - Choose a scan type from the “Profile” dropdown, such as “Intense scan” or “Ping scan.”
- Click “Scan.”
Zenmap displays results in readable tabs, including a visual “Topology” view that maps out discovered hosts and their relationships. It’s a great way to learn what different scan types actually do before moving to the command line full-time.
Essential Nmap Commands for Windows Beginners
Once Nmap is installed, open Command Prompt or PowerShell and try these commands. Remember: the target goes at the end of the command, after your flags.
Discover live devices on your network (ping scan):
nmap -sn 192.168.1.0/24Scan a single host for open ports (default SYN scan):
nmap -sS 192.168.1.1Scan specific ports:
nmap -p 80,443 192.168.1.1Detect service versions running on open ports:
nmap -sV 192.168.1.1Try to guess the operating system of a target:
nmap -O 192.168.1.1Run a comprehensive scan (OS detection, version detection, script scanning, and traceroute):
nmap -A 192.168.1.1Control scan speed and stealth (T0 = slowest/stealthiest, T4 = fast):
nmap -T4 192.168.1.1A tip for beginners: start with -sn to see what’s on your network before running deeper scans, and use -T4 on networks you control so scans finish quickly. Save the slower, stealthier timing templates for situations where you genuinely need to minimize network impact.
Troubleshooting Common Issues
“nmap is not recognized as an internal or external command” — This means Nmap’s install folder isn’t in your system PATH. Reinstall and make sure the installer’s PATH option is enabled, or manually add the Nmap install directory (commonly C:\Program Files (x86)\Nmap) to your PATH environment variable.
Scans return no results or seem incomplete — Windows Firewall or third-party antivirus software can interfere with Nmap’s raw packet access. Try running Command Prompt as administrator, and temporarily check whether your firewall or antivirus is blocking Nmap.
“WinPcap/Npcap is required” — This means Npcap didn’t install correctly alongside Nmap. Reinstall Nmap and make sure the Npcap component is checked, or download Npcap separately from npcap.com.
Conclusion
Getting Nmap running on Windows is far simpler than it used to be, and you now have four solid ways to do it: the official installer for most users, package managers like Winget or Chocolatey for a quick command-line install, WSL for a native Linux experience, and Zenmap if you prefer a visual interface. From there, a handful of core commands — ping scans, port scans, version detection, and OS detection — will cover the vast majority of what most people need day to day.
As you grow more comfortable, you can explore the Nmap Scripting Engine (NSE) for vulnerability detection, output formatting for reporting, and more advanced timing and evasion controls. Just remember the golden rule: only scan networks and devices you own or have explicit permission to test. Used responsibly, Nmap is one of the most valuable tools you can have in your networking or security toolkit.
Frequently Asked Questions
Is Nmap legal to use on Windows? Nmap itself is completely legal software, free to download and use. What matters is what you scan. Scanning networks or devices you own, or that you have explicit written permission to test, is legal in virtually all jurisdictions. Scanning systems without authorization can violate computer misuse laws, such as the U.S. Computer Fraud and Abuse Act, and similar legislation elsewhere, even if you don’t cause any damage.
Do I need administrator privileges to run Nmap on Windows? For most scan types, yes. Nmap’s default SYN scan and OS detection rely on raw socket access, which Windows restricts to administrator accounts. You can run some basic scans, like a plain TCP connect scan, without admin rights, but for full functionality, always open Command Prompt or PowerShell as administrator.
Why do I need Npcap, and is it safe to install? Npcap is the packet-capture driver that lets Nmap send and receive raw network packets on Windows, something the operating system doesn’t allow by default. It’s developed by the same team behind Nmap and is the modern, actively maintained successor to the older WinPcap library. It’s safe as long as you get it from the official Nmap installer or npcap.com directly.
Can Nmap scan my whole home network at once? Yes. You can scan an entire subnet using CIDR notation, for example nmap -sn 192.168.1.0/24, which pings every address in that range and reports which devices respond. This is a great way to get a quick inventory of everything connected to your router. Just make sure it’s your own network before you scan it.