
 Geeksdigit Team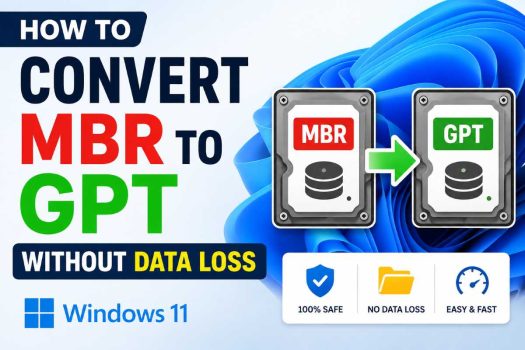
If you’ve recently tried to upgrade to Windows 11 or install it fresh on an older PC, you may have run into a roadblock: Windows 11 requires your system disk to use the GPT (GUID Partition Table) partitioning scheme along with UEFI boot mode and TPM 2.0. Many older computers, however, still run on the legacy MBR (Master Boot Record) scheme paired with BIOS/Legacy boot mode — a setup that was standard for decades but is now incompatible with Windows 11’s stricter hardware requirements.
The good news is that you don’t need to wipe your drive, reinstall Windows, and start from scratch just to switch partition styles. Microsoft and several third-party developers have built tools specifically to convert a disk from MBR to GPT while keeping your operating system, applications, files, and settings completely intact.

In this guide, you’ll learn exactly what MBR and GPT are, why the distinction matters for Windows 11, and — most importantly — several proven methods to convert your disk from MBR to GPT without losing a single file. We’ll walk through Microsoft’s built-in MBR2GPT tool, explain why some common methods (like Disk Management) are destructive and should be avoided, and cover reliable third-party alternatives. We’ll close with a conclusion and answer four frequently asked questions.
Understanding MBR vs. GPT
Before diving into the conversion process, it helps to understand the basics:
- MBR (Master Boot Record) is an older partitioning scheme dating back to the 1980s. It supports a maximum of four primary partitions and disks up to 2TB in size. It uses BIOS-based legacy boot.
- GPT (GUID Partition Table) is a modern partitioning standard that supports virtually unlimited partitions and drives larger than 2TB. It works with UEFI firmware, which enables faster boot times, Secure Boot, and is a hard requirement for Windows 11.
Because Windows 11 mandates UEFI and Secure Boot for security reasons, your system drive must be GPT — not MBR — for the installation or upgrade to proceed.
How to Check If Your Disk Is MBR or GPT
Before attempting any conversion, confirm your current partition style:
Press Windows key + R, type diskmgmt.msc, and press Enter to open Disk Management.
Right-click your disk (usually Disk 0) in the lower panel and select Properties.
Go to the Volumes tab and check the Partition style field — it will say either “Master Boot Record (MBR)” or “GUID Partition Table (GPT).”
Alternatively, open Command Prompt or PowerShell as Administrator and run:
diskpart
list disk
Disks marked with an asterisk (*) under the “GPT” column are already using GPT. If there’s no asterisk, the disk is MBR.
Before You Begin: Backup Your Data
Even though the methods below are designed to preserve your data, converting a disk’s partition style is a significant, low-level operation. It’s always wise to create a full backup or system image before proceeding, using Windows’ built-in Backup and Restore tool, File History, or a third-party backup utility. This gives you a safety net in case of an unexpected power loss or hardware issue during conversion.
Method 1: Use Microsoft’s Built-In MBR2GPT Tool
Microsoft introduced MBR2GPT.exe starting with Windows 10 version 1703, and it remains fully supported in Windows 11. This is the official, no-cost, non-destructive way to convert your system disk from MBR to GPT without touching your files.
Requirements
- The disk being converted must be the system/boot disk.
- The disk must have fewer than 4 primary partitions (or fewer than 3 if using a recovery partition).
- Windows must be running in BIOS/Legacy mode currently.
Steps
- Open Command Prompt as Administrator. Search for “cmd” in the Start menu, right-click Command Prompt, and choose Run as administrator.
- Validate the disk first (this checks compatibility without making changes):
mbr2gpt /validate /disk:0 /allowFullOS
Replace 0 with your actual disk number if different. The /allowFullOS flag is required because, by default, MBR2GPT expects to run from Windows Preinstallation Environment (WinPE), not a fully booted OS.
- If validation succeeds, run the actual conversion:
mbr2gpt /convert /disk:0 /allowFullOS
- Wait for the tool to complete the conversion. It typically takes under a minute since it only rewrites the partition table metadata — your files, folders, and installed programs are untouched.
- Restart your computer and enter the BIOS/UEFI settings (commonly by pressing F2, F10, Del, or Esc during boot — check your manufacturer’s key). Switch the boot mode from Legacy/CSM to UEFI, then save and exit.
- Boot back into Windows to confirm everything loads correctly. You can re-check the partition style using the steps above to confirm it now reads “GPT.”
Why This Method Is Ideal
MBR2GPT was purpose-built by Microsoft for exactly this scenario. It doesn’t delete or move your data — it converts the underlying partition table structure and recreates the necessary boot files for UEFI, all while your files remain exactly where they were.
Method 2: Use Third-Party Partition Management Software
If MBR2GPT fails validation (for example, due to too many partitions or an unsupported disk layout), third-party partition management tools offer a graphical, often more flexible alternative. Popular options include:
- AOMEI Partition Assistant
- EaseUS Partition Master
- MiniTool Partition Wizard
These tools include a “Convert MBR to GPT” or “Convert to GUID Partition Table Disk” feature that works without deleting partitions.
General Steps (similar across most tools)
- Download and install your chosen partition manager from the developer’s official website.
- Launch the program and locate your system disk in the main window.
- Right-click the disk and select the Convert MBR Disk to GPT Disk option (wording varies slightly by software).
- Confirm the operation. Most tools will queue this as a “pending operation.”
- Click Apply or Commit to execute the changes. The software will typically need to restart your PC into a special pre-boot environment to safely perform the low-level conversion.
- Once complete, boot back into Windows, then switch your firmware boot mode to UEFI in the BIOS settings, just as in Method 1.
Advantages
These GUI tools are beginner-friendly, often support additional disk management tasks (resizing, merging, cloning partitions), and can sometimes succeed in edge cases where MBR2GPT’s stricter validation checks fail.
Method 3: Clean Install with Data Migration (Alternative Approach)
If your disk has a complicated partition layout that neither MBR2GPT nor third-party tools can convert safely, another (more time-consuming) option is to:
- Back up your entire system using a disk imaging tool or by copying files to an external drive/cloud storage.
- Boot from Windows 11 installation media.
- Delete the existing partitions during setup (this converts the disk’s underlying style when a fresh GPT partition table is created).
- Reinstall Windows 11 fresh.
- Restore your personal files and reinstall applications from your backup.
While this method technically involves “data loss” in the sense that the drive is wiped, your data is never actually lost because it’s fully preserved in your backup and restored afterward. This is typically considered a last resort, reserved for disks with partition configurations too complex for direct in-place conversion.
Method 4: Using DiskPart’s Clean Command (For New/Empty Disks Only)
It’s worth clarifying a common point of confusion: many guides mention using diskpart with the clean and convert gpt commands. This approach does erase all data on the target disk, so it is only appropriate for secondary/empty drives, not your data-containing system disk. For a true no-data-loss conversion of your active Windows installation, stick to Method 1 or Method 2 above.
Common Errors and Troubleshooting
Even with a straightforward tool like MBR2GPT, you may occasionally run into errors. Here are a few of the most common ones and how to address them:
- “Disk layout validation failed for disk 0.” This usually means your disk has more partitions than MBR2GPT can handle, or an unsupported partition type is present (such as a dynamic disk instead of a basic disk). Try converting a dynamic disk to basic first using Disk Management, but only if it contains no critical volumes, or switch to a third-party tool instead.
- “Cannot find OS partition(s) for disk 0.” This typically occurs when Windows isn’t installed on the disk you specified, or the disk number is incorrect. Double-check the disk number using
list diskin diskpart before retrying. - PC won’t boot after switching to UEFI mode. If your computer fails to boot after you change the BIOS setting from Legacy to UEFI, go back into the BIOS and confirm that Secure Boot and UEFI boot mode are both enabled, and that Legacy/CSM support is fully disabled. Some motherboards also require you to manually select the new UEFI boot entry from the boot order menu the first time.
- “The specified disk is not a fixed MBR disk.” This message appears if you attempt to convert a disk that’s already GPT, or if you specified the wrong disk number. Re-run
list diskto confirm which disk needs conversion.
If you hit a wall with any of these issues, don’t panic — as long as you haven’t run a destructive command like diskpart clean, your data remains safe on the disk. Take a step back, verify your disk configuration, and try again with the corrected parameters, or fall back to a third-party GUI tool for a more guided experience.
Tips for a Smooth Conversion
A few extra precautions can make the process go more smoothly:
- Update your drivers first. Before switching to UEFI boot mode, ensure your storage controller (AHCI/RAID) drivers are up to date, as some older systems can experience boot issues if drivers aren’t UEFI-compatible.
- Check for pending Windows updates. Install any pending updates and restart your PC before starting the conversion, since a clean, fully updated system reduces the chance of unexpected errors mid-process.
- Close background applications. Disk-intensive background tasks, such as antivirus scans or cloud sync services, can occasionally interfere with low-level disk operations. Pausing them beforehand is good practice.
- Note your BIOS key in advance. Since you’ll need to enter the BIOS/UEFI settings immediately after conversion, know your manufacturer’s specific key (commonly F2, F10, F12, Del, or Esc) so you aren’t left guessing during restart.
- Keep a bootable USB recovery drive on hand. Creating a Windows 11 bootable USB drive beforehand gives you a way to troubleshoot or reinstall if something goes wrong, providing extra peace of mind throughout the process.
Verifying the Conversion Was Successful
After completing your chosen method and switching your BIOS to UEFI mode:
- Boot into Windows normally to confirm no errors occur.
- Reopen Disk Management or use
diskpart→list diskto confirm the disk now shows GPT. - Check System Information (
msinfo32) — the BIOS Mode field should now read “UEFI” instead of “Legacy.” - Run the PC Health Check app (available from Microsoft) to confirm your system now meets Windows 11’s compatibility requirements, assuming TPM 2.0 and Secure Boot are also enabled.
Conclusion
Converting your disk from MBR to GPT no longer has to mean backing up everything, wiping your drive, and starting over. Thanks to Microsoft’s built-in MBR2GPT tool, most users can perform this conversion directly from a running Windows installation in just a few minutes, with zero data loss. For more complex partition layouts, third-party tools like AOMEI Partition Assistant, EaseUS Partition Master, or MiniTool Partition Wizard provide user-friendly, graphical alternatives that accomplish the same result.
Whichever method you choose, remember to back up your important files beforehand as a safety precaution, switch your firmware from Legacy/BIOS to UEFI mode after conversion, and verify everything is working correctly before considering the process complete. With your disk successfully converted to GPT and UEFI enabled, you’ll be fully prepared to install or upgrade to Windows 11 — and you’ll also benefit from GPT’s improved reliability, larger partition support, and Secure Boot protection along the way.
Frequently Asked Questions
1. Will converting from MBR to GPT delete my files?
No — not if you use the proper methods described above (MBR2GPT or a reputable third-party partition tool). These tools convert the underlying partition table structure without touching the actual data stored on the disk. That said, it’s always recommended to have a backup before performing any low-level disk operation, just as a safety precaution against unexpected interruptions like power outages.
2. Do I need to convert to GPT if I only want to use Windows 10, not Windows 11?
No. GPT is not a strict requirement for Windows 10 — it can run on either MBR or GPT disks. Conversion is only necessary if you plan to install or upgrade to Windows 11, which requires UEFI and GPT for its enhanced security features, or if you have a drive larger than 2TB that you want to use to its full capacity.
3. What happens if the MBR2GPT validation check fails?
If mbr2gpt /validate returns an error, it usually means your disk has more partitions than the tool supports, or it isn’t currently the active boot disk in BIOS/Legacy mode. In this case, try a third-party partition manager like AOMEI Partition Assistant or EaseUS Partition Master, which often handle more complex partition layouts. Reviewing the specific error code returned can also help pinpoint the exact issue.
4. Can I convert back from GPT to MBR later if needed?
Yes, technically it’s possible to convert a disk back from GPT to MBR, though it’s far less commonly needed. Microsoft doesn’t provide a reverse “GPT2MBR” tool, so this typically requires third-party partition software or a clean reinstall with the disk repartitioned as MBR. Keep in mind that reverting to MBR would make the disk incompatible with Windows 11 again, since GPT is a hard requirement for that operating system.




