
 Geeksdigit Team
Storage drives can develop errors over time due to unexpected shutdowns, power failures, corrupted system files, bad sectors, malware, or hardware issues. These problems may cause your computer to slow down, display disk-related error messages, prevent files from opening, or even stop Windows from booting properly. Fortunately, Windows 11 and Windows 10 include several built-in tools that can detect and repair many common drive problems without requiring third-party software.
Whether you’re using a traditional Hard Disk Drive (HDD), a Solid State Drive (SSD), or an external storage device, it’s important to address disk errors as soon as possible. Ignoring them may lead to data corruption, application crashes, or permanent data loss if the underlying issue worsens. Windows provides multiple repair options, ranging from simple error checking to advanced command-line utilities that can scan for and fix file system errors, recover readable data, and repair damaged system files.

In this guide, you’ll learn the best ways to repair a drive in Windows 11 and Windows 10. These methods cover both internal and external drives and can help resolve common storage issues while protecting your important files.
What Does Drive Repair Mean?
Drive repair is the process of scanning a storage device for file system errors, corrupted sectors, damaged system files, or other issues that may affect its performance or reliability. Windows includes several utilities, such as Error Checking, CHKDSK, SFC, and DISM, that can identify and repair many software-related drive problems.
It’s important to note that while these tools can fix logical errors, they cannot permanently repair physical hardware damage. If a drive has severe hardware failures or numerous bad sectors, replacing it may be the best long-term solution.
Method 1: Use the Error Checking Tool
Windows includes a built-in Error Checking utility that scans a drive for file system errors and repairs them automatically when possible.
To use Error Checking:
Open File Explorer.
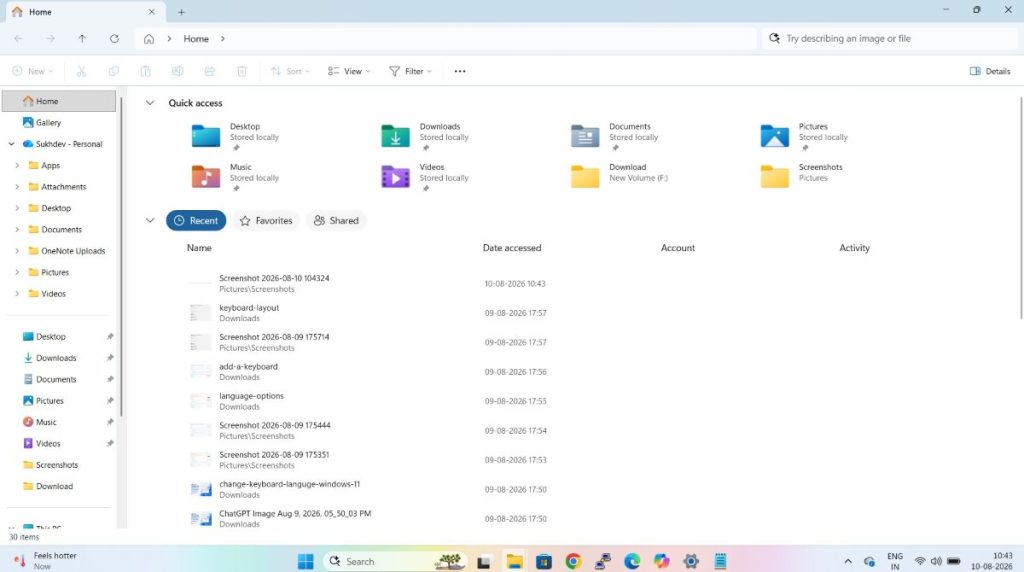
Click This PC.
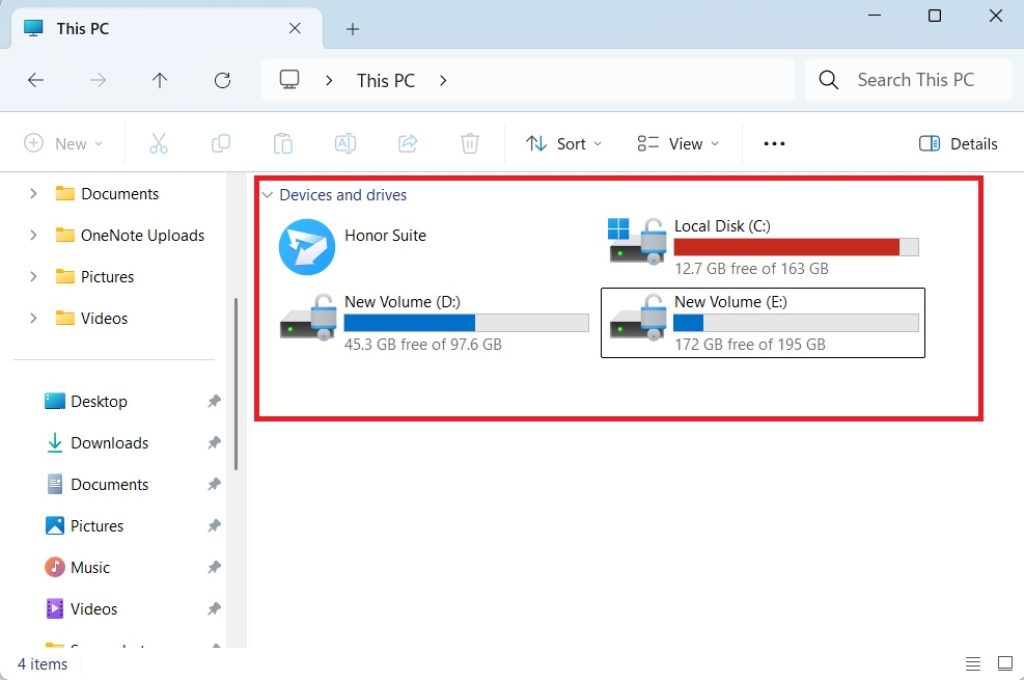
Right-click the drive you want to repair.
Select Properties.
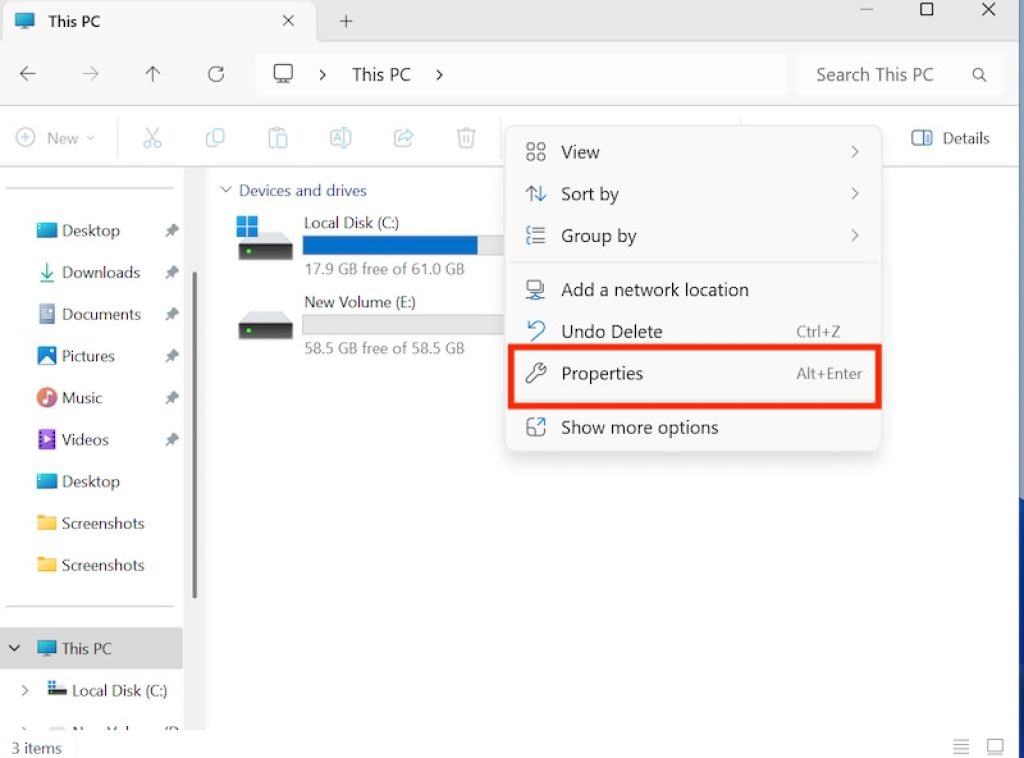
Open the Tools tab.
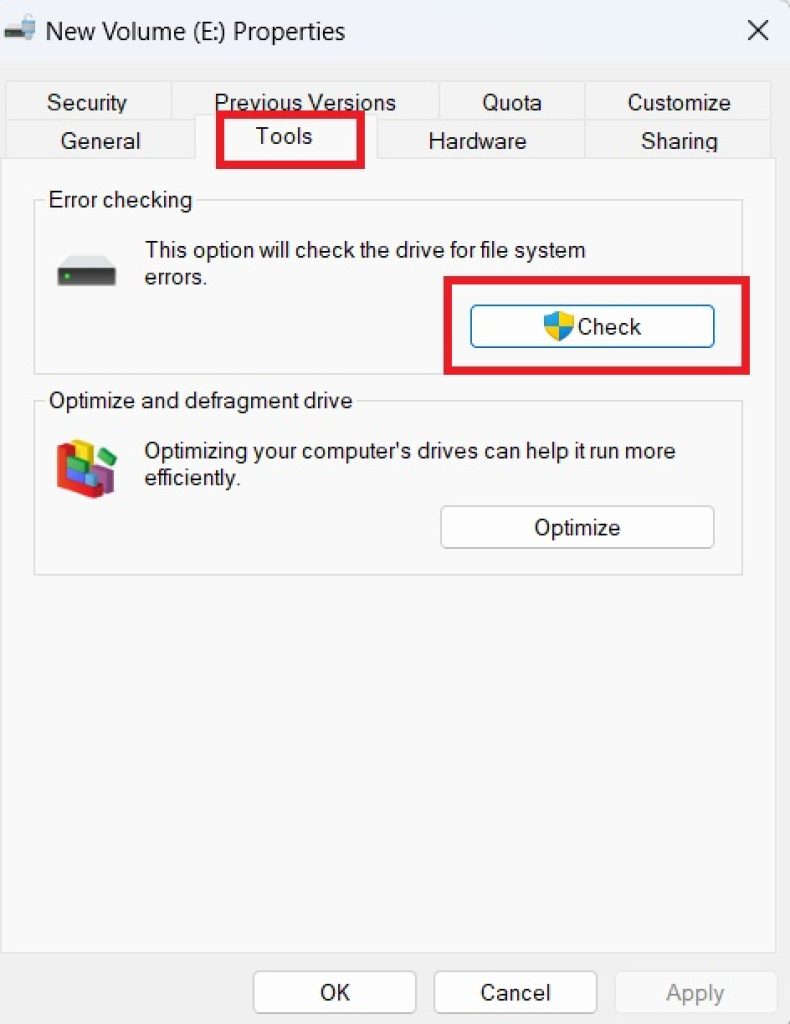
Under Error checking, click Check.
If Windows finds errors, follow the on-screen instructions to repair the drive.
If no errors are detected, Windows will inform you that the drive appears healthy. You can still choose to scan it manually if you suspect hidden issues.
Method 2: Run CHKDSK from Command Prompt
Check Disk (CHKDSK) is one of the most effective Windows tools for repairing file system errors and identifying bad sectors.
To run CHKDSK:
- Press Windows + S.
- Search for Command Prompt.
- Right-click it and select Run as administrator.
- Type the following command:
chkdsk C: /fReplace C: with the drive letter you want to scan.
If you’re checking the Windows system drive, you may receive a message asking whether you want to schedule the scan during the next restart. Type:
YThen restart your computer.
The /f parameter repairs file system errors automatically.
Method 3: Scan for Bad Sectors
If you suspect physical problems with the drive, use CHKDSK with the /r option.
Run:
chkdsk C: /rThe /r switch scans the drive for bad sectors, attempts to recover readable data, and marks damaged sectors so Windows avoids using them in the future.
Because this scan is much more thorough, it may take a long time to complete, especially on large HDDs.
Method 4: Repair System Files Using SFC
Sometimes drive-related issues are actually caused by corrupted Windows system files. The System File Checker (SFC) scans protected operating system files and replaces damaged versions with healthy copies.
To run SFC:
- Open Command Prompt as Administrator.
- Enter:
sfc /scannowPress Enter.
Wait until the scan reaches 100%.
If corrupted system files are found, Windows repairs them automatically.
Restart your computer after the scan finishes.
Method 5: Repair the Windows Image with DISM
If SFC cannot repair damaged files, use the Deployment Image Servicing and Management (DISM) tool.
Open Command Prompt as Administrator and run:
DISM /Online /Cleanup-Image /RestoreHealthDISM downloads healthy system components from Windows Update and repairs the Windows image.
After DISM completes successfully, run:
sfc /scannowagain to repair any remaining corrupted files.
Method 6: Use Windows Security and Virus Scan
Malware infections can corrupt files, damage partitions, or interfere with normal drive operations.
Run a full antivirus scan:
- Open Settings.
- Navigate to Privacy & Security > Windows Security.
- Open Virus & threat protection.
- Click Scan options.
- Choose Full scan.
- Click Scan now.
Allow Windows Security to remove any detected threats before checking the drive again.
Method 7: Check Drive Health Using Windows Settings
Windows 11 includes a Storage Health feature for supported SSDs that provides information about the drive’s condition.
To view it:
- Open Settings.
- Go to System > Storage.
- Select Advanced storage settings.
- Click Disks & volumes.
- Select your SSD.
- Choose Properties.
If supported, Windows displays health information such as estimated remaining life, available spare capacity, and temperature.
If Windows reports serious health issues, back up your important files immediately.
Method 8: Repair an External Drive
External USB drives and flash drives may develop file system errors if disconnected improperly.
To repair an external drive:
- Connect it directly to your PC.
- Open File Explorer.
- Right-click the drive.
- Choose Properties.
- Open the Tools tab.
- Click Check.
If the drive doesn’t appear in File Explorer, reconnect it, try another USB port, or test it on another computer.
Method 9: Run Startup Repair (If Windows Won’t Boot)
If disk errors prevent Windows from starting, Startup Repair may resolve the issue.
To access Startup Repair:
- Turn off your PC.
- Turn it back on and interrupt the boot process three times to enter the Windows Recovery Environment.
- Select Troubleshoot.
- Choose Advanced options.
- Click Startup Repair.
- Select your Windows installation.
- Allow Windows to diagnose and repair startup issues automatically.
This tool repairs boot-related files and configuration problems without affecting your personal data.
Method 10: Back Up Your Data and Replace a Failing Drive
If repeated scans continue reporting bad sectors or the drive frequently disconnects, freezes, or makes unusual noises (in the case of HDDs), the hardware may be failing.
In such situations:
- Back up all important files immediately.
- Avoid storing new data on the drive.
- Monitor the drive for worsening symptoms.
- Replace the drive as soon as possible.
For SSDs, frequent SMART warnings or health reports indicating critical wear are signs that replacement should be considered.
Replacing a failing drive before complete failure helps prevent permanent data loss.
Conclusion
Windows 11 and Windows 10 provide several powerful tools for repairing drive errors without requiring third-party software. Built-in utilities like Error Checking, CHKDSK, SFC, DISM, and Startup Repair can resolve many common file system issues, repair corrupted system files, and restore normal drive operation.
If these tools repeatedly detect errors or your drive continues to experience problems, the issue may be hardware-related rather than software-related. In that case, backing up your files and replacing the drive is the safest solution. Regular maintenance, proper shutdown procedures, and monitoring your drive’s health can help prevent many storage-related problems before they become serious.
Frequently Asked Questions
Can Windows repair a damaged drive?
Yes. Windows can repair many logical file system errors using built-in tools such as Error Checking and CHKDSK. However, it cannot permanently repair physical hardware damage.
Does CHKDSK delete files?
No. CHKDSK is designed to repair file system errors while preserving your data. However, if files are severely corrupted or stored in damaged sectors, some data may not be recoverable.
How long does a drive repair take?
The time depends on the drive’s size, speed, and condition. A basic scan may finish within a few minutes, while a full CHKDSK scan with bad sector recovery can take several hours.
Should I replace a drive with bad sectors?
If a drive continues developing new bad sectors or repeatedly reports hardware errors, replacing it is recommended. Continuing to use a failing drive increases the risk of data loss.





