Geeksdigit Team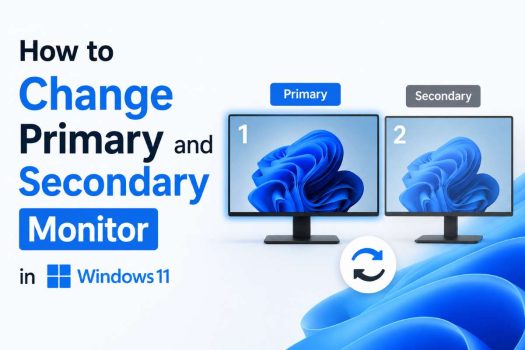
Working with two or more monitors is one of the simplest ways to boost productivity on Windows 11. Whether you’re a developer juggling code editors and documentation, a video editor previewing timelines while working on a second screen, or someone who just wants email open on one display while working on the other, a multi-monitor setup can make a real difference to how efficiently you work.
But a multi-monitor setup only works well when Windows knows which screen should behave as your “main” display. This is where the concept of a primary monitor comes in. The primary monitor is the screen that hosts your taskbar, Start menu, notifications, and the default location where new apps and windows open. Your secondary monitor, on the other hand, acts as an extension of your desktop, giving you extra space to spread out windows, reference materials, or media.

Sometimes, after connecting a new monitor, updating your graphics drivers, or simply rearranging your desk, Windows 11 may assign the wrong display as primary. Maybe your laptop screen is set as primary when you’d rather have your external monitor take that role, or your two monitors are swapped in a way that makes your mouse cursor jump in confusing directions when you move between them. Fortunately, Windows 11 makes it fairly straightforward to fix this through the Settings app.
In this guide, we’ll walk you through exactly how to change your primary and secondary monitor in Windows 11, step by step, along with tips for getting your display arrangement to match your physical desk setup. We’ll also cover some frequently asked questions to help you troubleshoot common issues along the way.
Why Does It Matter Which Monitor Is Primary?
Before diving into the steps, it helps to understand why this setting matters:
- Taskbar and Start menu placement: By default, the taskbar and Start menu appear only on the primary monitor (unless you’ve configured the taskbar to show on all displays).
- Default app launch location: Most applications open on the primary monitor when first launched, unless you manually move them.
- Full-screen games and apps: Games and certain full-screen applications typically default to displaying on the primary monitor.
- Login screen and lock screen: The Windows login and lock screens usually appear on the primary display.
- Cursor movement logic: The relative positions of your primary and secondary monitors (left, right, above, below) determine how your mouse cursor moves between them, which needs to match your physical monitor arrangement for a smooth experience.
Getting this setting right means your workflow feels natural, and your cursor moves the way you expect when you glance from one screen to another.
Method: How to Change Primary and Secondary Monitor in Windows 11
Here is the complete step-by-step method to change which monitor is treated as primary and which is treated as secondary in Windows 11.
Step 1: Open Display Settings
There are a few ways to get to the Display settings page, so use whichever is fastest for you:
- Right-click method: Right-click on any empty area of your desktop and select Display settings from the context menu.
- Settings app method: Click the Start button, open Settings, then navigate to System > Display.
- Keyboard shortcut method: Press Windows key + I to open Settings directly, then click on Display in the System section.
Any of these will take you to the same place: the Display settings page, where Windows shows a visual representation of all connected monitors.
Step 2: Identify Your Monitors
At the top of the Display settings page, you’ll see numbered boxes representing each monitor connected to your PC. Windows assigns a number to each display (1, 2, 3, and so on), and these numbers also appear briefly on your physical screens if you click the Identify button.
Take a moment to click Identify so you know exactly which numbered box on the screen corresponds to which physical monitor on your desk. This step avoids confusion, especially if you have three or more displays connected, or if your monitors are similar in size and easy to mix up.
Step 3: Rearrange the Monitor Layout (Optional but Recommended)
Before changing the primary display, it’s worth confirming that the on-screen arrangement of monitor boxes matches your actual physical desk setup. If your right-hand monitor is shown on the left side in the Display settings layout (or vice versa), your mouse cursor will feel “backwards” when moving between screens.
To fix this:
- Click and drag the numbered monitor boxes in the Display settings window until their arrangement matches your physical setup.
- Click Apply to save the new layout.
This step isn’t strictly required to change your primary monitor, but it’s highly recommended, since an accurate layout makes your entire multi-monitor experience feel intuitive.
Step 4: Select the Monitor You Want as Primary
Click on the numbered box representing the monitor you want to designate as your primary display. Once selected, the box will be highlighted, and additional display options will appear below the monitor layout diagram, including resolution, orientation, and scaling settings for that specific display.
Step 5: Enable “Make This My Main Display”
Scroll down slightly until you see a section labeled Multiple displays. Here, you’ll find a checkbox that says:
“Make this my main display”
Check this box for the monitor you selected in Step 4. Windows 11 will automatically:
- Move your taskbar, Start menu, and notification icons to this display.
- Set this monitor as the default location for new windows and app launches.
- Automatically designate your other connected monitor(s) as secondary displays.
Note: If the monitor you selected is already set as primary, this checkbox will be greyed out and unavailable, since a monitor can’t be made primary a second time.
Step 6: Confirm the Change
Once you’ve checked the box, Windows applies the change almost instantly. Your taskbar should visibly shift to the newly designated primary monitor, confirming the change was successful.
If you don’t see the taskbar move immediately, try clicking elsewhere on the Display settings page or clicking Apply if that button is visible. In rare cases, you may need to click on the desktop or reopen the Start menu for the visual change to register.
Step 7: Adjust Additional Settings for Your New Layout (Optional)
With your primary monitor now set correctly, it’s a good time to review a few related settings that often need adjusting after a primary/secondary swap:
- Display resolution: Each monitor can have its own resolution setting. Confirm both displays are set to their native or preferred resolution under the Display resolution dropdown for each screen.
- Scale: If your monitors have different pixel densities (for example, a 4K primary monitor paired with a 1080p secondary monitor), you may want different scaling percentages for each, found under Scale.
- Multiple displays mode: Ensure you’re set to Extend these displays rather than Duplicate these displays, unless you specifically want both screens mirroring each other.
- Taskbar settings: If you’d like the taskbar to appear on both monitors instead of only the primary one, go to Settings > Personalization > Taskbar, expand Taskbar behaviors, and enable the option to show the taskbar on all displays.
Step 8: Restart Apps if Needed
Some applications, particularly full-screen games or older software, may not immediately recognize the new primary monitor until they’re closed and reopened. If an app still launches on the wrong screen after making this change, try closing it completely and relaunching it. In persistent cases, you may need to drag the app window manually to the correct screen once, after which Windows will often remember its position for future launches.
Frequently Asked Questions
1. Why can’t I find the “Make this my main display” option?
If this checkbox is missing or greyed out, it typically means only one monitor is currently detected as connected, or the monitor you’ve selected is already set as primary. Double-check your cable connections, make sure the second monitor is powered on, and click Detect in Display settings if a second display isn’t showing up in the layout diagram. Graphics driver issues can also cause a monitor to not be recognized correctly, so updating your GPU drivers through Device Manager or your graphics card manufacturer’s website can help resolve detection problems.
2. Can I set a laptop’s built-in screen as the secondary display?
Yes. Laptops are treated the same way as desktop monitor setups in Windows 11. Simply follow the same steps above, select your external monitor in the Display settings layout, and check “Make this my main display.” Your laptop’s built-in screen will then automatically become the secondary display, and you can rearrange the layout boxes so cursor movement between the laptop screen and external monitor feels natural.
3. Why does my cursor move to the wrong monitor when I drag windows to the edge?
This usually happens when the on-screen arrangement of monitors in Display settings doesn’t match your physical desk layout. For example, if your primary monitor is physically on the right side of your desk but Windows has it positioned on the left in the settings layout, your cursor will seem to “jump” in the wrong direction. Revisit Step 3 above and drag the monitor boxes into the correct left-to-right (or top-to-bottom) arrangement that matches reality, then click Apply.
4. Will changing the primary monitor affect my open windows and files?
Changing your primary monitor doesn’t close or delete anything, but it can shift which screen certain windows, the taskbar, and new app launches default to. Any windows you already have open will typically stay on the screen they were on, though some apps may reset to open on the new primary display the next time you launch them. It’s a good idea to save your work before making display changes, just as a general precaution any time you’re adjusting system settings.
Conclusion
Setting up your primary and secondary monitors correctly in Windows 11 is a small adjustment that can meaningfully improve your day-to-day computing experience. Once your taskbar, Start menu, and default app windows are anchored to the screen you actually want them on, and your cursor moves naturally between displays that match your physical desk arrangement, your entire multi-monitor workflow starts to feel effortless rather than frustrating.
To recap, the process boils down to a few simple steps: open Display settings, identify and arrange your monitors to match their physical positions, select the monitor you want as primary, and check the “Make this my main display” box. From there, a few optional tweaks to resolution, scaling, and taskbar behavior can help you fine-tune the setup even further.
Whether you’re setting up a new monitor for the first time, troubleshooting a mixed-up display arrangement after a driver update, or simply reorganizing your desk, these steps will have your Windows 11 primary and secondary monitors configured correctly in just a couple of minutes. Once it’s set up the way you like, you likely won’t need to touch these settings again unless you add, remove, or rearrange your displays in the future.