
 Sukhdev Kamboj
Network adapters are the unsung heroes of every Windows 11 PC. Whether you connect through a Wi-Fi card or a wired Ethernet port, these adapters are what let your computer talk to your router, your office network, or the wider internet. Most of the time you never think about them — until something goes wrong, or until you specifically need to turn one off.
There are plenty of legitimate reasons to enable or disable a network adapter. You might want to disable Wi-Fi on a desktop that’s always connected via Ethernet, to stop it from occasionally switching networks. You might need to disable Ethernet on a laptop so it doesn’t compete with Wi-Fi for bandwidth. IT administrators frequently disable unused adapters to reduce the attack surface of a machine, and everyday users disable adapters to save battery life, troubleshoot connectivity issues, or fix conflicts between two active connections on the same subnet.

Whatever your reason, Windows 11 gives you several ways to do this — from a quick toggle in the taskbar to more advanced options buried in Device Manager and PowerShell. This guide walks through four reliable methods, explains when each one is most useful, and answers the most common questions people have about managing network adapters on Windows 11.
A quick note before you start: disabling a network adapter is different from simply disconnecting from a network or turning on Airplane Mode. Disabling an adapter effectively switches off the hardware (or its driver) at the system level, so the device disappears from network lists entirely until you re-enable it. Keep this in mind, especially if you’re doing this on a work laptop or a PC you don’t want to lock yourself out of remotely.
Method 1: Enable or Disable via Settings App
The Settings app is the most user-friendly way to manage your network adapters, and it’s the method most people should start with.
Steps:
Press Windows key + I to open Settings, or click the Start button and select Settings.
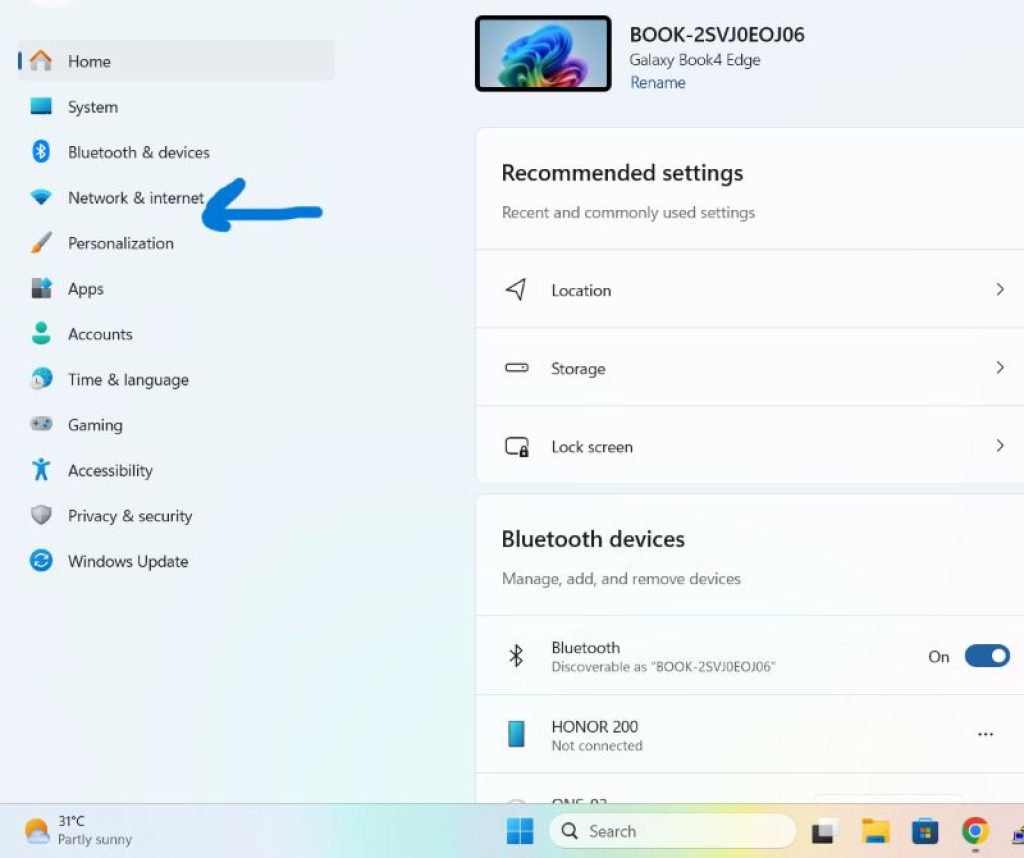
In the left sidebar, click Network & internet.
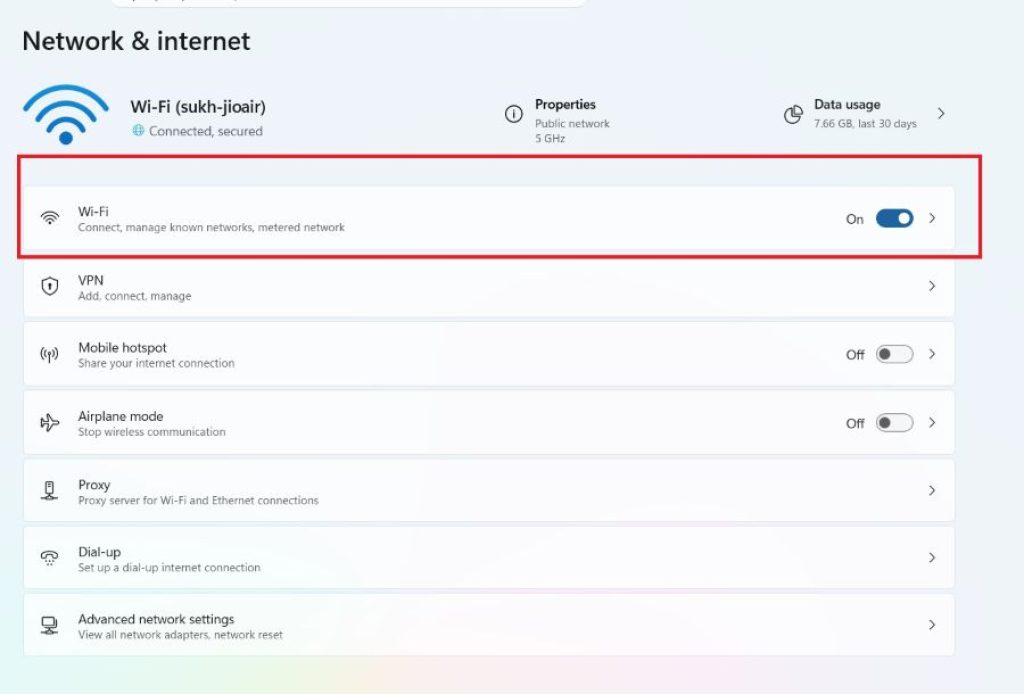
You’ll see a list of your active connections, including Wi-Fi and Ethernet. Click on the one you want to manage.
On the Wi-Fi page, you’ll find a toggle switch at the top that says Wi-Fi. Simply click it to turn the adapter on or off.
For Ethernet, click on Ethernet from the Network & internet page, then click on the specific Ethernet connection listed under it. From there, you can toggle the connection or scroll down and click Disable next to the adapter properties (you may need to click into the specific adapter’s detail page).
Alternatively, for a faster route:
Click the network icon in the bottom-right corner of the taskbar (near the clock).
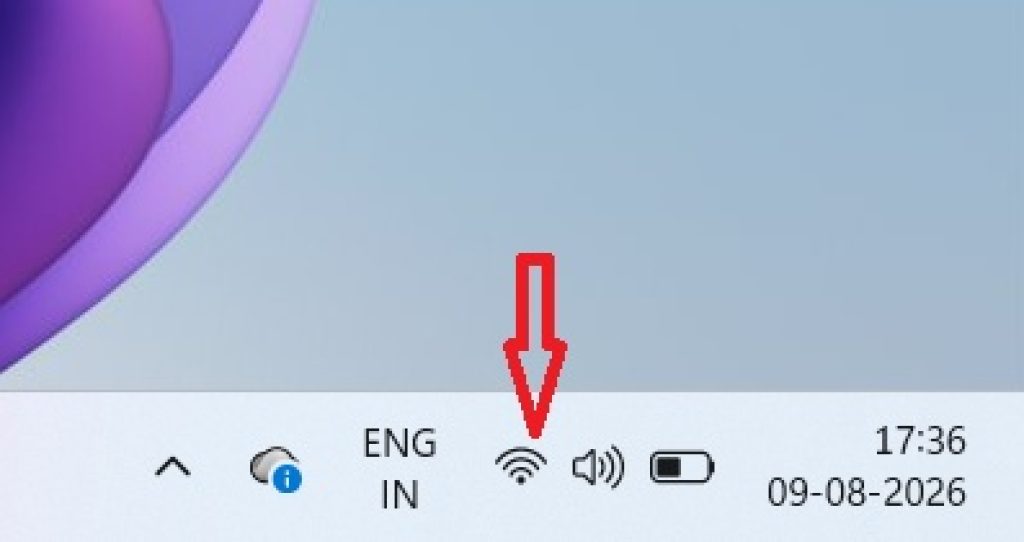
This opens the Quick Settings panel showing Wi-Fi, Bluetooth, and Airplane mode tiles.
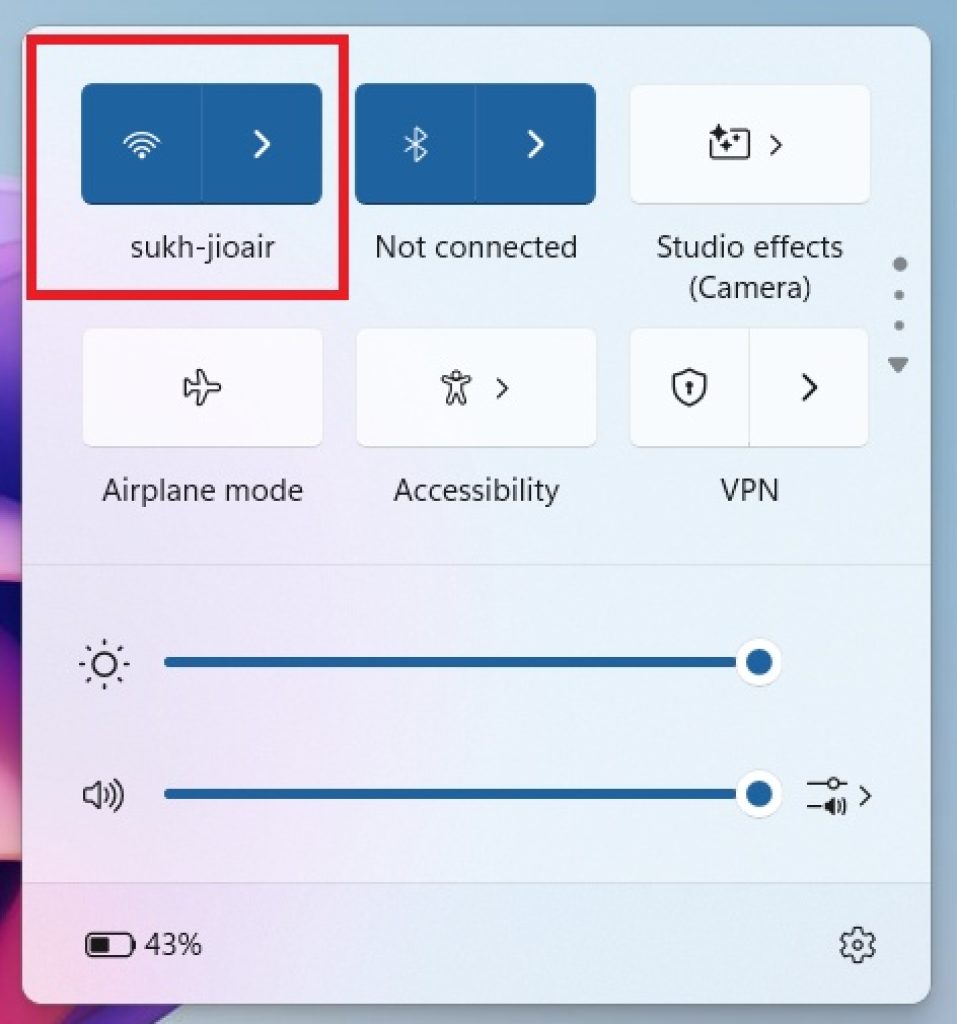
Click the Wi-Fi tile to toggle it on or off directly from here.
For more granular control, click the small arrow next to the Wi-Fi tile to see and connect to available networks, or click the gear icon to jump straight into the full Settings page.
This method is ideal for everyday users who just want a quick, safe way to toggle their adapter without digging into system-level tools. It’s reversible instantly and doesn’t require administrator rights in most cases.
Method 2: Enable or Disable via Control Panel (Network Connections)
The classic Control Panel method has survived multiple generations of Windows and remains one of the most reliable ways to manage adapters, especially because it lets you control Wi-Fi and Ethernet from the same window.
Steps:
- Press Windows key + R to open the Run dialog.
- Type ncpa.cpl and press Enter. This opens the Network Connections window directly, skipping the need to navigate through Control Panel menus.
- You’ll see icons representing each network adapter installed on your PC — typically labeled Wi-Fi and Ethernet, though the exact names can vary depending on your hardware and drivers.
- Right-click on the adapter you want to disable and select Disable from the context menu.
- The adapter icon will turn gray, and the connection will immediately drop.
- To re-enable it, right-click the same (now grayed-out) icon and select Enable.
You can also open this window manually:
- Open Control Panel (search for it in the Start menu).
- Click Network and Internet.
- Click Network and Sharing Center.
- Click Change adapter settings in the left sidebar.
This method is particularly useful for power users and IT professionals because it shows every adapter on the system at once, including virtual adapters created by VPNs or virtual machines. It’s also faster than the Settings app once you’re used to the ncpa.cpl shortcut, and it works identically across recent versions of Windows, making it a dependable choice if you manage multiple PCs.
Method 3: Enable or Disable via Device Manager
Device Manager works at a slightly lower level than Control Panel. Instead of just disabling the network connection, it can disable the adapter’s driver entirely, which is useful for deeper troubleshooting, such as when an adapter is misbehaving, showing driver conflicts, or needs a full reset.
Steps:
- Right-click the Start button and select Device Manager from the menu, or press Windows key + X and choose it from the list.
- In the Device Manager window, expand the Network adapters category by clicking the arrow next to it.
- You’ll see all the network adapters recognized by Windows, including your Wi-Fi card, Ethernet controller, and possibly virtual adapters (like those from VPN software or Bluetooth PAN).
- Right-click the adapter you want to manage.
- Select Disable device to turn it off, or Enable device if it’s already disabled and you want to turn it back on.
- Windows may show a confirmation prompt warning that disabling the device will stop it from functioning — click Yes to confirm.
Device Manager is the best option when you’re troubleshooting hardware or driver issues, because disabling and re-enabling the adapter here forces Windows to reload its driver, which often resolves minor glitches like an adapter that refuses to connect or keeps dropping out. It’s also the method to use if an adapter isn’t showing up correctly in Settings or Control Panel at all, since Device Manager operates closer to the hardware level.
Method 4: Enable or Disable via PowerShell or Command Prompt
For those comfortable with the command line, PowerShell offers the fastest and most scriptable way to control network adapters — especially handy if you manage several machines or want to automate the process.
Steps using PowerShell:
- Right-click the Start button and select Windows Terminal (Admin) or PowerShell (Admin).
- First, list all your network adapters to find their exact names by typing:
Get-NetAdapter- This displays a table with each adapter’s name, status, and interface description. Note the Name column value for the adapter you want to control (commonly “Wi-Fi” or “Ethernet”).
- To disable an adapter, type:
Disable-NetAdapter -Name "Wi-Fi" -Confirm:$falseReplace “Wi-Fi” with the exact adapter name from step 3, such as “Ethernet.” 5. To re-enable it, type:
Enable-NetAdapter -Name "Wi-Fi" -Confirm:$falseSteps using Command Prompt (netsh):
- Open Command Prompt as Administrator by searching “cmd” in the Start menu, right-clicking, and choosing Run as administrator.
- To disable an adapter, type:
netsh interface set interface "Wi-Fi" admin=disable- To enable it again, type:
netsh interface set interface "Wi-Fi" admin=enable- Replace “Wi-Fi” with the exact interface name if you’re targeting Ethernet or another adapter; you can find the exact names by typing netsh interface show interface.
This method is best suited for IT administrators, scripters, and anyone who needs to toggle adapters as part of a batch file, scheduled task, or remote management script. It requires administrator privileges and a bit more comfort with typed commands, but it’s unmatched in speed and repeatability once you know the syntax.
FAQ
1. Why can’t I find the option to disable my Wi-Fi or Ethernet adapter?
If an adapter option is missing from Settings or Control Panel, it’s possible the driver isn’t installed correctly, or the adapter is a virtual one created by software like a VPN client, which sometimes hides itself from certain menus. Try checking Device Manager first, since it lists every recognized adapter, including hidden or virtual ones. If the adapter doesn’t appear there either, updating or reinstalling the network driver from the manufacturer’s website usually resolves the issue.
2. Will disabling my Wi-Fi adapter save battery life on my laptop?
Yes, to some degree. A Wi-Fi radio that’s actively scanning for networks and maintaining a connection does consume power, so disabling it when you don’t need wireless access (for example, when you’re using Ethernet or working entirely offline) can extend battery life slightly. For most modern laptops the savings are modest, but every bit helps on a long flight or during extended offline work.
3. Is disabling an adapter the same as turning on Airplane Mode?
Not quite. Airplane Mode disables all wireless radios at once, including Wi-Fi, Bluetooth, and cellular, and it’s designed to be a quick, temporary, reversible switch. Disabling a specific adapter through Device Manager, Control Panel, or PowerShell is more targeted and persistent — it stays off after a restart until you manually enable it again, and it doesn’t affect other wireless features like Bluetooth.
4. Can I disable my Ethernet adapter remotely without losing access to my PC?
This is risky if Ethernet is your only connection to that machine, particularly for remote servers or PCs you access over RDP through a wired connection. If you disable the adapter you’re currently connected through, you’ll lose access immediately and may need physical access to re-enable it. Always confirm you have an alternative way to reach the machine (like Wi-Fi, a secondary NIC, or physical access) before disabling a remote connection.
Conclusion
Managing your Wi-Fi and Ethernet adapters on Windows 11 doesn’t have to be complicated, and having multiple methods available means you can pick the one that fits your comfort level and the task at hand. For quick, everyday toggling, the Settings app or the taskbar’s Quick Settings panel is the fastest and safest option. When you need a bit more visibility into all your adapters at once, the classic Control Panel Network Connections window (accessible instantly via ncpa.cpl) remains a dependable choice.
If you’re troubleshooting driver issues or a misbehaving adapter, Device Manager lets you dig a level deeper by disabling and reloading the device itself. And for IT professionals, scripters, or anyone managing multiple machines, PowerShell and Command Prompt offer the speed and automation that graphical menus simply can’t match.
Whichever method you choose, the underlying goal is the same: giving you precise control over how your PC connects to the world, whether that means saving battery, avoiding network conflicts, tightening security, or just fixing a stubborn connection issue. Once you’re comfortable with these four approaches, you’ll be able to enable or disable any network adapter on Windows 11 confidently and quickly, no matter which situation you run into.





