Geeksdigit Team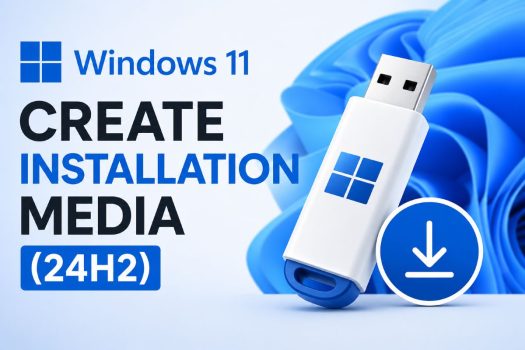
Whether you’re setting up a new PC, performing a clean install, repairing a corrupted Windows installation, or deploying Windows 11 across multiple machines, you need bootable installation media. With the release of Windows 11 version 24H2 (the 2024 Update), Microsoft refreshed its installer and rolled out a new set of components under the hood, which means the process of creating installation media has a few nuances worth understanding before you start.
Windows 11 24H2 brought a new file system foundation, tightened hardware requirements enforcement, and refreshed AI-driven features such as Windows Studio Effects and Recall. If you’re building a USB drive or ISO file to install this version, you have several options depending on your goals: staying strictly within Microsoft’s official tools, bypassing hardware restrictions like TPM 2.0 and Secure Boot, or working entirely offline using Windows’ built-in ISO mounting features.
Before you begin, you’ll need a USB flash drive with at least 8 GB of storage (16 GB is safer for future updates), a stable internet connection to download several gigabytes of installation files, and about 30–60 minutes depending on your connection speed. Every method described below will erase existing data on the USB drive, so back up anything important first.
Method 1: Using Microsoft’s Media Creation Tool (Official and Simplest)
The Media Creation Tool is Microsoft’s own utility, purpose-built to download the latest Windows 11 installation files and turn them into a bootable USB drive or ISO file. It’s the most straightforward option for most users because it handles compatibility checks, downloads, and formatting automatically. Keep in mind that Microsoft only distributes the current build through this tool <cite index=”1-1″>so once a newer version is released, you can no longer use it to fetch an older one like 24H2 specifically — the tool will always pull whatever the latest servicing build is</cite>. If your goal is specifically to preserve 24H2, you may want to pair this method with an ISO downloaded and archived early, or verify the build number after creation.
Steps:
- Insert your USB flash drive (8 GB minimum) into your PC.
- Open a browser and go to Microsoft’s official “Download Windows 11” page.
- Under the “Create Windows 11 Installation Media” section, click Download Now to get
MediaCreationTool.exe. - Double-click the downloaded file to launch it, then click Accept on the license terms.
- On the next screen, uncheck “Use the recommended options for this PC” if you want to select a different language, edition, or architecture than your current device — this matters if you’re building media for another computer.
- Choose USB flash drive as the media type and click Next.
- Select your USB drive from the list of available drives. Double-check you’ve picked the right one, since <cite index=”4-1″>the tool will erase everything currently stored on it</cite>.
- Click Next to begin downloading and building the installer. This step downloads several gigabytes of data and can take a while depending on your connection.
- Once complete, click Finish.
Your USB drive is now bootable. To use it, restart the target PC, enter its boot menu or UEFI firmware settings (commonly F12, F2, Esc, or Del depending on the manufacturer), and select the USB drive as the boot device.
Best for: Users who want an official, no-frills path and don’t need to bypass Windows 11’s hardware requirements.
Method 2: Downloading the ISO File Directly and Burning It Yourself
If you’d rather not run an executable tool, or if you want more control over the process (such as mounting the ISO in a virtual machine, archiving it, or burning it to a DVD), you can download the raw ISO file and handle the media creation separately using Windows’ built-in tools.
Steps:
- Go to Microsoft’s official Windows 11 download page.
- Under “Download Windows 11 Disk Image (ISO),” select the edition you want (Windows 11, which covers both Home and Pro) and click Download.
- Choose your product language, then click Confirm.
- Click the 64-bit Download button to save the ISO file to your PC.
Once downloaded, you have a few options for turning that ISO into usable installation media:
- Burn to DVD: Right-click the ISO file in File Explorer and select Burn disc image. This uses Windows’ native Windows Disc Image Burner tool — no extra software needed.
- Mount and copy manually: Double-click the ISO to mount it as a virtual drive, then copy its contents to a FAT32-formatted USB drive. Note this method alone won’t make the drive bootable on UEFI systems without additional boot sector configuration, so it’s best reserved for DVD burning or virtual machine use.
- Use the Windows USB/DVD Download Tool or a third-party burner: Several lightweight utilities exist purely to turn an ISO into a bootable USB, if you don’t want to use Rufus (covered next) or the Media Creation Tool.
This approach is also ideal if you plan to install Windows 11 in a virtual machine like Hyper-V, VMware, or VirtualBox, where you can attach the ISO directly without needing a physical USB drive at all.
Best for: Users who want the raw ISO for archiving, virtual machines, or manual control over the burning process.
Method 3: Using Rufus to Bypass Hardware Requirements
Rufus is a free, open-source third-party tool that has become the go-to solution for anyone installing Windows 11 24H2 on a PC that doesn’t meet Microsoft’s official requirements — such as missing TPM 2.0, an unsupported CPU, or Secure Boot disabled. Beyond bypassing requirements, <cite index=”4-1″>Rufus can also modify the installation media to skip the forced Microsoft account sign-in during setup</cite>, which many users prefer for local account setups.
Steps:
- Download the Windows 11 24H2 ISO file using Method 2 above (Rufus needs an existing ISO to work with).
- Download Rufus from its official website and run it — no installation required.
- Insert your USB flash drive (8 GB or larger).
- In Rufus, under Device, select your USB drive.
- Under Boot selection, click Select and choose the Windows 11 24H2 ISO file you downloaded.
- Rufus will detect the Windows 11 image and may prompt you with customization options. Look for a prompt or checkbox related to “Windows User Experience” — this is where you can:
- Remove the requirement for TPM 2.0 and Secure Boot.
- Remove the 4GB+ RAM requirement check.
- Bypass the forced online Microsoft account and internet connection requirement during setup.
- Disable data collection prompts (if offered).
- Choose your Partition scheme (GPT for UEFI systems, which is the modern standard; MBR for legacy BIOS systems).
- Click Start to begin writing the image to the USB drive. This will erase all existing data on the drive.
- Once finished, click Close.
Because Rufus modifies the installer’s registry checks during setup, the resulting USB drive will let you install Windows 11 24H2 on hardware that Microsoft’s standard installer would otherwise reject, including older CPUs and PCs without a TPM chip.
Best for: Users installing on unsupported or older hardware, or anyone who wants a local-account setup without Microsoft account sign-in prompts.
Method 4: Using the Command Line (DiskPart) for a Manual Bootable USB
For advanced users, IT administrators, or anyone scripting deployments across many machines, creating installation media manually via Command Prompt and DiskPart offers full control without relying on third-party tools. This method is also useful in environments where downloading external utilities like Rufus isn’t permitted.
Steps:
- Download the Windows 11 24H2 ISO file (Method 2).
- Insert your USB flash drive and note its drive letter.
- Open Command Prompt as Administrator.
- Type
diskpartand press Enter to launch the disk partitioning utility. - Type
list diskto see all connected drives, and identify your USB drive by its size (be very careful here — selecting the wrong disk can erase your system drive). - Type
select disk X, replacing X with your USB drive’s number. - Type
cleanto wipe the drive. - Type
create partition primaryto create a new partition. - Type
activeto mark the partition as bootable. - Type
format fs=fat32 quickto format the drive (use FAT32 for UEFI compatibility; use NTFS instead if your installation files exceed 4 GB per file, which is common with 24H2’s larger install.wim/install.esd — in that case, consider splitting the WIM file or using theformat fs=ntfs quickoption combined with UEFI:NTFS boot support). - Type
assignto assign a drive letter, thenexitto leave DiskPart. - Mount the downloaded ISO file by double-clicking it in File Explorer, which assigns it a virtual drive letter.
- Copy all files from the mounted ISO to your USB drive, either by dragging them in File Explorer or using a command like:
xcopy D:\*.* E:\ /E /F /H(replace D: with your mounted ISO drive letter and E: with your USB drive letter).
Once the copy finishes, your USB drive is bootable and ready to use on UEFI-based systems.
Best for: IT professionals, system administrators, and advanced users comfortable with the command line who want a lightweight, tool-free process.
Frequently Asked Questions
Do I need a product key to create installation media? No. You can create and use Windows 11 installation media without a product key. You’ll be prompted for one during setup, but you can skip that step and activate later, or the system will activate automatically if it’s tied to a digital license from a previous Windows 10/11 installation.
How much storage does the USB drive need? Microsoft recommends at least 8 GB, but 16 GB or larger is a safer choice, since installation files have grown over successive updates and larger drives leave room for driver packages or additional files if needed.
Can I create Windows 11 24H2 media on a Mac or Linux machine? The official Media Creation Tool only runs on Windows. However, you can download the ISO file directly from Microsoft’s website on any operating system, then use a cross-platform tool like Rufus (Windows only) or balenaEtcher (Windows, macOS, Linux) to write it to a USB drive.
Will the installation media work with an unsupported CPU or no TPM chip? The official Media Creation Tool and Microsoft’s ISO enforce Windows 11’s hardware requirements, including TPM 2.0, Secure Boot capability, and a supported CPU generation. If your hardware doesn’t meet these, Method 3 using Rufus is your best option since it can bypass those checks during setup.
Conclusion
Creating Windows 11 24H2 installation media doesn’t require advanced technical knowledge, but the right method depends on what you’re trying to accomplish. If you simply want an official, hassle-free build for a supported PC, Microsoft’s Media Creation Tool remains the simplest and most reliable option. If you’d rather download the raw ISO for archiving, virtual machines, or DVD burning, downloading it directly and using Windows’ native tools gives you that flexibility. For anyone working with older or unsupported hardware, Rufus is the clear choice, since it lets you bypass TPM, Secure Boot, and CPU restrictions while also skipping the forced Microsoft account sign-in. And for IT professionals or anyone comfortable with the command line, building media manually with DiskPart offers full control without needing any third-party software at all.
Whichever method you choose, remember to back up any data on your USB drive before starting, since every approach described here will erase its existing contents. Once your bootable media is ready, you’ll be equipped to perform clean installs, repairs, or upgrades to Windows 11 24H2 on any compatible system, giving you a dependable tool to keep in your kit for future troubleshooting or deployment needs.