
 Sukhdev Kamboj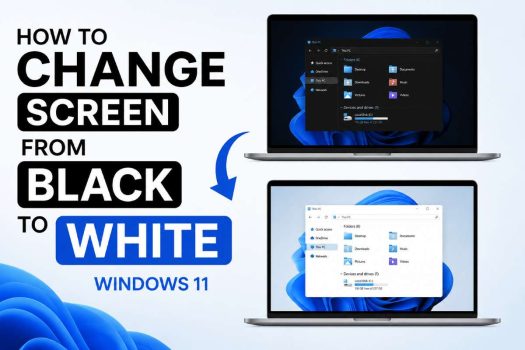
If your Windows 11 screen has suddenly changed from a white background to a black or dark appearance, you can usually switch it back to a white or light appearance in just a few clicks. Windows 11 includes several settings that can make the screen look black, including Dark Mode, high contrast themes, color filters, and accessibility options. In most cases, the problem is simply that Windows or an individual app has been switched to dark mode.
Changing the screen from black to white can make Windows easier to read if you prefer a traditional light interface. It can also restore the familiar white File Explorer, Settings, Start menu, taskbar, and other Windows interface elements. The exact steps can vary slightly depending on whether the entire Windows interface is dark or only a particular application is displaying a black background.

This guide explains several ways to change the screen from black to white in Windows 11. Start with the first method because it is the simplest and usually fixes the problem immediately. If Windows still appears dark afterward, continue with the other methods.
Method 1: Change Windows 11 from Dark Mode to Light Mode
The easiest way to change a black or dark Windows screen back to a white appearance is to switch Windows from Dark mode to Light mode.
Windows 11 has a built-in Color mode setting that controls the general appearance of the operating system. When Dark is selected, supported Windows elements use dark backgrounds and light text. When Light is selected, Windows uses white or light-colored backgrounds with darker text.
To change the mode:
Press Windows + I to open Settings.
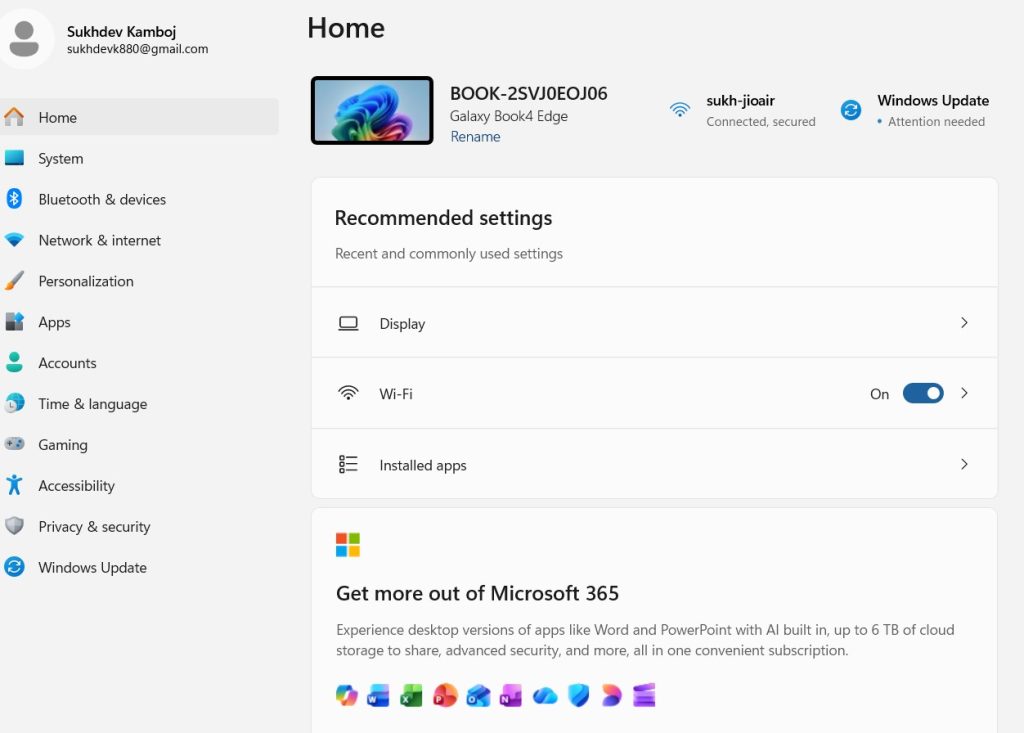
Click Personalization in the left sidebar.
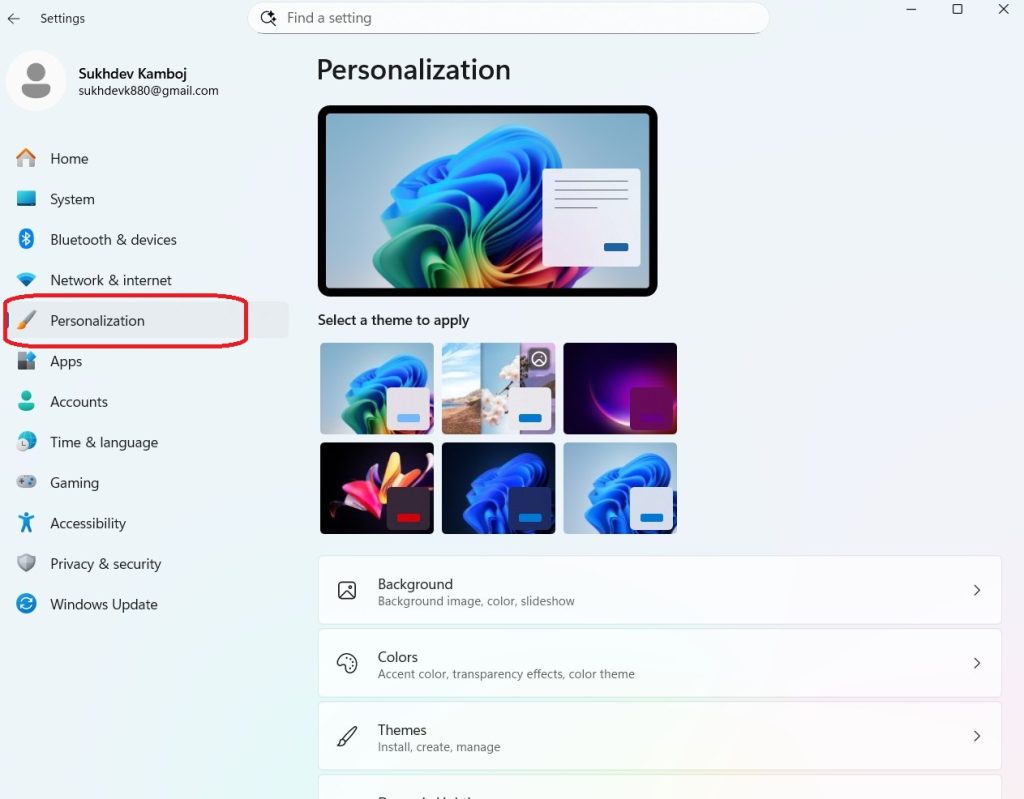
Select Colors.
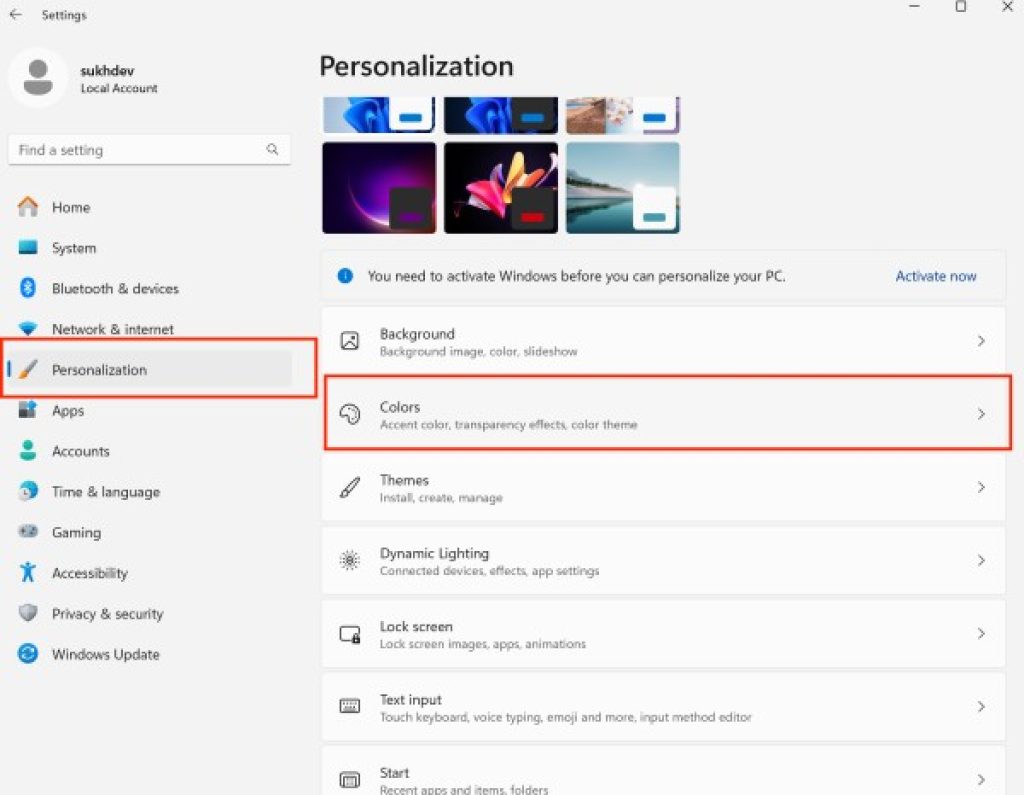
Find the Choose your mode option.
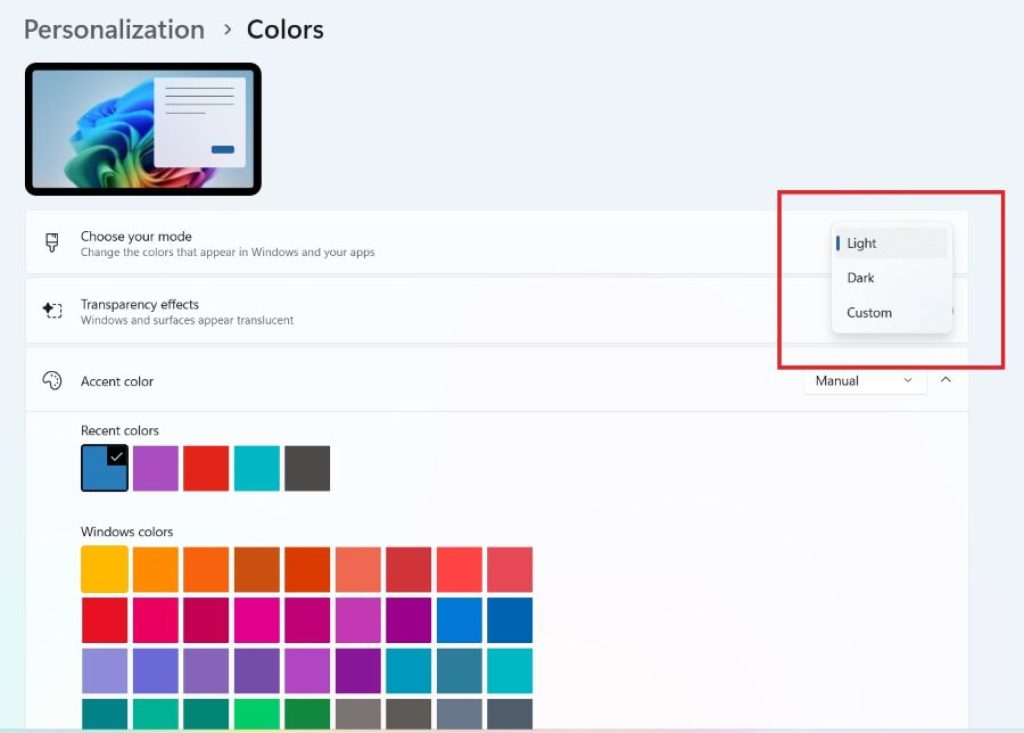
Open the drop-down menu.
Select Light.
Windows should immediately change from the dark appearance to the light appearance.
You should now see a white or light background in areas such as Settings, File Explorer, and other supported Windows components. If you only want Windows itself to be light while allowing individual apps to use their own appearance settings, select Custom instead of Light.
The Custom option gives you separate controls for Windows mode and app mode. This can be useful if File Explorer and the Windows interface should remain white while you prefer a dark appearance in certain applications.
Method 2: Use the Quick Settings to Check Related Display Options
Windows 11 Quick Settings does not provide a direct Dark Mode button on every installation, but it gives you quick access to display-related settings that can sometimes be responsible for a screen appearing unusual.
Click the area containing the network, volume, and battery icons on the taskbar. This opens Quick Settings.
Look for options such as Accessibility, Night light, or other display-related controls. If Night light is enabled, turn it off temporarily and check whether the screen appearance returns to normal.
Night light normally creates a warmer yellow or orange tint rather than turning the screen completely black, so it is unlikely to be the cause of a fully dark Windows interface. However, disabling it can help you determine whether the unusual appearance is caused by a display setting rather than Windows Dark Mode.
You can also right-click the desktop and open Display settings to review additional display options.
Method 3: Change the App Mode Separately
Sometimes Windows is set to Light mode while individual applications continue to use a black background. This happens because Windows 11 allows Windows mode and app mode to be controlled separately.
If the desktop and taskbar look normal but applications such as Settings, File Explorer, or another supported application remain dark, check the color settings again.
Go to:
Settings > Personalization > Colors
Under Choose your mode, select Custom.
You will then see separate settings for:
- Choose your default Windows mode
- Choose your default app mode
Set the Windows mode to Light and the app mode to Light if you want both Windows and supported applications to use a white appearance.
This option is particularly useful when changing the main mode to Light does not produce the exact appearance you want.
Some applications also have their own independent theme settings. For example, a web browser, Microsoft Office application, media player, or third-party program may continue using dark mode even after Windows has been switched to Light mode. In that situation, you need to change the theme from inside that particular application.
Method 4: Turn Off High Contrast or Contrast Themes
If your screen has a very strong black-and-white appearance, the problem may not be Dark Mode at all. Windows 11 includes accessibility features called Contrast themes that can dramatically change the colors displayed throughout Windows.
A contrast theme can make backgrounds nearly black and text extremely bright. This can look very different from normal Windows Dark Mode.
To check this setting:
- Open Settings with Windows + I.
- Click Accessibility.
- Select Contrast themes.
- Open the contrast theme selection box.
- Select None.
- Click Apply.
After applying the change, Windows should return to its normal color scheme.
If the screen was using a high-contrast configuration, this can make a much bigger difference than simply changing Dark Mode.
You can also use the keyboard shortcut Left Alt + Left Shift + Print Screen to toggle high contrast on supported Windows configurations. Be careful with this shortcut because pressing it accidentally can change the screen appearance again.
If you do not need high-contrast accessibility features, leaving the setting disabled prevents accidental changes.
Method 5: Turn Off Color Filters
Another Windows accessibility feature that can change how the screen looks is Color filters. These filters are designed to help people distinguish between certain colors, but an inappropriate filter can make the display appear unusual.
To check color filters:
- Open Settings.
- Select Accessibility.
- Click Color filters.
- Make sure Color filters is turned Off.
If a filter was enabled, disabling it should immediately restore the normal colors.
Windows provides several filter types, including grayscale, inverted, and color-specific filters. Depending on the selected filter, the screen may appear black and white, inverted, or significantly different from normal.
If your entire display looks like a photographic negative, an inverted color setting is especially worth checking.
Windows also provides a keyboard shortcut for color filters:
Windows + Ctrl + C
If this shortcut is enabled, pressing it can toggle color filters. If your screen suddenly changes after using a keyboard shortcut, check the Color filters settings rather than changing your monitor settings.
Method 6: Check Whether Inverted Colors Are Enabled
If by “black to white” you mean that the colors on the screen are literally reversed, you may be dealing with an inverted-color effect rather than Dark Mode.
For example, a normal white webpage may appear black, while black text may appear white. Images can also look like negatives. This is different from simply having Windows Dark Mode enabled.
Open:
Settings > Accessibility > Color filters
Check whether a filter that changes or reverses colors is enabled.
Turn Color filters off and check the display again.
If the screen immediately returns to its normal colors, the problem was caused by the accessibility filter.
You should also check whether a third-party application is applying an inversion effect. Some graphics utilities, accessibility applications, remote-desktop software, and display-management programs can alter screen colors independently of Windows.
Method 7: Reset the Windows Theme
A customized Windows theme can also cause the interface to use unexpected colors. If you have changed several personalization settings and cannot determine which setting is responsible, switching back to a standard Windows theme can be an easy solution.
Open:
Settings > Personalization > Themes
Look through the available themes and select a standard light Windows theme.
After selecting it, check whether the desktop, taskbar, Start menu, and supported applications return to a white appearance.
Changing the theme can reset several visual settings at once, making it useful when the appearance has been heavily customized.
If you want a completely white and traditional Windows appearance, choose a light theme and then verify that Settings > Personalization > Colors > Choose your mode is set to Light.
Method 8: Check the Application’s Own Dark Mode Setting
If only one application has a black screen, changing Windows’ overall theme may not solve the problem.
Many modern applications have their own appearance settings. A browser, document editor, image editor, media player, or other program can ignore the Windows theme and use its own dark interface.
For example, if only your browser is black, open the browser’s settings and look for options such as:
- Appearance
- Theme
- Color scheme
- Dark mode
- Light mode
- System default
Choose Light or System default, depending on your preference.
The same principle applies to Microsoft Office and other desktop applications. If Windows is already using Light mode but one application remains dark, look inside that application’s settings.
This is one of the most common reasons users believe Windows is still in Dark Mode when the operating system itself has already been switched back to Light mode.
Method 9: Restart Windows Explorer
If you changed Windows to Light mode but parts of the interface remain black, Windows Explorer may not have refreshed correctly.
You can restart Windows Explorer without restarting the entire computer.
Press:
Ctrl + Shift + Esc
This opens Task Manager.
Find Windows Explorer in the list of running processes. Right-click it and select Restart.
Your taskbar and desktop may briefly disappear and then return. This is normal.
After Windows Explorer restarts, check File Explorer, the taskbar, Start menu, and desktop again.
This method is particularly useful when the correct Light mode setting is already selected but the interface still appears to be using an older appearance.
You can also simply restart the computer. A normal restart allows Windows and its desktop components to reload their personalization settings.
Method 10: Reset Display and Personalization Settings
If none of the previous methods work, review the main Windows display and personalization settings together.
First open:
Settings > Personalization > Colors
Set the mode to Light.
Then open:
Settings > Accessibility > Contrast themes
Set the contrast theme to None.
Next open:
Settings > Accessibility > Color filters
Make sure color filters are disabled.
Finally, open:
Settings > Personalization > Themes
Select a standard light Windows theme.
This combination effectively removes the most common Windows settings that can make the interface appear black, inverted, or unusually high contrast.
If the entire physical display remains black even after these settings are corrected, however, the issue may not be related to Windows’ appearance settings at all.
Frequently Asked Questions
How do I change my Windows 11 screen from black to white?
Open Settings > Personalization > Colors, then set Choose your mode to Light. This is the fastest way to change the standard Windows interface from a dark appearance to a white or light appearance.
Why is my Windows screen black but everything else works?
If you can still see text, icons, and applications, Windows is probably using Dark Mode, a contrast theme, or a color filter. Check Personalization > Colors, Accessibility > Contrast themes, and Accessibility > Color filters.
How do I turn off inverted colors in Windows 11?
Go to Settings > Accessibility > Color filters and turn Color filters off. If an inversion filter was responsible, the screen should immediately return to its normal colors.
What if the entire monitor is black?
If there is no visible Windows interface at all, the issue may be related to the display rather than Windows’ theme. Check the monitor power, brightness, cable, display output, and graphics driver. You can also press Windows + Ctrl + Shift + B to reset the graphics driver.
Conclusion
Changing a black Windows 11 screen back to white is usually a simple settings change. In most cases, you only need to open Settings > Personalization > Colors and change the Windows mode from Dark to Light. This restores the familiar white appearance across supported Windows components.
If that does not solve the problem, check the separate app mode setting, Contrast themes, Color filters, and Windows themes. These features can all change the way Windows looks, and color filters in particular can create an inverted or black-and-white appearance that looks very different from normal Dark Mode.
Remember that a black Windows interface is different from a completely black monitor. If you can see Windows content, concentrate on personalization and accessibility settings. If the entire display is blank, investigate the display connection, brightness, graphics driver, or output settings instead.
With these methods, you should be able to restore a white screen in Windows 11 without installing additional software or making complicated system changes.





