Geeksdigit Team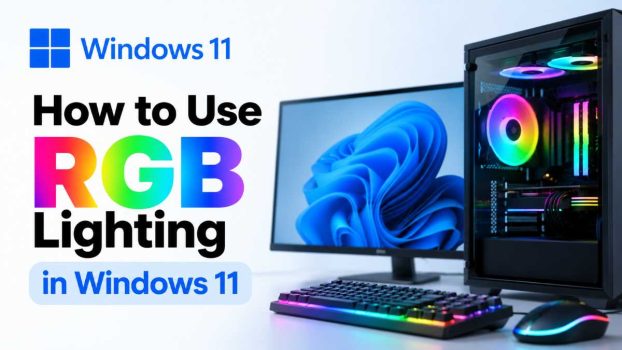
RGB lighting has become one of the defining features of modern PC builds. Keyboards that ripple with color, mice that pulse in sync with your desktop theme, and case fans that glow to match your mood are no longer niche extras — they’re a standard part of the PC gaming and enthusiast experience. For years, though, controlling all of that lighting meant juggling a separate app for every brand you owned: one program for your Razer keyboard, another for your Corsair case fans, a third for your Logitech mouse. Each app had its own interface, its own quirks, and often its own background process quietly eating up system resources.
Windows 11 changed that with a built-in feature called Dynamic Lighting. Instead of bouncing between manufacturer apps, you can now control brightness, color, and lighting effects for compatible RGB devices directly from the Settings app. It’s a small addition, but for anyone with more than one RGB accessory, it can genuinely simplify your setup.

This guide walks through everything you need to know: what Dynamic Lighting is, how to turn it on, the different ways you can use it, how it compares to manufacturer software, and answers to the most common questions people have about RGB lighting on Windows 11.
What Is Dynamic Lighting?
Dynamic Lighting is a native Windows 11 feature, introduced with the 22H2 update and expanded in 23H2, that lets you manage RGB-enabled peripherals from one central location. It relies on an open hardware standard called HID LampArray, which manufacturers can build into their products so that Windows can recognize and control the lighting without a proprietary driver.
Dynamic Lighting on Windows 11 enables users to control their RGB devices right in Windows Settings, letting them extend their Windows accent color onto nearby devices and synchronize RGB effects across accessories. Brands including Razer, Corsair, Logitech, and ASUS have added support for the standard, though device compatibility varies, so not every RGB accessory will appear in Dynamic Lighting.
If your hardware is on the older side, or if a manufacturer hasn’t updated its firmware to support LampArray, you may still need to rely on that company’s dedicated software. But for newer gear, Dynamic Lighting offers a genuinely useful alternative that cuts down on app clutter.
Method 1: Turning On Dynamic Lighting in Settings
The most straightforward way to start using RGB lighting in Windows 11 is through the built-in Settings app.
- Open Settings. Click the Start button and select the gear-shaped Settings icon, or press
Windows + I. - Go to Personalization. In the sidebar, click Personalization.
- Select Dynamic Lighting. You can change brightness, colors, and lighting effects from Settings > Personalization > Dynamic Lighting.
- Turn on the master toggle. Switch on Use Dynamic Lighting on my devices. This activates the feature system-wide.
- Check for connected devices. If you have a compatible RGB keyboard, mouse, headset, or case lighting controller plugged in, it should appear as a card near the top of the page.
Once enabled, you’re ready to start customizing how your devices look — either as a group or individually.
Adjusting Brightness and Global Effects
With Dynamic Lighting turned on, the Settings page gives you a few global controls that apply across all your connected devices at once:
- Brightness slider — controls how intense the RGB lighting appears across your devices.
- Effects dropdown — choose from preset lighting styles such as Solid Color, Breathing, Rainbow, and Wave. Solid Color, for instance, keeps a single chosen color displayed constantly.
- Direction controls — for effects like Wave and Gradient, Microsoft has added options to change the direction the effect travels, including forward, backward, outward, and inward movement.
These global settings are a fast way to get a cohesive look across every device without configuring each one separately.
Method 2: Matching Your Windows Accent Color
One of the more popular tricks in Dynamic Lighting is syncing your RGB devices to your Windows accent color, so your peripherals visually match your desktop theme.
- Navigate to Settings > Personalization > Dynamic Lighting.
- Scroll to the Effects section.
- Turn on Match my Windows accent color.
This feature was added in a Windows 11 update and lets your keyboard, mouse, and other lighting accessories instantly reflect whatever accent color you’ve chosen in the Colors section of Personalization. If you like to switch your accent color seasonally or based on mood, your RGB gear will update automatically to match — no manual recoloring needed. Microsoft has also added the option to apply a specific custom color across devices if you’d rather not tie lighting to your accent color at all.
Method 3: Controlling Individual Devices
Global settings are convenient, but sometimes you want one device to behave differently from the rest — maybe you want your keyboard on a rainbow wave while your mouse stays a solid color. Dynamic Lighting supports this too.
- Go to Settings > Personalization > Dynamic Lighting.
- Look at the row of device cards at the top of the page.
- Click on the specific device you want to adjust.
- From there, you can set a unique brightness level, effect, and color just for that device, independent of your global settings.
This per-device control is especially useful in mixed setups where you own peripherals from multiple brands, since it lets you fine-tune each one without needing to open a separate manufacturer app.
Method 4: Letting Apps and Games Control Your Lighting
Dynamic Lighting isn’t just a manual settings panel — it’s also a platform that other apps and games can plug into. Some games use lighting cues to reflect in-game events, like your keyboard flashing red when your character takes damage, or pulsing when a match is about to start.
- Open Settings > Personalization > Dynamic Lighting.
- Find the option that manages compatible apps controlling your lighting.
- Toggle it on if you want supported games and third-party apps to override your RGB settings during specific moments, or turn it off if you’d rather keep your lighting static and under manual control at all times.
This is a nice middle ground: your everyday lighting can stay exactly how you like it, while still allowing supported games to add dynamic effects when it matters.
Dynamic Lighting vs. Manufacturer Software
It’s worth being upfront about the trade-offs. Dynamic Lighting is designed for simplicity, not depth. If you’ve used software like Razer Synapse, Corsair iCUE, or Logitech G Hub, you know those apps often include advanced options: custom per-key macros, elaborate multi-zone lighting profiles, reactive typing effects, and game-specific integrations that go far beyond basic color and brightness.
As one comparison puts it, some special effects from a manufacturer’s app may be richer, but Dynamic Lighting covers the essentials simply and without the bloat of multiple background apps. In practice, that means:
- Choose Dynamic Lighting if you want one simple place to manage lighting across multiple brands, you don’t need advanced per-key customization, and you’d rather avoid running several manufacturer apps in the background.
- Stick with manufacturer software if you rely on detailed profiles, per-key RGB mapping, macro integration, or effects that Dynamic Lighting doesn’t yet support.
The good news is you don’t have to pick just one system-wide. You can use Dynamic Lighting for devices where basic control is enough, and keep a manufacturer app running for a single device that needs more advanced tuning — though running both at once for the same device can occasionally cause conflicts, so it’s generally best to pick one method per accessory.
Troubleshooting Common Issues
If your RGB devices aren’t showing up or behaving as expected, a few quick checks usually resolve the problem:
- Confirm Windows compatibility. Dynamic Lighting requires Windows 11 version 23H2 or newer — Windows 10 does not support it, and earlier Windows 11 builds may lack the feature entirely.
- Update your firmware and drivers. Make sure your RGB device’s firmware and drivers are up to date, and that you’ve installed the most recent Windows 11 updates.
- Check the USB connection. Some devices need a direct USB connection (rather than through a hub or dock) to be detected properly by LampArray.
- Verify manufacturer support. Not every RGB product supports the LampArray standard yet. Check your manufacturer’s website or support documentation to confirm your specific model is compatible.
- Disable Dynamic Lighting if an app misbehaves. If a third-party app starts acting strangely after Dynamic Lighting integration, turn off Dynamic Lighting until the app is updated with proper support.
Conclusion
RGB lighting used to mean a tangle of manufacturer apps, each with its own login, its own background process, and its own inconsistent interface. Windows 11’s Dynamic Lighting feature doesn’t replace those apps entirely, but it gives most people a much simpler starting point: one settings page, one toggle, and a handful of controls that cover brightness, color, effects, and accent-color syncing across every compatible device you own.
If you’re someone who just wants your keyboard and mouse to glow in a color that matches your desktop — or you’re tired of running three different lighting apps just to keep your setup looking cohesive — Dynamic Lighting is worth turning on today. And if you need deeper customization down the road, your manufacturer’s software is still there waiting, ready to pick up where Windows leaves off.
FAQ
1. Does Windows 11 have built-in RGB lighting control? Yes. The feature handling RGB lighting in Windows 11 is called Dynamic Lighting, and Microsoft introduced it in September 2023 before including it in the Windows 11 2023 Update (23H2). Any Windows 11 PC running version 23H2 or newer has it built in.
2. Why isn’t my RGB device showing up in Dynamic Lighting? Your device likely doesn’t support the HID LampArray standard that Dynamic Lighting is built on. Older or cheaper RGB devices may lack this support, though the list of compatible brands and models keeps growing over time. Unsupported devices will still need to be controlled through their manufacturer’s own app.
3. Can I use Dynamic Lighting and a manufacturer’s RGB app at the same time? Generally, yes, as long as they’re controlling different devices. For a single device, though, it’s best to pick one control method to avoid conflicting commands, and disable Dynamic Lighting for that device if you want the manufacturer app to take priority.
4. Will Dynamic Lighting slow down my PC? No — it’s a lightweight, built-in Windows feature rather than a separate background application. In fact, using Dynamic Lighting instead of multiple manufacturer apps can reduce the number of background processes running on your system, which may free up resources compared to running several dedicated RGB apps at once.