Geeksdigit Team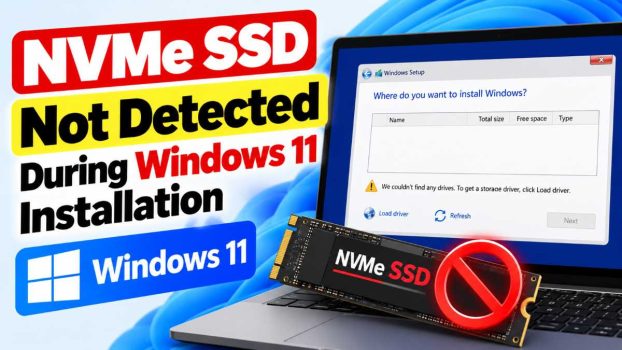
You’ve built or upgraded your PC, booted from your Windows 11 USB drive, and reached the “Where do you want to install Windows?” screen. But the list is empty, or your shiny new NVMe SSD isn’t in it. It’s frustrating, but it’s one of the most common problems people hit during a Windows 11 install, and it’s usually fixable in minutes.
The cause is almost always one of a few things: the Windows installer lacks the storage driver for your controller, the drive is disabled or misconfigured in BIOS/UEFI, Intel RST or VMD is hiding the drive, or the drive isn’t seated properly. This guide walks through seven methods, ordered from quickest to most involved, so you can get to the installation without wasting time.
Method 1: Check the Physical Connection and Reseat the SSD

Before changing any software settings, rule out the simple hardware problem.
- Shut down the PC and unplug the power cable.
- Remove the NVMe SSD from its M.2 slot. Take care with the small mounting screw.
- Check the gold contacts for dust or debris and wipe gently with a dry, lint-free cloth.
- Reinsert the drive at roughly a 30-degree angle, press it flat, and secure it with the screw.
- If your motherboard has multiple M.2 slots, try a different one.
Also remove any protective film on thermal pads and make sure the drive is fully seated. A drive that looks inserted but isn’t making full contact is a surprisingly common cause. Check your motherboard manual too: some boards disable certain SATA ports when a particular M.2 slot is populated, or the slot may only support SATA M.2 drives rather than NVMe.
Method 2: Confirm the Drive Appears in BIOS/UEFI
If the drive isn’t visible in your firmware, Windows won’t see it either.
- Restart and press the BIOS key (usually Del, F2, F10, or F12).
- Look for a Storage, NVMe Configuration, or Boot section.
- Confirm the SSD is listed with its model name.
If it’s there, the problem is in software or drivers, so continue to the next methods. If it’s not listed, try reseating the drive (Method 1), test it in another PC or an M.2 USB enclosure, and check whether the M.2 slot is enabled in BIOS. Some boards have a setting like “M.2 Slot Enable” or “PCIe Storage Remapping.” If the drive still doesn’t show up anywhere, it may be faulty.
Method 3: Update Your BIOS/UEFI Firmware
Older firmware can have poor compatibility with newer NVMe drives, especially recent PCIe 4.0 and 5.0 models. Motherboard makers regularly release updates that improve storage detection.
- On another computer, visit your motherboard manufacturer’s support page and download the latest BIOS for your exact model.
- Copy the file to a FAT32-formatted USB drive.
- Enter BIOS and use the built-in flash utility (EZ Flash, M-Flash, Q-Flash, or similar) to update.
- Don’t power off during the update.
After updating, reset BIOS settings to defaults and check whether the drive appears. Read the manufacturer’s instructions first, since an interrupted flash can leave the board unusable.
Method 4: Load the NVMe or Storage Driver During Setup
If the drive shows in BIOS but not in the installer, Windows probably lacks the driver for your controller. This is very common with systems using Intel Rapid Storage Technology (RST/VMD) or certain AMD RAID configurations.
Steps:
- On another PC, download the correct driver:
- Intel systems: the Intel RST/VMD driver (often called “F6 driver”) from Intel or your motherboard/laptop vendor.
- AMD systems: the AMD RAID/storage driver from your motherboard’s support page.
- Samsung, WD, or other brands: their NVMe driver, if provided for your model.
- Extract the files and copy the folder to a USB drive (a separate one, or the same one if it has space for the files).
- Boot into Windows 11 Setup and reach the drive selection screen.
- Click Load driver, then Browse.
- Select the folder containing the driver files (the
.inffile), click OK, and choose the driver from the list. - Click Next. The NVMe drive should now appear.
Make sure you use the driver matching your exact platform and Windows 11 version. For laptops, always use the manufacturer’s page, since generic drivers often won’t work.
Method 5: Change the SATA/Storage Mode in BIOS (RAID/RST vs. AHCI)
This one catches many laptop and prebuilt PC owners. If the storage mode is set to Intel RST / RAID On or VMD, Windows setup won’t see the drive without a special driver. You have two options: load the driver (Method 4) or switch modes.
To switch to AHCI:
- Enter BIOS and find SATA Mode, Storage Configuration, or VMD Controller.
- Change from RAID/Intel RST to AHCI, or disable VMD.
- Save and exit, then boot the installer again.
Important: Changing this on a system with an existing Windows install can cause boot failures, so only do it when doing a clean installation and you don’t need existing data. Some newer laptops don’t offer an AHCI option at all, in which case the driver method is the only route.
Method 6: Adjust BIOS Settings (Secure Boot, CSM, and PCIe Options)
Certain firmware settings can prevent the drive from being detected or bootable.
- Boot mode: Windows 11 requires UEFI. Disable CSM/Legacy support and use UEFI boot.
- Secure Boot: Make sure it’s enabled or set to the standard mode, since Windows 11 needs it. If setup can’t proceed, toggling it off temporarily may help identify the problem.
- PCIe link speed: If you have a PCIe 4.0 or 5.0 drive on an unstable setup, set the M.2 slot speed to Gen 3 or Auto to test compatibility.
- Above 4G Decoding / Resizable BAR: Try toggling these if the drive isn’t detected on modern boards.
- Reset to defaults: Load optimized defaults, then reconfigure only the necessary settings. A bad overclock or previous customization can cause detection problems.
Change one setting at a time so you know which one made the difference.
Method 7: Clean the Drive with DiskPart and Recreate the Installation Media
Sometimes the drive is detected but shows as unallocated, or the installer can’t use it because of a corrupt partition table. Faulty installation media can also cause odd behavior.
Clean the disk:
- At the Windows Setup screen, press Shift + F10 to open Command Prompt.
- Type
diskpartand press Enter. - Type
list diskand identify your NVMe drive by its size. - Type
select disk X(replace X with the disk number). - Type
cleanand press Enter. This erases everything on the disk. - Type
convert gptand press Enter, thenexit. - Close the window and click Refresh on the drive selection screen.
Recreate your media: Download a fresh Windows 11 ISO from Microsoft and rebuild the USB using the Media Creation Tool or Rufus. Use a quality USB 3.0 drive, and format it with GPT and UEFI settings. An outdated or corrupted ISO may lack newer driver support.
If the drive still isn’t detected after all this, test it in another computer to determine whether it has failed.
Conclusion
An NVMe SSD not showing up during Windows 11 installation feels alarming, but it’s rarely a dead drive. In most cases, the fix is loading the right storage driver, switching from RAID/VMD to AHCI, updating BIOS, or making sure the drive is seated and enabled properly.
Work through the methods in order, starting with the physical connection and BIOS visibility, and you’ll almost certainly find the culprit. If nothing works and the drive isn’t recognized in any other system, contact the manufacturer about a warranty replacement.
FAQ
1. Why does my NVMe SSD show in BIOS but not in Windows setup?
Windows 11 setup likely lacks the driver for your storage controller, commonly Intel RST/VMD or an AMD RAID driver. Load the driver using the “Load driver” option, or switch the storage mode to AHCI if you’re doing a clean install.
2. Is it safe to switch from RAID to AHCI in BIOS?
For a fresh installation, yes. On a system that already has Windows installed, changing the mode can prevent it from booting until you adjust settings. Back up your data before making changes.
3. Do I need to install drivers for every NVMe SSD?
No. Most NVMe drives work with the built-in Windows driver. Drivers are usually only needed when a controller technology like Intel VMD or RAID sits between the drive and Windows.
4. Could my NVMe SSD be defective?
It’s possible if it doesn’t appear in BIOS and doesn’t work in another PC or M.2 enclosure after reseating. Test it elsewhere and contact the manufacturer if it fails everywhere.