
 Sukhdev Kamboj
Knowing whether a Windows 11 account has administrator privileges matters more than most people realize. Admin rights determine whether you can install software, change system settings, manage other user accounts, or modify security configurations.
Whether you’re troubleshooting a permissions error, auditing accounts on a shared or work computer, or simply trying to remember what kind of account you set up years ago, Windows 11 gives you several reliable ways to check. This guide walks through every major method, from the simplest point-and-click approach to command-line techniques that are useful for IT professionals managing multiple machines.
Why Admin Rights Matter
Windows uses two primary account types: Standard User and Administrator. A standard account can run most everyday applications, browse the web, and use installed software, but it’s blocked from making system-wide changes without approval. An administrator account, by contrast, has full control — it can install and uninstall programs, change security settings, manage other accounts, access all files on the system, and modify the Windows Registry.
This distinction exists for security reasons. If malware infects a standard user account, its damage is generally contained because it lacks permission to alter core system files. If it compromises an administrator account, it has much greater reach. That’s why many IT departments configure employees with standard accounts for daily use, reserving admin credentials for specific tasks.
Because of this, it’s worth knowing exactly what privilege level your account — or someone else’s — currently has. Below are the most effective ways to check.
Method 1: Check Through Windows Settings (Easiest Method)
The most straightforward way to check your own account’s status is through the Settings app.
Press Windows key + I to open Settings, or click the Start menu and select the gear icon.
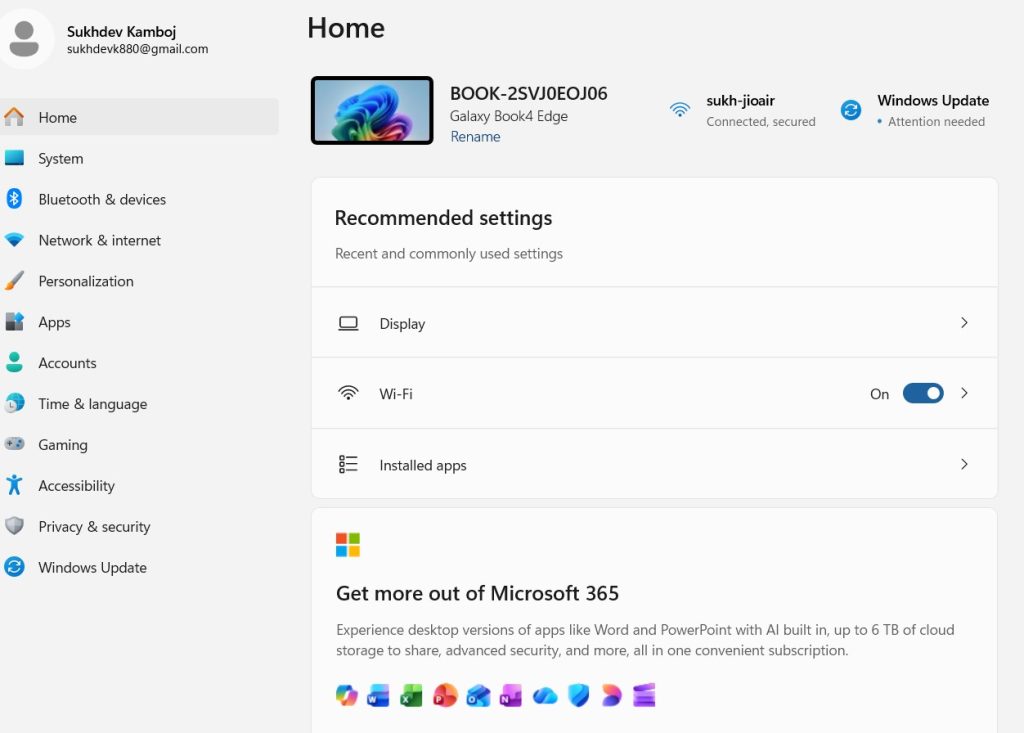
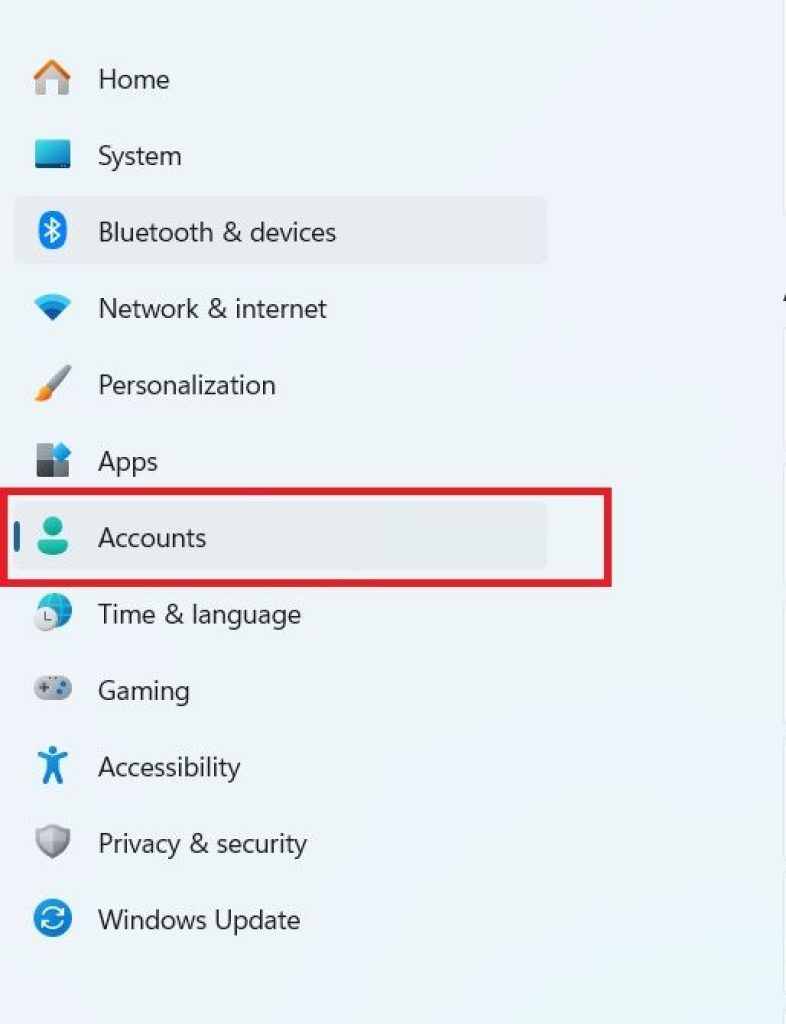
Navigate to Accounts in the left sidebar.
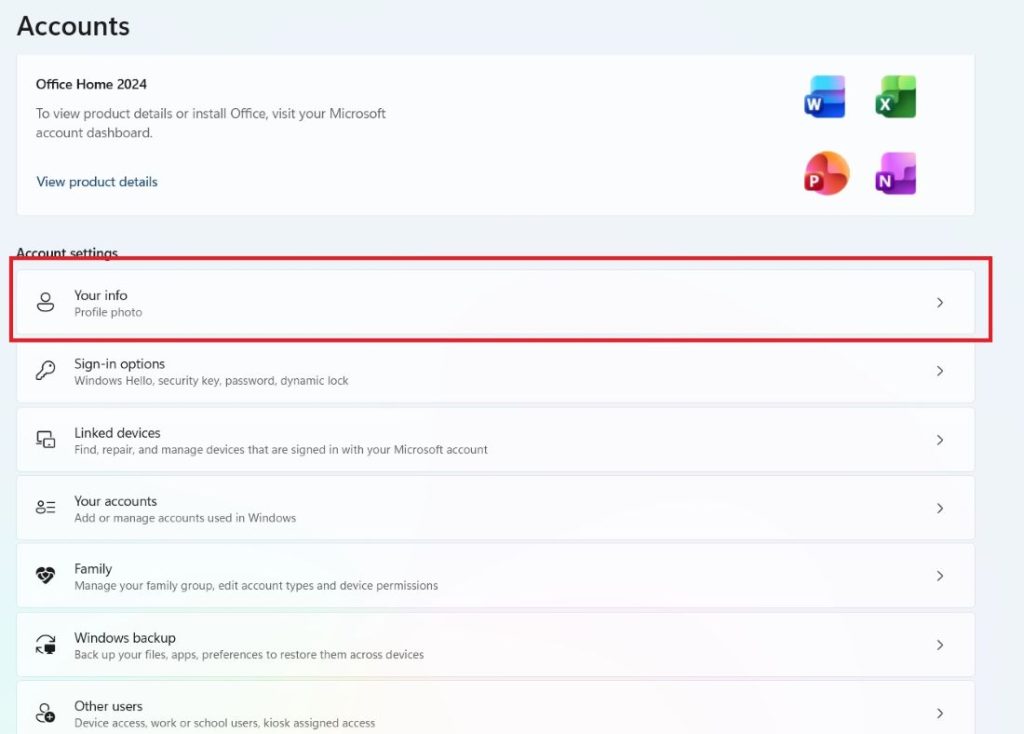
Click Your info (this is usually the first option and often the page Settings opens to by default).
Underneath your account name and email address, you’ll see a label that reads either “Administrator” or “Standard User” (sometimes shown simply as “Local Account” without a role label, in which case you’ll want to cross-check with Method 2 below).
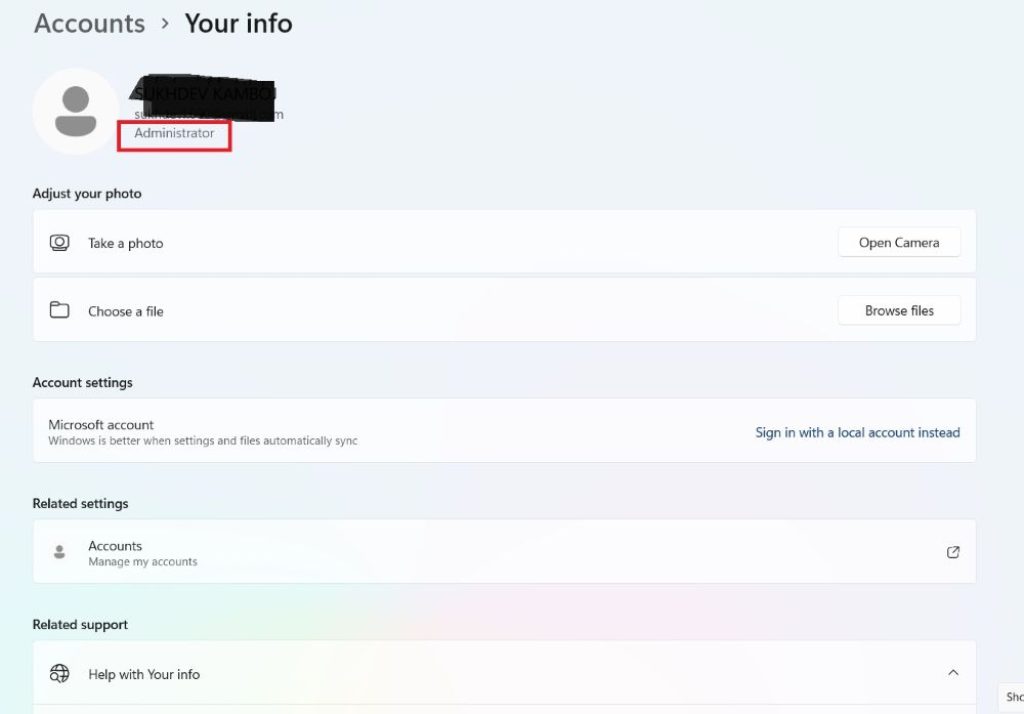
This method only shows the account type for the person currently logged in. If you want to check a different account on the same PC, you’ll need to look at the full list of accounts instead.
Checking Other Accounts via Settings
To see the privilege level of every account on the machine:
- Open Settings (Windows key + I).
- Go to Accounts > Other users (on some builds this is labeled Family & other users).
- Under each listed account, Windows displays whether it’s an Administrator or doesn’t display a label at all (accounts without a label are standard users).
This is useful for parents managing family PCs, small business owners checking a shared computer, or anyone auditing who has elevated access.
Method 2: Use Control Panel
Even though Microsoft has been steadily migrating settings into the modern Settings app, Control Panel remains available in Windows 11 and offers a clear, dedicated view of account types.
- Press Windows key + R to open the Run dialog.
- Type
controland press Enter. - In Control Panel, click User Accounts, then click User Accounts again.
- Click Manage another account (this may prompt for administrator confirmation).
- You’ll see a list of all accounts on the PC, each labeled clearly as Administrator or Standard user directly beneath the account name.
This method tends to be faster than digging through Settings when you need to see every account’s status at a glance, since Control Panel’s account manager was designed specifically for this purpose.
Method 3: Use the Command Prompt
For a fast, no-nonsense answer, the Command Prompt offers a couple of built-in commands.
Checking Your Current Session’s Privilege Level
- Press Windows key, type
cmd, and press Enter to open a regular (non-elevated) Command Prompt. - Type the following command and press Enter:
whoami /groups- Look through the output for a line containing
BUILTIN\Administrators. If it appears with an “Enabled” state, your current session belongs to the Administrators group.
Alternatively, a quicker (though less detailed) check:
net user %username%This displays details about your account, including which Local Group Memberships it belongs to. If *Administrators appears in that list, the account has admin rights.
Checking Any Account on the System
To list every local account and see which group each belongs to:
net localgroup administratorsThis command prints every username that’s a member of the Administrators group on that machine — useful when you want a clean list without opening any GUI at all.
Method 4: Use PowerShell
PowerShell offers more flexibility and cleaner output, especially useful for anyone comfortable with scripting or managing multiple accounts.
- Press Windows key, type
PowerShell, and open it (elevated isn’t required for these particular queries). - To check members of the local Administrators group, run:
powershell
Get-LocalGroupMember -Group "Administrators"This returns a list of every user (and any groups) with administrator rights on the device.
- To check your specific account’s group memberships:
powershell
whoami /groups | findstr "Admin"- Alternatively, for a broader look at all local accounts and their basic properties:
powershell
Get-LocalUserWhile this command doesn’t directly show admin status in its default output, cross-referencing the returned usernames against the Get-LocalGroupMember -Group "Administrators" list tells you exactly who has elevated rights.
PowerShell is particularly handy in enterprise or IT support contexts because these commands can be scripted and run remotely against multiple machines using tools like PowerShell Remoting, saving significant time compared to manually checking each PC through Settings.
Method 5: Computer Management (Local Users and Groups)
This method provides a structured, GUI-based view similar to Control Panel but with more detail, and it’s especially useful for IT technicians.
- Right-click the Start button and select Computer Management (or press Windows key + X and choose it from the menu).
- In the left pane, expand System Tools, then Local Users and Groups.
- Click Groups.
- Double-click Administrators.
- A window opens listing every account and group that’s a member of the local Administrators group.
Note: Local Users and Groups is not available in Windows 11 Home edition — it’s a feature reserved for Pro, Enterprise, and Education editions. Home users should rely on Settings, Control Panel, or the command-line methods above instead.
Method 6: Check via the User Account Control (UAC) Prompt
There’s also an indirect but very telling way to check: simply try to do something that requires administrator approval, such as installing software or changing a system setting.
- If you’re an administrator, Windows displays a User Account Control (UAC) prompt asking “Do you want to allow this app to make changes to your device?” You just click Yes to proceed.
- If you’re a standard user, the same prompt appears, but it will ask for an administrator’s username and password rather than simply asking for confirmation. This is because standard accounts need explicit credentials from an admin-level account to proceed.
This isn’t a formal diagnostic method, but it’s a quick real-world test that confirms your privilege level without opening any menus.
Method 7: Check via Microsoft Account Settings (For Microsoft Accounts)
If the computer is linked to a Microsoft account (rather than a purely local account) and is part of a family group, you can also check admin status—and manage it—through the web.
- Go to account.microsoft.com in a browser and sign in.
- Navigate to the Family section if the account is part of a Family Safety group.
- Each family member’s device permissions and account roles can be viewed here, alongside broader settings like screen time and content restrictions.
This won’t necessarily reflect local device permissions directly (a Microsoft account can be an admin on one PC and a standard user on another), but for family or household setups, it’s a helpful supplementary view.
Troubleshooting Common Confusions
A few points often trip people up when checking admin status:
- “Administrator” the built-in account vs. an administrator-level account: Windows 11 has a hidden, disabled-by-default account literally named “Administrator.” This is different from any user account that has been granted administrator privileges. Don’t confuse the two — most guidance in this article refers to privilege level, not this specific hidden account.
- Domain-joined vs. local accounts: On work or school computers joined to an Active Directory domain, admin rights might be controlled centrally by IT policy rather than the local machine. In these cases, the methods above may show you’re a “standard user” locally even if you have elevated rights granted temporarily by IT through other tools. If your organization uses Microsoft Entra ID (formerly Azure AD), account roles might also be managed from the cloud admin center rather than the device itself.
- UAC being disabled: If User Account Control has been turned off entirely, admin accounts won’t show the confirmation prompt at all, which can make Method 6 unreliable. In that case, rely on Settings, Control Panel, or the command-line methods instead.
Which Method Should You Use?
- For a quick personal check: Settings > Accounts > Your info is fastest.
- For checking multiple accounts on a shared PC: Control Panel’s User Accounts manager or Computer Management’s Local Users and Groups.
- For scripting, automation, or IT administration across many machines: PowerShell’s
Get-LocalGroupMembercommand. - For a no-GUI, fast terminal check: Command Prompt’s
whoami /groupsornet localgroup administrators.
Final Thoughts
Windows 11 doesn’t limit you to just one way of checking admin rights — it offers overlapping methods so that whether you’re a casual user, a parent managing a family computer, or an IT professional supporting dozens of machines, there’s an approach that fits your comfort level and use case. For most people, the Settings app will answer the question in seconds.
For deeper audits or scripted checks across a fleet of devices, Command Prompt and PowerShell provide the precision and speed that GUI tools can’t match. Understanding your account’s privilege level isn’t just a technical curiosity — it directly affects what you can do on your PC and how exposed your system might be if something goes wrong, making it well worth the two minutes it takes to check.





