
 Sukhdev Kamboj
Every Windows 11 machine needs at least one administrator account to install software, change system settings, and manage other user profiles. While most people rely on the graphical Settings app to add a new user, there are times when the GUI isn’t available, is misbehaving, or you simply prefer the speed and precision of the command line. That’s where Command Prompt (CMD) comes in.
Creating a local administrator account through CMD is fast, scriptable, and doesn’t require navigating multiple settings menus. It’s especially useful for IT administrators managing several machines, technicians troubleshooting a locked-down PC, or power users who want a repeatable process they can save as a batch file. It’s also a lifesaver in situations where the Settings app is corrupted, the current user account is locked out, or you’re working through Windows Recovery Environment (WinRE) with only Command Prompt access.
In this guide, you’ll learn several reliable methods to create a local administrator account using CMD in Windows 11, how to verify the account was created correctly, and how to troubleshoot common issues along the way. Whether you’re setting up a new account for a family member, preparing a test environment, or recovering access to a system, the steps below will get you there without touching a single settings screen.
Before diving in, keep one thing in mind: creating or modifying administrator accounts requires elevated privileges. You’ll need to run Command Prompt as an administrator, or already have administrator access on the machine, for any of these methods to work.
Method 1: Create a Local Administrator Account Using the net user Command
The net user command is the most straightforward way to create a new local account from CMD, and it has been part of Windows for decades, which means it’s stable and well documented.
Step 1: Open Command Prompt as Administrator
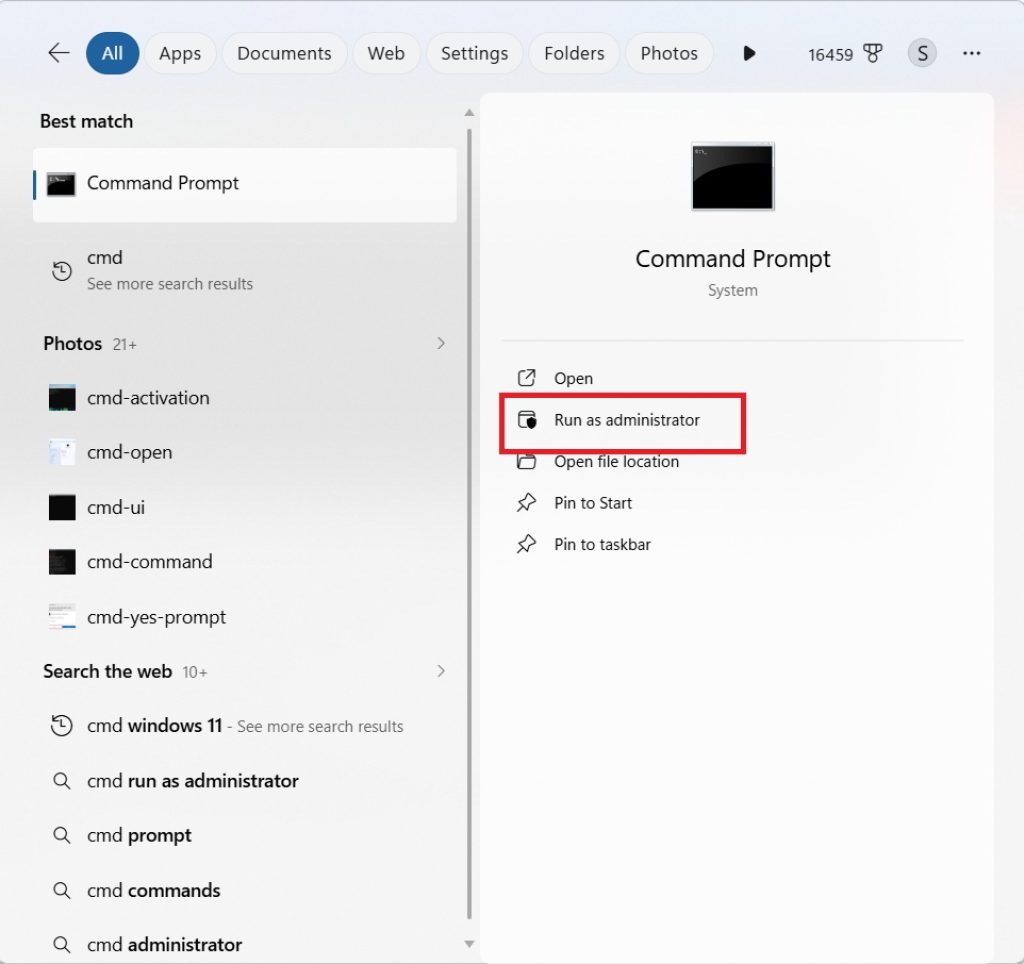
Press Windows + S to open search, type cmd.
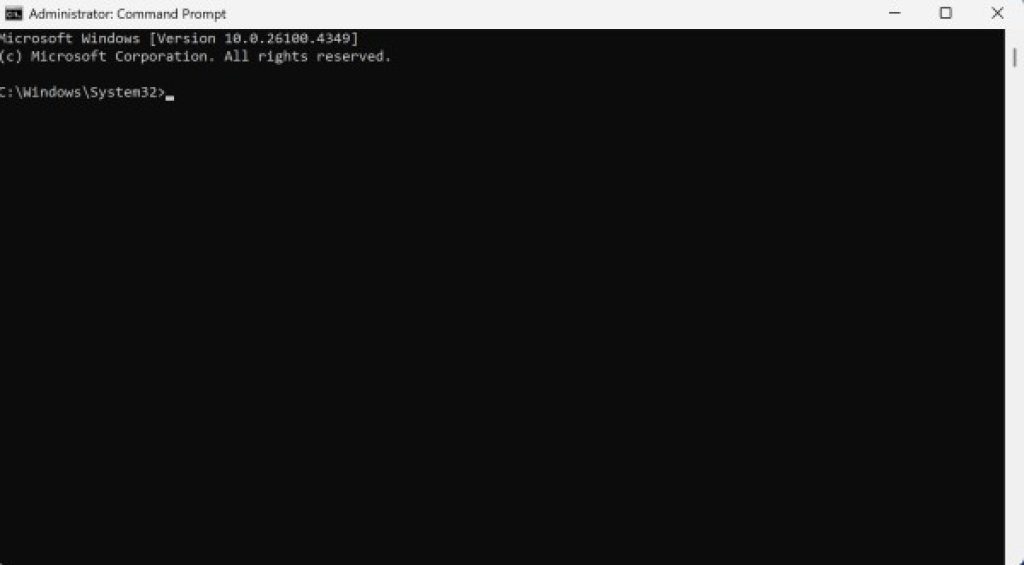
Right-click on Command Prompt and select Run as administrator.
Click Yes on the User Account Control (UAC) prompt.
Step 2: Create the New User Account
Type the following command, replacing NewAdmin with your preferred username and YourPassword with a strong password:
net user NewAdmin YourPassword /add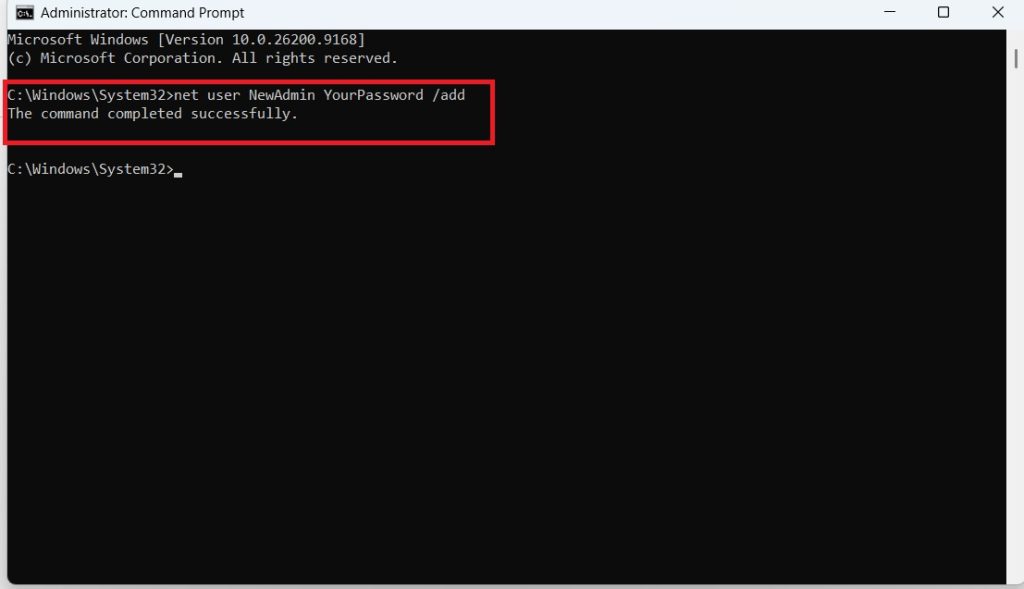
Press Enter. If successful, you’ll see the message “The command completed successfully.”
Step 3: Add the Account to the Administrators Group
By default, the account you just created is a standard user, not an administrator. To grant it administrator rights, run:
net localgroup administrators NewAdmin /add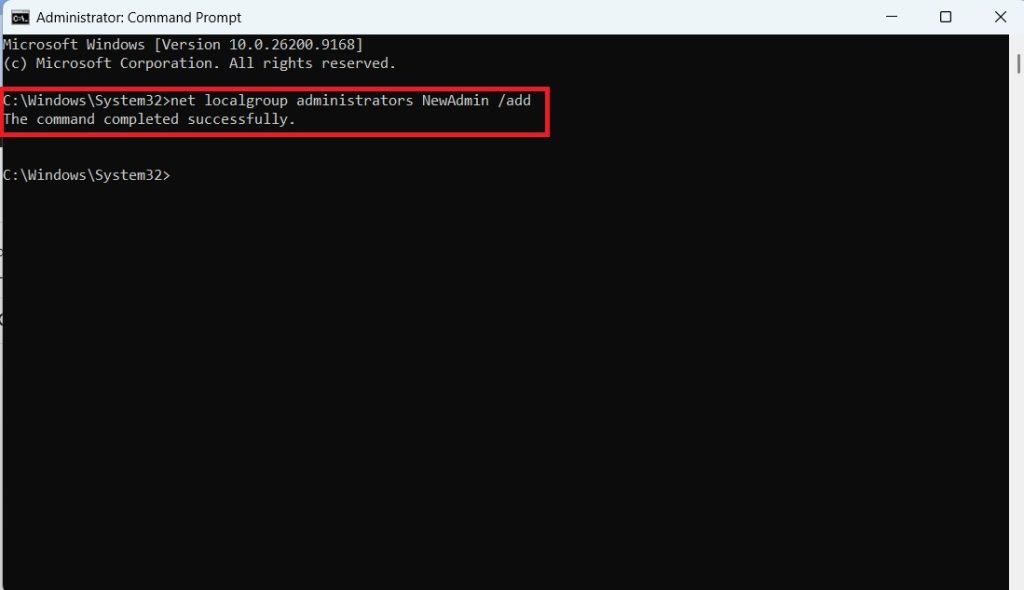
This command adds the NewAdmin account to the built-in Administrators group, which grants it full administrative privileges on the local machine.
Step 4: Verify the Account
Confirm the account was created and correctly assigned by running:
net user NewAdmin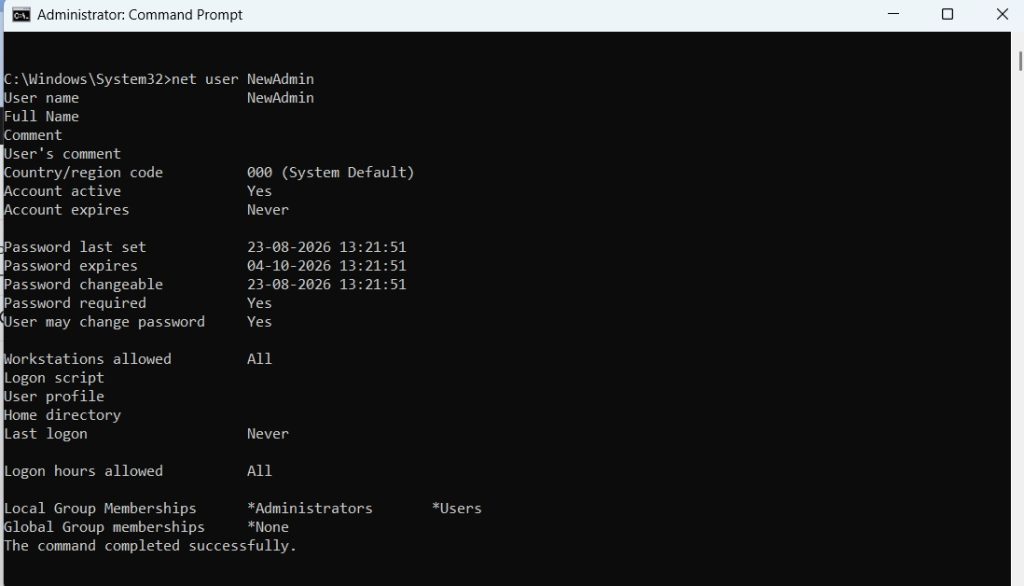
This displays account details including group memberships. Look for “Administrators” listed under Local Group Memberships to confirm success.
This method is ideal for quick, one-off account creation and works on virtually every version of Windows, including Windows 11 Home and Pro editions.
Method 2: Create a Local Administrator Account Using PowerShell Commands via CMD
Although PowerShell is a separate shell, you can invoke PowerShell commands directly from Command Prompt without leaving the CMD window. This method is useful if you prefer PowerShell’s more modern cmdlets but want to stay within a CMD-based script or workflow.
Step 1: Open Command Prompt as Administrator
Follow the same steps as above to launch an elevated CMD window.
Step 2: Launch a PowerShell Command from CMD
Type the following, adjusting the username and password:
powershell -Command "New-LocalUser -Name 'NewAdmin' -Password (ConvertTo-SecureString 'YourPassword' -AsPlainText -Force) -FullName 'New Admin' -Description 'Local administrator account'"This creates a new local user account with the specified name, password, and description.
Step 3: Add the User to the Administrators Group
Run this command to elevate the new account’s privileges:
powershell -Command "Add-LocalGroupMember -Group 'Administrators' -Member 'NewAdmin'"Step 4: Confirm the Account
Verify the account and its group membership with:
powershell -Command "Get-LocalGroupMember -Group 'Administrators'"This lists everyone currently in the Administrators group, and you should see NewAdmin in the output.
This hybrid approach combines the convenience of launching everything from a single CMD session with the flexibility of PowerShell’s cmdlets, which offer more granular control over account properties like full name, description, and password expiration settings.
Method 3: Create an Administrator Account Using lusrmgr.msc Launched from CMD
If you prefer a visual confirmation step but still want to start from Command Prompt, you can launch the Local Users and Groups management console directly from CMD.
Step 1: Open Command Prompt
You don’t necessarily need administrator rights just to launch the console, but you will need them to make changes within it.
Step 2: Launch the Local Users and Groups Snap-in
Type:
lusrmgr.mscPress Enter. This opens the Local Users and Groups management window.
Note:
lusrmgr.mscis not available on Windows 11 Home edition. If you’re using Home edition, stick with Method 1 or Method 2.
Step 3: Create the New User
- In the left pane, right-click Users and select New User.
- Fill in the username, full name, and password fields.
- Uncheck User must change password at next logon if you want the password to remain as set (or leave it checked for better security practice).
- Click Create, then Close.
Step 4: Add the Account to the Administrators Group
- Click on Users in the left pane, then double-click your newly created account.
- Go to the Member Of tab.
- Click Add, type
Administrators, click Check Names, then OK. - Click Apply, then OK.
This method is technically a hybrid of CMD and GUI, but it’s included here because many users start from CMD specifically to reach this console quickly, especially during troubleshooting sessions where navigating through Settings would take longer.
Method 4: Create a Local Administrator Account from the Windows Recovery Environment (WinRE) Using CMD
This method is specifically for situations where you’re locked out of Windows entirely and need to create an administrator account without logging into the desktop.
Step 1: Boot into Windows Recovery Environment
- Restart your PC and interrupt the boot process three times (force shutdown during startup), which triggers automatic repair and boots into WinRE.
- Alternatively, boot from a Windows 11 installation USB and select Repair your computer.
Step 2: Navigate to Command Prompt
From the WinRE menu, go to Troubleshoot > Advanced options > Command Prompt.
Step 3: Identify the Windows Drive Letter
In WinRE, drive letters can differ from your normal Windows session. Run:
diskpart
list volume
exit
Identify which letter corresponds to your Windows installation (commonly C:, but sometimes D: in recovery mode).
Step 4: Create the Administrator Account
Use the net user command with the correct drive context, or simply run the standard command if the system context is already loaded:
net user NewAdmin YourPassword /add
net localgroup administrators NewAdmin /add
Step 5: Restart and Log In
Type exit to close Command Prompt, then restart your PC normally. You should now see the new administrator account on the login screen.
This method is particularly valuable for account recovery scenarios, such as when the only administrator account on a machine has a forgotten password or has been disabled.
Conclusion
Creating a local administrator account using CMD in Windows 11 is a practical skill whether you’re managing multiple computers, recovering from a lockout, or simply prefer the command line over clicking through menus. The net user and net localgroup commands remain the fastest and most universally compatible approach, working across every edition of Windows 11. For those who want more control over account properties, PowerShell commands invoked from CMD offer additional flexibility. And for deeper troubleshooting scenarios, launching lusrmgr.msc or working from the Windows Recovery Environment ensures you’re never completely locked out of your own system.
Whichever method you choose, always use a strong, unique password for any new administrator account, and consider enabling additional security measures like Windows Hello or BitLocker to keep your system protected. Administrator accounts have full control over a machine, so it’s worth being deliberate about who has one and how it’s secured.
Frequently Asked Questions (FAQ)
1. Do I need administrator rights to create a new administrator account via CMD?
Yes. You must run Command Prompt as an administrator, or already have administrative access on the current user account, to create or modify user accounts. If you don’t have admin access and are locked out entirely, use Method 4 (Windows Recovery Environment) to create an account from a recovery context.
2. What’s the difference between the net user command and PowerShell’s New-LocalUser cmdlet?
Both accomplish the same core task, but PowerShell’s New-LocalUser offers more granular options, such as setting a full name, description, password expiration policy, and account enable/disable status in a single command. The net user command is simpler and works identically across older and newer Windows versions, making it more reliable for quick tasks or scripts meant to run on multiple Windows editions.
3. Can I create a local administrator account this way if my PC is set up with a Microsoft account instead of a local account?
Yes. Even if your primary account is a Microsoft account, the net user and net localgroup commands still create a genuine local account stored on the device itself, separate from any Microsoft account. This local administrator account will appear as a separate sign-in option on the lock screen.
4. Is it safe to leave multiple administrator accounts on one PC?
It’s not inherently unsafe, but it does increase the potential attack surface, since each administrator account is a potential entry point for someone trying to gain full control of the system. Best practice is to keep the number of administrator accounts to a minimum, use strong and unique passwords for each, and downgrade accounts to standard user status when full administrative access isn’t needed for daily use.





