Geeksdigit Team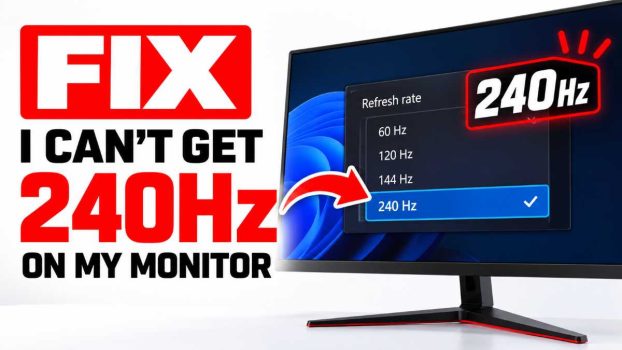
You spent good money on a 240Hz gaming monitor, set it up on your desk, and fired up a fast-paced game, only to notice that motion doesn’t look any smoother than on your old screen. You open Windows display settings and find the refresh rate dropdown stuck at 60Hz, 120Hz, or 144Hz, with no sign of 240Hz anywhere. It’s frustrating, but this is one of the most common display problems, and the good news is that it is almost never caused by a defective monitor.
In nearly every case, the issue comes down to one of a handful of causes: a cable or port that can’t carry enough bandwidth, a connection running through the wrong output, a setting hidden in the monitor’s on-screen menu, an outdated or generic graphics driver, or a resolution and GPU combination that doesn’t allow the full refresh rate. Because a 240Hz signal needs far more data than a standard 60Hz one, every link in the chain has to be up to the job. A single weak link, such as an old HDMI cable that came free with a cheap device, is enough to cap the entire system.
This guide walks through the fixes in order, starting with the quickest and most likely solutions and moving toward the more advanced ones. Work through them one at a time and test after each change. Most people solve the problem within the first three or four steps.
Method 1: Use the Right Cable and Port
The cable is the single most common culprit, so start here. Many monitors ship with both an HDMI cable and a DisplayPort cable in the box, and people often grab whichever one is closest. Unfortunately, they don’t perform equally.
Prefer DisplayPort. For high refresh rate gaming, DisplayPort 1.4 or newer is the most dependable choice. It has more than enough bandwidth for 240Hz at 1080p and 1440p, and it supports features like G-Sync and FreeSync without fuss. If both your monitor and graphics card have DisplayPort, use it.
If you must use HDMI, check the version. HDMI 1.4 is limited and often tops out at 60Hz to 120Hz at common gaming resolutions. HDMI 2.0 can reach 240Hz at 1080p on some monitors, but many displays still restrict their 240Hz mode to DisplayPort. HDMI 2.1 offers far more headroom. Remember that both the port on the monitor and the port on the graphics card must support the version you need, and the cable itself must be certified for it. Look for labels such as “Ultra High Speed” on the packaging.
Use the graphics card output, not the motherboard. On a desktop PC, your motherboard’s rear panel has video ports too, and they sit right above the graphics card’s ports. If you plug into the motherboard, the signal comes from your processor’s integrated graphics, which often can’t output 240Hz. Look at the back of the case. The graphics card ports are in the expansion slot area, usually lower down and arranged horizontally or vertically on a separate bracket. Move your cable there if it isn’t already.
Avoid adapters, splitters, and cheap long cables. A DisplayPort-to-HDMI adapter, a docking station, or a KVM switch can silently cut your bandwidth. Very long cables, especially over three meters, can also lose signal quality at high speeds. If you’re using any of these, bypass them temporarily and connect the monitor directly with the shortest, highest-quality cable you have.
After switching, restart the PC and check the refresh rate options again.
Method 2: Set the Refresh Rate in Windows
Windows does not always select the highest available refresh rate when you plug in a new monitor. It often defaults to 60Hz, which makes it look like 240Hz isn’t supported when it simply hasn’t been selected.
- Right-click an empty area of your desktop and choose Display settings.
- Scroll down and click Advanced display.
- If you have more than one monitor, use the dropdown at the top to select the correct one.
- Under Choose a refresh rate, open the dropdown and select 240 Hz.
- Click Keep changes when the confirmation box appears.
On Windows 10, you may need to click Display adapter properties, go to the Monitor tab, and choose the refresh rate from the Screen refresh rate menu there.
If you open the dropdown and 240Hz isn’t listed, don’t worry. That means something upstream is blocking it, and the next methods will help you find out what.
Method 3: Enable High Refresh Rate Options in the Monitor Menu
Many monitors, especially those that advertise “overclocked” refresh rates, need a setting enabled in their own menu before they will accept the full speed. Out of the box, they may be set to a conservative mode for compatibility.
Use the buttons or joystick on the monitor to open the on-screen display (OSD). Navigate through the menus and look for options with names like:
- Overclock or OC mode
- DisplayPort version (such as DP 1.1, 1.2, or 1.4)
- HDMI mode (such as HDMI 1.4 or 2.0)
- Overdrive (OD) or Response Time
- Adaptive-Sync, FreeSync, or G-Sync
If a DisplayPort or HDMI mode setting exists, set it to the newest version available. If there is an overclock or high refresh rate toggle, turn it on. Some monitors require you to confirm and reboot the display. Others only offer 240Hz on one specific input, so check your user manual to see which input supports the full rate.
It is also worth running a factory reset from the OSD if the menu looks confusing or settings seem stuck. Then reapply the changes.
Method 4: Update Your Graphics Driver
The graphics driver controls which resolutions and refresh rates your GPU offers. If you’re running a basic Microsoft driver, or an old version that predates your monitor, 240Hz may not appear at all.
Avoid relying on Windows Update for this. It often installs older, generic versions. Instead, download the latest driver directly from the manufacturer:
- NVIDIA: Download from the NVIDIA website or use the NVIDIA App.
- AMD: Download from the AMD website or use AMD Software.
- Intel: Download from Intel’s website or the Intel Driver & Support Assistant.
During installation, choose the custom or clean installation option if one is offered. This removes old settings that may be interfering.
If you still have problems, do a full clean install:
- Download Display Driver Uninstaller (DDU) from a trusted source.
- Restart your PC into Safe Mode.
- Run DDU and select your GPU manufacturer, then choose Clean and restart.
- After the restart, install the freshly downloaded driver.
This clears out corrupted or leftover files that can quietly block high refresh rates, and it’s a surprisingly effective fix.
Method 5: Create a Custom Resolution in the GPU Control Panel
If the monitor, cable, and driver are all fine but 240Hz still doesn’t show up, you can add it manually in your graphics control panel. Only do this if your monitor is rated for 240Hz.
On NVIDIA:
- Right-click the desktop and open NVIDIA Control Panel.
- Go to Display → Change resolution.
- Click Customize, then Create Custom Resolution.
- Enter your monitor’s native resolution and set the refresh rate to 240Hz.
- Click Test. If the screen displays properly, click Yes to save, then select the new resolution from the list.
On AMD:
- Open AMD Software and go to Settings → Display.
- Find Custom Resolutions and click Create New.
- Set the refresh rate to 240Hz, keep the timing standard on automatic, and save.
If the screen goes black, simply wait. Windows reverts to the previous setting after about 15 seconds. Never push the refresh rate above the manufacturer’s rating, as it can cause flickering, artifacts, or instability.
Method 6: Check Your Resolution and GPU Capability
Refresh rate and resolution are linked. A monitor may reach 240Hz only at a specific resolution, and higher resolutions require much more bandwidth. For example, a 1440p monitor can often hit 240Hz at its native resolution, but a 4K monitor typically needs DisplayPort 1.4 with Display Stream Compression (DSC) or HDMI 2.1 to do the same. If your GPU or cable doesn’t support DSC, the system will cap you at a lower rate.
Try lowering the resolution temporarily to see whether 240Hz appears. If it does, you’ve confirmed that bandwidth is the limit, and you should upgrade the cable or connection type.
Also confirm that your graphics card is up to the task. Older cards, such as those released before NVIDIA’s GTX 10-series or AMD’s RX 400-series, may only support older DisplayPort or HDMI versions and simply cannot output 240Hz at higher resolutions. Check your card’s specifications on the manufacturer’s website to see which port versions it supports.
Method 7: Rule Out Conflicting Settings and Hardware Faults
If you’ve reached this point, check for a few less obvious issues:
- Other monitors: Disconnect secondary displays temporarily. In some setups, a second monitor on an older port forces the system into a lower common mode, or shares bandwidth in a way that restricts the primary screen.
- Scaling and display overrides: Reset any custom DPI scaling and remove third-party display tools that may override refresh rate settings.
- Game or launcher settings: Some games lock refresh rate separately. Check the in-game video options and select 240Hz in fullscreen mode.
- Try another cable, port, and PC: Swap the cable for a different known-good one, test a different port on the graphics card, and if possible connect the monitor to another computer. This will tell you whether the monitor or the original PC is at fault.
Hardware faults are rare, but if the monitor can’t reach 240Hz on any computer with a verified cable, contact the manufacturer about a warranty replacement.
Conclusion
Missing 240Hz is a frustrating problem, but it is rarely permanent. In the vast majority of cases, the fix is simple: use a high-quality DisplayPort 1.4 cable plugged directly into your graphics card, select the refresh rate in Windows, enable any overclock or version options in the monitor menu, and install the latest driver from the manufacturer. Those four steps solve most cases.
If they don’t, move on to creating a custom resolution, checking whether your resolution and GPU can handle the bandwidth, and eliminating conflicting devices or settings. Test after each change so you know exactly what worked. And if everything fails on every computer you try, you may have a faulty monitor or cable that deserves a warranty claim.
Once 240Hz is working, you’ll notice the difference immediately: cursor movement, scrolling, and fast gameplay look noticeably smoother and more responsive. It’s worth the effort to get it right.
FAQ
1. Why does my 240Hz monitor only show 60Hz?
The most common reasons are an older HDMI cable or port, a connection to the motherboard instead of the graphics card, or a missing or generic graphics driver. Switch to a DisplayPort cable connected to your GPU, update the driver from the manufacturer’s website, and then select 240Hz in Windows Advanced display settings. If it still isn’t available, check the monitor’s on-screen menu for an overclock or port version option.
2. Can I get 240Hz over HDMI?
Sometimes. You need HDMI 2.0 or newer on both the monitor and the graphics card, plus a certified high-speed cable. Even then, many monitors limit 240Hz to DisplayPort or only allow it at 1080p. HDMI 2.1 makes it easier, particularly at higher resolutions. Check your monitor’s specifications to see which inputs support the full refresh rate, and when in doubt, use DisplayPort.
3. Does my graphics card need to be powerful to use 240Hz?
Not to enable it. Any GPU with the right port version can output a 240Hz signal on your desktop, and that’s what the refresh rate setting controls. However, to actually reach 240 frames per second in games, you need a strong GPU and often lower graphics settings. If your frame rate is lower than 240, the monitor will still run at 240Hz but display fewer unique frames, or use variable refresh rate to match what your card produces.
4. Is it safe to create a custom resolution at 240Hz?
Generally yes, as long as your monitor is officially rated for 240Hz. Most monitors reject signals they cannot handle, and Windows automatically reverts to the previous setting if the screen goes blank. The risk comes from setting values beyond the monitor’s rated specification, which may cause flickering, visual artifacts, or in rare cases long-term instability. Stick to the manufacturer’s documented limits and use the built-in Test button before saving.