Geeksdigit Team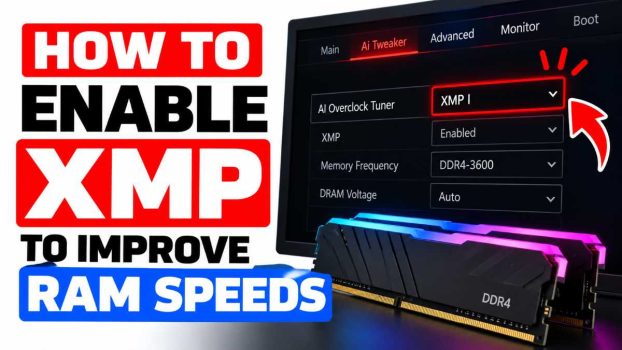
You’ve built or upgraded a PC with a shiny new kit of DDR4 or DDR5 memory, the box says 3600 MHz, 6000 MT/s, or even higher, and you feel good about the purchase. Then you open Task Manager or CPU-Z and see 2133 MHz, 2666 MHz, or 4800 MT/s staring back at you. Did you get ripped off? No. Your RAM is simply running at a conservative default speed instead of the speed it was designed for.
The reason is that motherboards boot memory at the baseline speeds defined by JEDEC, the industry standards body. These speeds are slow on purpose, because they work on virtually every CPU and motherboard combination. The faster speeds advertised on your RAM packaging are “overclocked” profiles that you have to switch on yourself.
That’s where XMP comes in. XMP (Extreme Memory Profile) is a technology developed by Intel that stores pre-tested speed, timing, and voltage settings directly on your memory modules. Enabling it takes a few clicks in your BIOS, and it can noticeably improve performance in gaming, video editing, compression, and other memory-sensitive tasks. AMD users have equivalent technologies called DOCP, EXPO, and A-XMP, depending on the platform and motherboard maker.
This guide walks you through everything: what XMP does, how to check whether you need it, step-by-step instructions for enabling it on the major motherboard brands, how to verify it worked, and what to do if your PC refuses to boot afterward.
What XMP Actually Does
Before changing BIOS settings, it helps to understand what you’re changing. Your RAM has a small chip called the SPD (Serial Presence Detect) that holds its default settings. Alongside the standard JEDEC profiles, many kits also store one or more XMP profiles. Each profile contains:
- Frequency or data rate (for example, 3600 MHz or DDR5-6000)
- Primary timings (such as CL16-18-18-38)
- Voltage (for example, 1.35 V for many DDR4 kits, or about 1.25–1.35 V for DDR5)
- Secondary timings that the manufacturer has validated
When you enable XMP, the motherboard reads this profile and applies all of those values at once. You get the speed you paid for without manually tuning dozens of settings.
A quick terminology note: the terms differ by brand and platform.
- XMP: Intel’s name, and the term used on most Intel boards. Many AMD boards also use it for compatibility.
- DOCP (Direct Over Clock Profile): ASUS’s term for AMD boards using XMP-rated kits.
- EXPO (Extended Profiles for Overclocking): AMD’s own standard, used mainly with DDR5 on Ryzen 7000 and newer platforms.
- A-XMP: MSI’s and some other vendors’ name on certain AMD boards.
All of them do essentially the same thing: they apply a pre-validated overclocked memory profile. In this guide, “XMP” refers to all of them unless noted.
Before You Begin: Check What You Have
A few minutes of preparation can save you troubleshooting later.
1. Confirm your RAM supports XMP or EXPO. Check the product listing, the sticker on the module, or the manufacturer’s website. Most mainstream gaming and enthusiast kits (Corsair Vengeance, G.Skill Ripjaws and Trident Z, Kingston Fury, Crucial Ballistix and Pro OC) support it. Basic budget kits often don’t.
2. Confirm your motherboard and CPU support the speed. Every CPU has a memory controller with limits, and every motherboard has a list of validated memory speeds (called the QVL, or Qualified Vendor List). Budget chipsets such as Intel H610 or older B-series boards may cap memory speed regardless of what your RAM can do. Check your motherboard’s manual or product page.
3. Check your current speed. Press Ctrl + Shift + Esc to open Task Manager, go to the Performance tab, and click Memory. The speed shown there is your current running speed. For more detail, download the free tool CPU-Z and look at the Memory and SPD tabs.
4. Make sure the modules are seated properly and in the right slots. For two sticks on a four-slot board, use the slots your manual recommends, usually the second and fourth from the CPU. Otherwise you may lose dual-channel mode, which hurts performance more than a missing XMP profile does.
5. Update your BIOS if needed. Newer BIOS versions often improve memory compatibility, especially on newer platforms. Only do this if you’re having problems or your board needs it for your CPU, and follow the manufacturer’s instructions carefully.
Method 1: Enable XMP in the BIOS (The Standard Way)
This is the method almost everyone will use. The exact menu names vary, but the process is the same everywhere.
Step 1: Enter the BIOS/UEFI
Restart your computer and tap the BIOS key repeatedly as it boots. The most common keys are Delete or F2. Some boards use F10 or Esc. Your motherboard’s splash screen usually shows the right key for a second or two.
Alternatively, in Windows 10 or 11, you can hold Shift while clicking Restart, then choose Troubleshoot → Advanced options → UEFI Firmware Settings → Restart.
Step 2: Find the memory profile setting
Many modern boards open in an “EZ Mode” or simplified view. Look for a memory or XMP option on the main screen. If you don’t see it, switch to Advanced Mode (usually by pressing F7 or clicking a button at the bottom).
Step 3: Select the profile
Choose “XMP Profile 1” (or “DOCP”, “EXPO I”, or “A-XMP” depending on your platform). Profile 1 is typically the manufacturer’s main rated speed. Some kits include a Profile 2 with different, sometimes more conservative or more aggressive, settings.
Step 4: Save and exit
Press F10, confirm the changes, and let the system reboot. The first boot after enabling XMP may take longer than usual, especially on DDR5, because the system performs “memory training.” This can take anywhere from several seconds to a couple of minutes, and the screen may stay black or the system may restart once or twice. This is normal. Be patient.
Brand-specific locations
ASUS: In EZ Mode, look for the “XMP”, “DOCP”, or “EXPO” toggle near the top of the screen. In Advanced Mode, go to Ai Tweaker and set Ai Overclock Tuner to XMP I, DOCP, or EXPO I.
MSI: Click the A-XMP or EXPO switch at the top of the Click BIOS 5 interface, or go to OC → Extreme Memory Profile (XMP) and select Profile 1.
Gigabyte / AORUS: Open the Tweaker tab and set Extreme Memory Profile (X.M.P.) to Profile 1. On AMD boards you’ll find equivalent options, such as EXPO or DOCP.
ASRock: Go to the OC Tweaker tab. Under DRAM Configuration, set Load XMP Setting to XMP 1.0 Profile 1 (or the equivalent EXPO setting on AMD).
Dell, HP, and Lenovo prebuilts: Many of these systems lock out memory overclocking in the BIOS. If you don’t see an XMP option, your system likely doesn’t support it, and no amount of searching menus will change that.
Method 2: Use Your Motherboard’s One-Click Utilities
Some motherboards offer shortcuts that simplify the process further.
Auto-detect and one-click profiles. Boards from ASUS, MSI, and Gigabyte often include a dedicated memory profile button or an “XMP” option on the first BIOS screen. Clicking it applies the profile without digging through menus.
Hardware switches and buttons. Certain high-end boards have a physical switch or BIOS button for memory profiles or for easily recovering from failed overclocks. Check your manual to see whether yours does.
Manufacturer software in Windows. Some vendors ship utilities (such as ASUS AI Suite or MSI Center) that adjust some performance settings from within Windows. Memory profile changes still generally require a reboot, and BIOS is the most reliable place to do it, so treat these utilities as optional extras rather than the primary method.
Method 3: Set the Speed and Timings Manually
If XMP doesn’t work or you want finer control, you can enter the values manually. This is more advanced, but it’s helpful when the automatic profile is unstable on your particular combination of parts.
- Look up your kit’s rated specifications (speed, timings, voltage) on the packaging or the manufacturer’s site.
- In the BIOS, find the DRAM Frequency (or Memory Frequency) setting and select your target speed.
- Set the primary timings (CL, tRCD, tRP, tRAS) to the rated values.
- Set DRAM Voltage to the rated voltage. Don’t exceed the manufacturer’s rating unless you know what you’re doing, since excess voltage can degrade hardware.
- Save, reboot, and test for stability.
A common compromise is to enable XMP and then lower the frequency one step (for example, from 3600 to 3466 MHz on DDR4). You keep most of the performance while gaining stability.
How to Verify XMP Is Working
After rebooting into Windows, confirm the change:
- Task Manager: Check the Performance → Memory tab. The speed should now match your kit’s rating. Note that Windows may display DDR memory at its actual clock rather than the doubled “effective” number. If your box says 3200 and Windows shows 3200 MHz, great. CPU-Z, on the other hand, shows the real clock, so a DDR4-3200 kit appears there as roughly 1600 MHz. Multiply by two to get the effective speed.
- CPU-Z: The Memory tab shows frequency, timings, and channel mode. The SPD tab shows the profiles stored on each module.
- Stability test: Run a memory test such as MemTest86 (bootable) or the memory test in tools like TestMem5 or OCCT for at least a few passes. Memory errors may not crash your PC immediately, but they can corrupt files over time, so don’t skip this.
You can also run your usual games or a benchmark before and after. Gains vary: some games gain a few percent, while CPU-bound titles and integrated-graphics systems (where RAM doubles as video memory) can see much larger improvements.
Troubleshooting Common Problems
The PC won’t boot after enabling XMP. Most boards will fail a few times and then automatically revert to safe defaults. If yours doesn’t, clear the CMOS using the motherboard jumper or button, or remove the coin-cell battery for a minute. Then re-enter the BIOS and try again.
Random crashes or blue screens. This suggests instability. Try a lower speed, loosen timings slightly, update the BIOS, or test each stick individually to rule out a bad module.
XMP option is missing. Your kit may not include an XMP profile, your board may not support it, or you may be using a locked prebuilt system. On AMD boards, look for DOCP, EXPO, or A-XMP instead.
Speed doesn’t match the box. Your CPU’s memory controller or the motherboard’s chipset may be capping it. Four sticks also typically run slower than two because the controller is under more load.
Mixed kits. Combining sticks from different kits, even of the same model, often causes problems. For best results, buy a single matched kit.
Conclusion
Enabling XMP is one of the simplest and cheapest ways to get more out of your PC. Your RAM was almost certainly built to run faster than the default settings allow, and a short trip to the BIOS lets it do so. The process is the same on nearly every system: enter the BIOS, find the memory profile setting (XMP, DOCP, or EXPO), choose Profile 1, save, and reboot. Then verify your speed in Windows and run a stability test so you can trust the result.
If something goes wrong, there’s no need to panic. Clearing the CMOS resets everything, and you can always fall back to a slightly lower speed or manual tuning. Taking a few minutes to set this up properly means you get the performance you paid for, with no extra hardware cost.
Frequently Asked Questions
1. Is it safe to enable XMP?
Generally, yes. XMP profiles are tested by the memory manufacturer and applied at voltages they’ve validated for the kit. Technically, running above the JEDEC baseline counts as overclocking, and a CPU or motherboard manufacturer’s warranty may not formally cover issues caused by it, but in practice this is a mainstream and widely used feature. Problems usually show up as instability rather than hardware damage, and the fix is simply to reduce the speed or revert the setting.
2. Will XMP actually make my PC faster?
It depends on what you do. Gaming at high frame rates, running integrated graphics, video editing, 3D rendering, and file compression tend to benefit most. Gains in everyday browsing or office work are negligible. On AMD Ryzen systems, faster memory also speeds up the Infinity Fabric, which can improve performance more than you’d see on some Intel setups. Don’t expect miracles, but a free improvement is still worthwhile.
3. Do I need to enable XMP every time I restart or after a BIOS update?
No, the setting is saved in the BIOS and persists across restarts. However, a BIOS update or a CMOS reset restores defaults, so you’ll need to enable XMP again afterward. It’s a good habit to check your memory speed after any BIOS change.
4. Can I use XMP with AMD processors?
Yes. AMD systems support it through AMD’s own variants. DDR5 kits designed for Ryzen often use EXPO, while many Intel-oriented XMP kits also work on AMD boards via DOCP or A-XMP, though results can vary. For the best compatibility, look for kits that list EXPO support if you’re on a modern Ryzen platform, or check your motherboard’s QVL.