Geeksdigit Team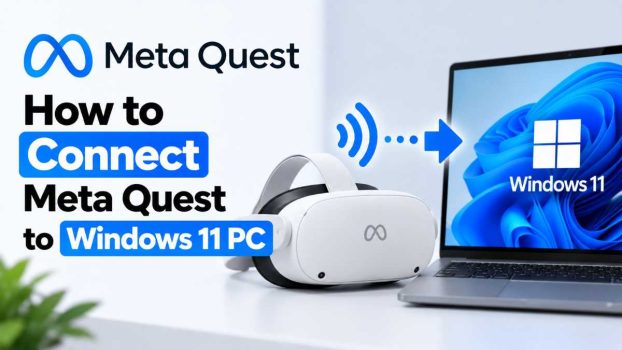
The Meta Quest is a capable standalone VR headset right out of the box, but its full potential opens up once you connect it to a Windows 11 PC. Pairing your Quest with a gaming computer gives you access to PCVR titles with sharper graphics, higher frame rates, and more processing power than the headset can manage on its own. It also lets you use your Quest as a wireless or wired extension of your desktop, complete with virtual monitors you can arrange around you.
The catch is that Meta and Microsoft now offer several different ways to make this connection, and picking the wrong one for your setup can lead to frustrating lag, dropped connections, or a headset that simply won’t pair. This guide walks through the main methods for linking a Meta Quest headset to a Windows 11 machine in 2026, including the requirements for each, step-by-step setup instructions, and answers to the questions people run into most often.

Before diving into the methods, it helps to know what you’ll need on hand:
- A Meta Quest headset (Quest 3 or Quest 3S for the newest wireless pairing options; older models work with Link and Air Link)
- A Windows 11 PC, ideally version 22H2 or newer, with a dedicated GPU that meets Meta’s minimum specifications
- The Meta Horizon Link app installed on your PC
- A 5GHz or 6GHz Wi-Fi network for wireless methods
- A certified USB-C 3.0+ cable if you plan to go wired
With that groundwork in place, here are the four main ways to connect your headset to your PC.
Method 1: Wired Connection with a Link Cable
The most reliable way to connect a Meta Quest to a Windows 11 PC is still a simple USB cable. Because the data runs over a physical connection instead of your Wi-Fi network, this method avoids the compression artifacts and latency spikes that can affect wireless streaming, which makes it a solid choice for fast-paced or competitive PCVR games.
What you’ll need:
- A USB-C 3.0 or higher cable capable of at least 5 Gbps data transfer (the official Meta Quest Link Cable works well, but many third-party cables rated for USB 3.0 speeds are cheaper alternatives)
- A free USB 3.0 port on your PC (usually colored blue inside the port, or labeled “SS” for SuperSpeed)
- The Meta Horizon Link app installed and updated on your computer
Steps to connect:
- Install the Meta Horizon Link app on your PC if you haven’t already, and let it run any required driver installations.
- Plug the USB-C end of your cable into your headset and the other end into a USB 3.0 port on your PC.
- Put on your headset. A prompt should appear asking you to allow the connection to your computer — select Allow.
- Press the Meta button on your right controller to open the Quick controls menu.
- Select Link, then choose the PC you just connected to.
- Your headset display will switch over to show your Windows desktop, and from there you can launch Steam VR or any other PCVR software.
If your headset doesn’t detect the cable, try a different USB port (preferably one wired directly to your motherboard rather than a front-panel hub), and confirm the cable itself supports data transfer and not just charging.
Method 2: Wireless Streaming with Air Link
Air Link is Meta’s official solution for cutting the cord entirely. It streams the same PCVR content over your home Wi-Fi network instead of a cable, which trades a small amount of latency for freedom of movement. For most single-player games and slower-paced experiences, the difference is barely noticeable on a strong connection.
What you’ll need:
- A 5GHz (or 6GHz) Wi-Fi network — 2.4GHz connections are too congested and slow for smooth streaming
- Ideally, your PC connected to the router via Ethernet, with the headset on Wi-Fi
- The Meta Horizon Link app running on your PC with Air Link enabled
Steps to connect:
- On your PC, open the Meta Horizon Link app, go to its settings, and make sure Air Link is turned on.
- Put on your headset and press the Meta button to open Quick controls.
- Select Settings, then Link, and toggle Air Link on if it isn’t already active.
- Your headset should detect nearby PCs running the Link app. Select your computer from the list.
- Confirm the connection prompt on your PC when it appears.
- Once paired, your headset will show your desktop just as it would over a wired connection.
Air Link performs best when both devices are close to your router and not competing with other heavy network traffic like video streaming or large downloads. If you notice stutter or compression artifacts, try lowering the bitrate in the Air Link settings within the Horizon Link app.
Method 3: Mixed Reality Link (Windows 11’s Native Pairing)
Meta and Microsoft have built a more integrated pairing option specifically for Windows 11, called Mixed Reality Link. Rather than routing everything through the Horizon Link software, this method uses a dedicated Windows app to pair your headset directly with your PC, primarily for extending your desktop into virtual displays. For Windows 11 PCs, pairing is done through the Mixed Reality Link app, while Mac and older Windows versions rely on the Meta Quest Virtual Display app instead.
What you’ll need:
- A Meta Quest 3 or Quest 3S headset — older headsets aren’t supported
- Windows 11 version 22H2 or newer
- Horizon OS v81 or newer on the headset
- Your PC and headset connected to the same 5GHz or 6GHz Wi-Fi network, using 802.11ac or higher
- A GPU that meets Mixed Reality Link’s system requirements
Steps to connect:
- Download and install Mixed Reality Link from the Microsoft Store on your PC.
- Make sure your PC is nearby, turned on, and unlocked.
- Put on your Quest headset.
- A prompt to pair should appear near your keyboard — select pair to continue. If it doesn’t appear automatically, open Virtual Display and select Add computer.
- Once paired, hover over the Virtual Display panel in your headset, open its settings, and select Add display to create a virtual monitor.
- You can resize and reposition each virtual display, and you’re able to run up to three at once.
This method is aimed less at gaming and more at using your headset as a productivity tool — think multiple floating monitors for work, rather than launching Steam VR titles. If you’re specifically after PCVR gaming, Link or Air Link remain the better fit.
Method 4: Third-Party Wireless Apps (Virtual Desktop and Steam Link)
If Meta’s own tools don’t give you the performance or features you want, third-party wireless streaming apps are a popular alternative. The two most common are Virtual Desktop and Valve’s Steam Link app, both of which stream PCVR content over Wi-Fi in a similar way to Air Link but with their own tuning options and, in some cases, noticeably better image quality.
What you’ll need:
- A purchased copy of Virtual Desktop (available on the Meta Quest Store) or the free Steam Link app
- SteamVR installed on your PC if you’re using it for gaming
- A strong, low-interference 5GHz or 6GHz Wi-Fi network — a dedicated router or a wired PC connection improves results noticeably
Steps to connect (Virtual Desktop):
- Purchase and install Virtual Desktop from the Meta Quest Store on your headset.
- Install the matching Virtual Desktop Streamer app on your PC.
- Launch the streamer on your PC and open the app on your headset; it should detect your computer automatically if both are on the same network.
- Select your PC from the list inside the headset app to connect.
- Adjust bitrate, resolution, and refresh rate settings in the streamer app to match your network’s capability.
Steps to connect (Steam Link):
- Install the Steam Link app from the Meta Quest Store.
- Make sure Steam and SteamVR are running on your PC.
- Open Steam Link in your headset and follow the on-screen pairing code to link it with your PC.
- Launch SteamVR from within the headset once connected.
Both apps tend to offer more granular control over video quality and network settings than Air Link, which can help if you have a capable router and want to fine-tune the balance between visual fidelity and latency.
Conclusion
Connecting a Meta Quest to a Windows 11 PC isn’t a one-size-fits-all process anymore — you have real choices depending on what you value most. A wired Link cable is still the most dependable option if you want the lowest latency and don’t mind being tethered. Air Link offers Meta’s official wireless experience without extra cost, provided your Wi-Fi is up to the task. Mixed Reality Link is worth exploring if your priority is turning your headset into a set of virtual monitors for productivity rather than gaming. And third-party tools like Virtual Desktop or Steam Link give enthusiasts more control over streaming quality, often at the cost of a small learning curve or an upfront purchase.
Whichever method you choose, most connection headaches come down to two things: outdated software and weak Wi-Fi. Keeping the Meta Horizon Link app, your headset’s Horizon OS, and your PC’s GPU drivers up to date will resolve the majority of pairing issues before they start, and a solid 5GHz or 6GHz network will make wireless methods feel just as responsive as a cable.
Frequently Asked Questions
1. Do I need a gaming PC to connect my Meta Quest to Windows 11? Yes, to a degree. While basic pairing and screen mirroring can work on modest hardware, running PCVR games smoothly requires a dedicated GPU that meets Meta’s minimum specifications. Check the official system requirements before assuming your laptop or budget desktop will handle demanding titles well.
2. Which is better: Link cable or Air Link? It depends on your priorities. A Link cable delivers the most consistent, lowest-latency connection since it isn’t affected by Wi-Fi interference, making it the safer choice for competitive or fast-reaction games. Air Link trades a small amount of latency and image compression for the freedom to move without a cable, which many people find worth it for casual or exploration-focused games.
3. Why isn’t my Quest headset detecting my PC over Air Link? This is almost always a network issue. Make sure both your headset and PC are on the same Wi-Fi network, ideally the 5GHz or 6GHz band rather than 2.4GHz. Router settings that isolate devices from each other (sometimes called AP or client isolation) can also block detection, so check your router’s admin settings if the problem persists.
4. Can I use Mixed Reality Link and Air Link at the same time? No, you can only actively use one connection method at a time. Mixed Reality Link and Air Link both rely on the same underlying Wi-Fi connection to your PC, so you’ll need to choose which app or feature you want active for a given session and disconnect from the other.
5. My headset connects but I’m getting a black screen or freezing — what should I try? Signing out of your Meta account on the PC’s Horizon Link app and signing back in resolves this for many users, since it’s often caused by cached account data getting stuck. It’s also worth checking that your GPU drivers are current and that no other application is using your USB port or Wi-Fi bandwidth heavily in the background.
6. Do older Meta Quest headsets support all of these methods? Not entirely. Wired Link and Air Link work across most Quest headsets, but Mixed Reality Link is currently limited to the Quest 3 and Quest 3S. If you’re using an original Quest, Quest 2, or Quest Pro, stick to Link, Air Link, or third-party apps like Virtual Desktop and Steam Link.
7. Is a wired connection actually faster than wireless? In terms of raw data reliability, yes — a good USB 3.0 cable will consistently outperform Wi-Fi in latency and won’t suffer from network congestion. That said, on a strong, uncongested 5GHz or 6GHz network with a nearby router, the practical difference for most games is small enough that many players prefer the freedom of a wireless setup.
8. What’s the easiest first method to try if I’m new to PCVR? Start with a wired Link cable connection. It has the fewest variables to troubleshoot — no network configuration required — and once you confirm your PC and headset can communicate properly, moving on to Air Link or a third-party wireless app becomes much easier to diagnose if something doesn’t work.

![How to Boot into Windows 11 Safe Mode [5 Easy Methods]](https://www.geeksdigit.com/wp-content/uploads/2026/09/How-to-Boot-into-Windows-11-Safe-Mode-336x220.jpg)