Geeksdigit Team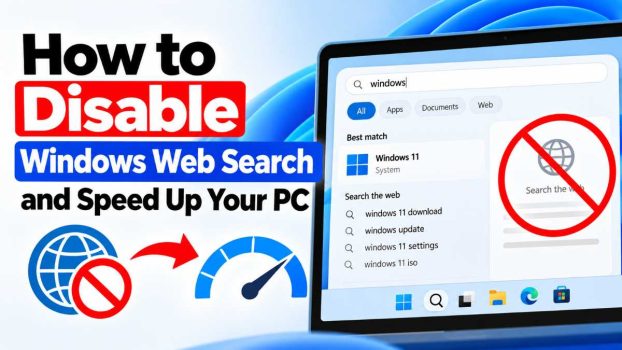
If you’ve ever hit the Windows key, started typing to find a local file, and instead got a page full of Bing search results, you’re not alone. Windows 10 and Windows 11 both blend local file search with web search by default, and for many users this feels less like a feature and more like an unwanted detour to Microsoft’s search engine. Beyond the annoyance, this behavior can add latency to what should be an instant search, since your PC is reaching out to the internet instead of just scanning your own indexed files.
The good news is that disabling web search is straightforward, and it can be done through several different methods depending on your Windows edition and comfort level with system settings. This guide walks through the most reliable ways to turn off web search in Windows, explains why it can help your PC feel faster, and answers some of the most common questions people have about this process.
Why Web Search Slows Things Down

When you search from the Start Menu, Windows tries to locate matches on your PC first. If nothing turns up quickly, or even in parallel, it fires off a query to Bing and folds those results into the same list. This means every search is potentially doing double duty: scanning your local index and making a network request. On a slow or unstable connection, that second half of the process can visibly delay how fast results appear, and it can make simple tasks like opening an app or finding a document feel sluggish. Removing the web component means Windows only has to do the part it’s actually good at: fast, local, indexed search.
Method 1: Turn Off Web Search Through Settings
This is the simplest method and doesn’t require touching the registry or Group Policy at all. On Windows 11, you can disable web search directly from the Settings app by opening Settings, going into Privacy & Security, and then Search Permissions, where you’ll find a toggle for web search that can be switched off. Some versions of this setting split the toggle by account type, so you may see separate switches for a Microsoft account and a work or school account, both of which should be turned off for full effect.
This method is reversible at any time and is the safest starting point for most users, especially those who aren’t comfortable editing system files.
Method 2: Disable Web Search Using the Registry Editor
For users on Windows 11 Home, where Group Policy Editor isn’t available, the registry is the most dependable route. The general steps involve opening the Registry Editor, navigating to a policy key under HKEY_CURRENT_USER, creating a new key if it doesn’t already exist, and adding a DWORD value that tells Explorer to suppress search suggestions.
Here’s the general process:
- Press Windows + R, type
regedit, and hit Enter, then approve the User Account Control prompt. - Navigate to
HKEY_CURRENT_USER\Software\Policies\Microsoft\Windows. - If there’s no
Explorerkey underneath, right-click on Windows, choose New, and create one. - Inside the Explorer key, right-click in the empty space, select New, and choose DWORD (32-bit) Value.
- Name it
DisableSearchBoxSuggestionsand set its value to 1. - Close the Registry Editor and restart your PC for the change to apply.
Some guides also point to a related value called BingSearchEnabled under a different path, HKEY_CURRENT_USER\Software\Microsoft\Windows\CurrentVersion\Search, which can be created as a DWORD and set to 0 to specifically stop Bing results from appearing in Start Menu searches. Because Windows updates periodically shuffle which registry keys control which behavior, it’s worth trying both if the first doesn’t fully suppress web results.
As always with registry edits, consider backing up the registry or creating a system restore point first, since incorrect edits elsewhere in the registry can cause instability.
Method 3: Use Group Policy Editor (Pro, Enterprise, and Education Editions)
If you’re running Windows 11 Pro, Enterprise, or Education, the Local Group Policy Editor offers a cleaner, more official way to disable web search without manually creating registry keys.
- Press Windows + R, type
gpedit.msc, and press Enter. - Navigate to User Configuration, then Administrative Templates, then Windows Components, then Search (some builds place this under File Explorer instead).
- Look for a policy along the lines of “Don’t search the web or display web results in Search,” or in some builds, “Turn off display of recent search entries in the File Explorer search box.”
- Set the policy to Enabled and click Apply, then OK.
- Restart your computer, or run
gpupdate /forcein Command Prompt to apply the change immediately.
Group Policy is generally considered more robust than registry edits because it’s designed specifically for this kind of system-wide configuration change, and it’s less likely to get silently reset by a future Windows update.
Method 4: Replace Start Menu Search With a Local-Only Tool
If you want to sidestep the Windows Search experience entirely, a lightweight third-party file search tool can serve as a full replacement for the Start Menu’s search function. Free local-index utilities scan your entire drive and return results instantly without ever touching the internet.
To set one up as a Start Menu alternative, install the tool, then configure a global keyboard shortcut (something like Alt + Space) to summon its search window instantly. Enabling a “close on execute” option means the window disappears the moment you launch a result, mimicking the feel of the Start Menu but without any web component at all. This approach is popular with power users who search for files constantly and want zero delay or network dependency.
Additional Tips to Speed Up Your PC
Disabling web search addresses one specific source of slowdown, but if your goal is a genuinely faster PC, it helps to pair it with a few other habits:
- Trim startup programs. Open Task Manager, go to the Startup Apps tab, and disable anything you don’t need launching automatically.
- Keep Windows Search indexing focused. In Indexing Options (found via Control Panel or Settings search), make sure only folders you actually search often are included, rather than your entire drive.
- Check for background bloatware. Some manufacturer-installed utilities run persistent background services that consume RAM and CPU for no real benefit.
- Update your SSD and driver firmware. Especially on older machines, outdated storage drivers can bottleneck search indexing and general responsiveness.
- Restart occasionally. Long-running Windows sessions accumulate memory fragmentation and stalled background processes; a routine restart clears a surprising amount of this out.
None of these alone will transform a struggling PC, but combined with disabling web search, they add up to a noticeably snappier experience.
Conclusion
Windows’ habit of mixing web results into local search is a design choice aimed at engagement with Bing, not at making your searches faster, and for most users it’s safe and beneficial to turn it off. Whether you go through Settings for a quick and reversible fix, the Registry Editor if you’re on Windows Home, Group Policy if you have a Pro or Enterprise license, or a dedicated third-party search tool for a full local-only experience, the outcome is the same: faster, more predictable search results that stay on your machine. Combine that change with a few general performance habits like trimming startup apps and keeping your search index lean, and you’ll get a Windows experience that feels considerably more responsive day to day.
FAQ
1. Will disabling web search break Windows Search entirely?
No. Turning off web search only removes the Bing-powered results; local file, app, and settings search continues to work normally. Some users report a warning message claiming indexing “isn’t working” after applying the registry fix, but this appears to be a cosmetic bug rather than an actual functional problem, since local search still returns correct results in practice.
2. Which method is best for someone who isn’t tech-savvy?
The Settings app method is the easiest and safest option. It requires no registry or policy editing, and you can toggle it back on just as easily if you change your mind.
3. Does this setting get reset after a major Windows update?
It can, particularly with registry-based changes, since large feature updates sometimes reset user preferences to defaults. If you notice web search has returned after an update, it’s worth reapplying whichever method you used originally.
4. How much of a speed difference will I actually notice?
The impact varies by connection speed and how often you search. On a fast, stable connection the difference may be subtle, but on slower or intermittent connections, cutting out the network round-trip can make Start Menu searches feel noticeably snappier, since results no longer wait on a web request that may time out or lag.