
 Sukhdev Kamboj
FFmpeg is the tool most video and audio software runs on under the hood. Whether you want to convert a file from one format to another, compress a bloated video, strip audio out of a clip, or trim a recording without opening a heavy editor, FFmpeg can do it from a single command line. It’s free, open source, and available for every major platform, including Windows 11.
The catch is that FFmpeg doesn’t ship with a friendly installer. There’s no “Next, Next, Finish” wizard — it’s a set of executable files that you either place manually or install through a package manager. That trips up a lot of first-time users, mostly around one step: getting FFmpeg onto your Windows PATH so you can type ffmpeg from any folder instead of hunting down the executable every time.

This guide walks through the most reliable ways to install FFmpeg on Windows 11, how to confirm it’s working, and how to run some of the commands you’ll use most often. By the end, you’ll have a working FFmpeg setup and a starting toolkit of commands for everyday video and audio tasks.
Method 1: Install with Winget (Recommended)
Winget is Microsoft’s official package manager, built into Windows 11 by default. It’s the fastest way to get FFmpeg installed correctly, since it handles the download and PATH configuration for you.
Steps:
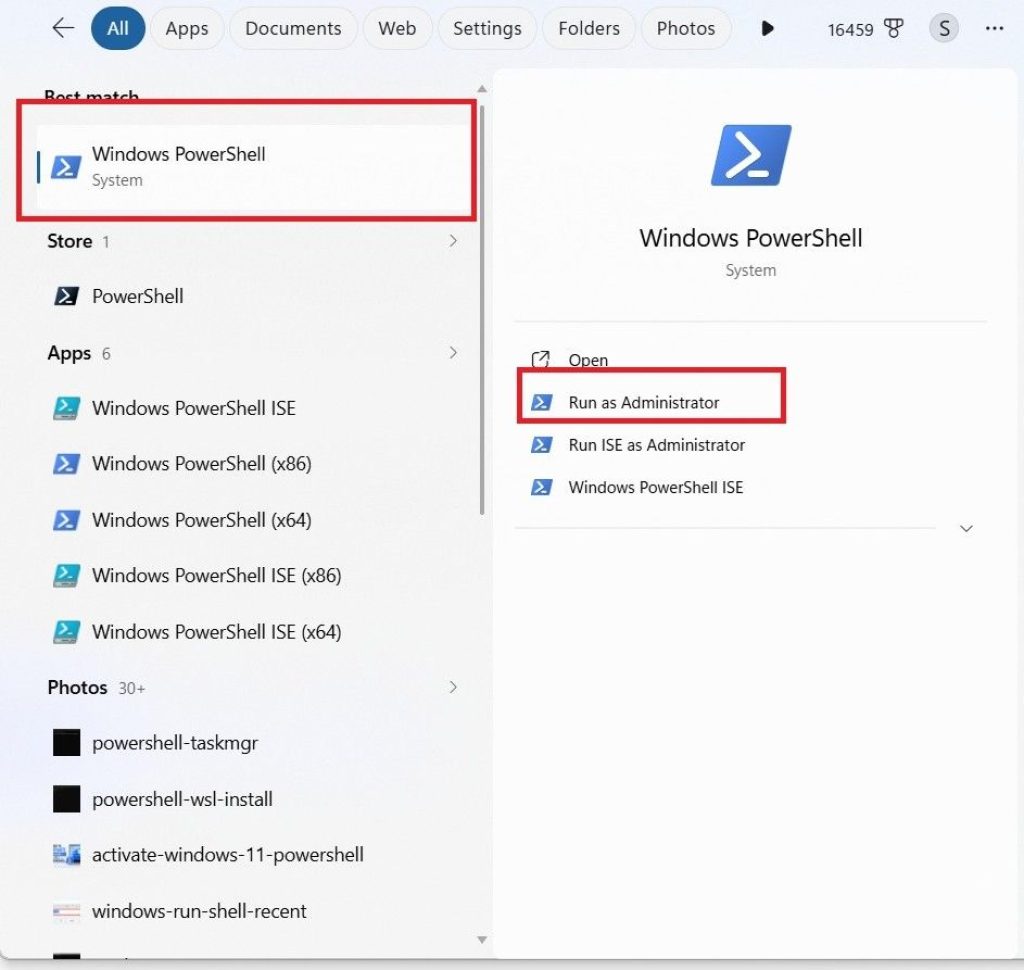
Right-click the Start button and choose Terminal (Admin), or search for “PowerShell” and run it as administrator.
Run the install command:
powershell
winget install -e --id Gyan.FFmpeg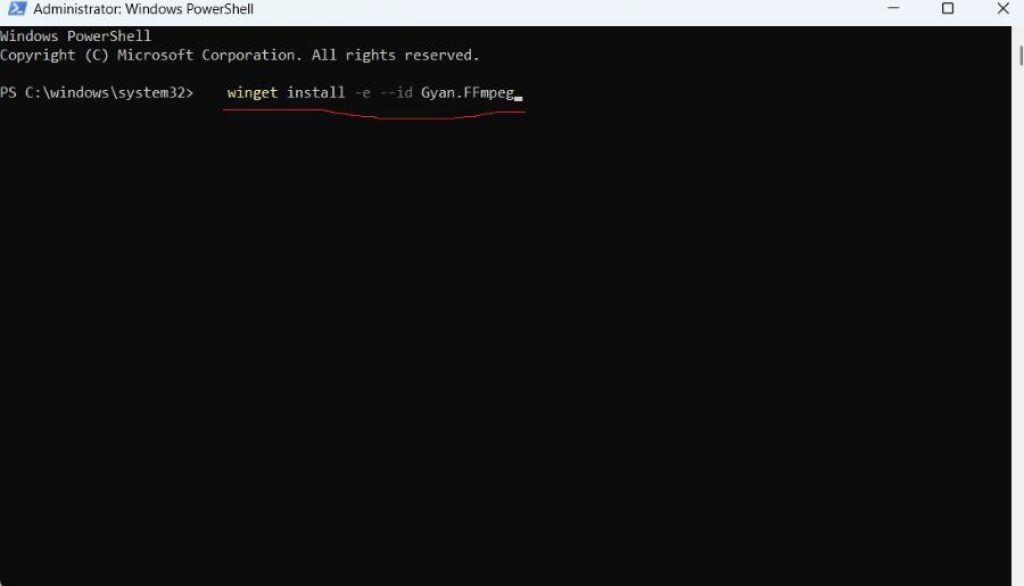
Approve any license prompt by typing Y and pressing Enter.
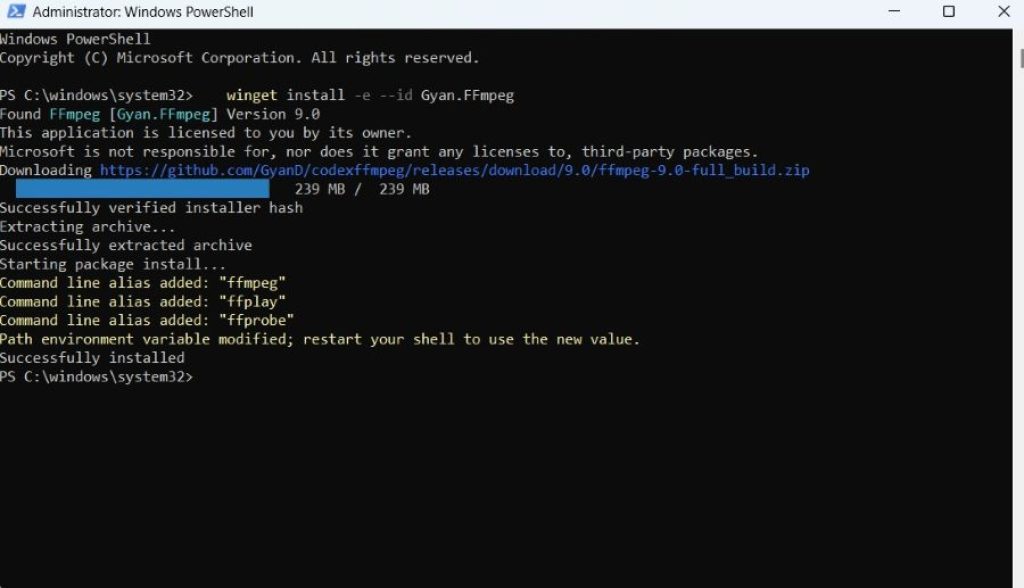
Close and reopen your terminal so the updated PATH takes effect.
Confirm the install:
powershell
ffmpeg -versionIf you see version details printed back, you’re done. This method installs a full static build maintained by Gyan.dev, one of the two most trusted Windows FFmpeg build providers, and keeps you on a reasonably current release.
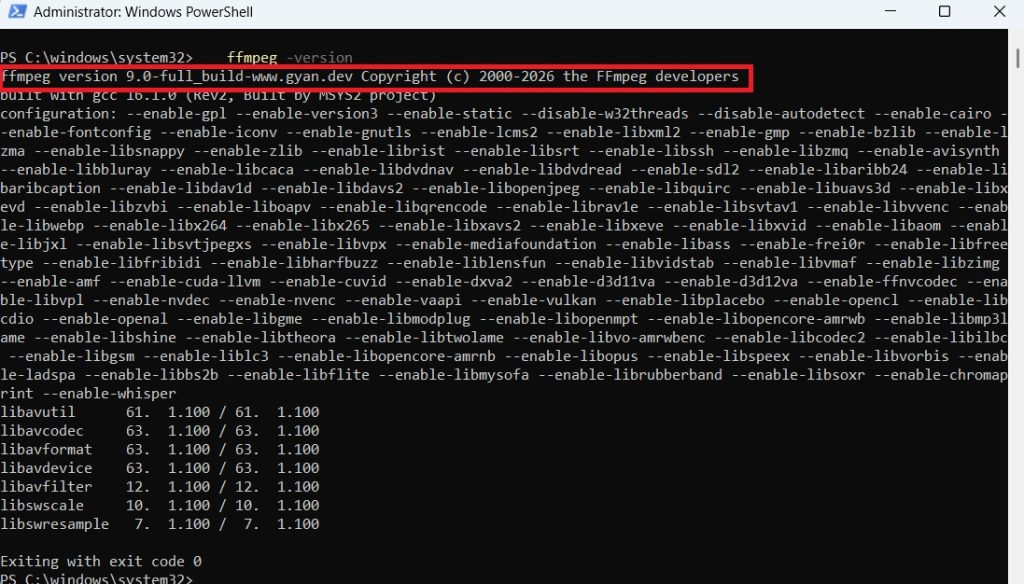
Why choose this method: no manual file extraction, no manual PATH editing, and updates are just a re-run of the same command later (winget upgrade Gyan.FFmpeg).
Method 2: Install with Chocolatey
Chocolatey is a popular third-party package manager for Windows. If you already use it for other developer tools, adding FFmpeg is a one-liner.
Steps:
- If you don’t have Chocolatey yet, install it by running this in an administrator PowerShell window:
powershell
   Set-ExecutionPolicy Bypass -Scope Process -Force
   [System.Net.ServicePointManager]::SecurityProtocol = [System.Net.ServicePointManager]::SecurityProtocol -bor 3072
iex ((New-Object System.Net.WebClient).DownloadString('https://community.chocolatey.org/install.ps1'))- Install FFmpeg:
powershell
choco install ffmpeg- Verify it:
powershell
ffmpeg -versionChocolatey packages FFmpeg from the same trusted essentials build and manages the PATH entry automatically. Updating later is just choco upgrade ffmpeg.
Why choose this method: you’re already managing other software through Chocolatey and want everything in one place.
Method 3: Install with Scoop
Scoop is a lightweight, script-friendly package manager that many developers prefer because it installs everything into your user folder rather than system-wide, avoiding the need for admin rights on most installs.
Steps:
- Install Scoop (in a regular, non-admin PowerShell window):
powershell
   Set-ExecutionPolicy RemoteSigned -Scope CurrentUser
irm get.scoop.sh | iex- Install FFmpeg:
powershell
scoop install ffmpeg- Verify it:
powershell
ffmpeg -versionWhy choose this method: you don’t have or want administrator access, or you prefer keeping tools isolated from the system-wide Program Files structure.
Method 4: Manual Installation (Full Control)
This is the “do it yourself” route. It works on any version of Windows, doesn’t depend on a package manager, and gives you full control over exactly where FFmpeg lives.
Steps:
- Go to gyan.dev/ffmpeg/builds (the most commonly recommended source for Windows builds), or the BtbN/FFmpeg-Builds GitHub page as an alternative.
- Download ffmpeg-release-essentials.7z for standard use, or ffmpeg-release-full.7z if you need extra codecs. You’ll need 7-Zip to extract
.7zarchives. - Extract the archive to a permanent location, for example
C:\ffmpeg. Inside, you’ll find abinfolder containingffmpeg.exe,ffplay.exe, andffprobe.exe. - Add that
binfolder to your PATH:- Press Win, search for “environment variables,” and open Edit the system environment variables.
- Click Environment Variables.
- Under System variables, select Path, then Edit.
- Click New and enter
C:\ffmpeg\bin. - Click OK on every window to save.
- Open a new terminal window (this is required — existing windows won’t see the PATH change) and confirm:
powershell
ffmpeg -versionWhy choose this method: you want a specific build, a specific version pinned in place, or you’re on a locked-down machine where package managers aren’t available.
Method 5: Portable Install (No PATH Setup)
If you don’t want to touch environment variables at all, you can run FFmpeg without ever adding it to PATH — you just have to reference the full file path or work from the same folder each time.
Steps:
- Download and extract the build as in Method 4, but keep it anywhere convenient, such as your Desktop or Downloads folder.
- Open a terminal and navigate directly into the extracted
binfolder:
powershell
cd C:\Users\YourName\Downloads\ffmpeg\bin- Run commands by calling the executable directly:
powershell
.\ffmpeg.exe -versionWhy choose this method: you’re testing FFmpeg once, working on a shared or restricted computer, or don’t want to modify system settings at all. The trade-off is that you’ll need to cd into that folder (or type the full path) every single time you want to use it, which gets tedious for regular use.
Using FFmpeg: Everyday Commands
Once installed, everything happens through the terminal. Here are commands that cover the vast majority of day-to-day tasks.
Convert a video to another format:
powershell
ffmpeg -i input.mov output.mp4Extract audio from a video:
powershell
ffmpeg -i input.mp4 -vn -acodec copy output.aacCompress a video (adjust CRF for quality vs. size; lower is higher quality):
powershell
ffmpeg -i input.mp4 -vcodec libx264 -crf 28 output.mp4Trim a clip without re-encoding (fast, precise to the nearest keyframe):
powershell
ffmpeg -i input.mp4 -ss 00:00:10 -to 00:00:30 -c copy output.mp4Convert audio to MP3:
powershell
ffmpeg -i input.wav -codec:a libmp3lame -qscale:a 2 output.mp3Resize a video:
powershell
ffmpeg -i input.mp4 -vf scale=1280:720 output.mp4Merge multiple video files (create a text file listing the inputs, then run):
powershell
ffmpeg -f concat -safe 0 -i filelist.txt -c copy output.mp4Check file info without converting anything:
powershell
ffprobe input.mp4Run ffmpeg -h at any time for a quick reference of flags, or ffmpeg -filters to see the full list of available video and audio filters.
FAQ
Do I need administrator rights to install FFmpeg? Only for the Winget and Chocolatey methods, since they modify system-level PATH entries. The Scoop and manual “user PATH” approaches can be done without admin access.
FFmpeg isn’t recognized after installing — what’s wrong? The most common cause is an open terminal window that hasn’t picked up the new PATH. Close every open terminal and open a fresh one. If it’s still not found, double-check the PATH entry points to the folder that actually contains ffmpeg.exe.
Is FFmpeg safe to download? Yes, as long as you use recognized sources: the official ffmpeg.org site, gyan.dev, or the BtbN GitHub builds, or a package manager like Winget, Chocolatey, or Scoop. Avoid third-party download sites that repackage installers with bundled extras.
Does FFmpeg have a graphical interface? Not on its own — it’s command-line only. If you want a GUI, tools like HandBrake or Shutter Encoder use FFmpeg internally while giving you buttons and sliders instead of commands.
How do I update FFmpeg later? With Winget: winget upgrade Gyan.FFmpeg. With Chocolatey: choco upgrade ffmpeg. With Scoop: scoop update ffmpeg. For a manual install, just download the newer build and overwrite the old files in the same folder — the PATH entry doesn’t need to change.
Conclusion
FFmpeg looks intimidating at first because it skips the installer and the interface that most software gives you, but getting it running on Windows 11 takes only a few minutes with the right method. If you want the least friction, Winget is the best starting point — one command, no manual PATH editing, easy to update later. If you already lean on Chocolatey or Scoop, either works just as well. And if you want full control over the exact build and version, the manual install gives you that, at the cost of a little extra setup.
Once it’s installed, the real value shows up in the commands themselves. A handful of one-line commands can replace tasks that would otherwise mean opening a heavy video editor, waiting through a slow export, or paying for conversion software entirely. Start with the basics — converting, trimming, and compressing — and expand from there as you run into new tasks; FFmpeg’s documentation and -h flags cover nearly everything else you’ll need along the way.





