
 Geeksdigit Team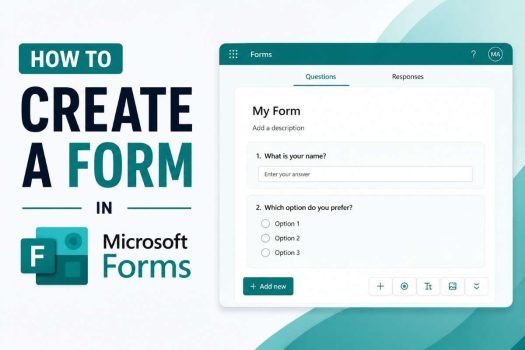
Collecting information efficiently is one of the most common challenges faced by teachers, event organizers, human resources professionals, marketers, and everyday users who need quick feedback or data from a group of people. Microsoft Forms, a lightweight and intuitive survey and quiz-building tool included with Microsoft 365, offers a fast and accessible way to solve this problem. Unlike more complex data-collection platforms that require extensive setup or technical knowledge, Microsoft Forms is designed for simplicity. It allows anyone with a Microsoft account to build a professional-looking form in minutes, share it broadly, and watch responses roll in through a real-time, auto-updating dashboard.
Microsoft Forms is particularly popular in educational settings, where teachers use it to create quizzes with automatic grading, and in corporate environments, where it supports everything from employee satisfaction surveys to event registrations. Its tight integration with other Microsoft 365 apps, such as Excel, Teams, and SharePoint, makes it especially convenient for organizations already embedded in the Microsoft ecosystem. Because it lives in the cloud, forms can be accessed, edited, and completed from virtually any device with an internet connection, whether that’s a desktop computer, tablet, or smartphone.
This guide walks through the practical steps of creating a form in Microsoft Forms, covering everything from initial setup to customization, question types, sharing options, and response analysis. Whether you are building your first survey or looking to refine your existing workflow, the methods outlined below will help you get the most out of this versatile tool.
Methods
Step 1: Accessing Microsoft Forms
The first step is gaining access to the platform. Microsoft Forms is available to anyone with a Microsoft 365 subscription, a school or work account, or even a free personal Microsoft account in many cases. To begin, navigate to forms.microsoft.com or forms.office.com in a web browser and sign in with your credentials. Alternatively, if your organization uses Microsoft 365, you can access Forms directly through the app launcher (the grid icon in the top-left corner of Outlook, Word, or other Office applications) by selecting the Forms icon, which may be listed under “All apps.”
For those working within Microsoft Teams, Forms can also be added as a tab within a channel or team, allowing collaborative form creation without leaving the Teams interface. This is particularly useful for group projects or departmental surveys where multiple people need to contribute to the same form.
Once logged in, you will land on the Forms homepage, which displays any forms or quizzes you have previously created, along with templates and a prominent option to start something new.
Step 2: Creating a New Form
From the homepage, click “New Form” to begin building from scratch, or select “New Quiz” if your goal is to create an assessment with automatically graded questions. Microsoft Forms also offers a library of templates for common use cases such as event feedback, customer satisfaction surveys, and RSVP forms. Using a template can save time, as the structure and common question types are already in place, requiring only customization to fit your specific needs.
After selecting “New Form,” you will be taken to the form editor, the central workspace where all design and configuration happens. The first task here is to give your form a title and, optionally, a description. The title should be clear and descriptive, since it is the first thing respondents see and often determines whether they choose to participate. A short description beneath the title can provide context, such as the purpose of the survey, an estimated completion time, or instructions for respondents.
Step 3: Adding Questions
With the title and description in place, the next step is building out the actual content of the form. Click “Add New” to insert a question, and choose from several available question types:
- Choice: Allows respondents to select one or multiple answers from a predefined list. This is ideal for multiple-choice questions or quick preference polls.
- Text: Provides an open field for short or long written responses, useful for gathering detailed feedback or comments.
- Rating: Uses a star or number scale, commonly applied in satisfaction surveys.
- Date: Captures a specific date, useful for scheduling or registration forms.
- Ranking: Asks respondents to order a list of items according to preference or priority.
- Likert: Presents a matrix of statements evaluated against a consistent scale, often used in more formal research or employee engagement surveys.
- Net Promoter Score (NPS): A specialized scale question designed to measure customer loyalty.
- File Upload: Allows respondents to attach documents or images, useful for assignment submissions or application forms.
Each question type includes its own configuration options. For example, choice questions let you specify whether multiple answers are allowed, whether the question is required, and whether answer options should be presented in a random order to reduce bias. Text questions can be restricted to accept only numbers or limited to a maximum character count.
As questions are added, they appear as individual cards on the editing canvas, which can be reordered simply by dragging and dropping. This flexibility allows form creators to restructure the flow of questions without having to rebuild them from scratch.
Step 4: Customizing Design and Branding
Microsoft Forms allows for a degree of visual customization to align the form with personal or organizational branding. Clicking the paint palette icon in the top-right corner opens theme options, where you can select a background color, upload a custom image, or choose from a curated set of pre-designed themes. This step, while optional, can meaningfully improve the professionalism and engagement level of a form, particularly for external-facing surveys such as customer feedback forms or event registrations.
Within each question, formatting options also allow the inclusion of images or short video clips, which can be useful for adding visual context, such as showing a product photo before asking respondents to rate it, or embedding an instructional video before a quiz section.
Step 5: Configuring Form Settings
Before sharing the form, it is worth reviewing the settings menu, accessible through the three-dot menu near the top of the editor. Here, several important options are available:
- Who can fill out this form: Choose between allowing anyone with the link to respond, or restricting access to only people within your organization.
- Options for responses: Decide whether to accept multiple responses from the same person, shuffle the order of questions for each respondent, or set a start and end date for when the form accepts submissions.
- Notifications: Enable email alerts each time a new response is submitted, which is helpful for time-sensitive forms like event RSVPs.
- Custom subdomain: Available to some organizational accounts, this allows the sharing link to reflect a company-branded URL rather than a generic one.
These settings determine both the accessibility and behavior of the form, so it is worth taking a moment to align them with the intended use case before moving forward.
Step 6: Previewing the Form
Before distributing the form, use the “Preview” button, located near the top-right corner of the editor, to see how the form will appear to respondents. Microsoft Forms provides both a computer and mobile view, which is particularly valuable given how many people now complete surveys on their phones. Reviewing the preview helps catch layout issues, awkward question phrasing, or missing required-field indicators before the form goes live. It is good practice to complete a full test submission during this stage to confirm that the form behaves as expected from start to finish.
Step 7: Sharing the Form
Once satisfied with the design and settings, click the “Share” button to distribute the form. Microsoft Forms offers several sharing methods:
- Link: A direct URL that can be copied and sent through email, messaging apps, or social media.
- QR Code: Automatically generated, useful for printed materials, posters, or in-person events where respondents can scan the code with a smartphone camera.
- Embed: HTML code that allows the form to be embedded directly within a website or blog.
- Email: Sends the form directly to specified recipients through Outlook integration.
- Teams: Shares the form within a specific Teams channel or chat for internal collaboration.
For quizzes and forms intended for a controlled audience, such as within a school or company, restricting the link to organizational accounts adds a layer of security and ensures only intended recipients can respond.
Step 8: Collecting and Analyzing Responses
As responses come in, Microsoft Forms automatically compiles them into a “Responses” tab within the form editor. This tab presents an at-a-glance summary, including the total number of responses, average completion time, and a breakdown of answers for each question, often visualized through charts and graphs. For choice-based questions, this typically appears as a pie chart or bar graph; for text-based questions, individual responses are listed for manual review.
For deeper analysis, click “Open in Excel” to export all response data into a spreadsheet. This is especially useful for larger datasets, when calculations, pivot tables, or advanced filtering are needed. The Excel export retains all response details, including timestamps, making it straightforward to track response trends over time.
If the form was created as a quiz, Forms also provides automatic grading for objective question types, along with a review screen that allows the creator to manually adjust scores for open-ended responses. Results can be shared back with respondents, and detailed performance breakdowns help identify commonly missed questions, which is particularly useful in educational settings for gauging where a class may need additional instruction.
Step 9: Editing and Managing Existing Forms
Forms are not static once published. Returning to the Forms homepage allows you to reopen and edit any existing form, add or remove questions, adjust settings, or duplicate a form as a starting point for a new one. This is a convenient feature for recurring surveys, such as monthly feedback forms, where only minor adjustments are needed each cycle rather than building an entirely new form from the ground up.
Conclusion
Microsoft Forms strikes an effective balance between simplicity and functionality, making it a practical choice for anyone who needs to gather information quickly without wrestling with complicated software. By following the steps outlined above, accessing the platform, creating a new form, adding and customizing questions, configuring settings, previewing, sharing, and analyzing responses, users can move from a blank page to a fully functional, professional survey or quiz in a short amount of time.
What makes Microsoft Forms particularly valuable is its seamless integration within the broader Microsoft 365 ecosystem. The ability to export data directly to Excel, share forms through Teams, and embed them within SharePoint sites means that Forms rarely operates in isolation; it fits naturally into workflows that many organizations and educational institutions already use daily. This interconnectedness, combined with real-time response tracking and built-in data visualization, reduces the manual effort typically required to collect and interpret survey data.





