Geeksdigit Team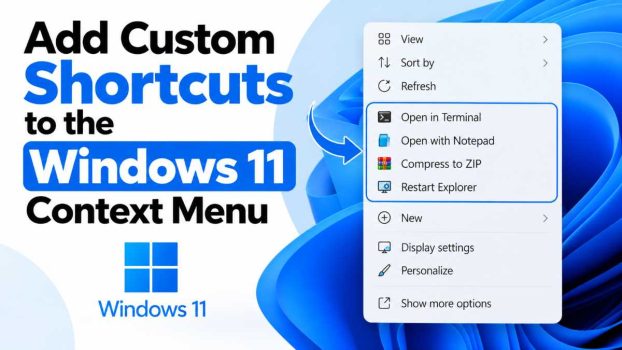
The right-click context menu is one of the most frequently used features in Windows, yet Microsoft’s Windows 11 redesign trimmed it down to a shorter, cleaner list that hides many familiar options behind a “Show more options” click. While this simplified look is easier on the eyes, it can slow down power users who rely on custom actions—launching a specific app, running a script, opening a folder in a terminal, or triggering a batch file—directly from the right-click menu.
The good news is that Windows 11 still allows deep customization of the context menu through the Windows Registry, third-party tools, or PowerShell scripting. Whether you want to add a shortcut for opening files with a specific program, running a script on a folder, or accessing a frequently used tool, there are several reliable ways to do it. This guide walks through the most practical methods, ranked roughly from safest and easiest to more advanced, so you can pick the one that best matches your comfort level and needs.

Before starting, it’s worth noting that editing the registry always carries some risk. A wrong entry can cause menu items to behave unexpectedly or, in rare cases, affect system stability. Creating a System Restore point before making changes is a smart precaution, and it only takes a minute.
Method 1: Add a Shortcut Using the Registry Editor (Manual Method)
This is the most direct way to add a custom entry to the context menu, and it doesn’t require installing anything.
Step 1: Open the Registry Editor
Press Win + R, type regedit, and press Enter. Approve the User Account Control prompt if it appears.
Step 2: Navigate to the correct key
For a shortcut that appears when right-clicking any file, navigate to:
HKEY_CLASSES_ROOT\*\shellFor a shortcut that appears when right-clicking inside a folder background (empty space in a folder), navigate to:
HKEY_CLASSES_ROOT\Directory\Background\shellFor a shortcut on folders themselves, use:
HKEY_CLASSES_ROOT\Directory\shellStep 3: Create a new key
Right-click the shell key, choose New > Key, and name it something descriptive, like OpenWithVSCode. This name won’t be shown to you—it’s just an internal identifier.
Step 4: Set the display name
With your new key selected, double-click the (Default) value in the right pane and type the text you want to appear in the context menu, such as “Open with VS Code.”
Step 5: Add an icon (optional)
Right-click the same key, choose New > String Value, name it Icon, and set its value to the full path of an .exe or .ico file you want displayed next to the menu entry.
Step 6: Create the command subkey
Right-click your new key again, choose New > Key, and name it command. Select it, double-click (Default), and enter the full path to the program you want to launch, followed by "%1" to pass the selected file or folder as an argument. For example:
"C:\Program Files\Microsoft VS Code\Code.exe" "%1"Step 7: Close Registry Editor and test
Right-click a file or folder to confirm your new entry appears and works as expected.
This method offers full control but requires care with exact key names and paths—one small typo and the entry won’t function.
Method 2: Use a Free Context Menu Editor Tool
If manually editing the registry feels risky or tedious, third-party context menu managers provide a graphical interface for the same result.
Popular free options include:
- Registrar Registry Manager (advanced editing with search/replace)
- Right Click Extender
- Easy Context Menu (ECM)
- CMenu (Context Menu Manager)
The general workflow across these tools is similar:
- Download and install the tool from its official source.
- Open the “Add” or “New Item” panel.
- Give your shortcut a name and choose the icon.
- Browse to select the executable or script to launch.
- Choose the scope (files, folders, folder background, or specific file extensions).
- Save the entry, then test it by right-clicking in File Explorer.
These tools essentially automate the registry steps above, reducing the risk of manual errors, and most include an “undo” or “remove” function that cleanly deletes the registry keys they created—something manual edits don’t offer as conveniently.
Method 3: Add a Shortcut via PowerShell Script
For users comfortable with scripting, PowerShell can create the same registry entries programmatically, which is especially useful if you want to deploy the same custom shortcut across multiple machines.
A basic script to add a “Open with Notepad++” option for all files might look like this:
powershell
$menuName = "OpenWithNotepadPP"
$displayName = "Open with Notepad++"
$exePath = "C:\Program Files\Notepad++\notepad++.exe"

New-Item -Path "HKCR:\*\shell\$menuName" -Force
Set-ItemProperty -Path "HKCR:\*\shell\$menuName" -Name "(Default)" -Value $displayName
New-Item -Path "HKCR:\*\shell\$menuName\command" -Force
Set-ItemProperty -Path "HKCR:\*\shell\$menuName\command" -Name "(Default)" -Value "`"$exePath`" `"%1`""
Note that HKCR: isn’t mapped by default in PowerShell, so you may need to create the drive first:
powershell
New-PSDrive -Name HKCR -PSProvider Registry -Root HKEY_CLASSES_ROOTRun PowerShell as Administrator when executing these commands, since writing to HKEY_CLASSES_ROOT typically requires elevated privileges. This approach is ideal for IT administrators managing several PCs, since the script can be packaged and run silently via deployment tools.
Method 4: Restore or Customize the Classic Full Context Menu
Rather than adding individual shortcuts, some users prefer to bypass Windows 11’s condensed menu entirely and restore the classic Windows 10-style full menu, which shows all options—including custom ones—without needing to click “Show more options.”
To do this via Registry Editor:
- Open
regeditand navigate to:
HKEY_CURRENT_USER\Software\Classes\CLSID- Create a new key named:
{86ca1aa0-34aa-4e8b-a509-50c905bae2a2}- Inside that key, create a subkey named
InprocServer32. - Select
InprocServer32and leave its(Default)value empty (do not type anything). - Restart File Explorer (via Task Manager, or sign out and back in).
After this change, right-clicking will show the full classic menu automatically, including any custom shortcuts you’ve added through Methods 1–3, without the extra click. If you want to revert to the compact Windows 11 menu, simply delete the {86ca1aa0-34aa-4e8b-a509-50c905bae2a2} key you created and restart Explorer again.
This method doesn’t technically “add” a shortcut by itself, but it’s often paired with the earlier methods since it makes all your custom entries more visible and accessible.
Conclusion
Windows 11’s streamlined context menu looks cleaner, but it can get in the way of workflows that depend on quick access to specific tools, scripts, or folders. Fortunately, Microsoft hasn’t removed the underlying flexibility that Windows has always offered—it’s just tucked a bit further from view.
For most users, a graphical context menu editor (Method 2) offers the best balance of safety and control, since it avoids manual registry editing while still producing reliable results. Power users and IT professionals who need to standardize custom menu entries across many machines will likely prefer the PowerShell scripting approach (Method 3), which can be automated and version-controlled. Those who want full manual control, or who are curious about how the registry actually stores this information, will benefit from learning the direct Registry Editor method (Method 1). And if the modern condensed menu is the real frustration, reverting to the classic full menu (Method 4) solves that instantly and works well alongside any of the other methods.
Whichever approach you choose, always back up your registry or create a restore point first. Custom context menu entries are a small tweak, but they can meaningfully speed up repetitive tasks once set up correctly.
Frequently Asked Questions
1. Will adding custom context menu entries slow down File Explorer?
A few extra entries won’t cause a noticeable slowdown. However, having dozens of third-party context menu additions—often installed silently by various apps over time—can make the right-click menu feel sluggish, since Windows has to load each entry’s handler before displaying the menu. If you notice lag, consider using a context menu manager tool to review and disable unused entries rather than removing your own custom shortcuts.
2. Can I add a custom shortcut for only specific file types, like .txt or .jpg?
Yes. Instead of using the HKEY_CLASSES_ROOT\*\shell key (which applies to all files), navigate to the key for that specific file extension, such as HKEY_CLASSES_ROOT\.txt, find the associated file type identifier referenced in its (Default) value, then locate that identifier’s key (for example txtfile) and add your custom entry under its shell subkey. This scopes the shortcut so it only appears for that file type.
3. How do I remove a custom shortcut I added if I no longer want it?
If you added it manually through Registry Editor, navigate back to the same key you created (for example HKEY_CLASSES_ROOT\*\shell\YourKeyName) and delete the entire key. If you used a third-party tool, it will typically have a built-in “Remove” or “Delete Entry” button that cleans up the registry automatically, which is generally safer than manual deletion for beginners.
4. Is it safe to edit the registry to add these shortcuts, and what if something goes wrong?
Editing the registry carries some risk if done carelessly, but adding a new key under shell for context menu purposes is a relatively low-risk, well-documented change as long as you’re precise with key names and paths. To minimize risk, create a System Restore point before you begin (search “Create a restore point” in the Start menu) or export the relevant registry key first via File > Export in Registry Editor. If something does go wrong, you can restore the exported .reg file or roll back using System Restore.