Geeksdigit Team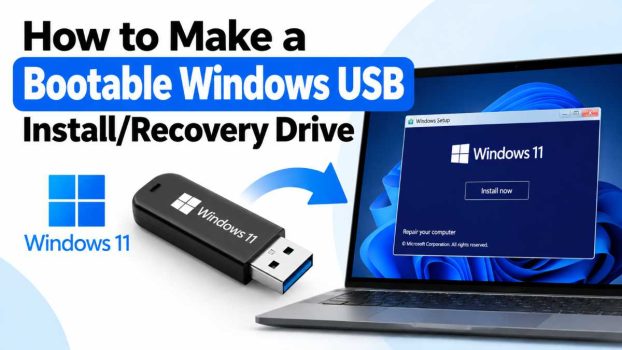
Whether you’re installing Windows from scratch, upgrading an aging PC, or preparing a recovery tool for when something goes catastrophically wrong, a bootable USB drive is one of the most useful tools you can keep in a drawer. It lets you install Windows without an internet connection, repair a system that won’t boot, wipe a drive clean before selling a computer, or run diagnostics outside of a broken operating system.
The good news is that creating one is far easier than it used to be. You no longer need to burn DVDs or fuss with obscure command-line utilities unless you want to. Microsoft and the broader Windows community have built several reliable tools that handle nearly all of the technical complexity for you.

This guide walks through four practical methods for creating a bootable Windows USB drive: Microsoft’s own Media Creation Tool, the popular third-party tool Rufus, the built-in Windows installer’s “USB flash drive” option, and the manual DiskPart command-line method for when you want full control. It also covers how to create a dedicated recovery drive, what to check before you start, and answers to the most common questions people run into along the way.
Before diving in, a few notes apply to every method:
- You need a USB drive of at least 8GB (16GB or larger is safer, especially if you’re bundling recovery tools or drivers alongside the installer).
- The drive will be completely erased. Back up anything on it first.
- You need a working computer with internet access to download the Windows ISO or media creation tool, even if the USB is meant for a different machine.
- Check your target PC’s boot mode (UEFI vs. Legacy BIOS) if you’re doing anything beyond the standard automated tools, since this affects partition formatting.
Method 1: Microsoft Media Creation Tool (Easiest, Windows 10/11)
This is Microsoft’s official, no-frills tool and the recommended starting point for most people.
- On a working Windows PC, go to Microsoft’s official Windows download page and download the Media Creation Tool for the version you want (Windows 10 or Windows 11).
- Run the tool and accept the license terms.
- Choose “Create installation media (USB flash drive, DVD, or ISO file) for another PC.”
- Select your language, edition, and architecture (64-bit is standard for nearly all modern PCs), or leave “Use the recommended options for this PC” checked if you’re building media for the same machine.
- Choose USB flash drive when prompted, then select your inserted USB drive from the list.
- The tool will download the Windows files and write them to the drive automatically. This can take 20–60 minutes depending on your internet speed.
- Once finished, the drive is bootable and ready to use.
Best for: People who want the official, most compatible option with minimal decision-making. It automatically formats the drive correctly for most systems and handles UEFI boot support out of the box.
Limitation: It only works for Windows 10 and Windows 11, and it doesn’t give you much control over partition style or additional customization.
Method 2: Rufus (Most Flexible, Third-Party)
Rufus is a free, open-source tool that’s become the community standard because of its speed and flexibility. It works with any Windows ISO (10, 11, older versions, or even Windows Server), and it gives you control over partition scheme, file system, and persistent options.
- Download a Windows ISO file separately. You can get this from Microsoft’s website using the “Download Windows 11 disk image (ISO)” option, or by using the Media Creation Tool and choosing “Create installation media” then “ISO file” instead of USB.
- Download Rufus from its official site (rufus.ie).
- Insert your USB drive, open Rufus, and it should auto-detect the drive under “Device.”
- Under “Boot selection,” click SELECT and choose your downloaded ISO file.
- Set the Partition scheme:
- GPT for modern UEFI systems (most PCs made since roughly 2012).
- MBR for older Legacy BIOS systems.
- Leave the file system as NTFS or FAT32 depending on your target hardware (FAT32 is required for some older UEFI systems but has a 4GB single-file size limit, which Rufus handles automatically by splitting files if needed).
- Click START. Rufus may prompt you with additional options, like removing certain Windows 11 installation requirements (TPM, Secure Boot, Microsoft account requirement) — useful if you’re installing on hardware that doesn’t officially meet Windows 11’s requirements.
- Wait for the process to complete; it usually takes 10–20 minutes.
Best for: Power users, IT technicians, and anyone installing on older or unusual hardware, or who wants to bypass Windows 11’s stricter hardware requirements.
Limitation: Slightly more steps than the Media Creation Tool, and it requires you to source the ISO yourself.
Method 3: Windows Installer’s Built-in USB Option (via ISO Mounting)
If you already have a Windows ISO and don’t want to install a third-party tool, you can use Windows’ own capabilities:
- Download the Windows ISO from Microsoft.
- Right-click the ISO file and select Mount — Windows will treat it as a virtual DVD drive.
- Insert your USB drive and format it as FAT32 (for UEFI compatibility) using File Explorer: right-click the drive, choose Format, and select FAT32 under file system.
- Copy all files from the mounted ISO drive directly onto the USB drive.
- If your target system is UEFI-based, this straightforward copy method usually works without further steps, since FAT32-formatted UEFI boot files are natively readable by most modern firmware.
Best for: People who want a no-download-required, tool-free approach and are comfortable with basic file management.
Limitation: This method can run into the FAT32 4GB file-size limit if the ISO contains an install.wim file larger than 4GB (common on newer Windows 11 builds), which will cause the copy to fail partway through. In that case, you’ll need to either use NTFS with manual boot file configuration (more advanced) or switch to Rufus, which handles this automatically by splitting the file.
Method 4: Manual DiskPart + Command Line (Full Control)
This is the most hands-on method, useful for troubleshooting, scripting, or when you want to understand exactly what’s happening under the hood.
- Insert your USB drive and note its drive letter.
- Open Command Prompt as Administrator.
- Type
diskpartand press Enter. - Type
list diskto identify your USB drive by its size — be careful to pick the right one, since the next steps will erase it. - Type
select disk X(replacing X with your USB drive’s number). - Type
cleanto wipe the drive. - Type
create partition primary. - Type
select partition 1. - Type
active(marks the partition as bootable). - Type
format fs=fat32 quick(orntfsif your ISO contains files over 4GB and your target system supports NTFS boot). - Type
assignto give the partition a drive letter. - Type
exitto leave DiskPart. - Mount your Windows ISO (right-click, Mount) and copy all its contents to the newly formatted USB drive using File Explorer or the
xcopycommand.
Best for: IT professionals, advanced users, and anyone building custom scripts or images.
Limitation: No automation or error-checking; a wrong disk number in step 5 can wipe the wrong drive. Double- and triple-check before typing clean.
Bonus: Creating a Dedicated Windows Recovery Drive
If your goal isn’t a full installer but a lightweight tool to troubleshoot an existing Windows installation, use the built-in Recovery Drive utility instead:
- On a working Windows PC (ideally the same one you’ll be recovering, since it can include a system image), search for “Create a recovery drive” in the Start menu and open it.
- Check “Back up system files to the recovery drive” if you want a full restore option, not just repair tools.
- Insert a USB drive (16GB+ recommended if backing up system files) and follow the prompts.
- The tool formats the drive and copies recovery environment files automatically.
This drive boots into Windows Recovery Environment (WinRE), giving you access to System Restore, Startup Repair, Command Prompt, and System Image Recovery — without needing a full installation ISO.
Conclusion
There’s no single “best” method — it depends on what you’re trying to accomplish. If you just want a straightforward, official way to install Windows 10 or 11, the Media Creation Tool is the simplest path. If you need more control, are installing on older or unsupported hardware, or want to bypass Windows 11’s stricter requirements, Rufus is the better choice. The manual copy and DiskPart methods are worth knowing for troubleshooting or scripting, even if you don’t use them day to day. And if your goal is recovery rather than a fresh install, the built-in Recovery Drive tool is purpose-built for that job.
Whichever method you choose, the fundamentals stay the same: get a reliable USB drive, back up anything on it first, match your partition scheme (GPT/UEFI vs. MBR/Legacy) to your target hardware, and double-check you’ve selected the correct drive before formatting. Get those right, and you’ll have a dependable tool ready whenever you need to install, repair, or rescue a Windows machine.
FAQ
1. Does it matter which USB drive I use, or how big it needs to be?
Any USB 2.0 or 3.0 drive with at least 8GB of space will technically work, but USB 3.0 drives are significantly faster for both writing the installer and later running the installation itself — a meaningful time saver. 16GB or larger is a safer bet if you plan to include drivers, recovery tools, or multiple Windows versions on the same drive.
2. How do I know if my computer uses UEFI or Legacy BIOS?
On a working Windows system, open System Information (search “msinfo32”), and check the “BIOS Mode” field — it will say either UEFI or Legacy. Most PCs built since around 2012 use UEFI. If you’re unsure and building media with Rufus or DiskPart, choosing GPT partitioning with FAT32 formatting is the safest default for modern hardware, since it works with virtually all UEFI systems.
3. My USB drive shows up as unbootable or the PC won’t boot from it — what’s wrong?
The most common culprits are: the wrong partition scheme for your target hardware (GPT vs. MBR mismatch), the boot order in your BIOS/UEFI settings not prioritizing USB, or Secure Boot blocking older/unsigned installers. Enter your PC’s boot menu (usually by pressing F12, F2, Esc, or Del during startup — it varies by manufacturer) and manually select the USB drive, or check your BIOS settings to temporarily disable Secure Boot if needed.
4. Can I put a Windows installer and recovery tools on the same USB drive?
Yes, though it takes extra setup beyond the basic methods above. Tools like Rufus support creating multi-boot USB drives with several ISOs, and more advanced solutions like Ventoy let you simply drag and drop multiple ISO files onto a single prepared drive and choose which one to boot at startup. This is a popular option for IT technicians who need several tools on one drive rather than swapping USB sticks.