Geeksdigit Team
Windows 11 looks fresh, but it is not for everyone. Maybe your favorite software keeps crashing, your printer driver refuses to cooperate, the new Start menu slows you down, or your PC simply feels sluggish since the upgrade. Whatever the reason, you are not stuck. If you want to uninstall Windows 11 and roll back to Windows 10, Microsoft and the wider Windows ecosystem give you several ways to do it.
The right method depends on one key factor: how long ago you upgraded. If it has been fewer than 10 days, a built-in rollback takes just a few clicks and keeps your files and apps. After that window closes, you will need a more involved approach, such as a clean installation or restoring a backup.
In this guide, you will learn six proven methods to downgrade from Windows 11 to Windows 10, what to do before you start, and how to avoid the most common mistakes. We also answer four frequently asked questions at the end.
An important note on support: Microsoft ended mainstream support for Windows 10 on October 14, 2025. After that date, Windows 10 no longer receives free security updates unless you are enrolled in the Extended Security Updates (ESU) program. Before you roll back, make sure you are comfortable with that trade-off, and check Microsoft’s official site for the current ESU terms for your region.
Before You Roll Back: Quick Checklist
A little preparation prevents most downgrade headaches. Run through this list first:
- Back up your important files. Rollbacks usually preserve personal data, but nothing is guaranteed. Copy documents, photos and project folders to an external drive or cloud storage.
- Know your account details. Have your Microsoft account or local account password ready, since you will need to sign in after the rollback.
- Plug in your laptop. A power cut mid-rollback can corrupt the installation.
- Do not delete the Windows.old folder. This folder stores your previous Windows 10 installation. Running Disk Cleanup, Storage Sense or third-party cleaners with “Previous Windows installation(s)” ticked removes your easiest way back.
- Note your installed software. Apps installed after the upgrade will be removed during a rollback and may need reinstalling.
- Check driver availability. Visit your PC manufacturer’s support page and confirm Windows 10 drivers exist for your model.
With that done, choose the method below that fits your situation.
Method 1: Use the Built-In “Go Back” Option in Settings (Within 10 Days)
This is the fastest and safest way to uninstall Windows 11, and it is the method Microsoft recommends. It works only if you upgraded from Windows 10 within the last 10 days and the Windows.old folder is intact.
Steps:
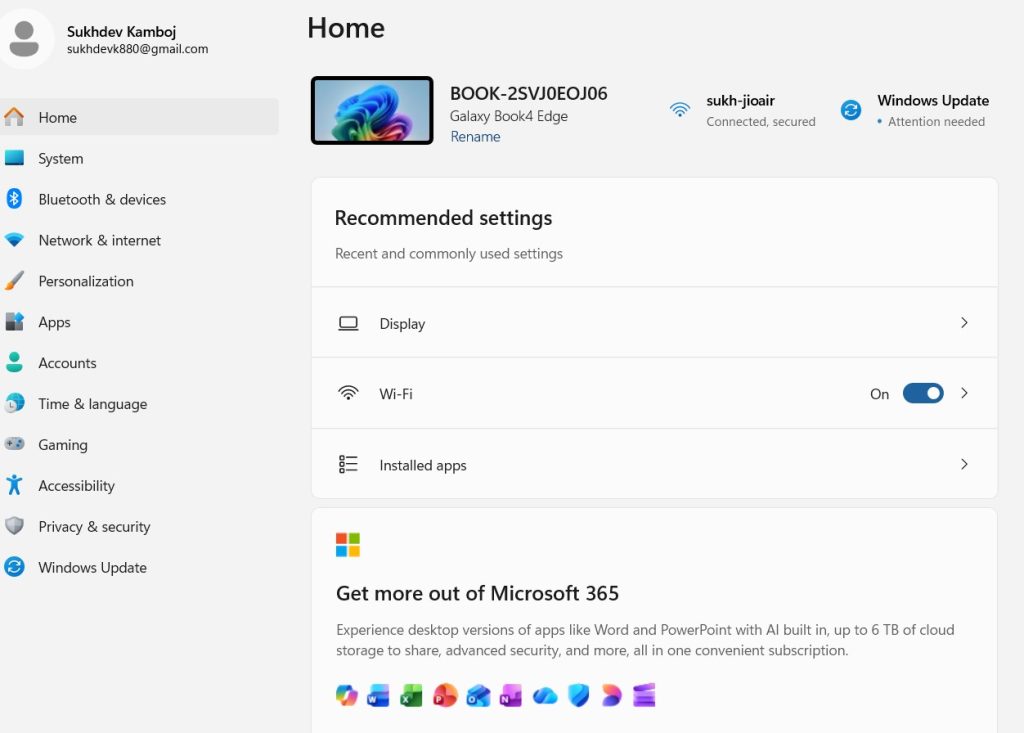
Press Windows + I to open Settings.
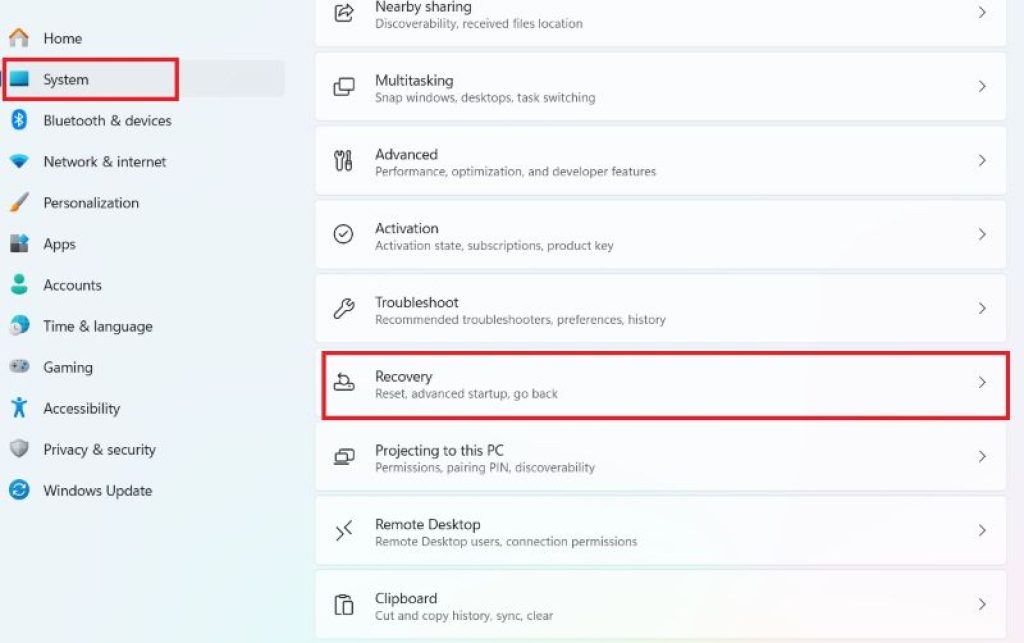
Go to System, then scroll down and click Recovery.
Under Recovery options, look for Go back (on some builds it is labeled Previous version of Windows).
Click Go back.
Windows asks why you are going back. Choose any reason, or tell Microsoft about the problem, then click Next.
When offered, you can choose No, thanks to skip checking for updates.
Read the warnings about apps and settings, then click Next.
Confirm that you know your Windows 10 sign-in password, click Next, and then click Go back to Windows 10.
Your PC will restart several times. The process usually takes 20 to 40 minutes, depending on your hardware and how much data you have.
What happens to your data? Personal files stay in place. Apps and settings changes made after the upgrade are removed.
If the Go back button is greyed out: The 10-day window has expired, Windows.old was deleted, or a major update was installed after the upgrade. In that case, move on to Method 3, 4 or 5.
Method 2: Roll Back from the Windows Recovery Environment (If Windows Will Not Boot)
Sometimes Windows 11 refuses to start properly, which means you cannot reach Settings. The Windows Recovery Environment (WinRE) lets you run the same rollback from outside Windows.
Steps:
- Turn your PC on, and as soon as the Windows logo appears, hold the power button to force a shutdown. Repeat this two or three times until you see Preparing Automatic Repair, then Recovery.
- Click See advanced repair options.
- Select Troubleshoot, then Advanced options.
- Choose Go back to previous version if it is listed. On some versions, you will instead choose Uninstall Updates, then Uninstall latest feature update.
- Select your account, enter your password, and confirm the rollback.
Alternatively, you can boot from a Windows installation USB, choose Repair your computer on the setup screen, and reach the same menu.
This method still depends on the Windows.old folder, so the same 10-day limit applies.
Method 3: Extend the Rollback Window with DISM (Do This Early)
If you are still inside the 10-day period but want more time to decide, you can stretch the deadline. This is a clever precaution for anyone who is not sure about Windows 11 yet.
Steps:
- Search for Command Prompt, right-click it, and select Run as administrator.
- To check how many days you have left, type:
DISM /Online /Get-OSUninstallWindow - To extend the window (for example, to 30 days), type:
DISM /Online /Set-OSUninstallWindow /Value:30
You can set any value between 2 and 60 days. Keep in mind that this command only works while the rollback is still available. Once the original 10 days pass, the files are deleted and you cannot bring them back.
This is not a rollback method on its own. Think of it as insurance that gives you a longer trial period, after which you can use Method 1 whenever you wish.
Method 4: Perform a Clean Install of Windows 10 Using the Media Creation Tool
When the 10-day window has passed, a clean install is the most reliable way to go back to Windows 10. It erases your system drive and installs a fresh copy, so backing up your data is essential.
What you need:
- A USB flash drive with at least 8 GB of space (it will be erased)
- A working PC with an internet connection
- Your Windows 10 license (if your PC had a digital license for Windows 10, it normally activates automatically)
Steps:
- Visit Microsoft’s official Download Windows 10 page and download the Media Creation Tool.
- Run the tool, accept the license terms, and choose Create installation media (USB flash drive, DVD, or ISO file) for another PC.
- Keep the recommended language, edition and architecture, then select USB flash drive and let the tool finish.
- Plug the USB drive into the PC you want to downgrade and restart it.
- Press the boot menu key (commonly F12, F10, Esc or Del, depending on the manufacturer) and boot from the USB drive.
- Choose your language and click Install now.
- When asked for a product key, select I don’t have a product key if your PC already had a digital license.
- Choose Custom: Install Windows only (advanced).
- Select the partition where Windows 11 is installed, delete it (or format it), and click Next.
- Follow the on-screen prompts and wait for the installation to finish.
After installation, run Windows Update and install your manufacturer’s drivers for the best performance.
Tip: If your hardware is newer, Windows 10 may be missing some drivers. Download chipset, graphics, Wi-Fi and audio drivers on another device first and keep them on a USB stick.
Method 5: Restore a System Image or Full Backup
If you made a full system image backup before upgrading, you can restore it and return to the exact state your PC was in, including programs, settings and files. This is the best option when the rollback window has expired and you want to avoid reinstalling everything.
This works with images created by Windows Backup and Restore (Windows 7) or by third-party tools such as Macrium Reflect, Acronis True Image or EaseUS Todo Backup.
Steps (using a Windows system image):
- Connect the external drive that holds your backup.
- Boot into the Windows Recovery Environment (see Method 2).
- Go to Troubleshoot, then Advanced options, then See more recovery options, and choose System Image Recovery.
- Select the most recent image taken before the upgrade, and follow the wizard.
- Confirm the restoration and wait for it to complete.
Steps (using third-party software): Boot from the recovery media created by your backup tool and select the image from before the Windows 11 upgrade.
Keep in mind that restoring an image overwrites everything on the drive. Any files created after the backup will be lost unless you copy them elsewhere first.
Method 6: Use Your PC Manufacturer’s Recovery Partition or Recovery Media
Many laptops and desktops from brands such as Dell, HP, Lenovo, ASUS and Acer ship with a hidden recovery partition or offer downloadable recovery tools. If your PC originally came with Windows 10, you can often restore it to that factory state.
Steps:
- Back up your files, because this process wipes the drive.
- Restart the PC and press the manufacturer’s recovery key during startup (for example, F11 on many HP and Lenovo models, F12 on Dell for SupportAssist OS Recovery, or F9 on ASUS).
- Choose the option to restore the factory image or reinstall the original operating system.
- Follow the prompts and wait for the process to finish.
If the recovery partition has been deleted, visit your manufacturer’s support website. Many brands let you download recovery software or order recovery media using your serial number.
Note that newer models that shipped with Windows 11 may only restore Windows 11, and some manufacturers do not provide Windows 10 images for those devices. In that case, use Method 4.
Common Problems and How to Fix Them
The “Go back” button is missing or disabled. The Windows.old folder is gone, or more than 10 days have passed. Use Method 4, 5 or 6.
Rollback fails or loops on restart. Boot into the Recovery Environment and retry the rollback from there. If it still fails, back up your data and do a clean install.
Drivers do not work after downgrading. Download Windows 10 drivers from your manufacturer or run Windows Update and check Optional updates for driver packages.
Windows 10 is not activated. If you did a clean install and activation fails, open Settings, then Update & Security, then Activation, and run the troubleshooter. Signing in with the Microsoft account linked to your digital license often fixes the issue.
Files seem to be missing. Check the Windows.old folder and any backups you made. If you did a clean install and formatted the drive, restore files from your backup.
Which Method Should You Choose?
- Upgraded in the last 10 days and Windows boots: Method 1.
- Upgraded in the last 10 days but Windows will not boot: Method 2.
- Still deciding and want more time: Method 3.
- Past the 10-day window, no backup: Method 4.
- Have a full system image from before the upgrade: Method 5.
- Want to return to factory settings from the manufacturer: Method 6.
Conclusion
Rolling back from Windows 11 to Windows 10 is entirely possible, and the method you choose mostly depends on timing and preparation. If you are within 10 days of upgrading, the built-in Go back feature in Settings is the quickest, safest option, and you can lengthen that window with a simple DISM command. If you have passed that deadline, a clean install with the Media Creation Tool, a system image restore, or the manufacturer’s recovery partition will get you back to Windows 10.
Whichever route you take, back up your data first, keep your power connected, and gather your drivers in advance. Also remember that Windows 10 has reached the end of its standard support, so consider your security needs, and look into the Extended Security Updates program or plan a future upgrade when you are ready.
Will I lose my files if I roll back from Windows 11 to Windows 10?
Using the built-in Go back option, your personal files such as documents, photos and downloads are normally kept. However, apps installed after the upgrade and any settings you changed will be removed. A clean install, a system image restore or a factory reset will erase the drive, so you should always create a backup before attempting any method.
Can I go back to Windows 10 after 10 days?
Not with the built-in rollback, because Windows deletes the Windows.old folder after the window closes. You can still return to Windows 10 by doing a clean install with the Media Creation Tool, restoring a full system image backup, or using your manufacturer’s recovery media. To avoid this problem in future, extend the window early with the DISM /Set-OSUninstallWindow command.
Do I need a product key to reinstall Windows 10?
Usually not. If your PC was already activated with Windows 10 (or upgraded from it), it holds a digital license linked to your hardware. During a clean install, choose I don’t have a product key, connect to the internet, and Windows should activate automatically. If your hardware changed significantly, you may need to enter a valid key or use the activation troubleshooter.
Is it safe to keep using Windows 10 after support ended?
Windows 10 still works, but it no longer receives free security updates, which raises the risk of malware and vulnerabilities over time. You can reduce the risk by joining Microsoft’s Extended Security Updates program where available, using a reputable security suite, keeping your browser and apps updated, and avoiding risky downloads. Check Microsoft’s website for the latest ESU details and deadlines.