 Geeksdigit Team
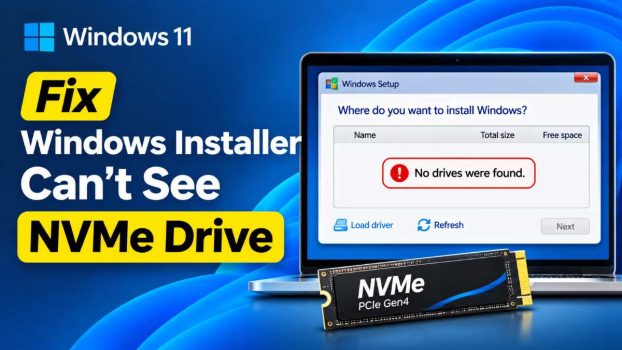
You boot from your USB stick, click through the language screen, accept the license terms, and arrive at the “Where do you want to install Windows?” screen. The list is empty. Or it shows a message like “We couldn’t find any drives. To get a storage driver, click Load driver.” Your brand-new NVMe SSD is sitting right there in the M.2 slot, and Windows Setup acts as if it does not exist.
This is one of the most common problems people hit when building a PC, replacing a laptop drive, or reinstalling Windows on newer hardware. The good news is that the drive is almost never dead. In most cases the cause is a missing storage driver, a BIOS setting that hides the drive, or a small mismatch between how the drive is formatted and how the installer is booted. This guide walks through every practical fix, from the quickest checks to the more involved ones, so you can get Windows installed without guessing.
Why the Windows installer can’t see your NVMe drive
Before changing settings, it helps to understand what is going on. The Windows installer runs from a small temporary environment called Windows PE. That environment contains a limited set of drivers. Standard NVMe drives use Microsoft’s built-in NVMe driver, which Windows 10 and Windows 11 include, so many drives appear without any help. The trouble starts when something sits between the drive and the operating system:
- Intel Volume Management Device (VMD) or Rapid Storage Technology (RST) puts the drive behind a RAID-style controller that the installer has no driver for.
- BIOS settings may have the M.2 slot disabled, set to the wrong mode, or sharing lanes with other ports.
- Old installation media may lack drivers needed by newer chipsets.
- Partition style conflicts between GPT and MBR can make a drive appear unusable.
- Hardware issues such as a loose drive, a bent connector, or an incompatible slot can prevent detection altogether.
The fastest way to narrow things down is to check whether the drive appears in your BIOS or UEFI firmware. If it shows up there, the hardware is fine and you are dealing with a driver or configuration problem. If it does not, start with the hardware checks in Method 5.
Method 1: Load the Intel RST or VMD driver during setup
This is the most common fix, especially on laptops with 11th generation Intel processors or newer, and on many business machines from Dell, HP, and Lenovo. On these systems the storage controller is set to Intel RST with VMD enabled by default, and the standard Windows installer cannot talk to it.
- On another working computer, go to your laptop or motherboard manufacturer’s support page. Search for your exact model and open the drivers section.
- Download the package named something like “Intel Rapid Storage Technology (RST) driver” or “Intel VMD driver.” Some manufacturers label it as an “F6 driver” or “SATA/NVMe driver for Windows installation.”
- Extract the download. You may need to unzip it twice. Look for a folder containing
.inf,.sys, and.catfiles. - Copy that folder onto a separate USB drive, or onto the same installer USB if it has free space and uses a file system that Windows can read.
- Boot the Windows installer again and reach the drive selection screen.
- Click Load driver, then Browse, and select the folder you extracted.
- Choose the listed driver (often named Intel RST VMD Controller) and click Next.
Within a few seconds your NVMe drive should appear in the list. You can then select it and continue with the installation as normal. Keep in mind that after Windows is installed, it is worth installing the full Intel RST driver from the manufacturer so that the system continues to work properly with the controller.
Method 2: Change the storage mode in BIOS
If you would rather avoid loading drivers manually, you can change the storage controller mode so that the NVMe drive is exposed directly to Windows.
- Restart the computer and enter the BIOS or UEFI setup. The key is usually F2, F10, F12, Delete, or Esc, depending on the manufacturer.
- Look for a section named Storage, SATA Configuration, Advanced, or Peripherals.
- Find an option called SATA Mode, Storage Controller Mode, or VMD Controller.
- If it is set to RAID On, Intel RST Premium, or VMD enabled, change it to AHCI or disable VMD.
- Save changes and exit, then boot the installer again.
This works well on a clean installation where there is no existing Windows system to worry about. If you are keeping an existing installation and only changing modes, be careful: switching from RAID to AHCI on an installed copy of Windows can cause a boot failure unless you prepare Windows first. For a fresh install, though, it is safe, because you are going to wipe the drive anyway.
Some systems, particularly recent Dell and Lenovo models, hide this setting or lock it. If you cannot find it, check whether a BIOS update (Method 3) exposes it, or fall back to Method 1.
Method 3: Update the BIOS or UEFI firmware
Firmware bugs can stop an NVMe drive from being recognized, particularly with newer SSDs on older motherboards. Manufacturers regularly release updates that improve compatibility with drives, add support for newer controllers, or fix lane-sharing issues.
- Note your exact motherboard or laptop model and your current BIOS version. You can usually see this on the BIOS main screen.
- Visit the manufacturer’s support page and compare the latest available version against what you have.
- Read the release notes. If a version mentions NVMe, M.2, storage, or compatibility improvements, it is a strong candidate.
- Follow the manufacturer’s instructions exactly. Many modern boards support a flash utility inside the BIOS itself, which reads the update file from a FAT32 USB stick. Laptops often ship updates as a Windows executable, which you would need to run from another working Windows installation.
Take the usual precautions: do not interrupt the update, keep a laptop plugged in, and never flash firmware from an unofficial source. If your PC has no working operating system, use the in-BIOS flashing tool or a BIOS recovery option if one is offered.
Method 4: Check the BIOS settings for the M.2 slot, UEFI mode, and CSM
Sometimes the drive is physically fine and the controller is fine, but a setting is quietly getting in the way.
Confirm the M.2 slot is enabled and in the right mode. On some desktop boards, an M.2 slot can be set to SATA mode, PCIe mode, or automatic. If your drive is NVMe, set the slot to PCIe or NVMe if the option exists. Some boards call this “M.2 Link Mode” or “M2_1 Configuration.”
Disable CSM and boot in UEFI mode. The Compatibility Support Module lets the system behave like an older BIOS. When it is enabled, the installer may start in legacy mode, and Windows will refuse to install to a GPT disk or fail to see the drive properly. Turn CSM off, enable UEFI boot, and make sure your USB installer appears with a “UEFI:” prefix in the boot menu.
Check lane sharing. Many motherboards share bandwidth between an M.2 slot and certain SATA ports or PCIe slots. If you have a SATA drive connected to a port that shares lanes with your M.2 slot, the NVMe drive can disappear. Your motherboard manual will have a table showing which ports are disabled when an M.2 slot is in use. Move your SATA cable to another port and test again.
Enable Above 4G Decoding if needed. On some systems, particularly with multiple drives or a dedicated graphics card, this setting can help NVMe devices initialize properly. Only change it if your manual or the manufacturer’s guidance suggests it.
Method 5: Reseat the drive and check the hardware
If the drive is not visible in the BIOS, treat it as a hardware problem first.
- Power off the computer completely and unplug it. On a laptop, disconnect the battery if it is removable.
- Open the case or the bottom panel and locate the M.2 slot.
- Remove the retaining screw, gently pull the SSD out, and check the gold contacts for dust or damage.
- Reinsert the drive at a slight angle, push it fully into the connector, and then press it down and secure it with the screw. A drive that is not fully seated is one of the most common causes of “missing” NVMe SSDs.
- If your motherboard has more than one M.2 slot, try a different one. Some slots only support SATA M.2 drives, or only work with certain processors.
- Check the drive’s key type. NVMe drives are typically M-key, while some older SATA M.2 drives are B+M key. Make sure the drive is compatible with the slot.
If possible, test the SSD in another computer or in a USB NVMe enclosure. If it fails to appear anywhere, the drive itself may be faulty or may need a firmware update, and a warranty claim could be the next step.
Method 6: Wipe the drive and fix the partition style
Occasionally the drive appears, but with an error saying Windows cannot be installed to it, or it shows as unallocated space that cannot be used. This is generally a partition style problem. UEFI systems require GPT, while legacy BIOS mode requires MBR.
- At the drive selection screen, press Shift + F10 to open a Command Prompt.
- Type
diskpartand press Enter. - Type
list diskand identify your NVMe drive by its size. Be careful here, because the next steps erase everything on the selected disk. - Type
select disk 0(replacing 0 with the correct number). - Type
cleanand press Enter. - Type
convert gptand press Enter. - Type
exit, close the Command Prompt, and click Refresh in the installer.
The drive should now appear as unallocated space, ready for installation. If the drive still does not appear in list disk, the problem is a driver or hardware issue rather than a partition problem, and you should return to the earlier methods.
Method 7: Use newer installation media or inject the driver
Older Windows installation media may not contain drivers for recent hardware. A Windows 10 ISO from several years ago, for example, may not recognize modern controllers that a current Windows 11 ISO handles without trouble.
- Download the latest ISO directly from Microsoft’s website.
- Create a fresh bootable USB drive using the Media Creation Tool or a tool such as Rufus. If you use Rufus, select the GPT partition scheme and UEFI target for modern systems.
- Boot from the new drive and see whether the NVMe SSD now appears.
If the drive still does not appear and you have to install on a large number of machines, advanced users can add the required storage driver directly into the installation image using DISM, so the driver loads automatically. For a single installation, loading the driver manually, as in Method 1, is far simpler.
For some third-party drives, particularly older Samsung models such as the 950 Pro or early 960 series on older Windows 10 media, a vendor-specific NVMe driver may be required. Download it from the manufacturer’s site and load it the same way.
A quick troubleshooting checklist
When you are not sure where to begin, work through these in order:
- Does the drive appear in the BIOS? If not, reseat it and test a different slot.
- Is VMD or RAID mode enabled? If yes, load the Intel RST driver or switch to AHCI.
- Is the installer booting in UEFI mode with CSM disabled?
- Is the BIOS up to date?
- Is your installation media recent?
- Is the drive carrying an incompatible partition style? Use diskpart to clean and convert it.
Most people solve the problem within the first three steps.
Conclusion
When the Windows installer can’t see your NVMe drive, it is rarely a sign that the SSD has failed. More often, a storage controller mode such as Intel RST or VMD is hiding the drive behind a driver that Windows Setup does not include, and loading the correct driver or switching to AHCI solves it in minutes. If that does not work, updating the BIOS, checking the M.2 slot settings, confirming UEFI mode, and reseating the drive cover nearly every remaining cause. Cleaning and converting the disk with diskpart handles partition conflicts, and fresh installation media handles outdated driver support.
Work through the methods in order, change one thing at a time, and note what you changed so you can undo it if needed. With a little patience, your NVMe drive will appear in the installer and you can finish setting up Windows on fast, modern storage.
Frequently Asked Questions
1. Why does my NVMe SSD show up in the BIOS but not in the Windows installer?
This nearly always means a driver issue. The BIOS can detect the drive at a hardware level, but Windows Setup needs a driver to communicate with the storage controller. If your system uses Intel RST or VMD, the installer lacks that driver. Load the manufacturer’s Intel RST driver using the Load driver option, or switch the controller to AHCI in the BIOS.
2. Is it safe to change from RAID to AHCI mode?
For a fresh installation, yes. You are erasing the drive anyway, so the mode change causes no harm. If you already have Windows installed and want to keep it, changing modes without preparation can result in a boot failure, since Windows loaded the driver for the old mode. In that case, back up your data first, or enable Safe Mode before switching so that Windows installs the correct driver.
3. Do I need to disable Secure Boot to see my NVMe drive?
Usually not. Secure Boot does not normally affect whether the installer detects a drive. Problems tend to come from CSM, VMD, or the storage mode instead. Windows 11 requires Secure Boot capability anyway, so leave it enabled unless a specific tool or driver requires otherwise.
4. What if the drive does not appear in the BIOS at all?
Start with the hardware. Power down, reseat the SSD firmly in the M.2 slot, and check that the retaining screw is in place. Try a different M.2 slot, confirm the drive’s key type matches the slot, and check your motherboard manual for lane sharing with SATA ports. Then update the BIOS. If the drive is still invisible, test it in another computer or an NVMe enclosure to determine whether the drive itself is faulty.