 Geeksdigit Team
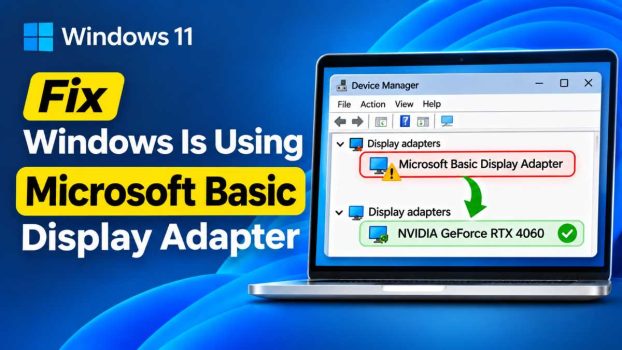
You boot up your PC and something feels off. The screen looks blurry, icons are oversized, the resolution is stuck at 1024×768, and games that ran smoothly yesterday now stutter like a slideshow. You open Device Manager, expand Display adapters, and find the culprit: Microsoft Basic Display Adapter.
This is one of the most common graphics problems on Windows 10 and Windows 11. The Microsoft Basic Display Adapter is a generic fallback driver built into Windows. It exists so that your screen always shows something, even when the correct driver for your NVIDIA, AMD, or Intel graphics card is missing or broken. It gets the job done at a basic level, but it offers no hardware acceleration, limited resolutions, no multi-monitor tuning, no HDR support, and poor performance in games, video editing, and 3D applications.
The good news is that the problem is almost always fixable without replacing any hardware. In this guide, you will learn why Windows falls back to the basic driver and how to fix it using nine proven methods, from the quickest checks to deeper repairs. A short FAQ at the end covers the questions people ask most.
Why Does Windows Use the Microsoft Basic Display Adapter?
Understanding the cause helps you pick the right fix. The most common reasons include:
- Missing graphics driver. After a clean Windows install, Windows may not find a matching driver and uses the generic one.
- Corrupted or incompatible driver. A failed update, a power cut during installation, or a driver built for another Windows version can break the installed driver.
- Windows Update conflicts. A faulty cumulative update or an automatic driver replacement can overwrite a working driver.
- Disabled or undetected GPU. The graphics card may be disabled in Device Manager, turned off in BIOS/UEFI, or poorly seated in its slot.
- Corrupted system files. Damaged Windows components can prevent drivers from loading properly.
- Hardware or power problems. A loose cable, a failing GPU, or an inadequate power supply can make the card invisible to Windows.
- Virtual machines. In some virtual environments, the basic adapter is normal because no physical GPU is passed through.
With that in mind, work through the methods below in order. Most users solve the issue within the first three or four.
Method 1: Restart Your PC and Check for Windows Updates
It sounds too simple, but a restart clears temporary driver glitches, and Windows Update can often fetch the right driver by itself.
- Save your work and restart your computer.
- Press Windows + I to open Settings.
- Go to Windows Update (Windows 11) or Update & Security > Windows Update (Windows 10).
- Click Check for updates and install everything available.
- Open Advanced options > Optional updates and look for a Driver updates section. If a graphics driver is listed, tick it and install it.
- Restart again when prompted.
After the restart, return to Device Manager and see whether your real graphics card now appears under Display adapters.
Method 2: Update the Driver Through Device Manager
If Windows Update does not fix it, try asking Windows to search for a driver directly.
- Right-click the Start button and choose Device Manager.
- Expand Display adapters.
- Right-click Microsoft Basic Display Adapter and select Update driver.
- Choose Search automatically for drivers.
- Follow the on-screen prompts and restart if asked.
If Windows reports that the best driver is already installed, do not give up. That message only means Windows cannot find something better in its own catalog. Move on to the manufacturer’s driver in the next method.
Method 3: Download and Install the Driver From the Manufacturer
This is the single most effective fix. Installing the official driver from the maker of your graphics hardware gives you the correct, complete package.
Identify your hardware first. If you are unsure which GPU you have, open Device Manager, right-click Microsoft Basic Display Adapter, choose Properties > Details, and select Hardware Ids from the dropdown. Look at the vendor code: VEN_10DE is NVIDIA, VEN_1002 is AMD, and VEN_8086 is Intel. You can search the full hardware ID online to find the exact model.
Then download the right driver:
- NVIDIA: Use the official NVIDIA driver download page or the NVIDIA app, select your product series and Windows version, and download the latest driver.
- AMD: Use the AMD Drivers and Support page or the AMD Software auto-detect tool.
- Intel: Use the Intel Driver & Support Assistant or download the graphics driver from Intel’s site.
- Laptops and prebuilt PCs: Visit the support page of your laptop or PC maker (Dell, HP, Lenovo, ASUS, Acer, and so on) and download the graphics driver for your exact model. Laptops often use customized drivers, and generic ones can sometimes fail to install.
Install it:
- Run the downloaded installer and choose the recommended or express installation.
- If the screen flickers or goes black briefly, that is normal.
- Restart your PC once the installation finishes.
If the installer says no compatible hardware was found, the problem may lie with the hardware detection itself. Continue to the next methods.
Method 4: Install the Driver Manually From a Downloaded Folder
Sometimes the installer refuses to run, but you can still point Windows at the driver files manually.
- Download the driver package and extract it to a folder if it is a compressed file. Many installers unpack to a folder such as
C:\NVIDIAorC:\AMDbefore showing a setup window. You can use that folder. - Open Device Manager, right-click Microsoft Basic Display Adapter, and choose Update driver.
- Select Browse my computer for drivers.
- Click Browse and select the extracted folder. Make sure Include subfolders is ticked.
- Click Next and let Windows install the driver.
Alternatively, choose Let me pick from a list of available drivers on my computer, untick Show compatible hardware, select your manufacturer on the left and the model on the right, and click Next. Windows may warn you about compatibility. If you are certain the driver matches your card, you can continue.
Method 5: Do a Clean Driver Reinstall With DDU
Leftover files from an older or corrupted driver are a frequent reason why a new driver will not take. Display Driver Uninstaller (DDU) is a free, widely trusted tool that removes every trace of previous graphics drivers.
- Download the latest graphics driver from your manufacturer first and keep the installer on your desktop.
- Download DDU from its official website and extract it.
- Disconnect from the internet (unplug Ethernet or turn off Wi-Fi) so Windows Update does not install a driver automatically while you work.
- Boot into Safe Mode. Hold Shift while clicking Restart from the Start menu, then go to Troubleshoot > Advanced options > Startup Settings > Restart and press 4 or F4.
- Run DDU, select GPU as the device type and your vendor (NVIDIA, AMD, or Intel), and click Clean and restart.
- When Windows restarts normally, install the driver you downloaded earlier.
- Reconnect to the internet after the installation is complete.
This method resolves a large share of stubborn cases, especially those caused by failed updates.
Method 6: Roll Back a Faulty Driver or Uninstall a Bad Update
If the problem began right after a driver or Windows update, undoing that change may be the fastest cure.
Roll back the driver:
- Open Device Manager and expand Display adapters.
- If your real GPU is listed, right-click it, choose Properties, and open the Driver tab.
- Click Roll Back Driver if the button is available, choose a reason, and confirm.
Uninstall a recent Windows update:
- Go to Settings > Windows Update > Update history.
- Scroll down and choose Uninstall updates.
- Select the most recent update installed around the time the issue began, and uninstall it.
- Restart your PC.
If you want to prevent Windows from reinstalling the same update, pause updates for a week or two in Windows Update settings until a fixed version is released.
Method 7: Check That the GPU Is Enabled and Detected
If the real graphics card does not appear at all, Windows may not be seeing it.
Enable it in Device Manager. Open the View menu and choose Show hidden devices. Look under Display adapters and Other devices for a graphics entry with a down-arrow icon or a yellow warning triangle. Right-click it and select Enable device.
Scan for hardware changes. In Device Manager, click the Action menu and select Scan for hardware changes. Windows will re-check connected devices and may detect the card.
Check BIOS/UEFI settings. Restart your PC and enter BIOS (usually by pressing Del, F2, or F10 during startup). Look for settings related to the primary display, integrated graphics, or PCIe configuration. Make sure the dedicated GPU is enabled and the primary display output is set to PCIe or Auto. Save and exit.
On laptops with both integrated and dedicated graphics, make sure neither is disabled in BIOS. Also confirm that you installed the driver for both GPUs, since the Intel or AMD integrated chip often needs its own driver before the dedicated card works correctly.
Method 8: Repair System Files With SFC and DISM
Corrupted Windows files can stop drivers from loading. Windows includes two tools that repair them.
- Type cmd in the Start menu, right-click Command Prompt, and choose Run as administrator.
- Run the System File Checker:
sfc /scannow
- Wait for the scan to reach 100 percent. If it reports that it repaired files, restart your PC.
- If problems remain, run the Deployment Image Servicing and Management tool, one command at a time:
DISM /Online /Cleanup-Image /CheckHealth
DISM /Online /Cleanup-Image /ScanHealth
DISM /Online /Cleanup-Image /RestoreHealth
- Restart your computer and run
sfc /scannowonce more.
Afterward, reinstall the graphics driver using Method 3 or Method 5.
Method 9: Check Hardware, Cables, and Power
If none of the software fixes work, the issue may be physical. This applies mainly to desktop PCs.
- Reseat the graphics card. Power off, unplug the PC, open the case, and remove and reinsert the card firmly into its PCIe slot. Dust and oxidation can cause a poor connection.
- Check the power connectors. Make sure the 6-pin or 8-pin power cables are fully plugged into the card.
- Test another slot or cable. Try a different PCIe slot if available, and test a different HDMI or DisplayPort cable. Also try connecting your monitor to the graphics card rather than the motherboard port.
- Test with another system. If possible, try the card in another computer. If it fails there too, the GPU may be faulty.
- Reset BIOS. Clear CMOS or load BIOS defaults to undo any misconfiguration. Updating the BIOS may help if your motherboard has known compatibility issues with your GPU.
If you suspect the card is dying, look for other signs such as artifacts on screen, random crashes, or fans that never spin. In that case, contact the manufacturer for warranty service or consider a replacement.
Extra Tips to Prevent the Problem From Returning
- Create a restore point before installing major drivers or updates, so you can undo changes quickly.
- Download drivers only from official sources. Third-party driver updaters can install the wrong package and cause the very issue you are trying to fix.
- Keep a copy of your working driver installer on a USB drive or external disk for emergencies.
- Avoid interrupting driver installations. Do not shut down your PC or sleep it while an update is in progress.
- Keep Windows and your BIOS reasonably up to date, but wait a few days after major releases if you rely on your PC for important work.
Conclusion
Seeing “Microsoft Basic Display Adapter” in Device Manager looks alarming, but it simply means Windows is using a generic backup driver because it cannot load the right one. In most cases, you can fix it by updating Windows, installing the correct driver from your GPU or laptop manufacturer, or doing a clean reinstall with DDU. If the problem began after an update, rolling back the driver or uninstalling the update often restores things immediately. When software solutions fail, checking BIOS settings, repairing system files, and inspecting the hardware will usually reveal the cause.
Work through the methods in order, starting with the simplest, and test after each one. Within a short time you should be back to full resolution, smooth performance, and proper hardware acceleration.
Frequently Asked Questions (FAQ)
1. Is the Microsoft Basic Display Adapter safe to use?
Yes, it is completely safe. It is an official Microsoft driver designed as a fallback so your display keeps working. However, it is not meant for long-term use. It lacks hardware acceleration, supports only limited resolutions and refresh rates, and cannot deliver the performance needed for gaming, video editing, or 3D work. Treat it as a temporary solution until you install the correct driver.
2. Why does my resolution stay stuck at 1024×768 or look blurry?
The basic adapter does not know the full capabilities of your graphics card or monitor, so it defaults to a safe, low resolution. Once you install the proper driver from NVIDIA, AMD, Intel, or your device maker, the full range of resolutions, refresh rates, and scaling options becomes available in Settings > System > Display.
3. Why does Windows keep replacing my graphics driver with the basic one?
This usually happens when a Windows update installs an incompatible driver, when the existing driver is corrupted, or when the GPU is not being detected properly. Using DDU for a clean install, then pausing automatic driver updates or installing the manufacturer’s driver, normally stops the cycle. You can also check your BIOS settings and hardware connections if the issue keeps coming back.
4. Can a faulty graphics card cause this problem?
Yes. If the GPU is failing, poorly seated, or not receiving enough power, Windows may not detect it and will fall back to the basic adapter. If drivers install successfully but the card still does not appear, or if you notice screen artifacts and crashes, test the card in another computer or contact the manufacturer for support.