sukh22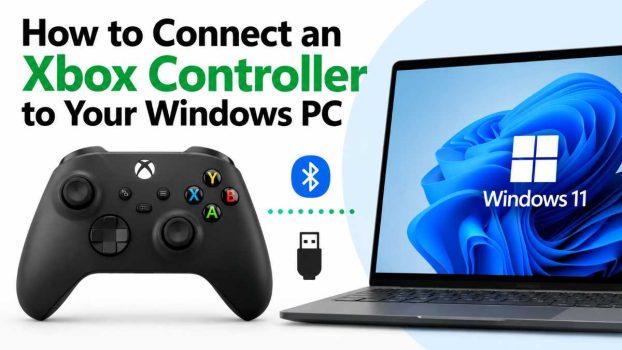
The Xbox controller is widely regarded as one of the most comfortable and reliable gamepads available, which is exactly why so many PC gamers reach for one instead of buying a dedicated PC controller. Microsoft designed the Xbox controller to work seamlessly across its ecosystem, and since Windows and Xbox share the same parent company, pairing the two is generally a smooth, driver-friendly experience. Whether you own an Xbox One controller, an Xbox Series X|S controller, or even an older Xbox 360 pad, Windows 10 and Windows 11 offer several ways to get you connected and gaming within minutes.
There isn’t just one way to hook up your controller, though. Depending on the hardware you own and what you already have lying around, you might connect via a simple USB cable, Bluetooth, the official Xbox Wireless Adapter, or even a wired Xbox 360 receiver for older controllers. Each method has its own pros and cons in terms of latency, convenience, and battery usage. This guide walks through every practical option, explains how to troubleshoot common issues, and answers the most frequently asked questions so you can get back to gaming as quickly as possible.
Methods to Connect an Xbox Controller to Windows
Method 1: Wired Connection via USB Cable

The simplest and most reliable way to connect any Xbox controller to a Windows PC is with a USB cable.
- Grab the right cable. Xbox One and Xbox Series X|S controllers use a USB-C port on top of the controller. Older Xbox One controllers may use Micro-USB instead. Any standard USB-A to USB-C (or Micro-USB) cable will work, including most phone charging cables.
- Plug it in. Connect one end to the controller and the other to an available USB port on your PC.
- Let Windows do the rest. Windows 10 and 11 have built-in drivers for Xbox controllers, so the system should automatically detect the device and install the necessary drivers within a few seconds. You’ll see a notification confirming the controller is ready to use.
- Verify the connection. Open Settings > Bluetooth & devices > Devices, or simply open a game, and check that the controller responds.
The biggest advantage of a wired connection is zero input lag and no battery drain, since the controller draws power directly from the PC. This makes it the preferred choice for competitive gaming. The downside, obviously, is that you’re tethered to your computer, which can be inconvenient if you like to sit back on a couch a few feet away.
Method 2: Bluetooth Connection (Wireless)
If your controller supports Bluetooth, this is the easiest wireless option since it doesn’t require any extra hardware. Bluetooth support is standard on Xbox Series X|S controllers and on newer Xbox One controllers (identifiable by the Xbox button that’s a small, rounded plastic piece rather than a shiny metallic one, or a controller with a small button-style connect icon rather than a curved one next to the USB port). Older Xbox One controllers without Bluetooth won’t appear in this menu — check Method 3 or 4 instead.
- Turn on your PC’s Bluetooth. Go to Settings > Bluetooth & devices and make sure Bluetooth is toggled on. If your desktop PC doesn’t have built-in Bluetooth, you’ll need a USB Bluetooth adapter.
- Put your controller into pairing mode. Press and hold the small Connect button on the top edge of the controller (next to the USB-C port) for about 3 seconds, until the Xbox logo on the front starts flashing rapidly.
- Add the device in Windows. Back on your PC, click Add device, select Bluetooth, and choose Xbox Wireless Controller from the list that appears.
- Wait for pairing to finish. Once paired, the flashing light on the controller will turn solid, indicating a successful connection.
Bluetooth is great for casual gaming and general desktop use, like navigating a media center or browsing. Keep in mind that Bluetooth connections can occasionally introduce a small amount of input latency compared to Microsoft’s proprietary wireless protocol, which matters more in fast-paced competitive titles than in single-player or casual games.
Method 3: Xbox Wireless Adapter for Windows
For the lowest possible wireless latency, Microsoft sells an official Xbox Wireless Adapter that plugs into a USB port on your PC and communicates with the controller using the same proprietary wireless protocol used by Xbox consoles — not Bluetooth.
- Plug in the adapter. Insert the Xbox Wireless Adapter into a free USB-A port on your computer.
- Install drivers if needed. Windows usually installs the necessary drivers automatically. If it doesn’t, download the Xbox Accessories app from the Microsoft Store, which handles driver installation and also lets you update your controller’s firmware.
- Pair the controller. Press the Xbox button on the controller to turn it on, then press the small Connect button on the adapter, followed by the Connect button on the controller within 20 seconds.
- Confirm the connection. The Xbox button on the controller will light up solid white once paired successfully.
This method is ideal for players who want console-quality wireless performance without any noticeable input delay. It also supports connecting multiple controllers to a single adapter (up to eight), which is handy for local multiplayer sessions. The only real downside is the added cost of purchasing the adapter separately, since it doesn’t come bundled with the controller itself.
Method 4: Using an Xbox 360 Wireless Receiver (For Older Controllers)
If you’re using a legacy Xbox 360 controller, note that it’s not compatible with the Xbox Wireless Adapter or Bluetooth pairing method described above. Instead, you have two choices:
- Wired: Xbox 360 controllers can connect via a USB Mini-B cable directly to your PC, and Windows will typically auto-install the correct drivers.
- Wireless: You’ll need a dedicated Xbox 360 Wireless Receiver for Windows, a small USB dongle sold separately (often now found on the secondhand market since Microsoft has discontinued it). Plug the receiver into your PC, install the drivers (available from Microsoft’s website if not automatic), press the Connect button on the receiver, then the Connect button on the controller.
This method is mostly relevant for players holding onto older hardware, but it’s worth knowing about if you’ve inherited a used PC setup or found an old controller in a drawer.
Bonus Tip: Using the Xbox Accessories App
Regardless of which method you use, installing the free Xbox Accessories app from the Microsoft Store is worth doing. It lets you:
- Check battery levels for wireless controllers
- Remap buttons and triggers
- Adjust trigger and thumbstick sensitivity
- Update controller firmware, which can resolve connectivity glitches
Keeping your firmware updated is one of the most overlooked fixes for controllers that connect but behave erratically, drop input, or refuse to pair reliably.
Troubleshooting Common Connection Issues
If your controller isn’t connecting despite following the steps above, try these general fixes:
- Replace or recharge batteries. Low battery power is the most common cause of failed Bluetooth or wireless pairing.
- Move closer to the PC. Both Bluetooth and the Xbox Wireless Adapter have limited range and can be disrupted by walls or interference from other wireless devices.
- Restart the controller. Hold the Xbox button for about 10 seconds to fully power it off, then turn it back on.
- Update Windows. Outdated Windows builds sometimes lack the latest Xbox controller drivers.
- Remove and re-pair the device. In Bluetooth & devices, remove the controller entry and go through the pairing process again from scratch.
- Try a different USB port or cable. Some USB cables are charge-only and don’t support data transfer, which will prevent a wired connection from working.
Conclusion
Connecting an Xbox controller to a Windows PC is refreshingly straightforward compared to some other third-party gamepads, largely thanks to Microsoft’s tight integration between its console and desktop operating systems. A simple USB cable will get you up and running instantly with zero lag, Bluetooth offers cable-free convenience for casual play, and the Xbox Wireless Adapter delivers the best of both worlds — low latency and full wireless freedom — for players willing to invest in the extra hardware. Even older Xbox 360 controllers can still find a home on a modern Windows rig with the right receiver.
Whichever method suits your setup and budget, take a few minutes to install the Xbox Accessories app afterward. It’s a small step that pays off in better performance, easier troubleshooting, and access to custom controller settings that can make a real difference in how your games feel to play.
FAQ
1. Can I use an Xbox controller on Windows without any extra software?
Yes. Windows 10 and 11 include native Xbox controller drivers, so a wired USB connection or Bluetooth pairing will work out of the box in most cases. The Xbox Accessories app is optional but recommended for extra features like remapping and firmware updates.
2. Why does my Xbox controller keep disconnecting from my PC?
This is usually caused by low battery, being too far from the PC or adapter, USB power-saving settings, or Bluetooth interference from other devices. Try disabling USB selective suspend in Windows’ power settings, moving closer to your PC, or switching to a wired connection to rule out wireless interference.
3. Do all Xbox controllers support Bluetooth?
No. All Xbox Series X|S controllers support Bluetooth, but only newer Xbox One controllers do. Older Xbox One models and all Xbox 360 controllers lack Bluetooth entirely and require either a wired connection or a dedicated wireless adapter/receiver.
4. Can I connect more than one Xbox controller to my PC at the same time?
Yes. Windows supports multiple simultaneous controllers, whether connected via USB, Bluetooth, or the Xbox Wireless Adapter (which supports up to eight controllers on a single adapter). This is especially useful for local co-op or split-screen PC games.