
 Geeksdigit Team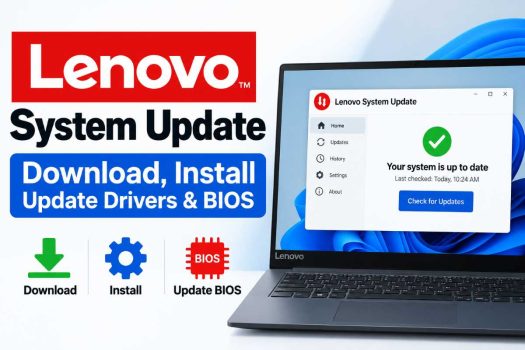
Keeping a Lenovo laptop or desktop running smoothly isn’t just about installing the occasional Windows Update. Lenovo ships its own dedicated tool — Lenovo System Update (formerly known as ThinkVantage System Update, or TVSU) — that scans your specific machine and pulls down drivers, BIOS/firmware, and Lenovo applications that are tested and approved for that exact model. This guide walks through what the tool does, how it differs from Lenovo Vantage, how to download and install it, and how to safely use it to update your drivers and BIOS.
What Is Lenovo System Update?
Lenovo System Update is a lightweight Windows utility built specifically to automate the process of finding, downloading, and installing the correct drivers, BIOS/UEFI firmware, and Lenovo software for your device. It’s a small Win32 application that can be preinstalled at the factory as part of a custom image or downloaded separately, and when launched, it checks either your local repository or Lenovo’s support site for updates, with that location configurable by IT departments.
Unlike generic driver-update software, System Update only offers packages that Lenovo has validated for your exact model number, which minimizes the risk of installing an incompatible driver that could cause instability. Lenovo rolls out its own software solution because software and driver updates delivered through Windows Update are not always as current as what’s available directly from the manufacturer.
Lenovo System Update vs. Lenovo Vantage
Lenovo offers two tools that overlap in purpose but serve different audiences:
- Lenovo Vantage is a full consumer-facing app. Beyond updates, it includes hardware optimization, warranty checks, device settings, battery health tools, and support resources — it’s a Windows app comprised of hardware optimization and update management functions.
- Lenovo System Update is a purpose-built, no-frills utility focused entirely on the update process itself. It’s designed specifically for the device update process, and both tools are offered free of charge. It’s the preferred option for IT administrators and power users who want a fast, scriptable way to push updates — including in managed environments where updates are distributed from a local server rather than downloaded individually from Lenovo’s servers each time.
If you just want a general dashboard for your laptop, Vantage is the better fit. If you specifically want a fast, minimal tool to pull drivers, firmware, and BIOS with as few extra features as possible, System Update is the one to use.
What It Can and Can’t Update
System Update handles:
- Device drivers (chipset, graphics, audio, Wi-Fi/Bluetooth, touchpad, camera, etc.)
- BIOS/UEFI firmware updates
- Embedded controller and other firmware
- Lenovo-branded applications and utilities
It does not update third-party applications like Adobe or Microsoft software — for that, you’ll still rely on Windows Update or each vendor’s own updater.
System Requirements
Lenovo System Update supports a broad range of Lenovo hardware. In terms of Windows versions, it supports everything from Windows 7 through Windows 11, in both 32-bit and 64-bit editions, and it’s built for Lenovo desktops, notebooks, and workstations, including ThinkPad, ThinkCentre, and ThinkStation lines. If your machine is very new, it may take Lenovo a short time to add full support for that specific model.
Step 1: Download Lenovo System Update
There are two official routes to get the tool, and it’s worth using Lenovo’s own site rather than a third-party mirror, even though several exist.
Option A — Direct product page Go to the official Lenovo System Update page: 🔗 https://www.lenovo.com/us/en/software/lenovo-system-update
Option B — Support downloads page This is the dedicated support/download listing, which also includes release notes and version history: 🔗 https://support.lenovo.com/us/en/downloads/ds012808-lenovo-system-update-for-windows-10-7-32-bit-64-bit-desktop-notebook-workstation
Option C — Administrator tools page If you’re an IT admin looking for System Update alongside related deployment tools like Thin Installer and Update Retriever: 🔗 https://support.lenovo.com/us/en/solutions/ht037099-download-thinkvantage-technologies-administrator-tools
Option D — Support solution/FAQ page Lenovo also maintains a dedicated how-to solution page with links and background information: 🔗 https://support.lenovo.com/us/en/solutions/ht003029-lenovo-system-update-update-drivers-bios-and-applications
On any of these pages, look for a button labeled something like “Download” next to the current version number. The installer is a small executable, typically only a few megabytes, since the tool downloads driver and firmware packages separately after installation rather than bundling them all upfront.
Tip: Avoid downloading Lenovo System Update from random third-party software repositories. While reputable mirrors like FileHorse or Softpedia do exist and are generally scanned for malware, the safest and most current build will always come directly from Lenovo’s own domains (lenovo.com or support.lenovo.com).
Step 2: Install Lenovo System Update
Once the installer has downloaded:
- Locate the downloaded file (usually in your Downloads folder) — it will have a name similar to
system_update_x.xx.xx.xx.exe. - Right-click and run as administrator. Administrative rights are required because the tool needs to install drivers and, eventually, flash firmware.
- Accept the User Account Control (UAC) prompt if Windows asks for permission.
- Follow the setup wizard. Accept the license agreement, choose an install location (the default is almost always fine), and click through to finish.
- Launch the application once installation completes. On first run, Lenovo System Update will typically ask for permission to check your system configuration and connect to Lenovo’s servers.
The whole process usually takes only a couple of minutes, since — as noted above — the installer itself is small and doesn’t include the update packages.
Step 3: Run Your First Scan
When you open Lenovo System Update for the first time, it automatically identifies your exact machine type/model and matches it against Lenovo’s update catalog for that hardware.
- Open the app and go to the “Get New Updates” (sometimes labeled “Get Updates”) tab.
- The tool will scan your currently installed drivers, BIOS version, and Lenovo software versions, then compare them against what’s available for your model.
- After the scan finishes, you’ll see a list of available updates, each tagged by importance:
- Critical — security patches, stability fixes, or updates Lenovo strongly recommends installing immediately.
- Recommended — quality-of-life improvements or minor bug fixes that aren’t urgent but are worth applying.
- Optional — updates you may or may not need, depending on your specific configuration or use case.
Step 4: Select and Install Updates
Once the scan results appear:
- Review each item. Click on an update’s name or the small info icon to see its description, release notes, and whether a restart will be required.
- Check the boxes next to the updates you want to install. By default, most versions of the tool pre-select Critical and Recommended items.
- Click Next (or Install Selected) to begin downloading and applying the updates.
- The tool downloads each package, then installs them sequentially. A progress bar shows the current file and overall completion status.
- Restart when prompted. Some driver updates — and virtually all BIOS updates — require a reboot to finish applying. Save your work before continuing.
If a large batch of updates is queued, it’s normal for the process to take anywhere from a few minutes to over half an hour, especially if a BIOS update is included, since firmware flashing itself takes longer than a typical driver install.
Updating BIOS Specifically
BIOS (or UEFI firmware) updates are the most sensitive category System Update handles, since they modify the low-level firmware that boots your machine. A few extra precautions matter here:
- Keep your laptop plugged into AC power during a BIOS update. Never run a firmware flash on battery alone — if power is lost mid-update, it can corrupt the BIOS and potentially require a motherboard/system board repair.
- Don’t interrupt the process. Once a BIOS update begins, avoid closing the laptop lid, putting the machine to sleep, or forcing a shutdown.
- Close other applications before starting, to reduce the chance of a conflict or unexpected reboot during the flash.
- Read the release notes. BIOS updates sometimes address specific security vulnerabilities (such as UEFI-level exploits) or fix boot/wake issues — worth knowing what you’re installing and why.
- Lenovo System Update will typically reboot the machine into a special update environment to flash the BIOS, then boot back into Windows automatically once finished.
If you ever need to update BIOS manually — for example, on a system that isn’t detected properly by System Update, or if you prefer downloading a standalone BIOS package — you can search for your exact model on Lenovo’s driver and software download portal and select the “BIOS/UEFI” category for that listing.
Scheduling Automatic Updates
If you’d rather not manually run scans, Lenovo System Update includes a scheduling feature:
- Open the “Schedule Updates” tab.
- Enable automatic checking and choose a frequency — typically weekly, on a day of your choosing.
- Decide whether the schedule should include Critical only or Critical + Recommended updates.
- Optionally, enable automatic download and installation so updates apply without further prompts — useful for less hands-on users, though many people prefer to review updates manually, especially BIOS updates.
- You can also choose to exclude updates that require a restart from the automatic schedule, so your PC won’t reboot unexpectedly while you’re working.
Viewing Installation History
The “View Installation History” tab keeps a log of every update the tool has applied, along with the date and time. This is useful for:
- Confirming a specific driver or BIOS version was actually installed.
- Troubleshooting a problem that appeared after an update (you can check what changed and roughly when).
- Verifying compliance in a managed IT environment.
Troubleshooting Common Issues
“No updates found” even though you expect some Make sure you’re connected to the internet and that Lenovo’s servers aren’t experiencing downtime. Also confirm your system’s model number is correctly detected — this is shown in the app’s system information section.
An update fails partway through Re-run the scan and try installing that specific package again. If it keeps failing, download that individual driver or BIOS file manually from Lenovo’s support site for your exact model and run the installer directly.
BIOS update won’t start / gets stuck Ensure the laptop is on AC power, has more than the minimum required battery charge (often 20–40%), and that no other update or antivirus scan is running simultaneously.
Tool doesn’t recognize your model This can happen on newer devices Lenovo hasn’t finished onboarding into the catalog yet, or on modified/custom-built systems. In this case, search for drivers manually through Lenovo’s support site using your machine type/model number, which is usually printed on a label on the bottom of the chassis or accessible via the wmic csproduct get name command in Command Prompt.
Conflicts with Lenovo Vantage If you have both Vantage and System Update installed, they can sometimes both try to manage updates. It’s fine to keep both, but if you notice duplicate notifications or scheduling conflicts, consider disabling automatic update scheduling in one of the two apps.
Uninstalling Lenovo System Update
If you no longer need the tool:
- Open Settings > Apps > Installed Apps (or Control Panel > Programs and Features on older Windows versions).
- Search for “Lenovo System Update.”
- Select it and click Uninstall, then follow the prompts.
Uninstalling the tool does not roll back any drivers or BIOS versions it already installed — those remain in place.
Is It Safe to Use?
Yes. The application is safe to use, since it connects to Lenovo’s official servers for updates and ensures that only verified drivers and firmware are installed. It’s built and maintained by Lenovo itself, so as long as you download it from lenovo.com or support.lenovo.com, you’re getting manufacturer-signed packages rather than repackaged or third-party driver bundles, which is a meaningfully safer path than generic “driver updater” software from unrelated vendors.
Manually Downloading Drivers or BIOS (Without the Tool)
There are times you may prefer to grab a driver or BIOS package by hand instead of running the full System Update scan — for example, if you’re reinstalling Windows from scratch on a fresh drive and need a network or storage driver before you even have internet access, or if System Update doesn’t yet recognize a brand-new model.
- Go to Lenovo’s main support portal at https://support.lenovo.com and either let it auto-detect your device or type in your machine’s serial number or model.
- Navigate to the “Drivers & Software” tab for that product.
- Filter by category — BIOS/UEFI, Chipset, Graphics, Audio, Network, Storage, and so on.
- Download the specific
.exepackage you need and run it directly; most Lenovo driver installers are self-contained and don’t require System Update to function. - For a clean Windows install, prioritize chipset, storage/RAID, and network drivers first, since without those some hardware may not even be recognized properly until installed.
This manual route is also handy for IT teams building a custom deployment image, since you can grab exactly the packages you need rather than running the interactive scan on every machine.
Frequently Asked Questions
Does Lenovo System Update cost anything? No. Like Lenovo Vantage, it’s a free tool provided directly by Lenovo for supported devices.
Will it slow down my computer? No — outside of scheduled scans (which are brief) or an active update installation, the tool sits idle and uses negligible system resources.
Can I use it on a non-Lenovo PC? No. The tool is designed to detect Lenovo hardware IDs and match them against Lenovo’s own driver/firmware catalog, so it won’t return meaningful results on a machine from another manufacturer.
What happens if I skip a BIOS update? Nothing breaks immediately — BIOS updates aren’t mandatory the way some security patches are — but skipping them for a long time means missing out on stability fixes, compatibility improvements for newer components, and occasionally important security patches at the firmware level. It’s generally good practice to at least review BIOS release notes even if you don’t install every single revision right away.
Can I roll back a BIOS update if something goes wrong? Some Lenovo systems support a rollback or dual-BIOS recovery mechanism, but not all models do. Because of this, it’s worth reading release notes carefully before updating and avoiding BIOS flashes on a system with a weak or failing battery.
Does System Update work over Wi-Fi, or does it need Ethernet? Either works. Wi-Fi is perfectly fine for driver downloads; a wired connection is only marginally safer for a BIOS flash in the sense that it avoids any (unlikely) network drop mid-download, but it isn’t a strict requirement.
Quick Reference: Official Links
| Purpose | Link |
|---|---|
| Product overview | https://www.lenovo.com/us/en/software/lenovo-system-update |
| Direct download / release notes | https://support.lenovo.com/us/en/downloads/ds012808-lenovo-system-update-for-windows-10-7-32-bit-64-bit-desktop-notebook-workstation |
| How-to / support solution page | https://support.lenovo.com/us/en/solutions/ht003029-lenovo-system-update-update-drivers-bios-and-applications |
| Admin tools (Thin Installer, Update Retriever, System Update) | https://support.lenovo.com/us/en/solutions/ht037099-download-thinkvantage-technologies-administrator-tools |
Final Thoughts
Lenovo System Update is one of the fastest, most reliable ways to keep a Lenovo machine’s drivers, BIOS, and bundled software current — especially compared to relying on Windows Update alone, which doesn’t cover firmware or many OEM-specific drivers.
For most home users, running a manual scan every month or two (and always applying Critical updates promptly) is a solid habit. For IT administrators managing many Lenovo devices, pairing System Update with Update Retriever and a local repository turns this into a scalable, controlled deployment pipeline rather than a one-machine-at-a-time chore.
Whichever way you use it, the core rule stays the same: download only from Lenovo’s own domains, keep your laptop on power during BIOS updates, and don’t interrupt a firmware flash once it’s started.





