Geeksdigit Team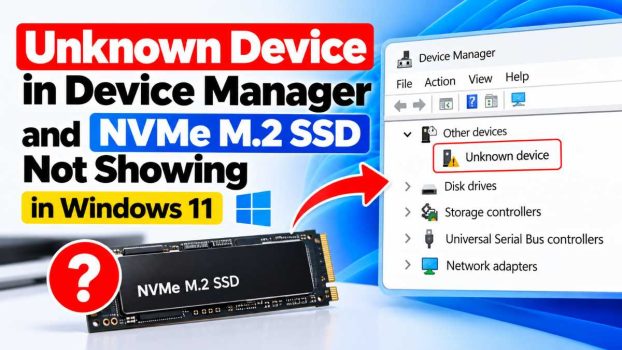
Few things are more frustrating for a PC builder or upgrader than installing a brand-new NVMe M.2 SSD, booting into Windows 11, and finding that the drive simply isn’t there. Sometimes the situation is even more puzzling: instead of a missing drive, you open Device Manager and spot a mysterious “Unknown Device” sitting under “Other devices,” with a yellow warning triangle and no clear indication of what it actually is. Both problems are common, and in many cases they’re actually connected — an NVMe SSD that Windows can’t properly identify will often show up as an unknown device rather than being invisible altogether.
This issue affects users across a wide range of hardware, from budget PCIe 3.0 drives to the latest PCIe 5.0 NVMe SSDs, and it isn’t limited to any one brand. Samsung 990 Pro, WD Black SN850X, Crucial P5 Plus, Kingston KC3000, and countless other models have all been reported missing from Windows 11 at one point or another. The causes range from something as simple as a loose connection to more complex issues involving BIOS configuration, driver conflicts, or even a dead drive.

Before diving into advanced fixes, it’s worth understanding what “Unknown Device” actually means in this context. When Windows detects hardware but cannot match it to a known driver or Plug and Play ID, it labels it generically. For NVMe SSDs, this often happens when the drive is detected at the hardware level (BIOS/UEFI sees it) but Windows either lacks the correct driver, the driver failed to load, or there’s a resource conflict preventing proper enumeration. In other cases, the “Unknown Device” isn’t the SSD at all — it might be an unrelated peripheral, and the real issue is that the SSD isn’t being detected by the system at any level.
Methods to Fix Unknown Device and Missing NVMe SSD Issues
Method 1: Check the Physical Installation
Before touching any software settings, confirm the SSD is seated correctly. M.2 drives use a small locking screw or a plastic clip to hold them flush against the motherboard, and even a slightly angled or loose installation can prevent proper contact with the connector pins.
- Power down the PC completely and unplug it from the wall.
- Open the case and locate the M.2 slot you used. Many modern motherboards hide M.2 slots under heatsinks or shields — remove these carefully if present.
- Reseat the SSD by inserting it at roughly a 30-degree angle into the slot, then pressing it flat and securing it with the screw or clip.
- If your motherboard has multiple M.2 slots, note that some share bandwidth with SATA ports or PCIe slots. Installing an SSD in a slot that’s already in use by another device can disable one of them. Check your motherboard manual for a lane-sharing diagram.
- Try the drive in a different M.2 slot if one is available, to rule out a faulty slot.
Method 2: Verify Detection in BIOS/UEFI
If Windows can’t see the drive, the next step is determining whether the hardware layer sees it at all.
- Restart the PC and enter BIOS/UEFI setup (commonly Delete, F2, or F10 depending on your motherboard brand).
- Navigate to a page that lists storage devices, sometimes labeled “Storage Configuration,” “NVMe Configuration,” or simply displayed on the main BIOS screen.
- If the SSD appears here with its model name, the hardware connection is fine and the problem lies within Windows or its drivers — proceed to the software-focused methods below.
- If it does not appear here, the issue is physical or firmware-related. Try a different slot, a different M.2 cable/adapter if using a PCIe-to-M.2 adapter card, or test the SSD in another computer to rule out a dead drive.
Method 3: Update the Motherboard BIOS/UEFI Firmware
Older BIOS versions sometimes lack proper support for newer NVMe drives, particularly larger-capacity models or those using newer NVMe protocol revisions (such as NVMe 2.0).
- Identify your motherboard model (found in BIOS or via a tool like CPU-Z).
- Visit the manufacturer’s official support page and check the changelog for your current BIOS version versus the latest available. Look specifically for mentions of “NVMe support,” “M.2 compatibility,” or “storage” improvements.
- Follow the manufacturer’s specific update instructions carefully, as BIOS updates carry inherent risk if interrupted. Most modern boards support USB-flash-drive-based updates without needing a working OS.
- After updating, recheck the BIOS storage page to see if the drive is now detected.
Method 4: Set the Correct Storage Controller Mode
Motherboards typically offer multiple storage controller modes: AHCI, RAID, and sometimes Intel RST (Rapid Storage Technology) or Intel VMD (Volume Management Device). NVMe SSDs generally work natively through the PCIe/NVMe standard regardless of this setting, but VMD in particular can cause NVMe drives to disappear from standard Windows detection unless the corresponding VMD drivers are installed.
- In BIOS, locate the SATA/storage mode setting.
- If VMD is enabled and you’re not using it for a RAID array, try disabling it and see if the SSD becomes visible in Windows without extra drivers.
- If you need VMD enabled for a RAID configuration, you’ll need to install Intel VMD drivers during Windows setup or via Device Manager afterward, since standard Windows installers may not include them.
- Avoid switching modes if you have an existing bootable Windows installation on another drive already configured with a specific mode, as this can render that OS unbootable.
Method 5: Update or Reinstall NVMe and Chipset Drivers
If the drive shows in BIOS but not in Windows, or shows in Windows as an Unknown Device, the driver stack is a prime suspect.
- Open Device Manager (right-click Start > Device Manager).
- Expand “Other devices” and look for the Unknown Device entry, or check under “Disk drives” and “Storage controllers” for anything with a warning icon.
- Right-click the entry and select “Update driver,” then choose “Search automatically for drivers.”
- If Windows can’t find one automatically, visit your motherboard manufacturer’s website and download the latest chipset drivers (which include storage/NVMe drivers) for your exact model.
- Also check your SSD manufacturer’s website — companies like Samsung, WD, Crucial, and Kingston sometimes provide their own NVMe drivers or management software with a driver component.
- After installing, restart the PC and check whether the unknown device resolves into a properly named NVMe controller.
Method 6: Uninstall and Rescan for Hardware Changes
Sometimes a corrupted driver installation needs to be forcibly removed before a clean one can take its place.
- In Device Manager, right-click the problematic device (whether it’s the Unknown Device or a malfunctioning storage controller) and select “Uninstall device.”
- If prompted, also check the box to “Delete the driver software for this device,” if available.
- After uninstalling, click the “Action” menu at the top of Device Manager and select “Scan for hardware changes.” Windows will attempt to redetect and reinstall drivers for all connected hardware.
Method 7: Initialize the Disk in Disk Management
A brand-new SSD that Windows detects at the hardware and driver level, but that still doesn’t show in File Explorer, likely just needs to be initialized and partitioned — this is normal for new drives and not a malfunction.
- Right-click Start and select “Disk Management.”
- Look for a disk listed as “Not Initialized” or showing as unallocated space. If Windows prompts you to initialize the disk, choose GPT (GUID Partition Table) for modern systems, as it supports drives larger than 2TB and is required for UEFI boot drives.
- Right-click the unallocated space and choose “New Simple Volume,” then follow the wizard to assign a drive letter and format the partition (NTFS is standard for a Windows data or boot drive).
- Once complete, the drive should appear in File Explorer with its assigned letter.
Method 8: Check Power Management Settings
PCIe link power management features, designed to save energy, can occasionally cause NVMe drives to intermittently disconnect or fail to initialize properly, especially on laptops or systems with aggressive power-saving BIOS defaults.
- In Device Manager, find your NVMe controller under “Storage controllers,” right-click it, and go to Properties > Power Management tab.
- Uncheck “Allow the computer to turn off this device to save power,” if present.
- In BIOS, look for a setting like “PCIe Power Management” or “ASPM (Active State Power Management)” and try disabling it or setting it to a less aggressive mode.
Method 9: Run the Windows Hardware Troubleshooter and Check for Windows Updates
Windows 11 includes built-in diagnostics that can catch driver and hardware detection issues automatically.
- Go to Settings > System > Troubleshoot > Other troubleshooters, and run “Hardware and Devices” if listed (in some Windows 11 builds this is accessed via a support page or by searching “troubleshoot” in Start).
- Separately, go to Settings > Windows Update and check for and install any pending updates, since Microsoft periodically ships updated storage and NVMe drivers through Windows Update.
Method 10: Test the SSD on Another System or Use Manufacturer Diagnostic Tools
If none of the above resolves the issue, it’s important to isolate whether the SSD itself is defective.
- If possible, install the SSD in a different computer (or an external NVMe enclosure connected via USB) to see if it’s detected there.
- Download your SSD manufacturer’s diagnostic software (such as Samsung Magician, Western Digital Dashboard, or Crucial Storage Executive) on a system where the drive is detected, and run a health check or SMART data scan.
- If the drive fails to appear on multiple systems, or diagnostic software reports critical health warnings, the SSD may be defective and eligible for warranty replacement.
Conclusion
An NVMe M.2 SSD not showing up in Windows 11, or appearing only as a vague “Unknown Device” in Device Manager, is rarely a single-cause problem — it’s the result of a chain of hardware and software components that all need to align correctly. Working through the methods above systematically, starting with the physical connection and BIOS detection before moving into driver updates, controller mode settings, and disk initialization, resolves the overwhelming majority of cases.
For most users, the fix turns out to be something straightforward: reseating the drive, updating chipset and NVMe drivers, or simply initializing a brand-new disk in Disk Management. In tougher cases involving BIOS firmware, VMD/RAID mode conflicts, or genuinely failed hardware, patience and methodical testing — including trying the drive in another system — will usually reveal the true cause. If every step here has been exhausted and the drive still won’t appear, it’s reasonable to suspect a hardware defect and pursue a replacement or warranty claim with the manufacturer.
Frequently Asked Questions
1. Why does my new NVMe SSD show up in BIOS but not in Windows 11?
This typically means the hardware connection is fine, but Windows either hasn’t initialized the disk yet or is missing the correct driver. Check Disk Management first — if the drive appears there as “Not Initialized” or unallocated, initialize it and create a new volume. If it doesn’t appear in Disk Management either, check Device Manager for an Unknown Device or malfunctioning storage controller and update its driver.
2. What does “Unknown Device” in Device Manager actually mean?
It means Windows detected a piece of hardware but couldn’t match it to any installed driver or recognize its device ID. For NVMe SSDs, this usually points to a missing or corrupted chipset/NVMe driver, though it can occasionally be an unrelated device, such as a card reader or Bluetooth adapter, so it’s worth checking the device’s “Details” tab and Hardware IDs to confirm what it actually corresponds to.
3. Can enabling or disabling Intel VMD fix a missing NVMe drive?
Yes, in many cases. Intel VMD (Volume Management Device) changes how NVMe drives are presented to the operating system, and Windows won’t recognize drives managed through VMD unless the appropriate VMD driver is installed. If you don’t need VMD for a RAID setup, disabling it in BIOS often makes the SSD immediately visible using standard NVMe drivers. If you do need it, you must install Intel’s VMD driver, ideally during a fresh Windows installation via “Load driver.”
4. Is it safe to update my motherboard’s BIOS just to fix a detection issue?
Generally yes, as long as you follow the manufacturer’s official instructions closely and avoid interrupting the update (such as a power loss) partway through. Most modern motherboards include safeguards like dual BIOS chips or USB flashback features that reduce risk. That said, treat a BIOS update as a “last resort before hardware failure” step rather than a first troubleshooting move, and always confirm you’re downloading the firmware for your exact motherboard model and revision.