
 Sukhdev Kamboj
Windows 11 brought a redesigned, more streamlined approach to managing network connections compared to earlier versions of Windows. Whether you’re connecting to Wi-Fi for the first time, troubleshooting a dropped Ethernet connection, setting up a VPN for remote work, or trying to understand why your data usage is unusually high, the Network & Internet settings panel is your central hub for everything related to connectivity. This guide walks through every major section of these settings, explains what each option does, and offers practical tips for getting the most out of your connection.
Getting to Network & Internet Settings
There are several ways to reach the Network & Internet settings page in Windows 11:
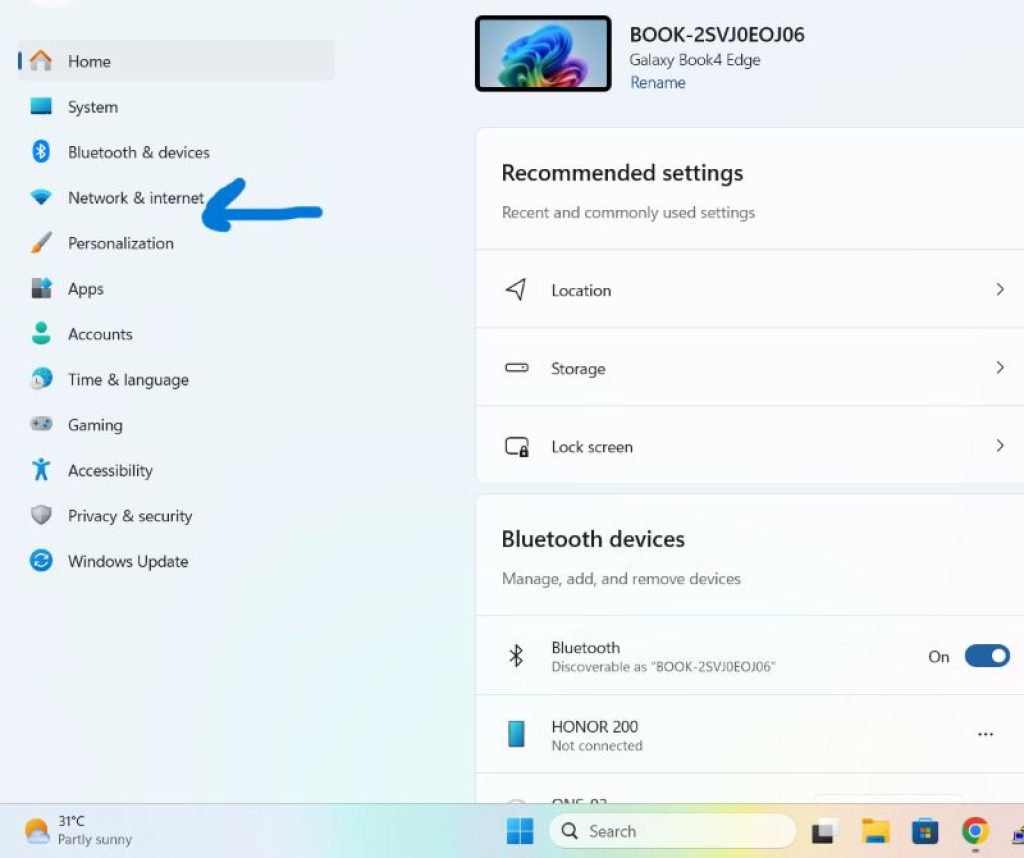
Via the Settings app: Click the Start button, select Settings (or press Windows key + I), then click
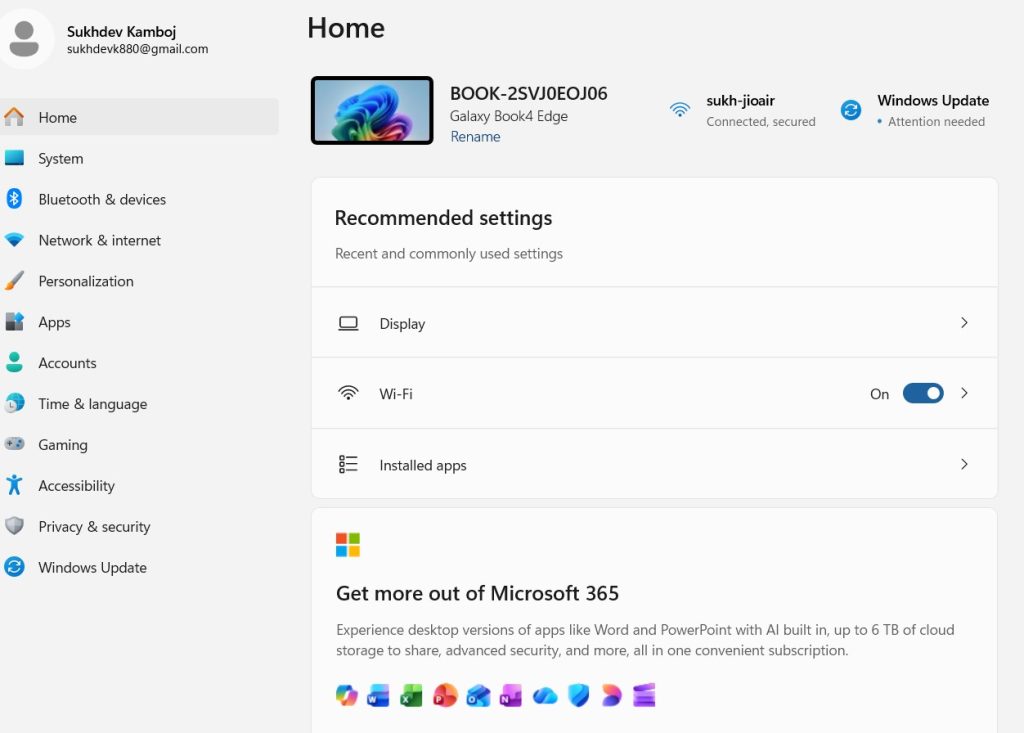
Network & internet in the left-hand sidebar.
Via the Quick Settings panel: Click the network, sound, or battery icons in the bottom-right corner of the taskbar, then click the arrow next to the Wi-Fi icon or select the gear icon to jump straight into full settings.
Via search: Click the search icon on the taskbar and type “network settings,” then select the top result.
Once inside, you’ll see a clean, categorized layout showing your current connection status at the top, followed by sections for Wi-Fi, Ethernet, VPN, Mobile hotspot, Airplane mode, and more advanced options further down the page.
Understanding the Status Overview
At the very top of the Network & Internet page, Windows 11 displays a status card summarizing your current connection — whether you’re online, which network you’re connected to, and basic details like signal strength. This card also includes shortcuts to run the Network troubleshooter and check Properties for the active connection. If you’re having connectivity issues, this is the first place to look, since Windows will often flag problems here before you dig deeper into individual settings.
Managing Wi-Fi Connections
The Wi-Fi section is where most users will spend the majority of their time. Clicking into it reveals a toggle to turn Wi-Fi on or off, along with a link to Show available networks, which opens the familiar network list from the taskbar.
Key features within Wi-Fi settings include:
- Manage known networks: This shows every Wi-Fi network your device has connected to previously. From here, you can forget a network (useful if you’ve changed a router’s password or no longer want your PC to auto-connect somewhere), or adjust properties like whether the connection is metered.
- Hardware properties: Displays technical details such as your device’s MAC address, IPv4 and IPv6 addresses, DNS servers, and the Wi-Fi adapter’s driver information. This is particularly useful when troubleshooting or when you need your IP address for network configuration elsewhere.
- Random hardware addresses: Windows 11 allows you to randomize your device’s MAC address for each Wi-Fi network you join, which improves privacy by making it harder for networks to track your device across locations. You can toggle this on a per-network basis or set a default behavior.
- Wi-Fi Direct: Found deeper in advanced settings, this lets your PC connect directly to other Wi-Fi Direct-compatible devices without a router, useful for streaming to a wireless display or printing wirelessly.
To connect to a new network, click the network icon in the taskbar, select the desired SSID from the list, enter the password when prompted, and choose whether to enable automatic connection in the future.
Setting Up and Managing Ethernet
For users who prefer a wired connection — which generally offers more stable speeds and lower latency than Wi-Fi — the Ethernet section handles this. Once a cable is plugged in, Windows typically detects and configures the connection automatically using DHCP (Dynamic Host Configuration Protocol), assigning an IP address without any manual input needed.
If you need to customize your Ethernet connection, click on the network name under Ethernet settings, then select Edit next to IP assignment. Here you can switch from automatic (DHCP) to manual configuration, entering a static IP address, subnet mask, gateway, and preferred DNS servers. This is common in office environments or for users setting up specific networking configurations, like port forwarding for a home server.
The Ethernet properties page also lets you set the network profile to Public or Private. A private network relaxes some firewall restrictions to allow file sharing and device discovery, which is appropriate for trusted home or office networks. A public network keeps your device more locked down, appropriate for connections you don’t fully trust.
Configuring a VPN
Virtual Private Networks (VPNs) are increasingly essential for remote work, secure browsing, and accessing geographically restricted content. Windows 11 has built-in VPN client support, found under the VPN section of Network & Internet settings.
To add a new VPN connection:
- Click Add VPN.
- Choose your VPN provider from the dropdown (Windows built-in, or a specific provider if you’ve installed their protocol).
- Enter a connection name, the server address provided by your VPN service or IT department, and the VPN type (such as PPTP, L2TP/IPsec, SSTP, or IKEv2).
- Enter your sign-in credentials, which can include a username and password, a certificate, or a smart card, depending on what your provider requires.
- Click Save.
Once configured, your VPN will appear in the Quick Settings panel alongside Wi-Fi, letting you connect or disconnect with a single click. You can also configure advanced VPN options, such as allowing the VPN over metered networks or permitting connections while roaming, which is helpful for laptop users who travel frequently.
Many third-party VPN services install their own dedicated apps rather than relying on this built-in client, in which case you’ll manage the connection through that app instead, though the system tray and Quick Settings will often still reflect the VPN’s connection status.
Mobile Hotspot
The Mobile hotspot feature turns your Windows 11 PC into a Wi-Fi access point, sharing your internet connection with other devices like phones, tablets, or laptops. This is useful when you have a wired or cellular connection on your PC but need to get another device online.
To set it up:
- Navigate to Mobile hotspot in Network & Internet settings.
- Choose which connection to share from the Share my internet connection from dropdown (Wi-Fi, Ethernet, or cellular if your PC has a SIM).
- Set the network name and password by clicking Edit.
- Toggle the hotspot on.
You can also enable Share over to choose whether the hotspot broadcasts via Wi-Fi, Bluetooth, or Ethernet, and there’s an option to automatically turn off the hotspot when no devices are connected, which helps conserve battery and bandwidth.
Airplane Mode and Power Saving
Airplane mode disables all wireless communications at once — Wi-Fi, Bluetooth, and cellular — which is handy when flying or when you simply want to cut all wireless activity quickly. You can toggle it from the Network & Internet settings page or directly from Quick Settings. Underneath this toggle, you’ll typically find individual switches for Wi-Fi and Bluetooth in case you want to keep one active while in airplane mode, such as using Bluetooth headphones without Wi-Fi.
Monitoring Data Usage
Windows 11 includes a built-in Data usage tracker that shows how much data your PC has consumed over Wi-Fi and Ethernet connections, broken down over the past 30 days. This is especially useful for users on limited or metered internet plans, such as mobile hotspots or satellite internet.
Within this section, you can:
- View overall usage totals per network.
- See a breakdown of which apps are consuming the most data.
- Set a data limit to receive warnings as you approach a specified cap.
Pairing this with the metered connection toggle (found in each network’s properties) tells Windows and installed apps to reduce background data usage, delay large downloads like Windows updates, and avoid automatic syncing when on that connection.
Proxy Settings
For users on corporate networks or those who need to route traffic through a specific server, the Proxy section allows configuration of proxy settings. Windows 11 supports both automatic and manual proxy setup:
- Automatically detect settings: Lets Windows query the network for proxy configuration scripts.
- Use setup script: Lets you specify a script address (often provided by an IT department) that configures proxy behavor automatically.
- Manual proxy setup: Lets you manually enter a proxy server address and port number, along with exceptions for addresses that should bypass the proxy entirely.
Most home users will never need to touch this section, but it’s essential in enterprise environments where all traffic must be routed and monitored through a central server.
Advanced Network Settings
Scrolling to the bottom of the main Network & Internet page reveals the Advanced network settings section, which consolidates several powerful tools:
- All network adapters: Lists every network adapter on your system — physical and virtual — with quick access to disable, diagnose, or view properties for each one. This is useful when you have multiple adapters (like a physical Ethernet port alongside a virtual adapter created by VPN software) and need to manage them individually.
- More network adapter options: Opens the classic Control Panel-style network connections window for users who prefer the legacy interface or need settings not yet migrated to the modern Settings app.
- Network reset: A powerful troubleshooting tool that removes and reinstalls all network adapters and resets networking components to their default settings. This is a good last resort when you’re experiencing persistent connectivity issues that other troubleshooting hasn’t fixed. Keep in mind this will forget saved Wi-Fi passwords and may require you to reinstall VPN software.
- Firewall & network protection: Links directly to Windows Security settings, where you can review firewall rules for domain, private, and public networks, and toggle protections individually.
- Hotspot 2.0 networks: Manages your device’s ability to auto-connect to Hotspot 2.0-compatible public Wi-Fi networks, which offer a more seamless and secure connection experience than traditional open hotspots.
Troubleshooting Common Issues
If you run into connectivity problems, Windows 11 offers several built-in tools before you need to seek outside help:
- Network troubleshooter: Accessible from the main Network & Internet page or by right-clicking the network icon in the taskbar. It automatically diagnoses common issues like IP conflicts, DNS failures, or driver problems, and often fixes them without further input.
- Restart your adapter: Under network adapter properties, you can disable and re-enable a specific adapter without restarting your whole PC.
- Flush DNS: Though not directly in the Settings app, opening Command Prompt as an administrator and running
ipconfig /flushdnscan resolve issues where your PC is using outdated DNS records. - Update network drivers: Outdated or corrupted drivers are a common cause of connectivity issues. Check Windows Update or Device Manager for driver updates specific to your network adapter.
- Check for a metered connection accidentally being on, which can cause apps to behave as though there’s low bandwidth even on a fast connection.
Final Thoughts
Windows 11’s Network & Internet settings consolidate what used to be scattered across multiple menus in earlier Windows versions into a single, more intuitive location. Whether you’re a casual user just trying to connect to Wi-Fi, a remote worker configuring a VPN, or an IT professional managing proxy settings and static IPs across a fleet of machines, understanding this settings hub will save you time and frustration.
Getting comfortable with the basics — Wi-Fi management, Ethernet configuration, and the network troubleshooter — covers the vast majority of everyday needs, while the more advanced tools like network reset, data usage tracking, and adapter-specific properties are there when deeper intervention is required.
![Network & Internet Settings in Windows 11 [Detailed Guide]](https://www.geeksdigit.com/wp-content/uploads/thumbs_dir/enable-virtual-machine-platform-windows-11-rsprijoabp01orgyd8wih331xfkb20obvl0ipcka4c.jpg)
![Network & Internet Settings in Windows 11 [Detailed Guide]](https://www.geeksdigit.com/wp-content/uploads/thumbs_dir/bluetooth-missing-not-showing-in-device-manager-rspsjfu8kli7drvpxp0cu9xdavpy6c51y6tltbuzwc.jpg)



